# Organization, Account, and Team Settings
Collaboration represents a significant challenge within the Machine Learning (ML) domain due to the complexity of managing large datasets, numerous projects, intricate file structures, and diverse model architectures. Effectively coordinating a team amidst these elements can further complicate maintaining an efficient data science workflow.
Intel® Tiber™ AI Studio platform addresses this challenge by providing robust organizational and team management capabilities. The AI Studio platform facilitates streamlined workflow processes and enhanced collaboration through a suite of features designed to optimize project and dataset management. Users can define granular access controls at both global and project-specific levels, ensuring that team members have appropriate access to relevant files while maintaining data security and integrity.
Moreover, AI Studio centralizes project artifacts and implements comprehensive version control mechanisms, ensuring that all team members are synchronized with the latest updates and changes. The platform is engineered to offer specific users administrative oversight over organizational and account settings, allowing for meticulous configuration of access permissions and operational parameters.
The topics in this page:
# Organization Settings
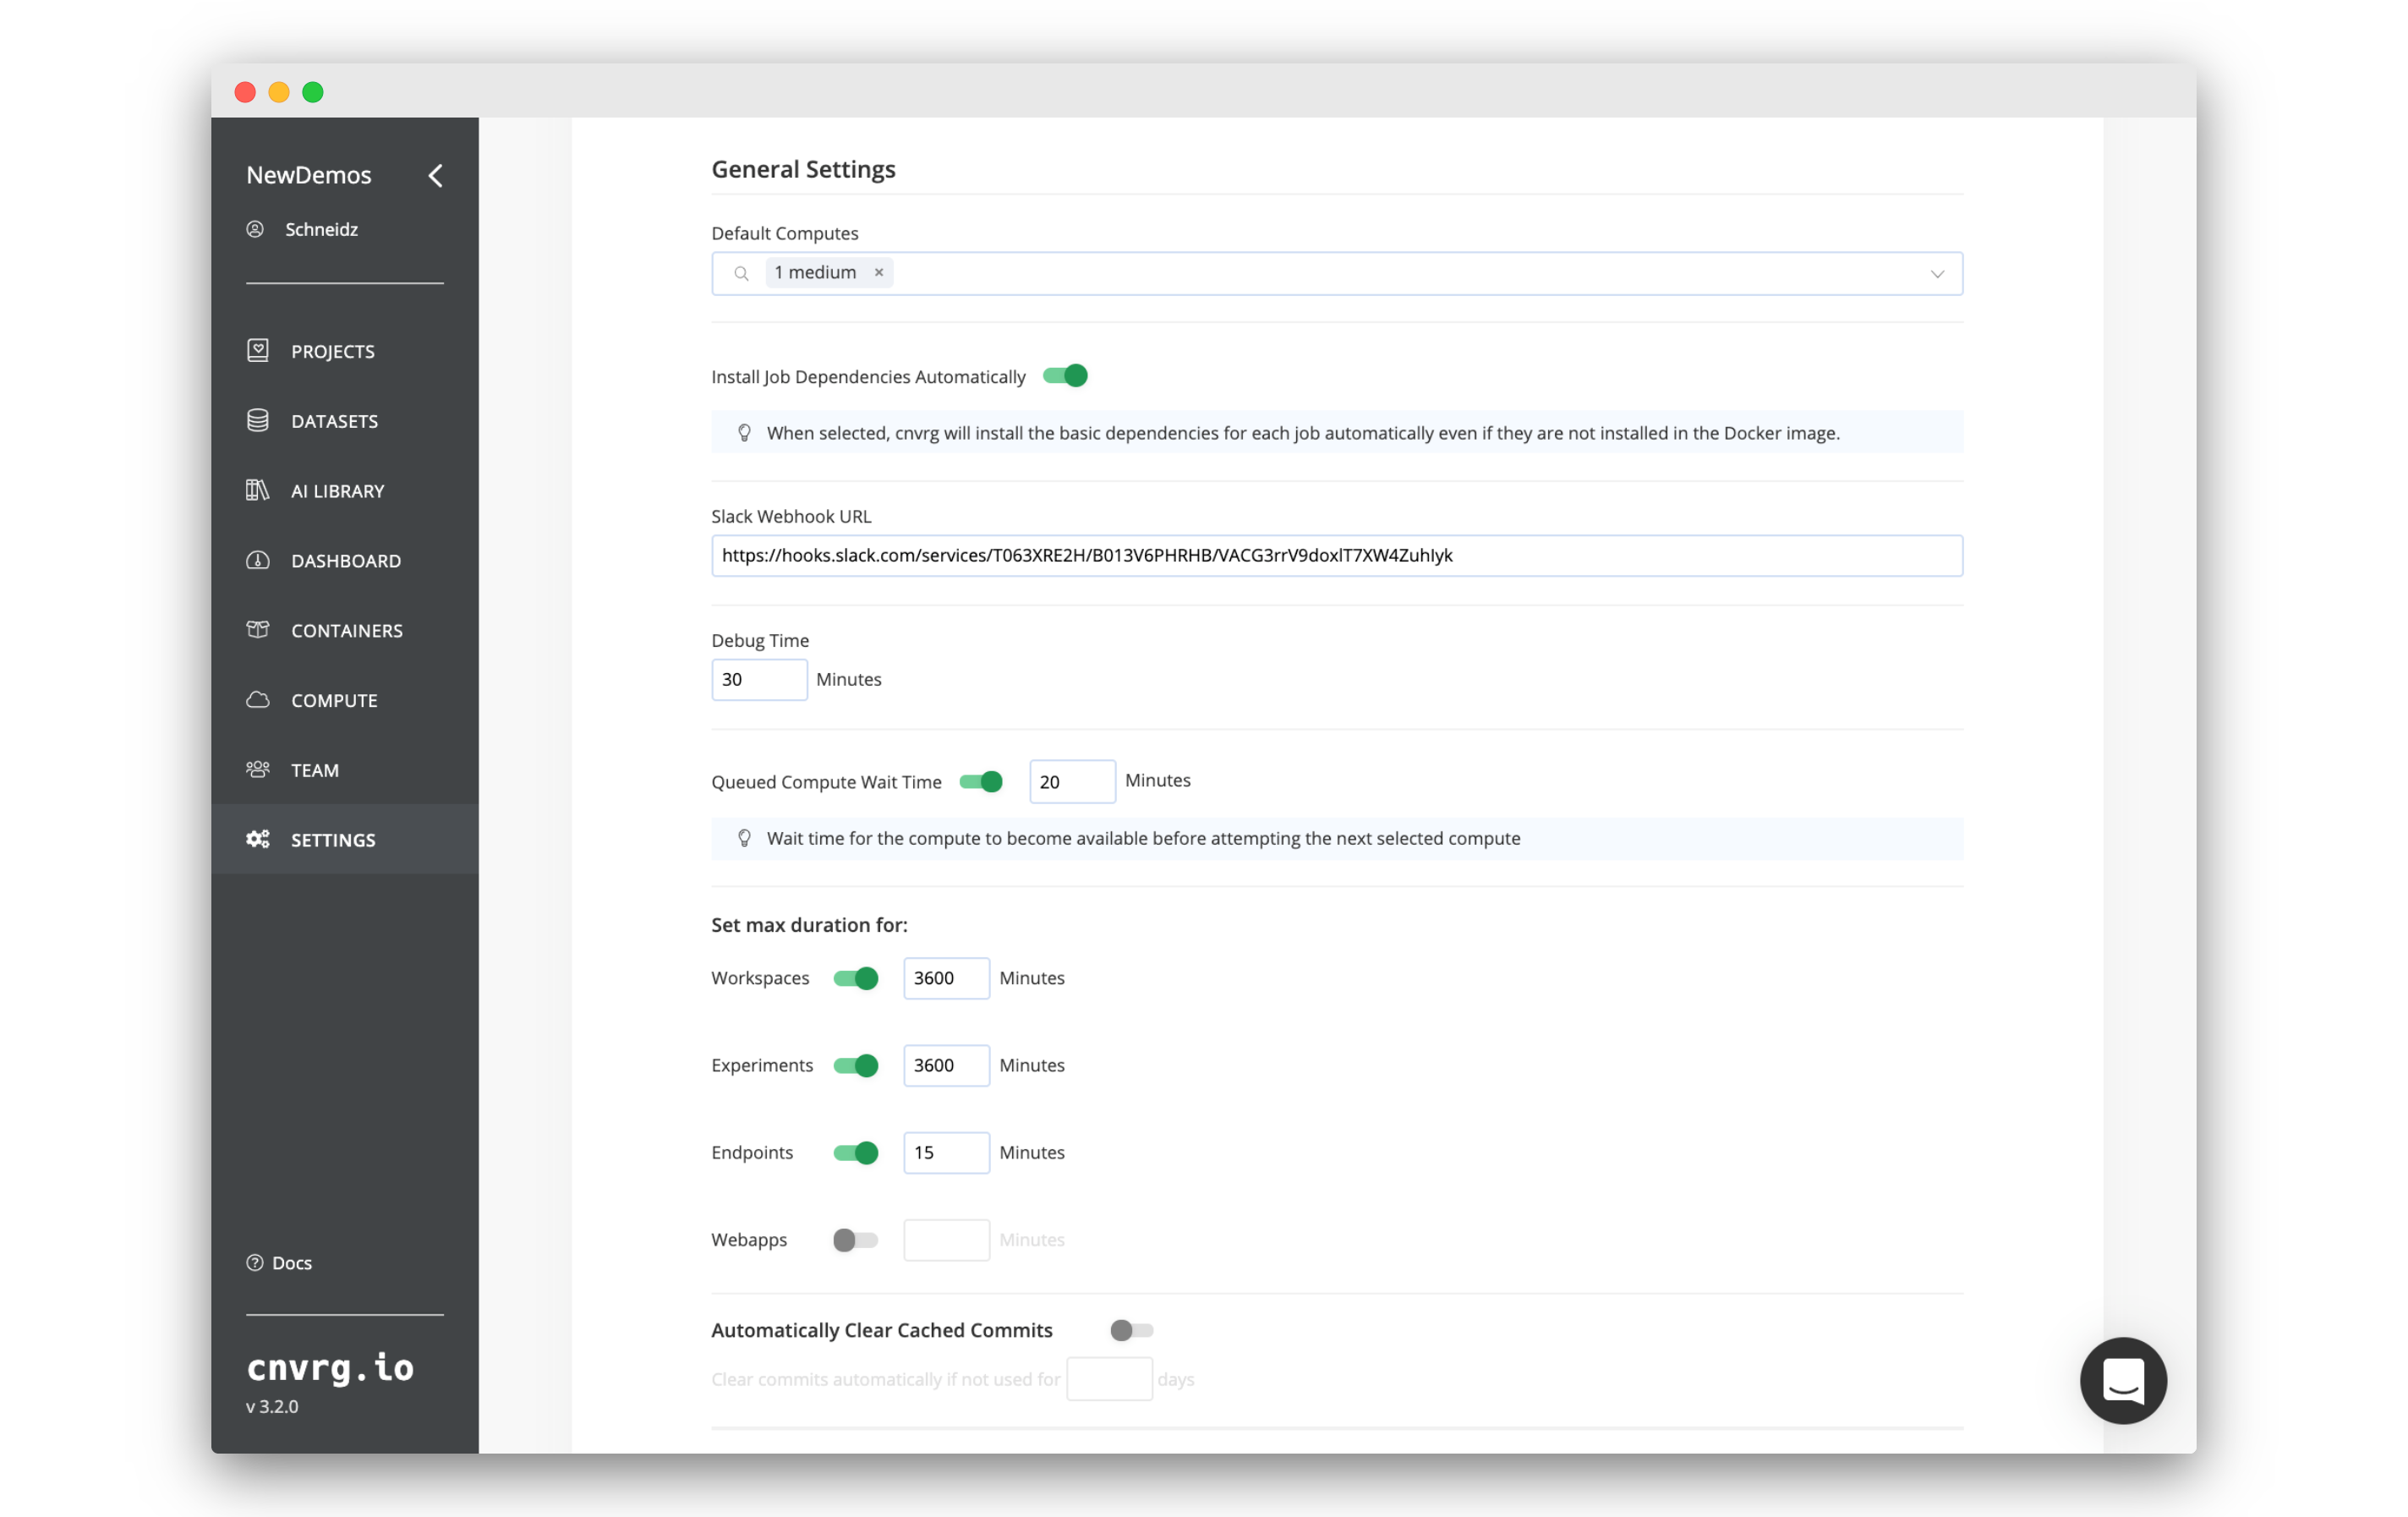
To access and change your organization's settings, click the Settings tab on the left sidebar.
# Compute Settings:
- Default Computes: Set the default compute of a project when created. If a project does not have default computes set in its settings, jobs use the default computes of the organization.
- Queued Compute: Specify the maximum wait time, in minutes, for a compute resource to become available before the system attempts to use the next available compute option (if multiple options were selected in the previous section).
# Jobs settings:
- Job Dependencie: Install Job Dependencies Automatically. Enable for your custom Docker images to automatically work with all AI Studio features. Read more here.
- Custom PYPI: Enable for Install python dependencies using a custom pypi repository.
- Debug Time: Specify the duration, in minutes, for which an experiment will remain in debug mode. During this period, users have the option to extend the debug mode in 15-minute increments as needed.
- Idle workspace time: Enable and specify the duration in minutes this option to automatically designate a workspace as idle, and thereafter, start a shutdown process.
- Max duration: Configure timeout settings in minutes for various job types, including workspaces, experiments, endpoints, and web applications.
- Email Notifications: Configure the system to send email alerts when a job finishes running. This setting allows users to receive notifications upon job completion, regardless of whether the job is successful or has encountered errors.
- Projects labels: Use customizable labels to categorize and manage your projects efficiently. Labels can be tailored to fit your organizational needs, allowing for better sorting, filtering, and identification of projects.
NOTE
You can edit the maximum duration settings only if you have administrator privileges within the organization.
# Datasets settings
- Dataset Cached Commits: Enable the automatic clearing of cached commits that are not used within a specified timeframe. (Only when Datasets Commit Caching is enabled).
- Datasets labels: Use customizable labels to efficiently categorize and manage your datasets. Tailor labels to fit your organizational needs for improved sorting, filtering, and identification.
TIP
Don't forget to click Update to apply and save any changes made to the settings.
# LDAP Support
AI Studio also supports authorizing users through an LDAP server. If you provide AI Studio access to your LDAP server, AI Studio can query it and authorize user access. To set this up, please contact AI Studio support.
# Account Settings
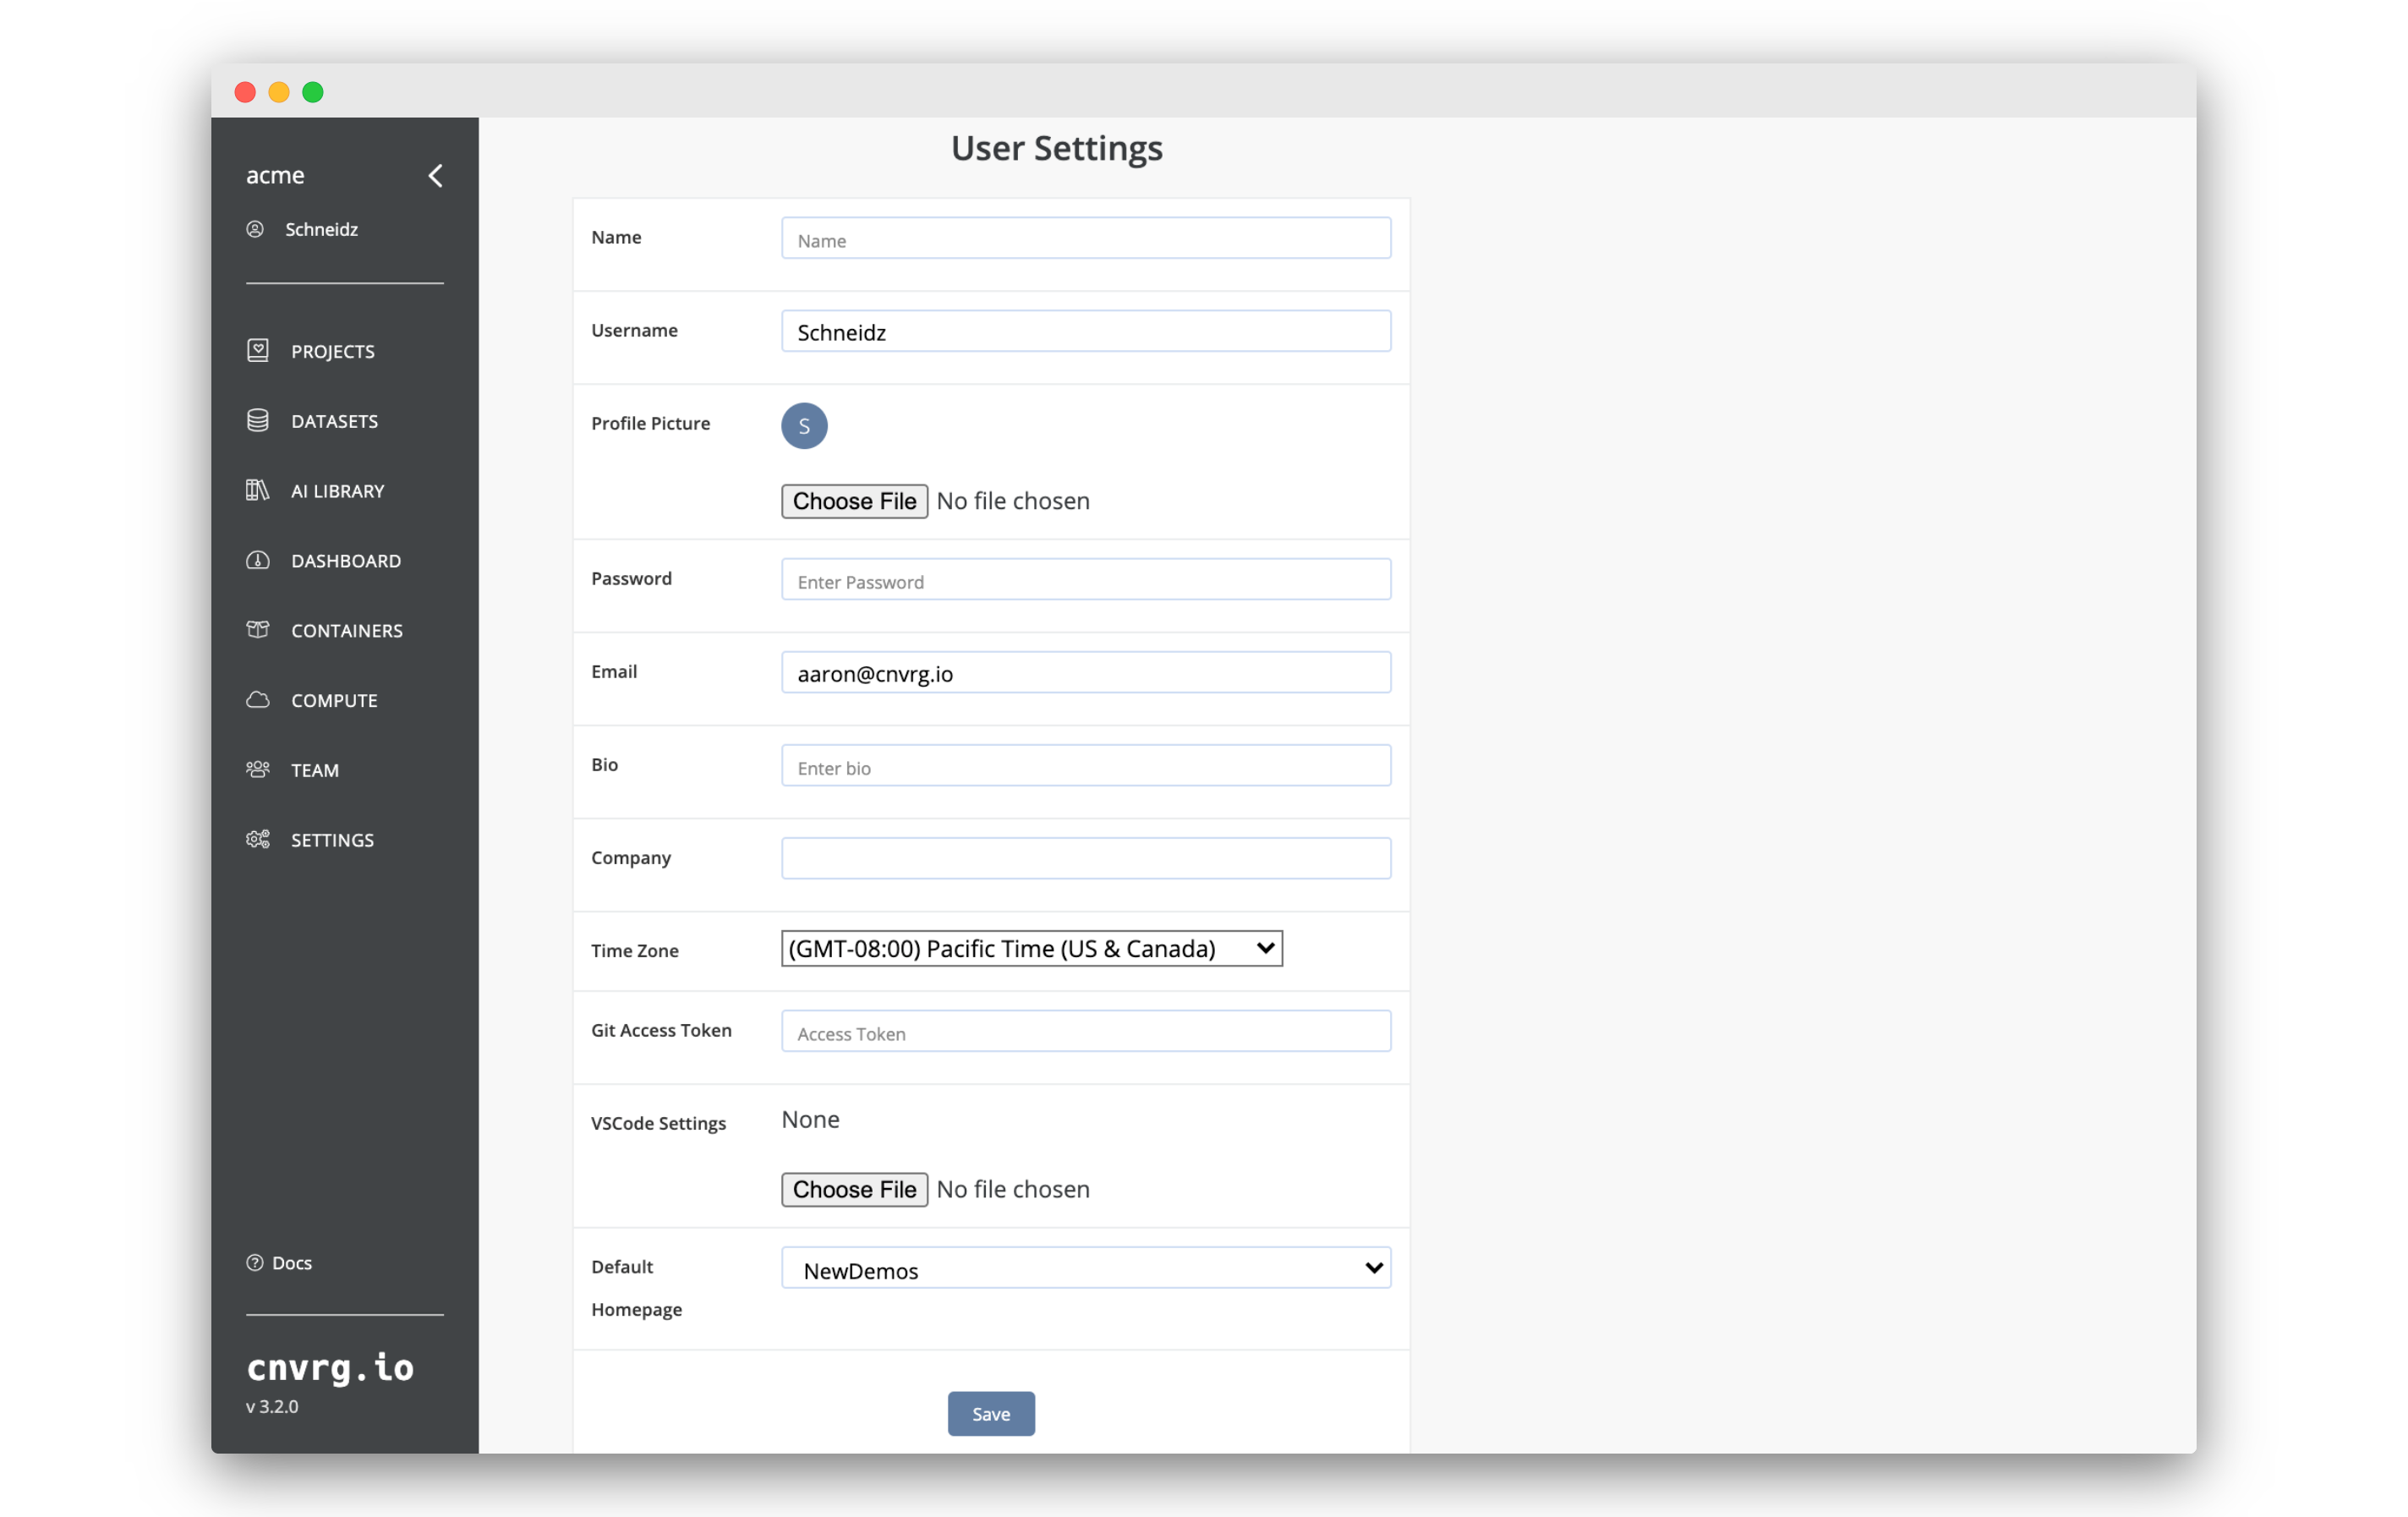
To access and update your account settings, click your profile's name in the top left of the side bar.
TIP
You may need to expand the sidebar if it is currently collapsed.
Here you can edit and save all the important details of your account, including:
- Name: Enter your full name.
- Username: Enter your account's name.
- Profile Picture: Click the Choose File button to select a display photo for your account.
- Password: Change your password.
- Bio: Enter a description of your account.
- Company: Enter your company name.
- Time Zone: Enter your local time zone. Used for scheduling jobs.
- VSCode Settings: Upload a Visual Studio Code settings file for use with any VSCode workspace you start.
- Git Access Token: Provide your OAuth token for communicating with Git.
- Default Homepage: Select an organization page that loads upon login.
In addition, this page provides:
- API TOKEN: This is a unique identifier used for authenticating API requests. Ensure that this token is kept confidential and used securely to interact with the API endpoints.
- List of organizations you are part of: Displays the organizations to which the authenticated user belongs.
# Team Members Page
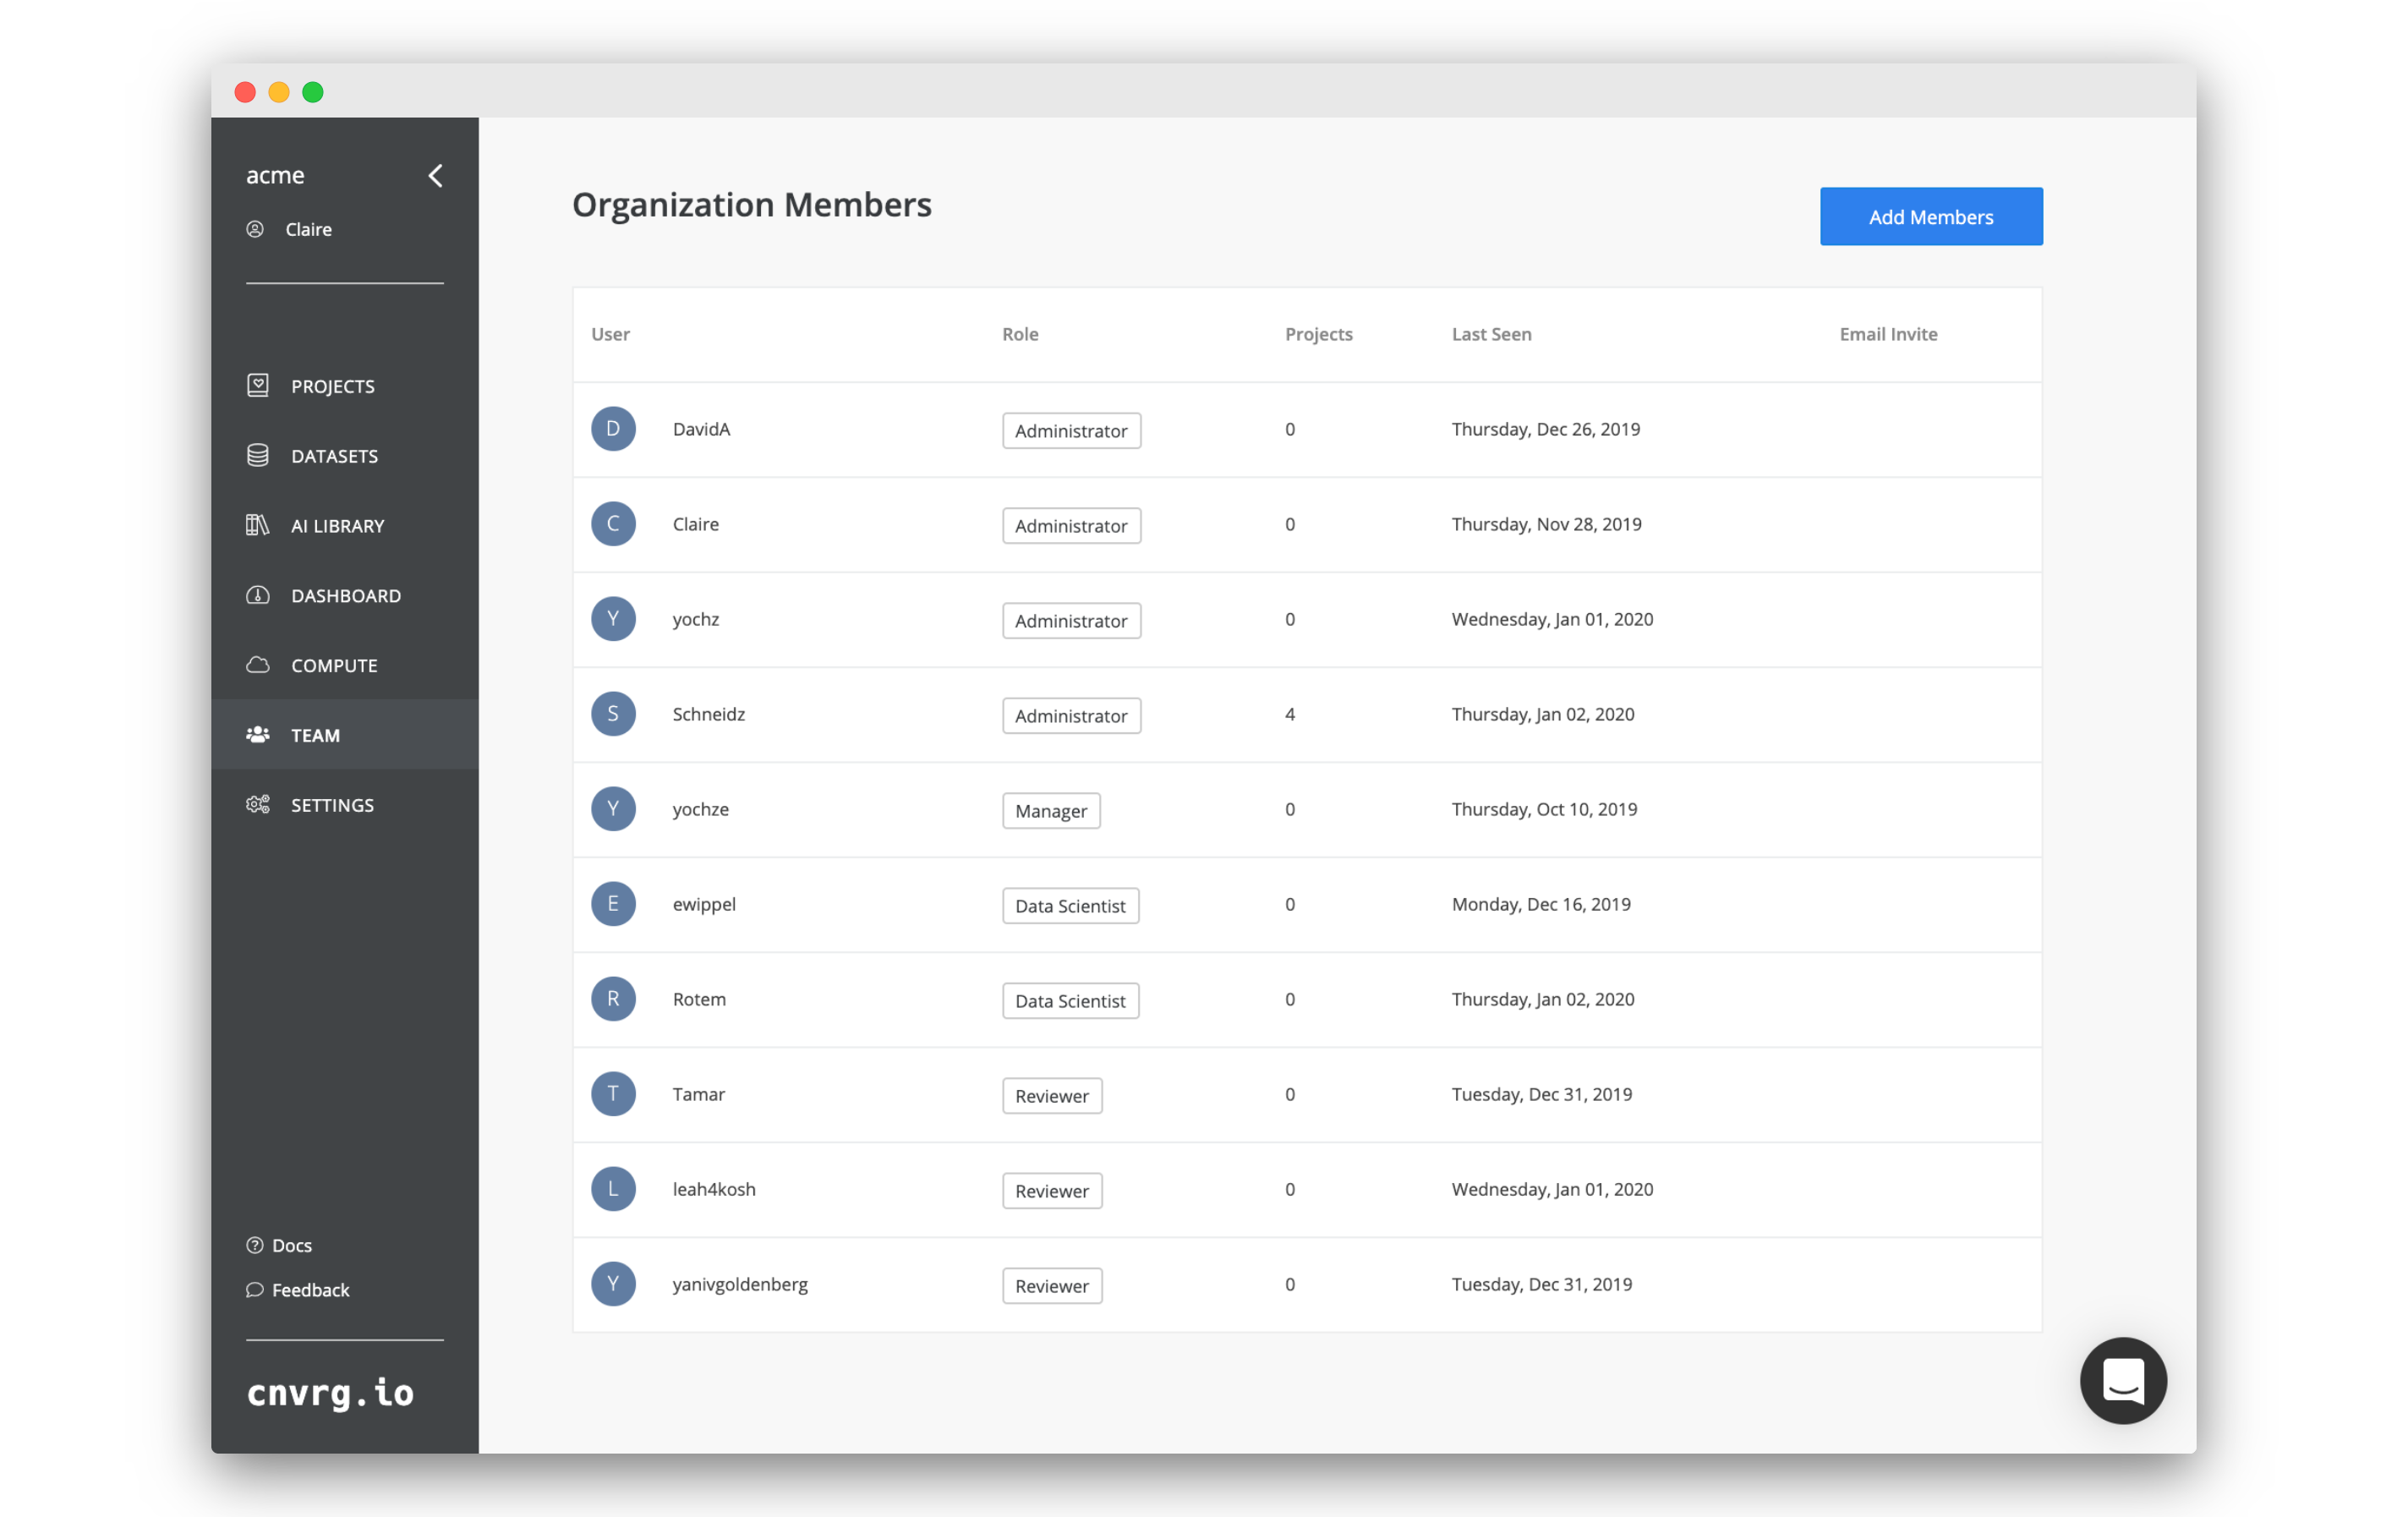
On the Team Members Page, you can view each user's:
- Username: The unique identifier or handle assigned to the user within the system.
- Email Address: The contact email associated with the user’s account.
- Role: The designated role or level of access the user has within the organization or project.
- Projects: the number of projects they collaborate on.
- Last Seen: the time they last logged into AI Studio.
- Pending invites: list of Users who have been invited to join the organization but have not yet accepted their invitations.
# Adding a new member to Organization
To add new users to your organization, click the Team tab on the sidebar.
Click Add Members on the top right, add their email, and select their access level. AI Studio sends an email invitation to them.
If the email address is already affiliated with a AI Studio account, AI Studio sends an invitation to the associated organization.
If the email address isn't already affiliated with a AI Studio account, AI Studio sends an invitation to set up a new AI Studio account. By following the link in the invitation, the new member can create an account and automatically become a member of the current organization.
NOTE
New users can also be added in the AI Studio configuration file within Kubernetes. For assistance, please contact AI Studio support.
# Access Levels(Roles)
Ai Studio supports many levels of access that you can set for users in your organization. This allows you to control the content your users can see and the read/write permissions they have. Leveraging the permission levels provides control of what your developers, analysts, and business managers can see and do.
| Level | Explanation |
|---|---|
| Administrator | Provides access to datasets and projects, as well as the ability to manage users and change organization settings. |
| Manager | Provides access to all datasets and projects. |
| Data Scientist | Allows access only to datasets and projects they have created or have been added to. |
| Reviewer | Provides read only access to datasets and projects they have been added to. |
| Revoke Member Access | Removes the user from your organization. |
# Project Collaboration
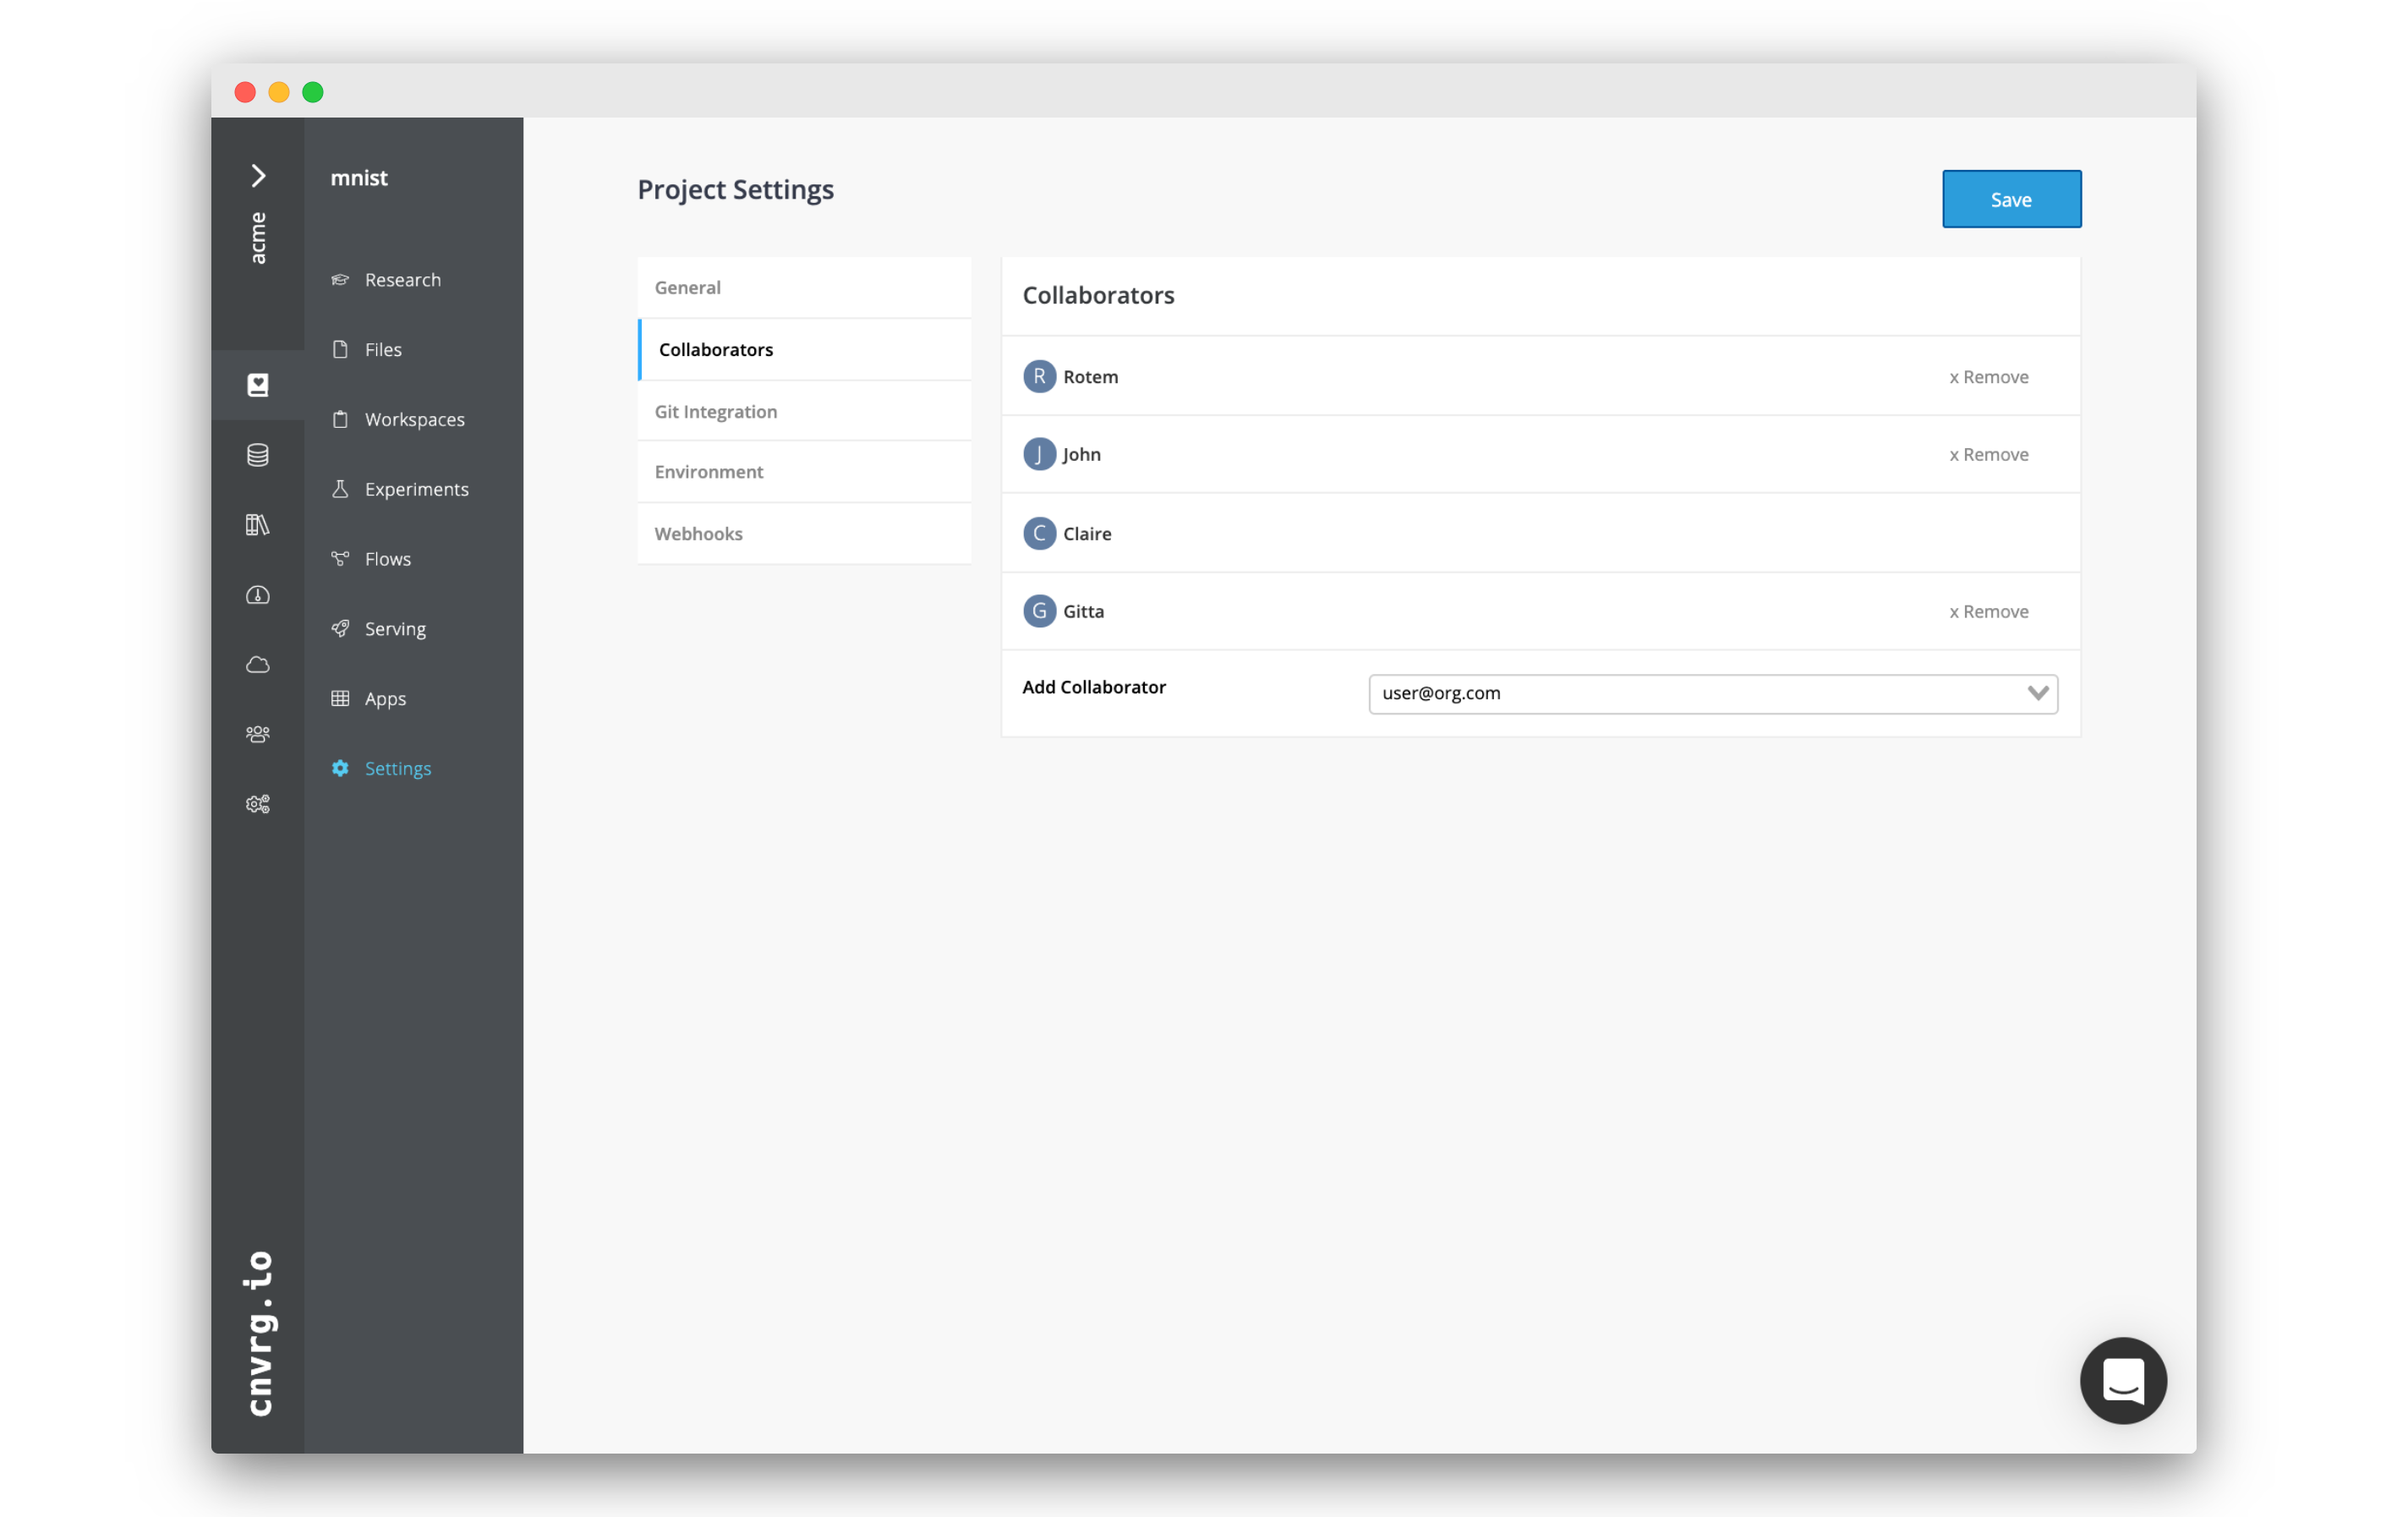 While administrators and managers have automatic access to all projects, data scientists and reviewers must be added to projects as collaborators.
To add another user as a collaborator on a project, navigate to the project's homepage. On the top right, a list of all the current collaborators displays. Click the + to display the project's collaborator management panel. This can also be displayed by navigating to the Project's Settings and selecting Collaborators on the left.
From here, add or delete collaborators for this specific project. This action does not affect their access to other projects.
TIP
Data scientists are automatically collaborators on projects they create.
# Dataset Collaboration
 Like projects, while administrators and managers have automatic access to all datasets, data scientists and reviewers also must be added to datasets as collaborators.
To add another user as a collaborator on a dataset, navigate to the dataset's homepage, go to its Settings, and select Collaborators on the left.
From here, add or delete collaborators for this specific dataset. This action does not affect their access to other datasets.
TIP
Data scientists are automatically collaborators on datasets they create.
← Compute Python SDK v2 →