# Create a Canary Release Flow
cnvrg is designed to simplify production and make complex serving methodology simple and approachable. As part of that vision, cnvrg comes with tools to get deploy models into production easily, helping automate the complicated DevOps and MLOps jobs for you.
Canary release is a popular release methodology. The driving goal is to avoid releasing faulty updates by testing its performance on a small subset of users or traffic, before ramping up its deployment to the rest of the userbase.
cnvrg's collection of production tools allows every user to leverage canary deployment, and start using the methodology when updating services in cnvrg.
In this tutorial, you will learn how to create a simple canary deployment flow.
# Before you start
# Validation
True canary release requires some sort of validation check. This test is run and if it is passed, the new model will be rolled out to more of the traffic. So too, if the validation check fails, the model will be rolled back and the previous model will be served to all users.
You might want your validation function to wait 10 minutes and then run, or even wait for a certain amount of predictions to be made by the new model. Since cnvrg allows you to use any validation check, it can be a simple 3 line function, or a complex multi-module validation check.
However, to make validation trackable, as part of your validation script, report the result as a metric using the SDK. For example:
from cnvrg import Experiment
e = Experiment()
if # validation check:
    e.log_param("validation", 1)
else:
    e.log_param("validation", 0)
The rest of this tutorial assumes you have a validation check written and saved in a file called validate.py.
# Updating a Model
Canary release is used when deploying a new model. As such, you will need to already have a model in production to leverage canary release.
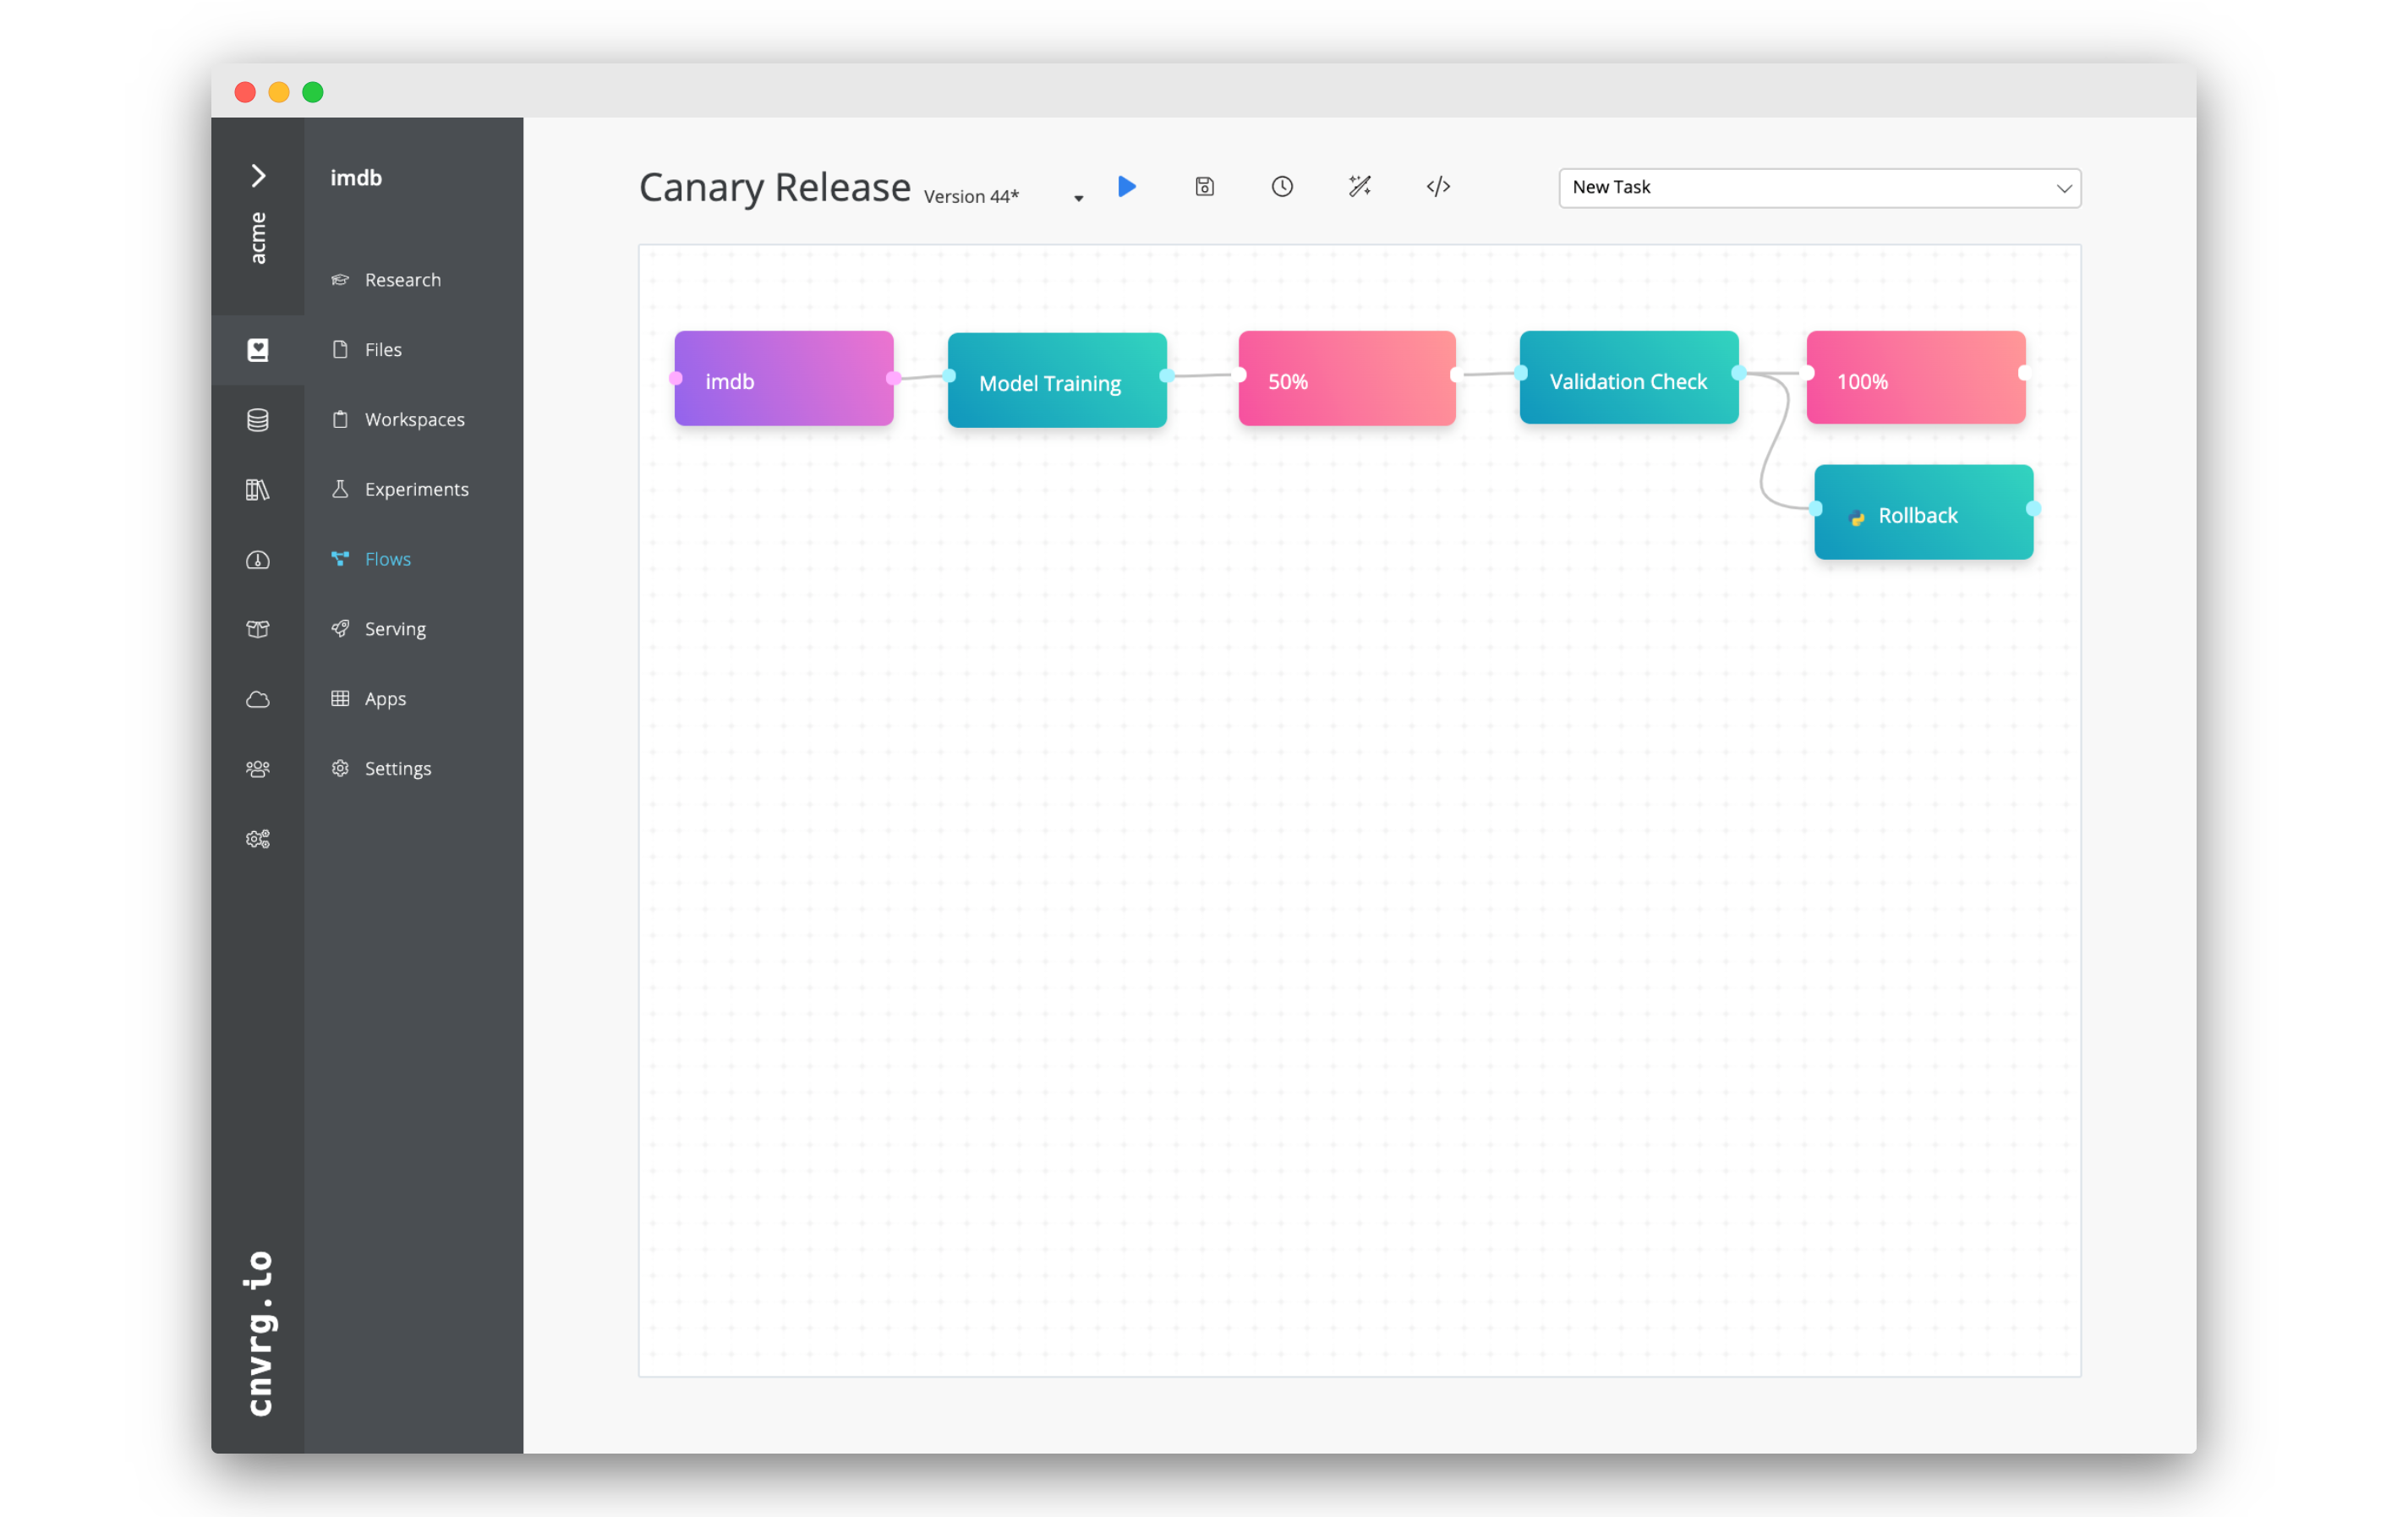
# Create the Canary Release Flow
# Create a New Flow
To create a new flow:
- Navigate to the Flows tab of your project.
- Click New Flow.
You will now have an empty flow to work with.
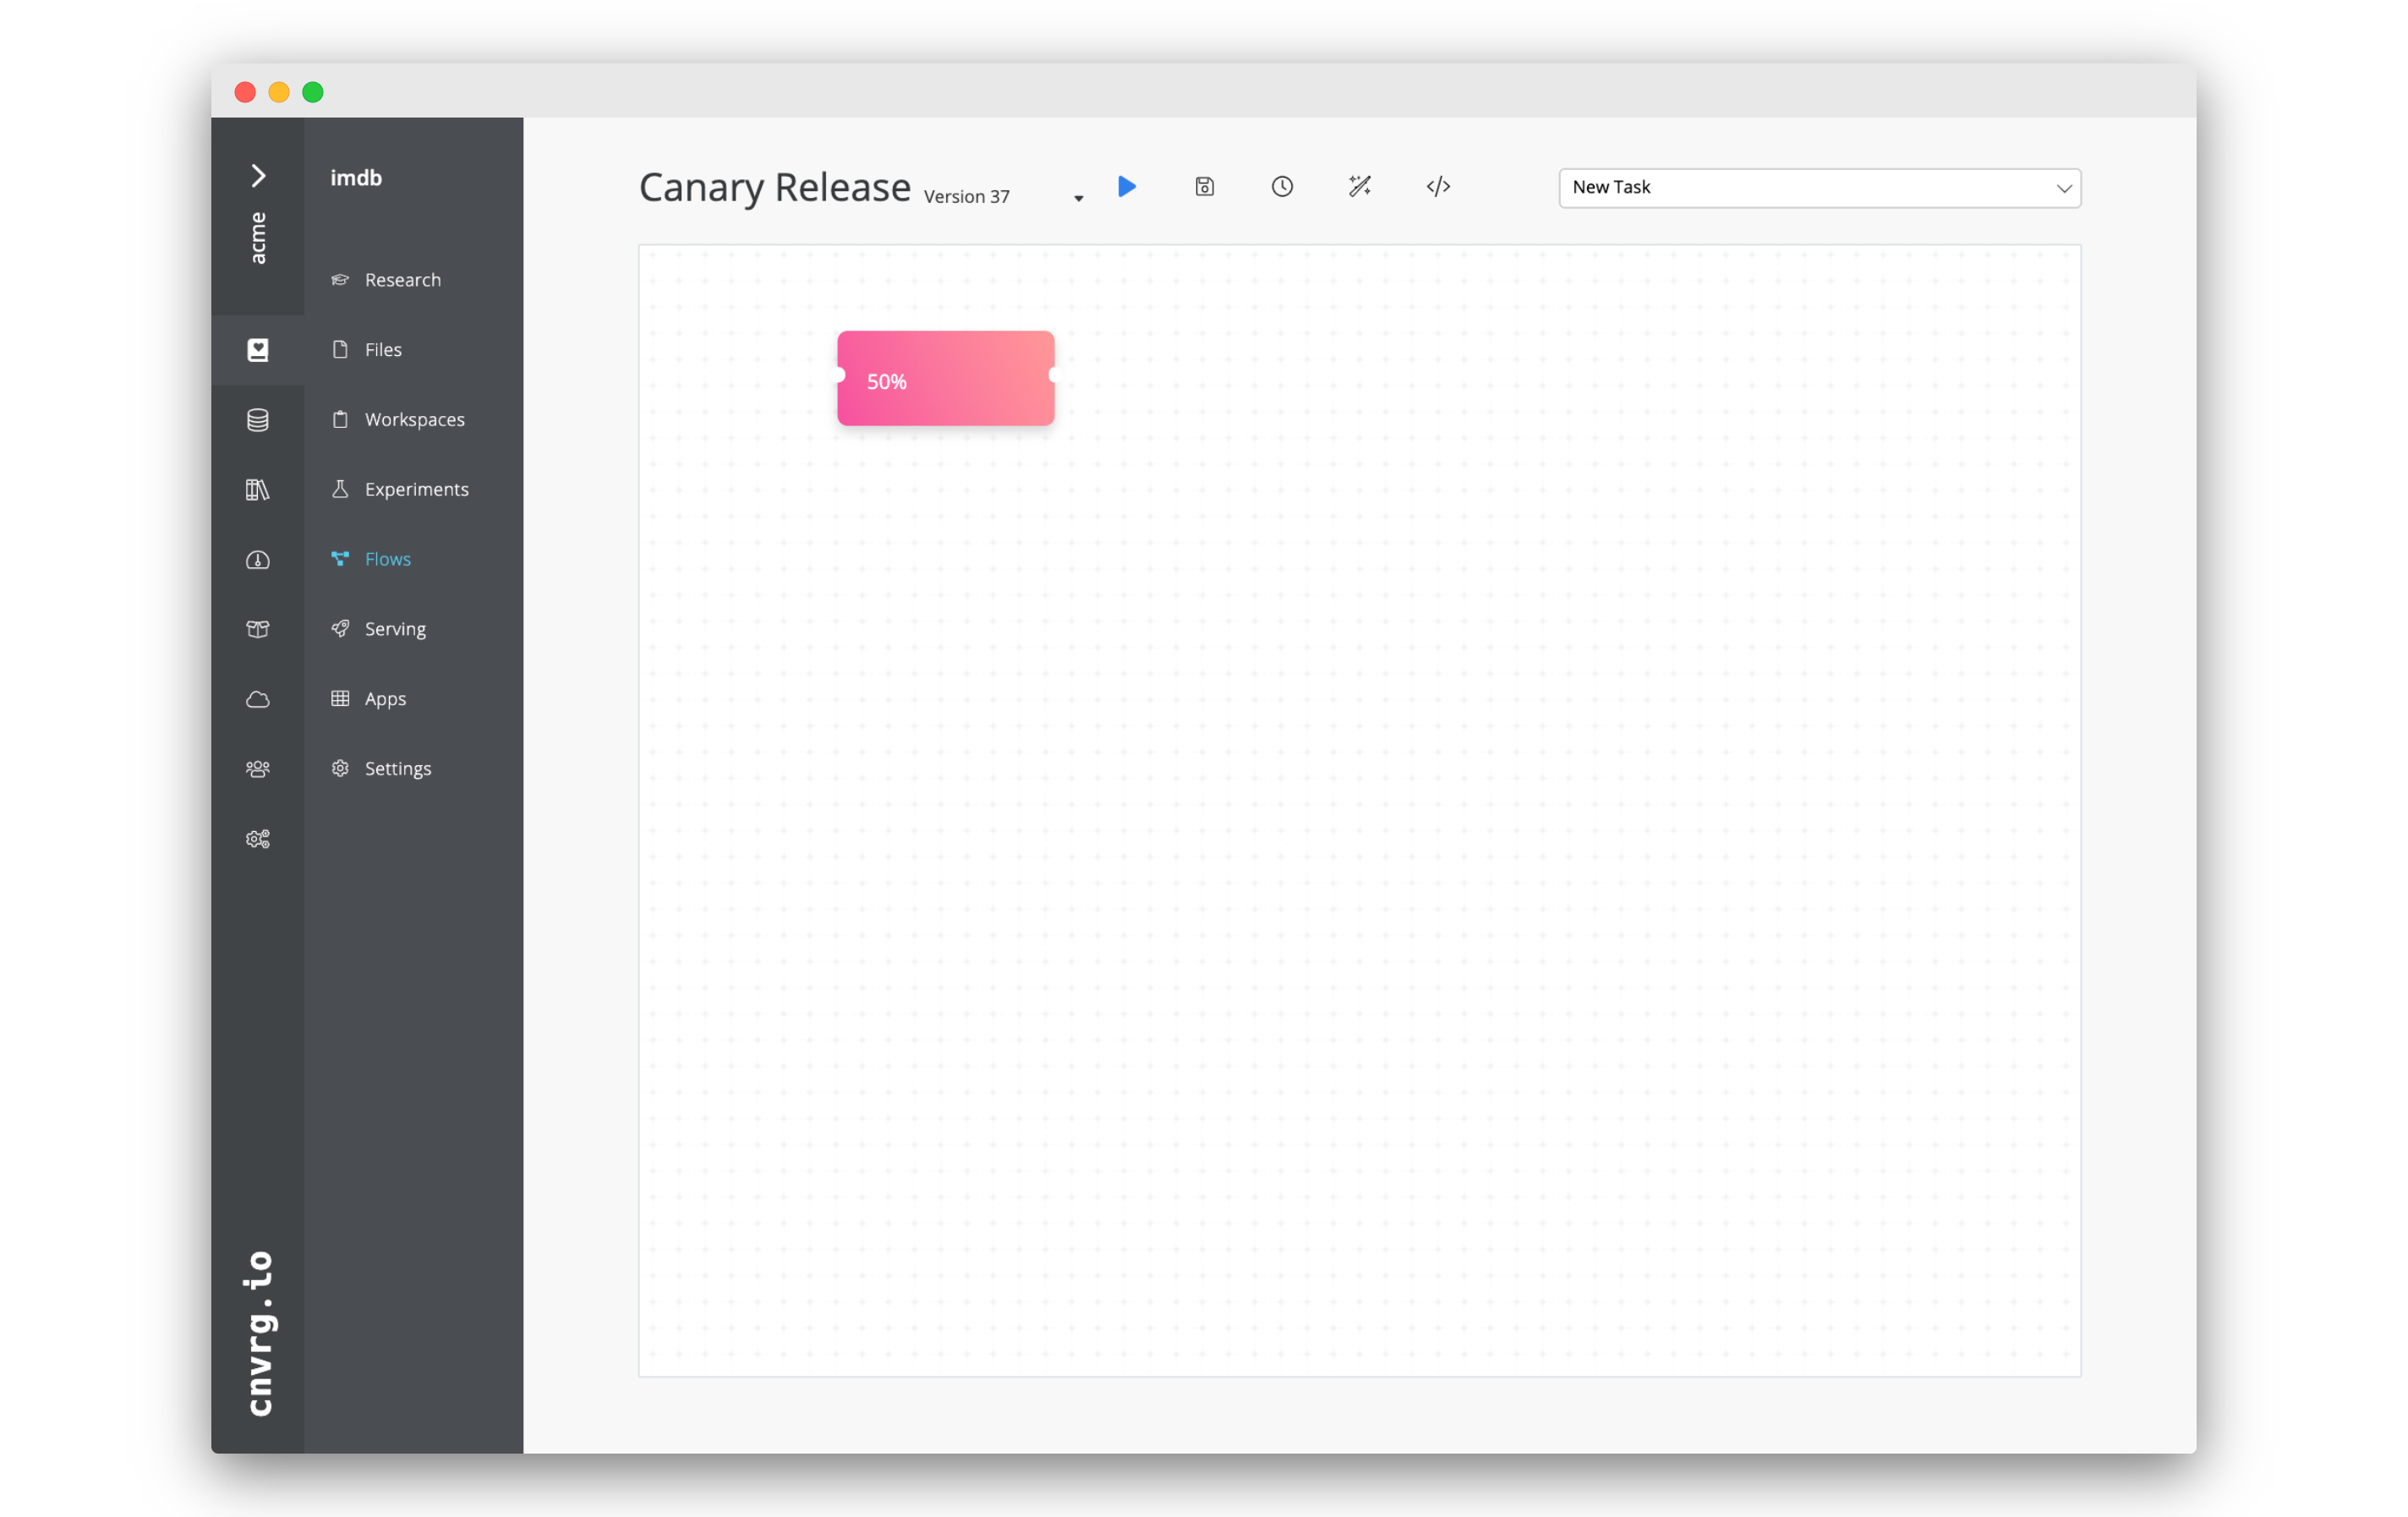
# Serve a new model to 50% of the traffic
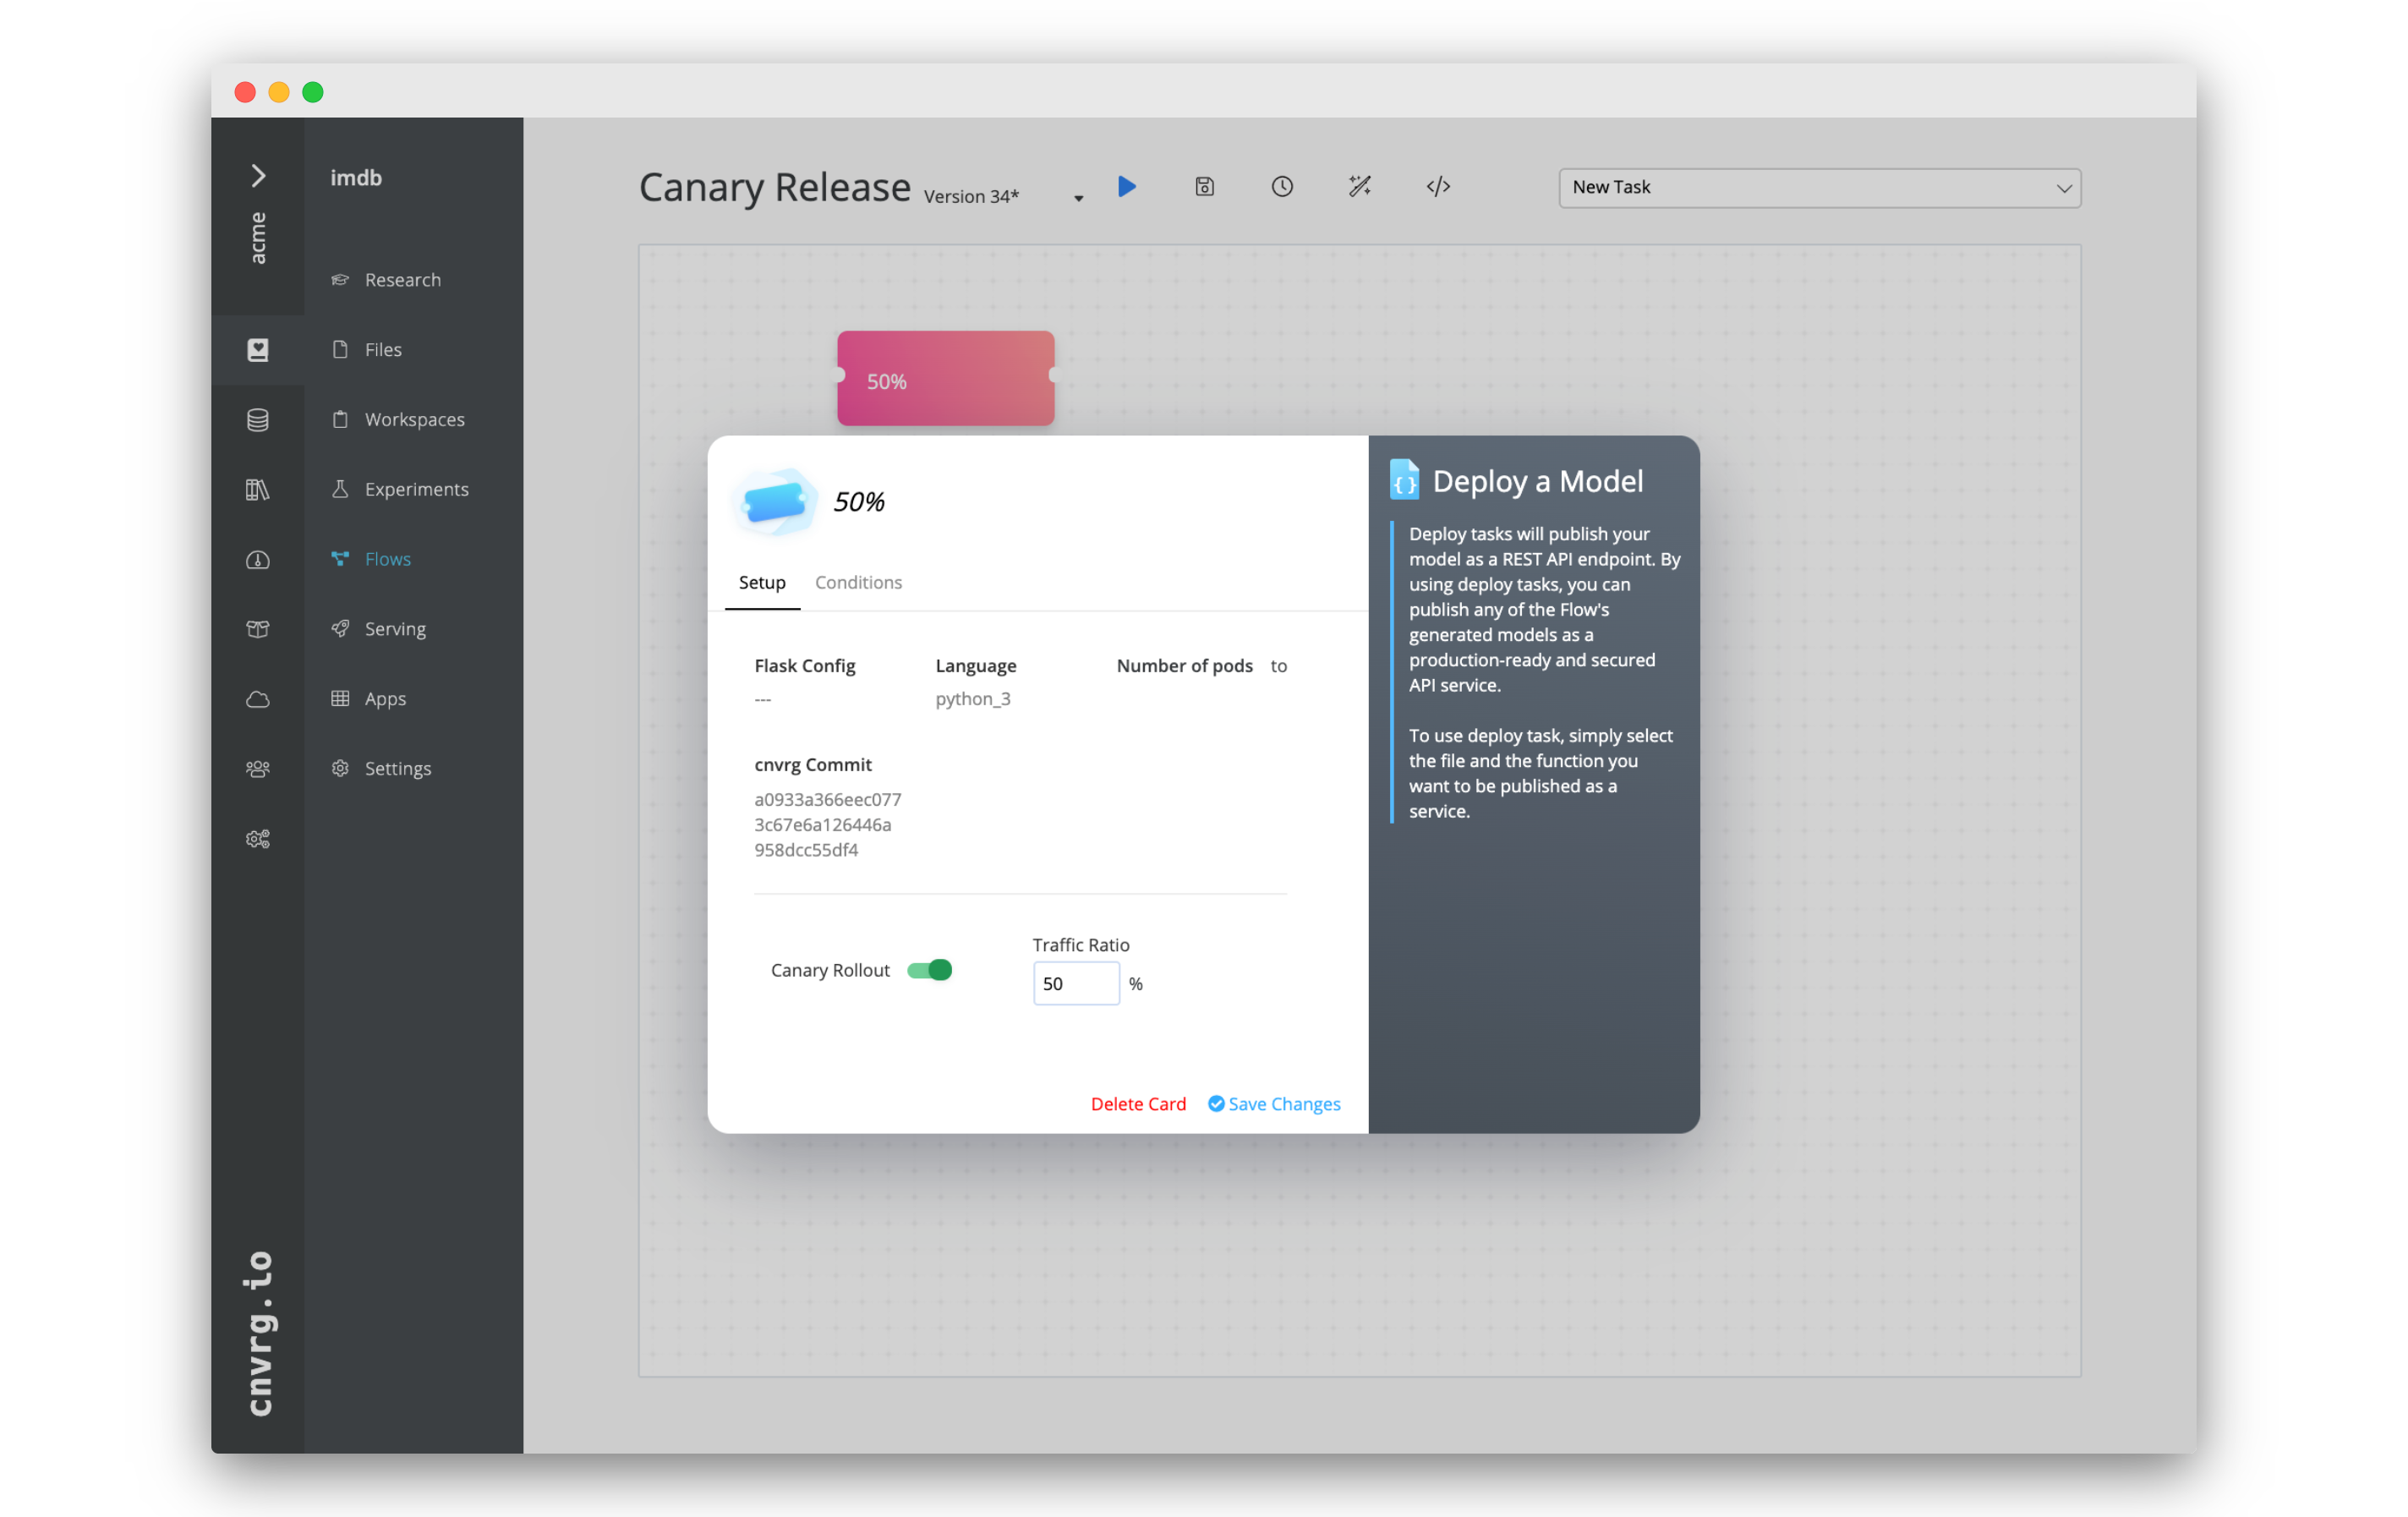
- Click the New Task menu.
- Choose Deploy Task from the menu.
- In the Select Endpoint menu, click the name of the existing endpoint you would like to update.
- Enable Canary Rollout by clicking the toggle. Set the Traffic Ratio to 50%.
- Click on the name of the task and rename it to "50%".
- Click Save Changes.
# Create a validation check
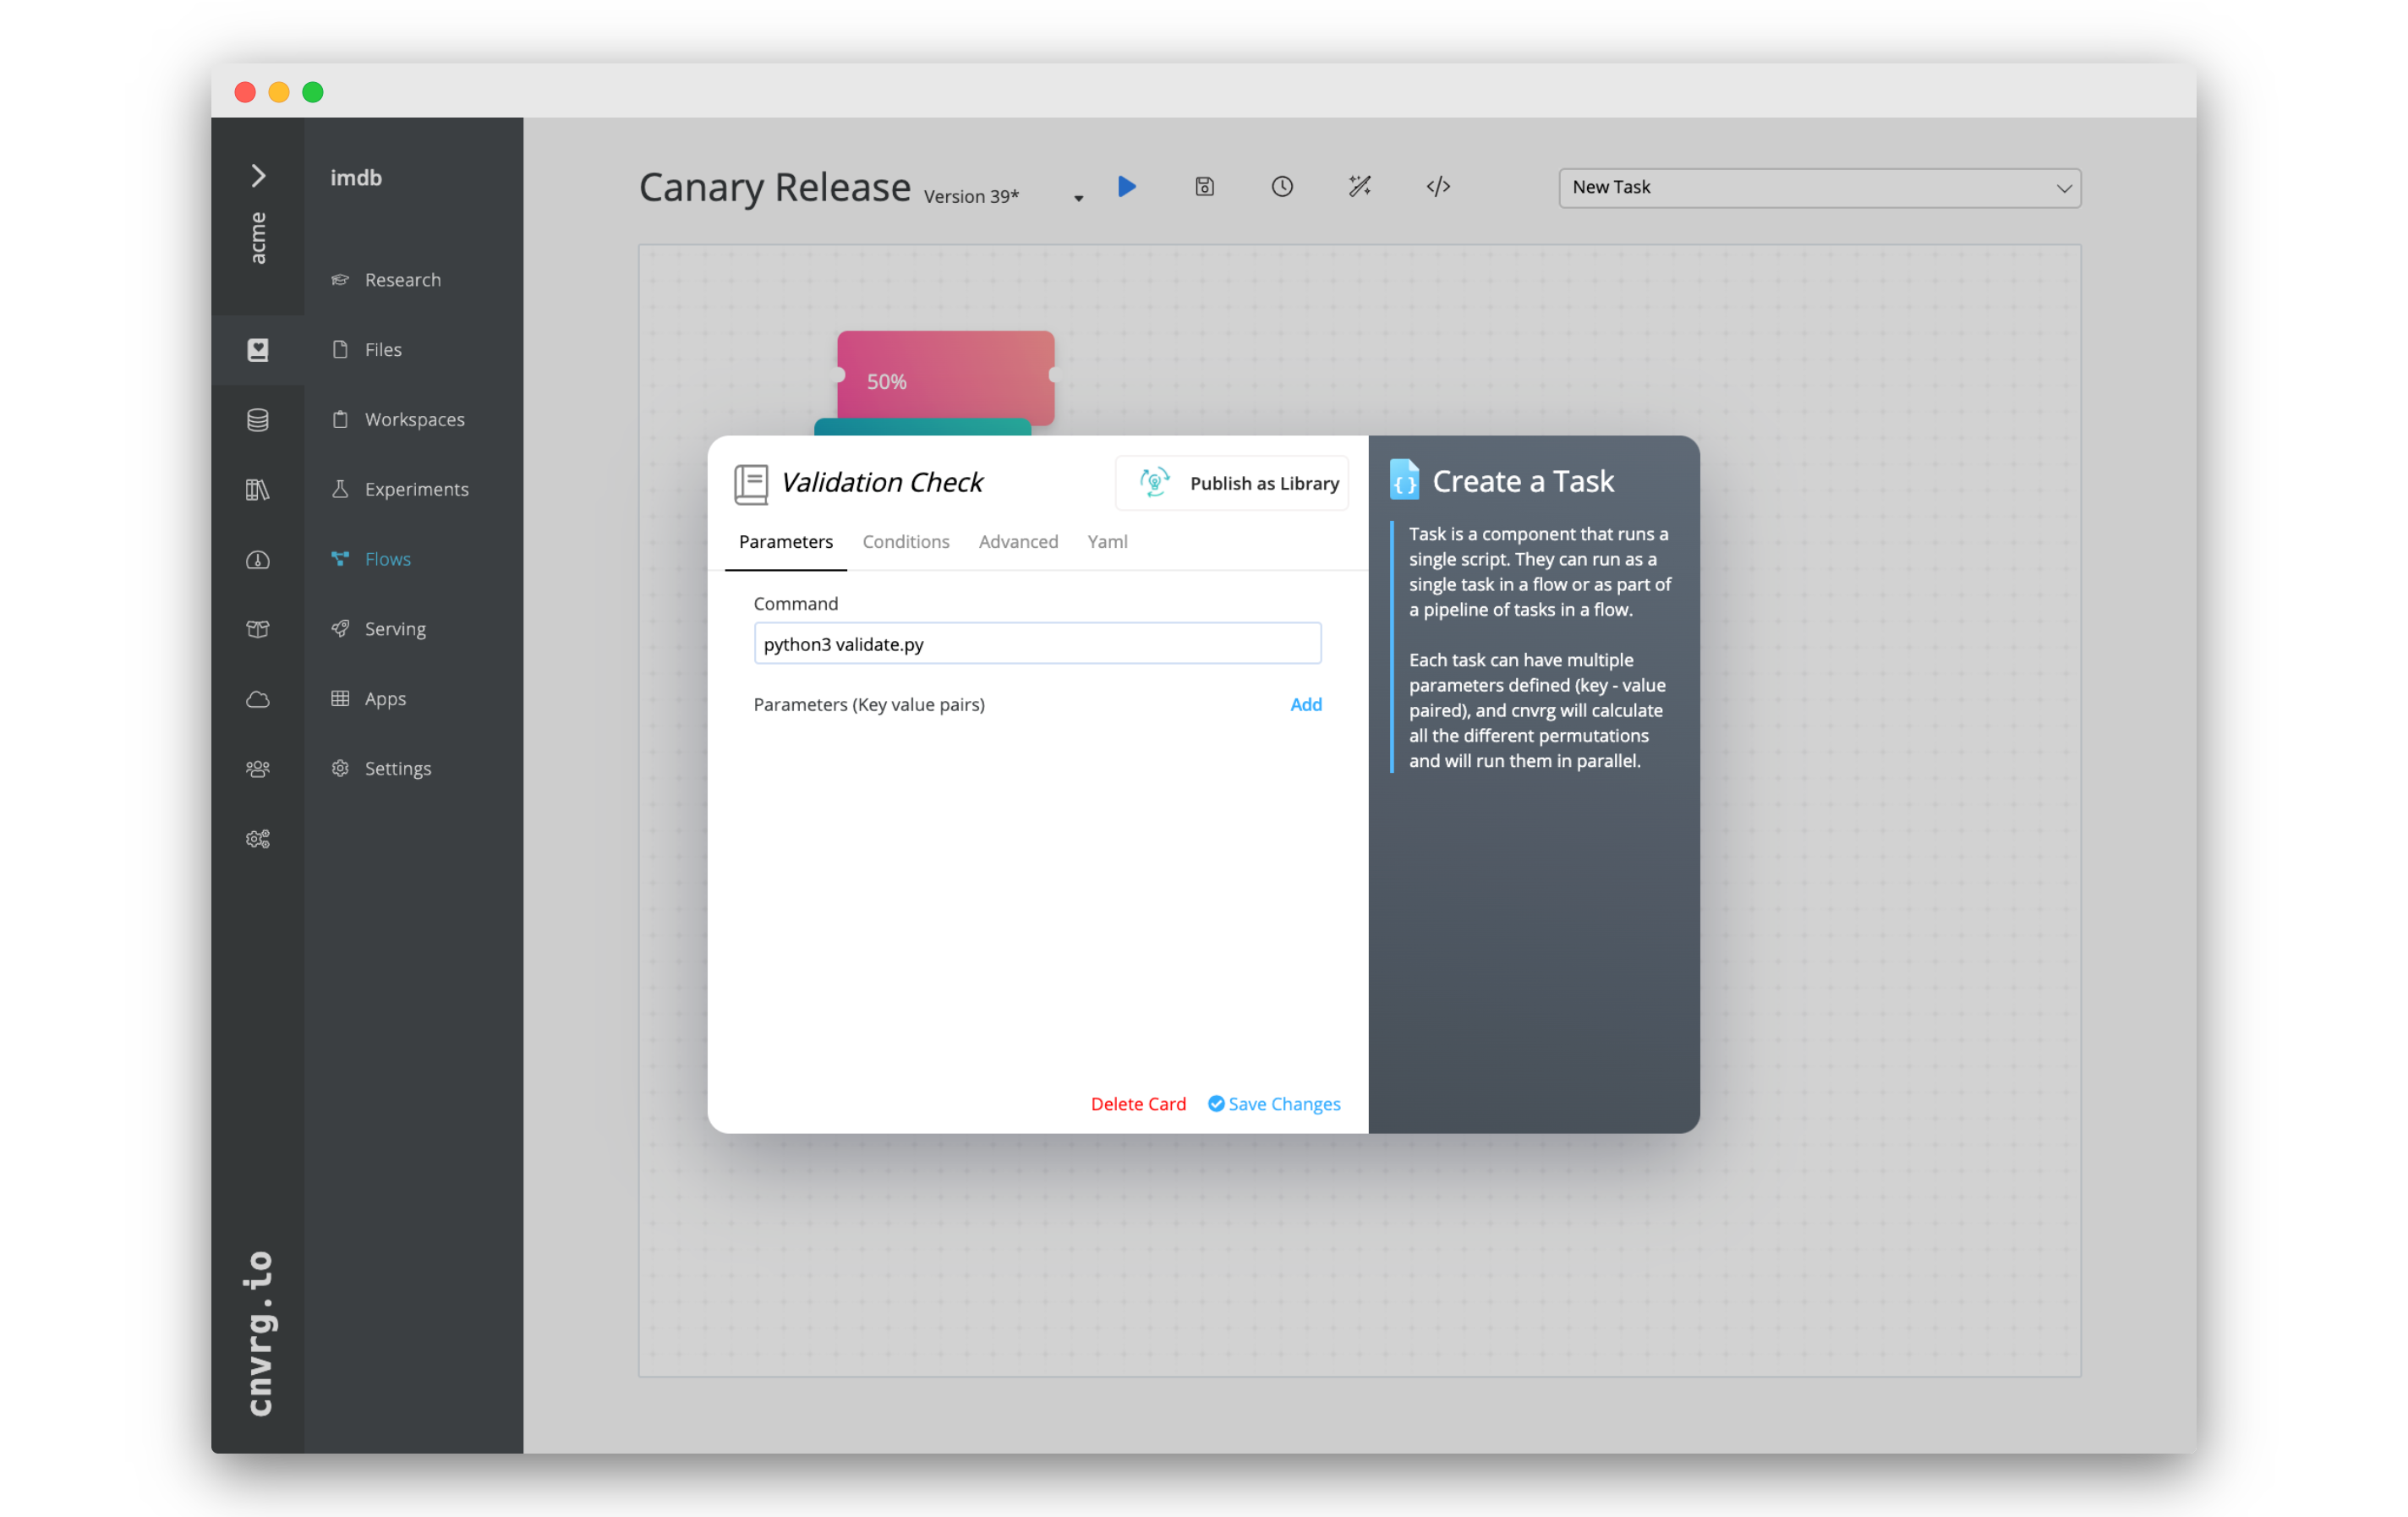
- Click the New Task menu.
- Choose Exec Task from the menu.
- For Command, write
python3 validate.py(or the command for you validation script). - Click on the name of the task and rename it to "Validation Check".
- Click Save Changes.
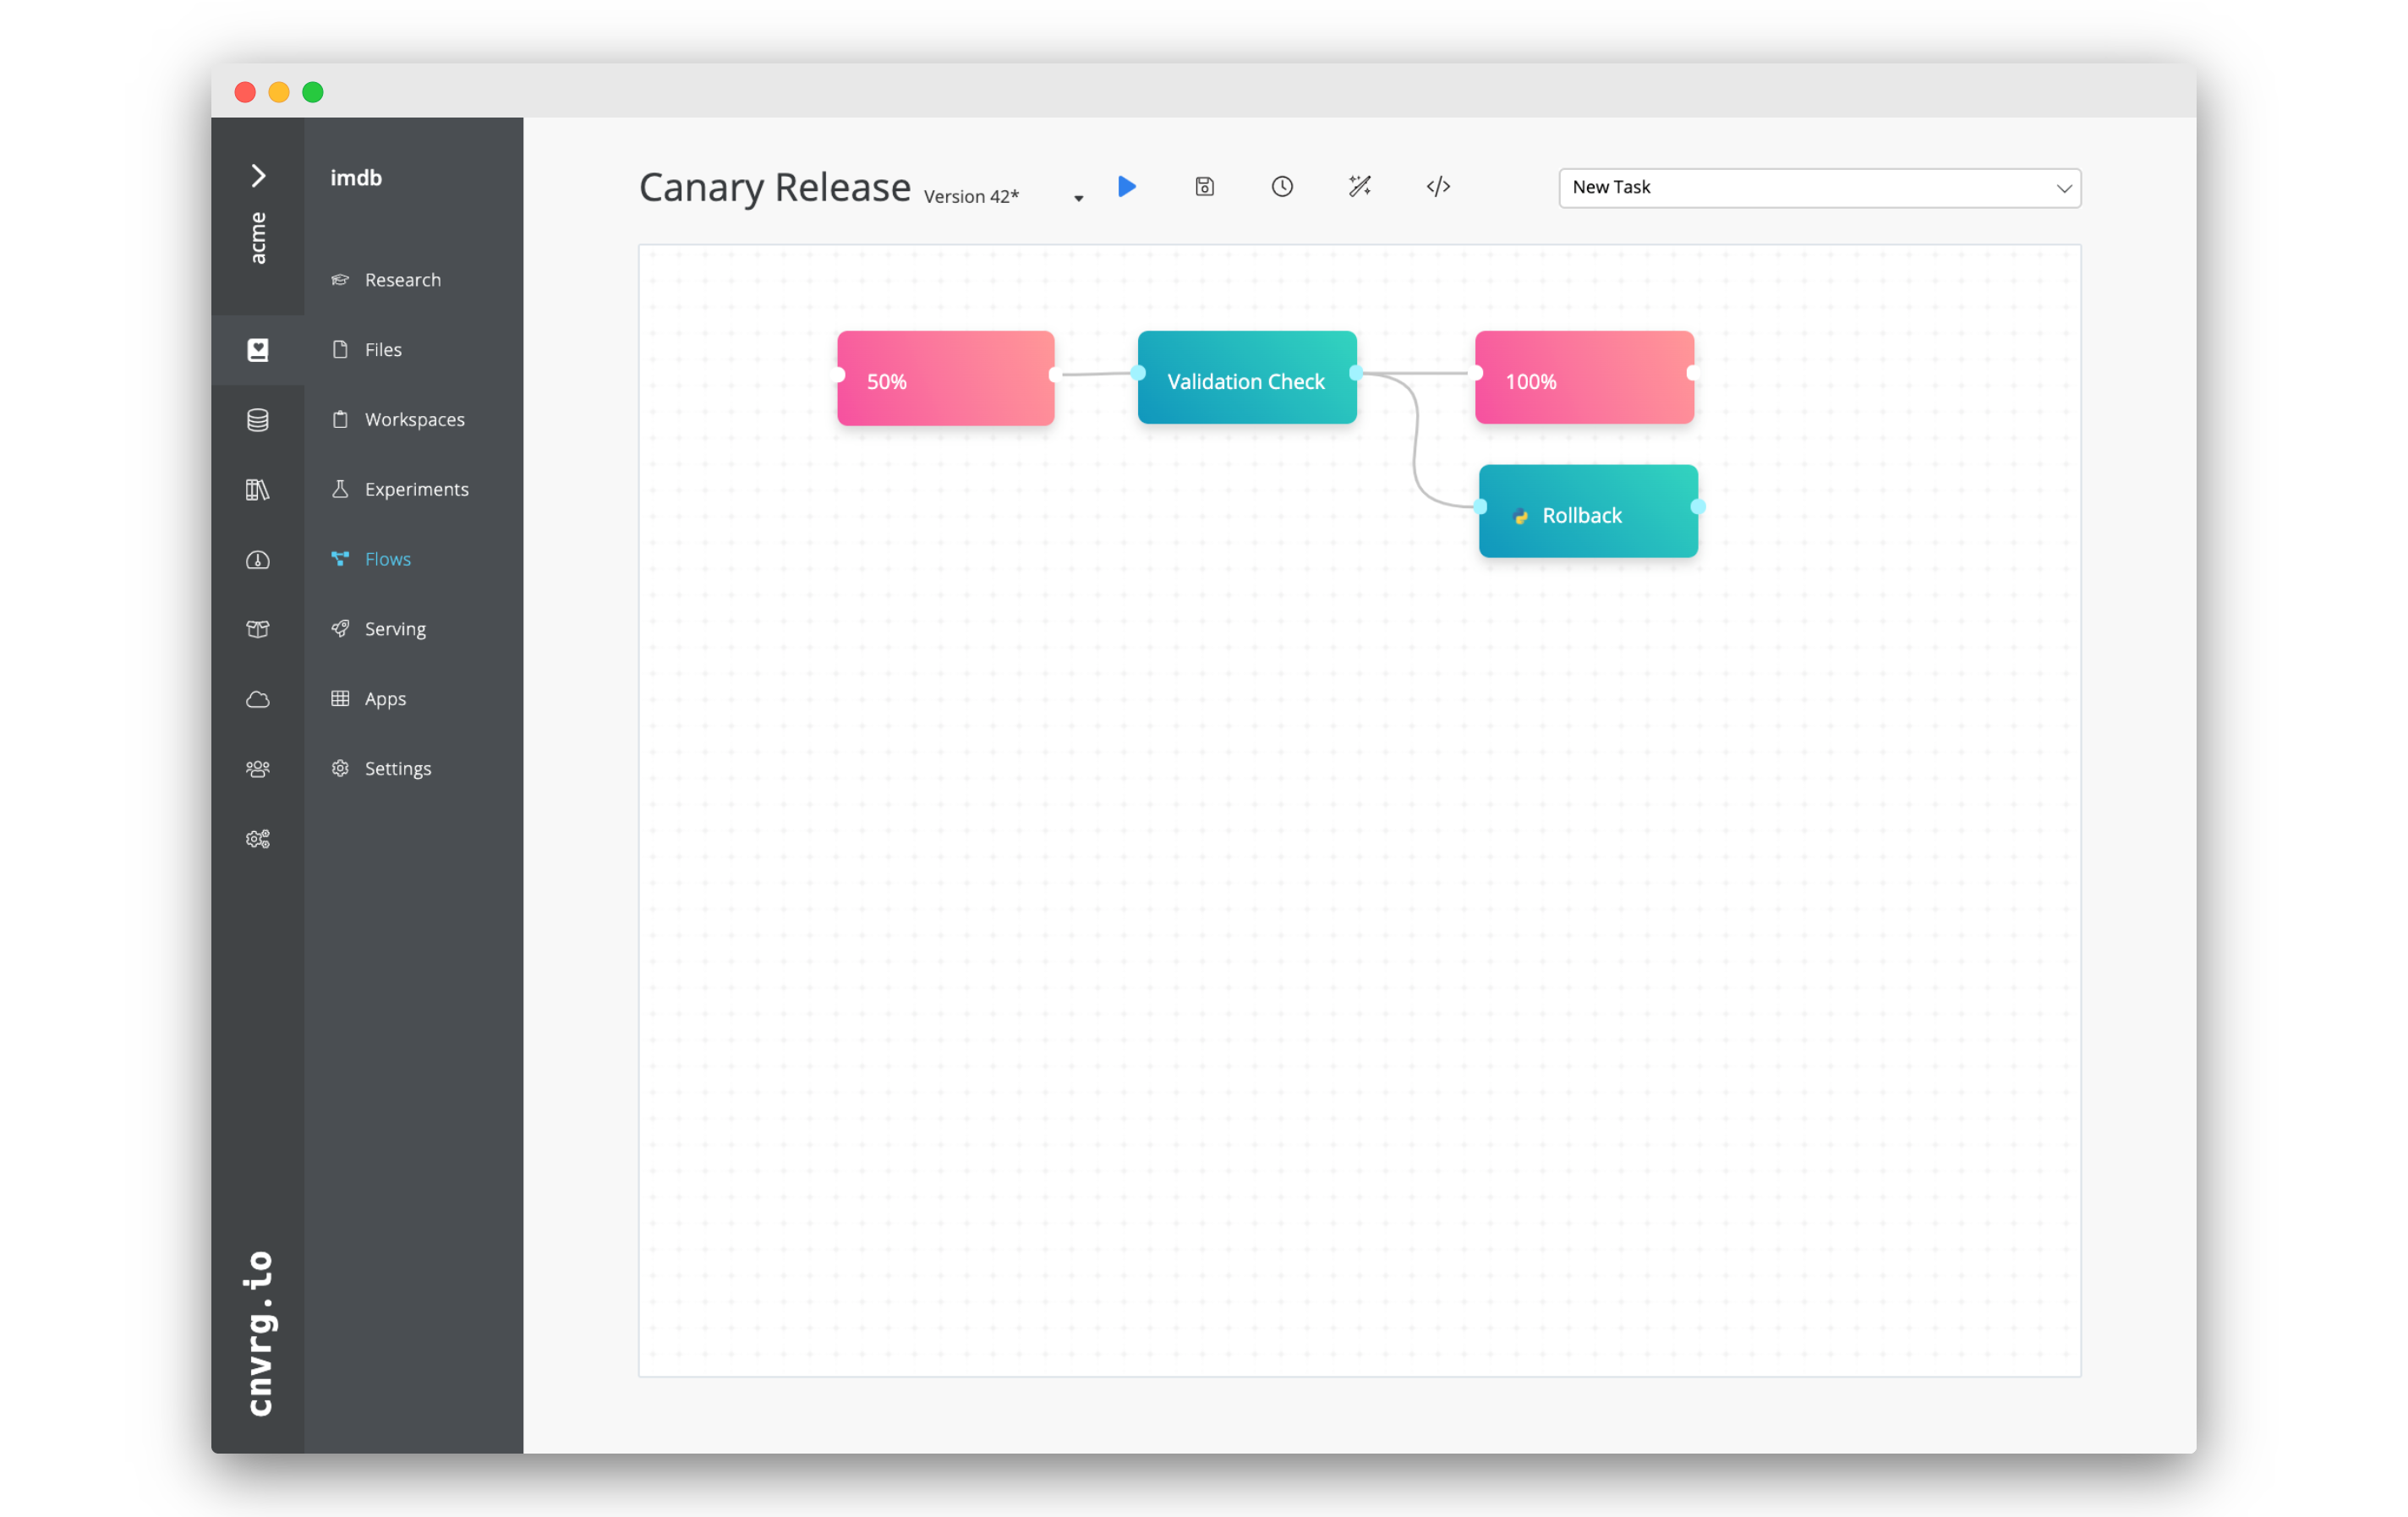
- Connect the the right dot of the 50% task to the left dot of the new Validation Check task.
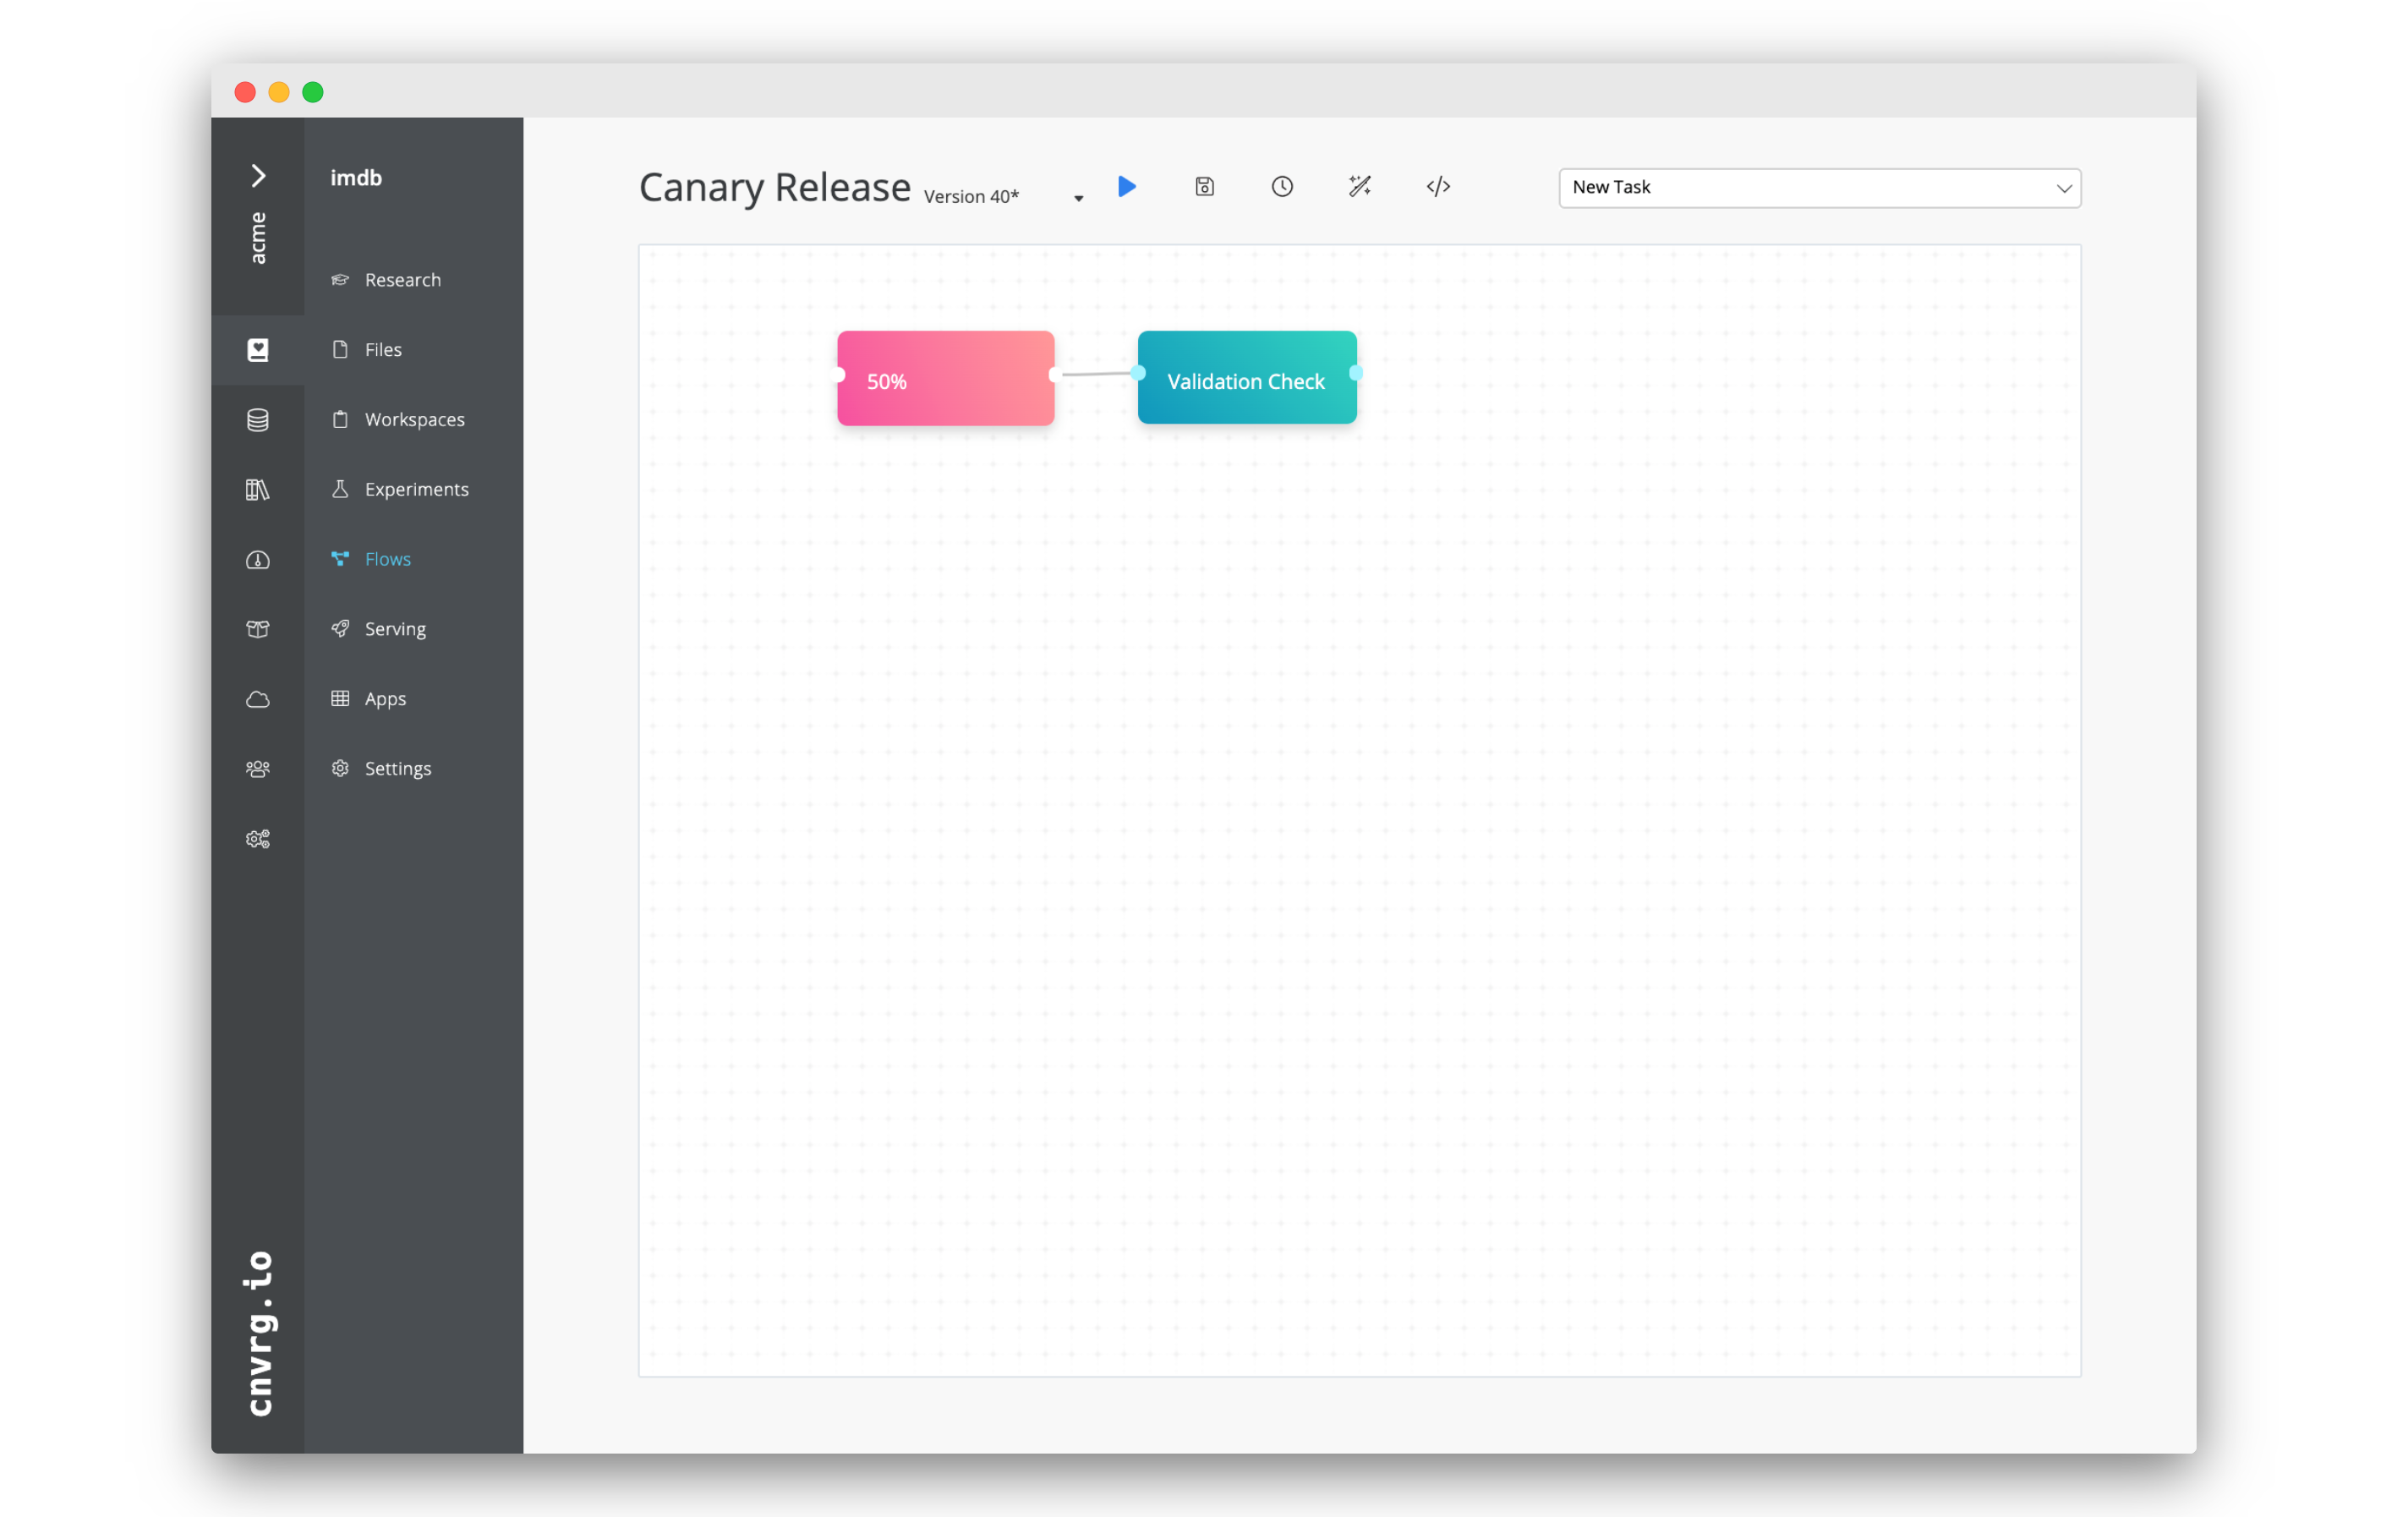
# Serve model to 100% of traffic if validation passes
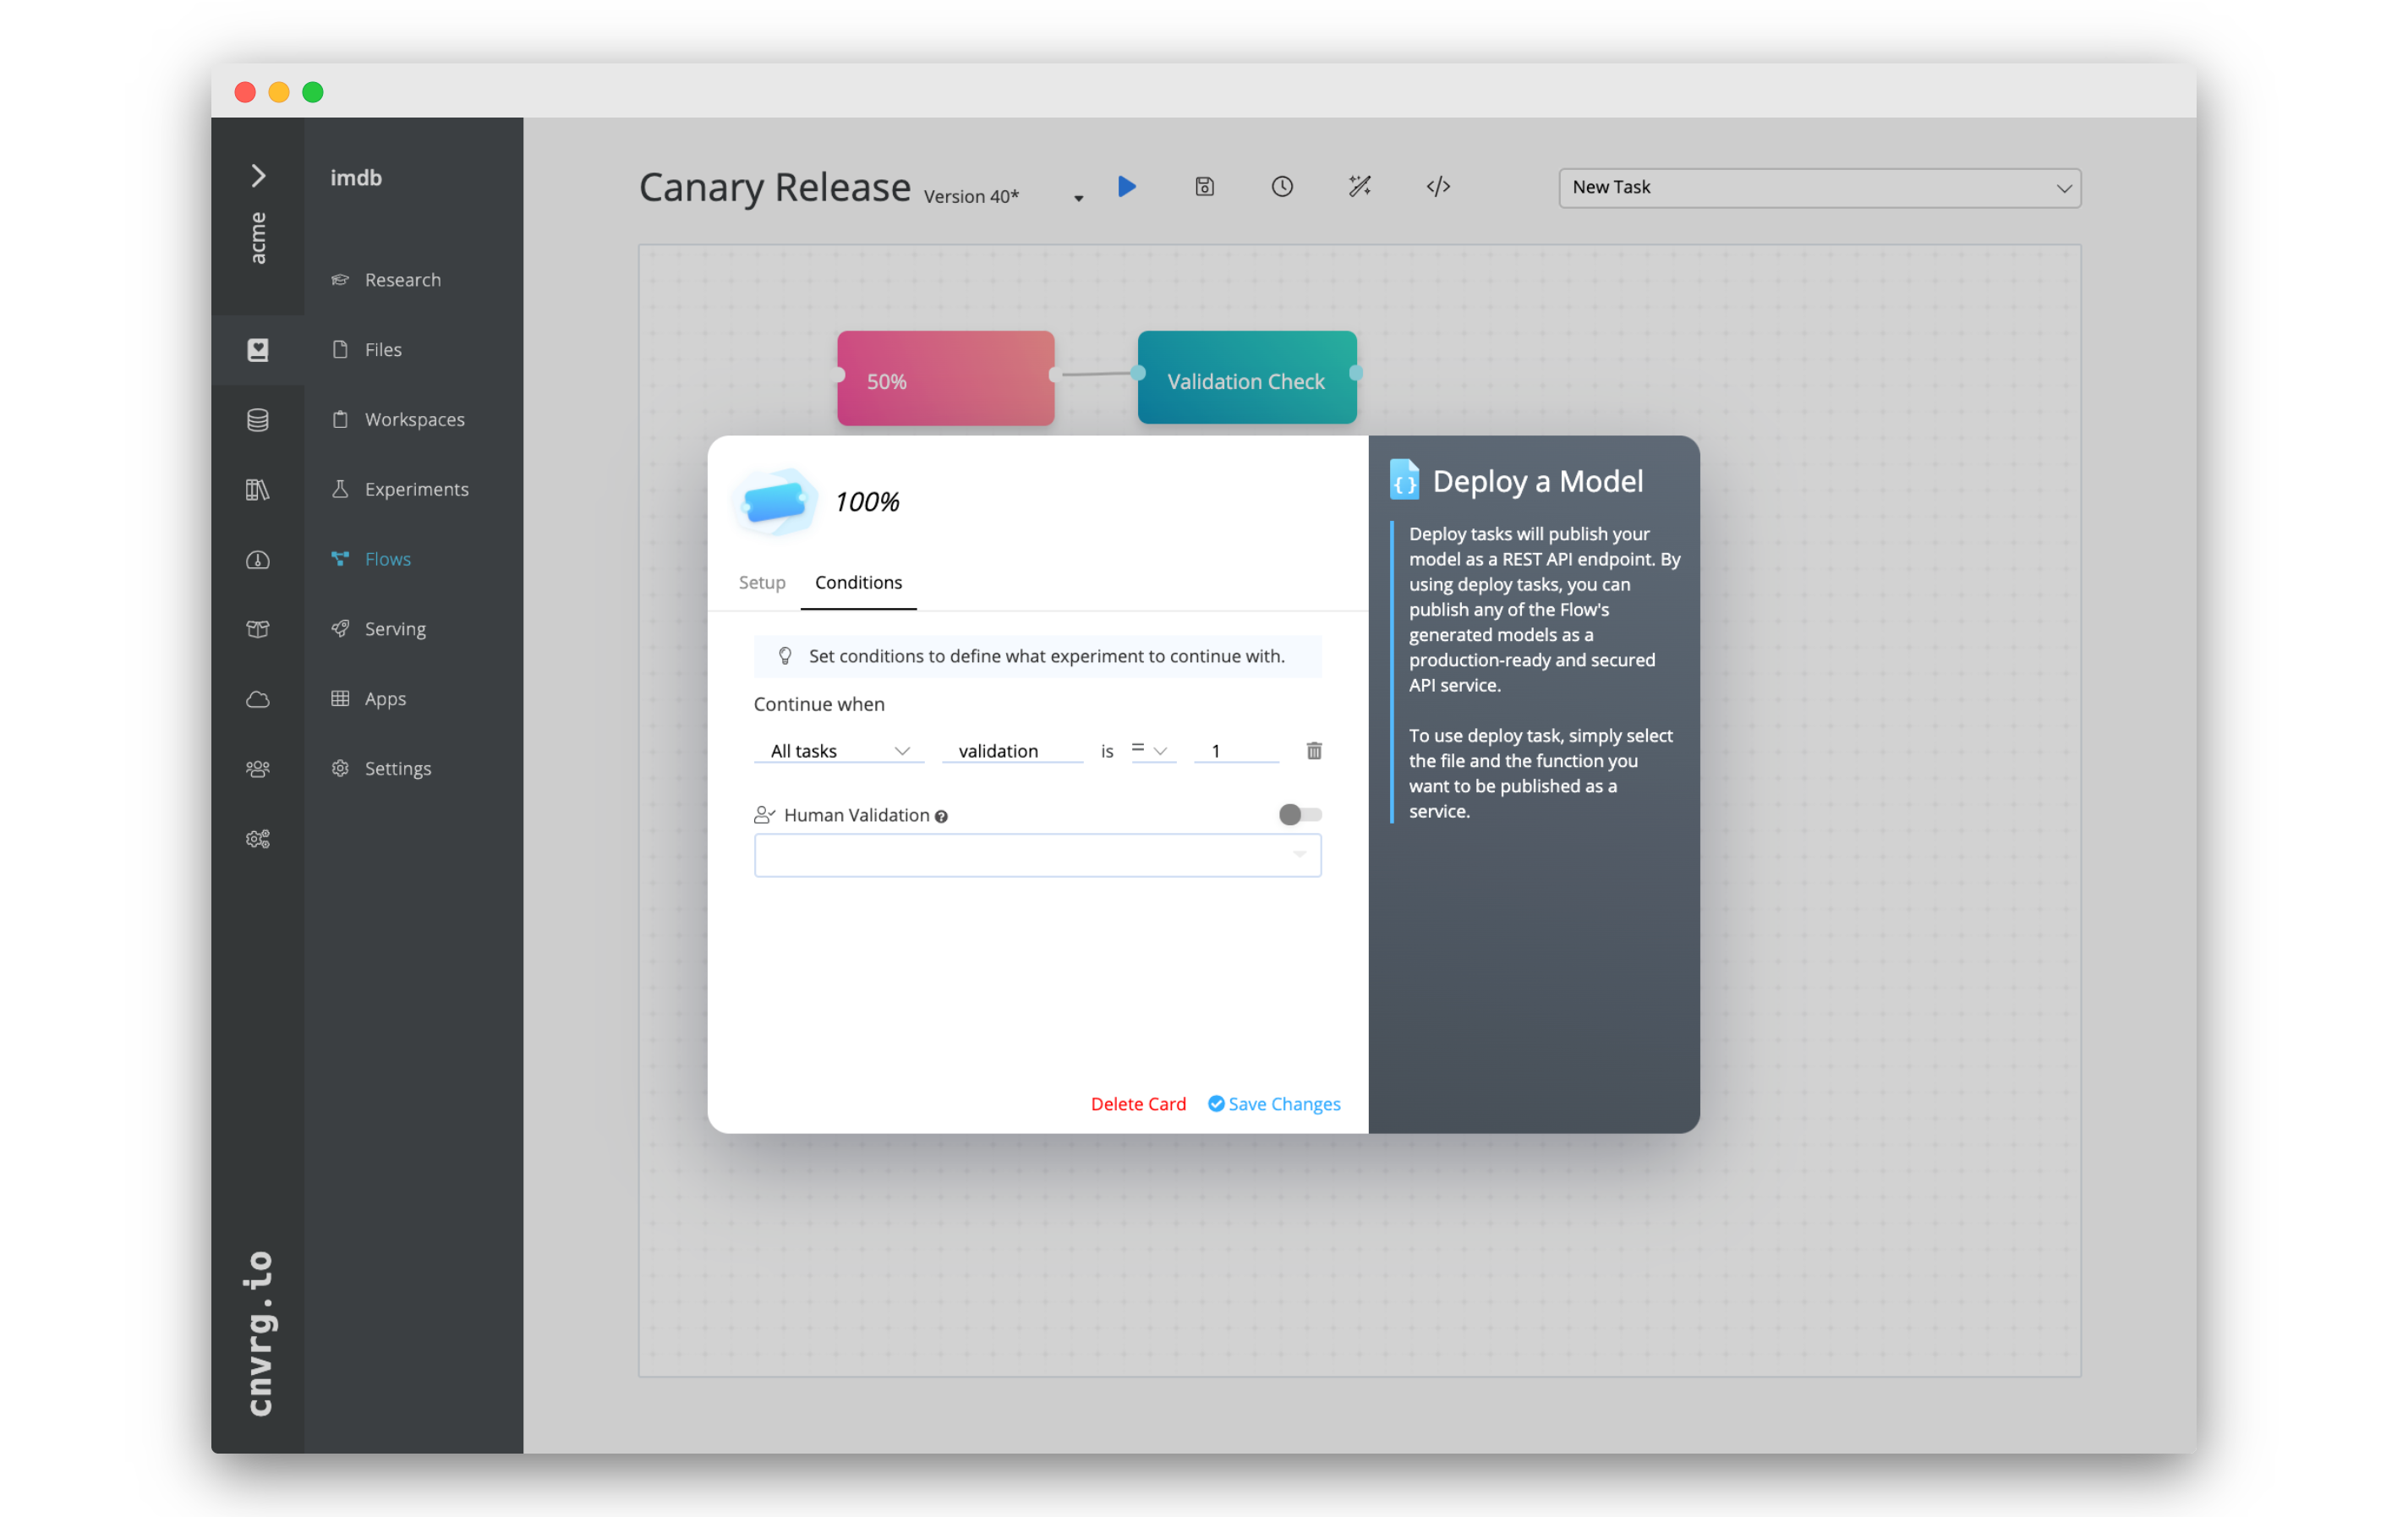 If the validation check passes, we want to serve the model to more of the traffic. In this case, 100% of traffic. By adding a condition we can make sure that further rollout only occurs if the validation passes.
- Click the New Task menu.
- Choose Deploy Task from the menu.
- In the Select Endpoint menu, click the name of the existing endpoint you would like to update.
- Enable Canary Rollout by clicking the toggle. Set the Traffic Ratio to 100%.
- Click on the name of the task and rename it to "100%".
- Click on the Conditions tab.
- Click Add Condition. Set the condition as:
- All Tasks
- validation
- is = (equal)
- 1
- Click Save Changes.
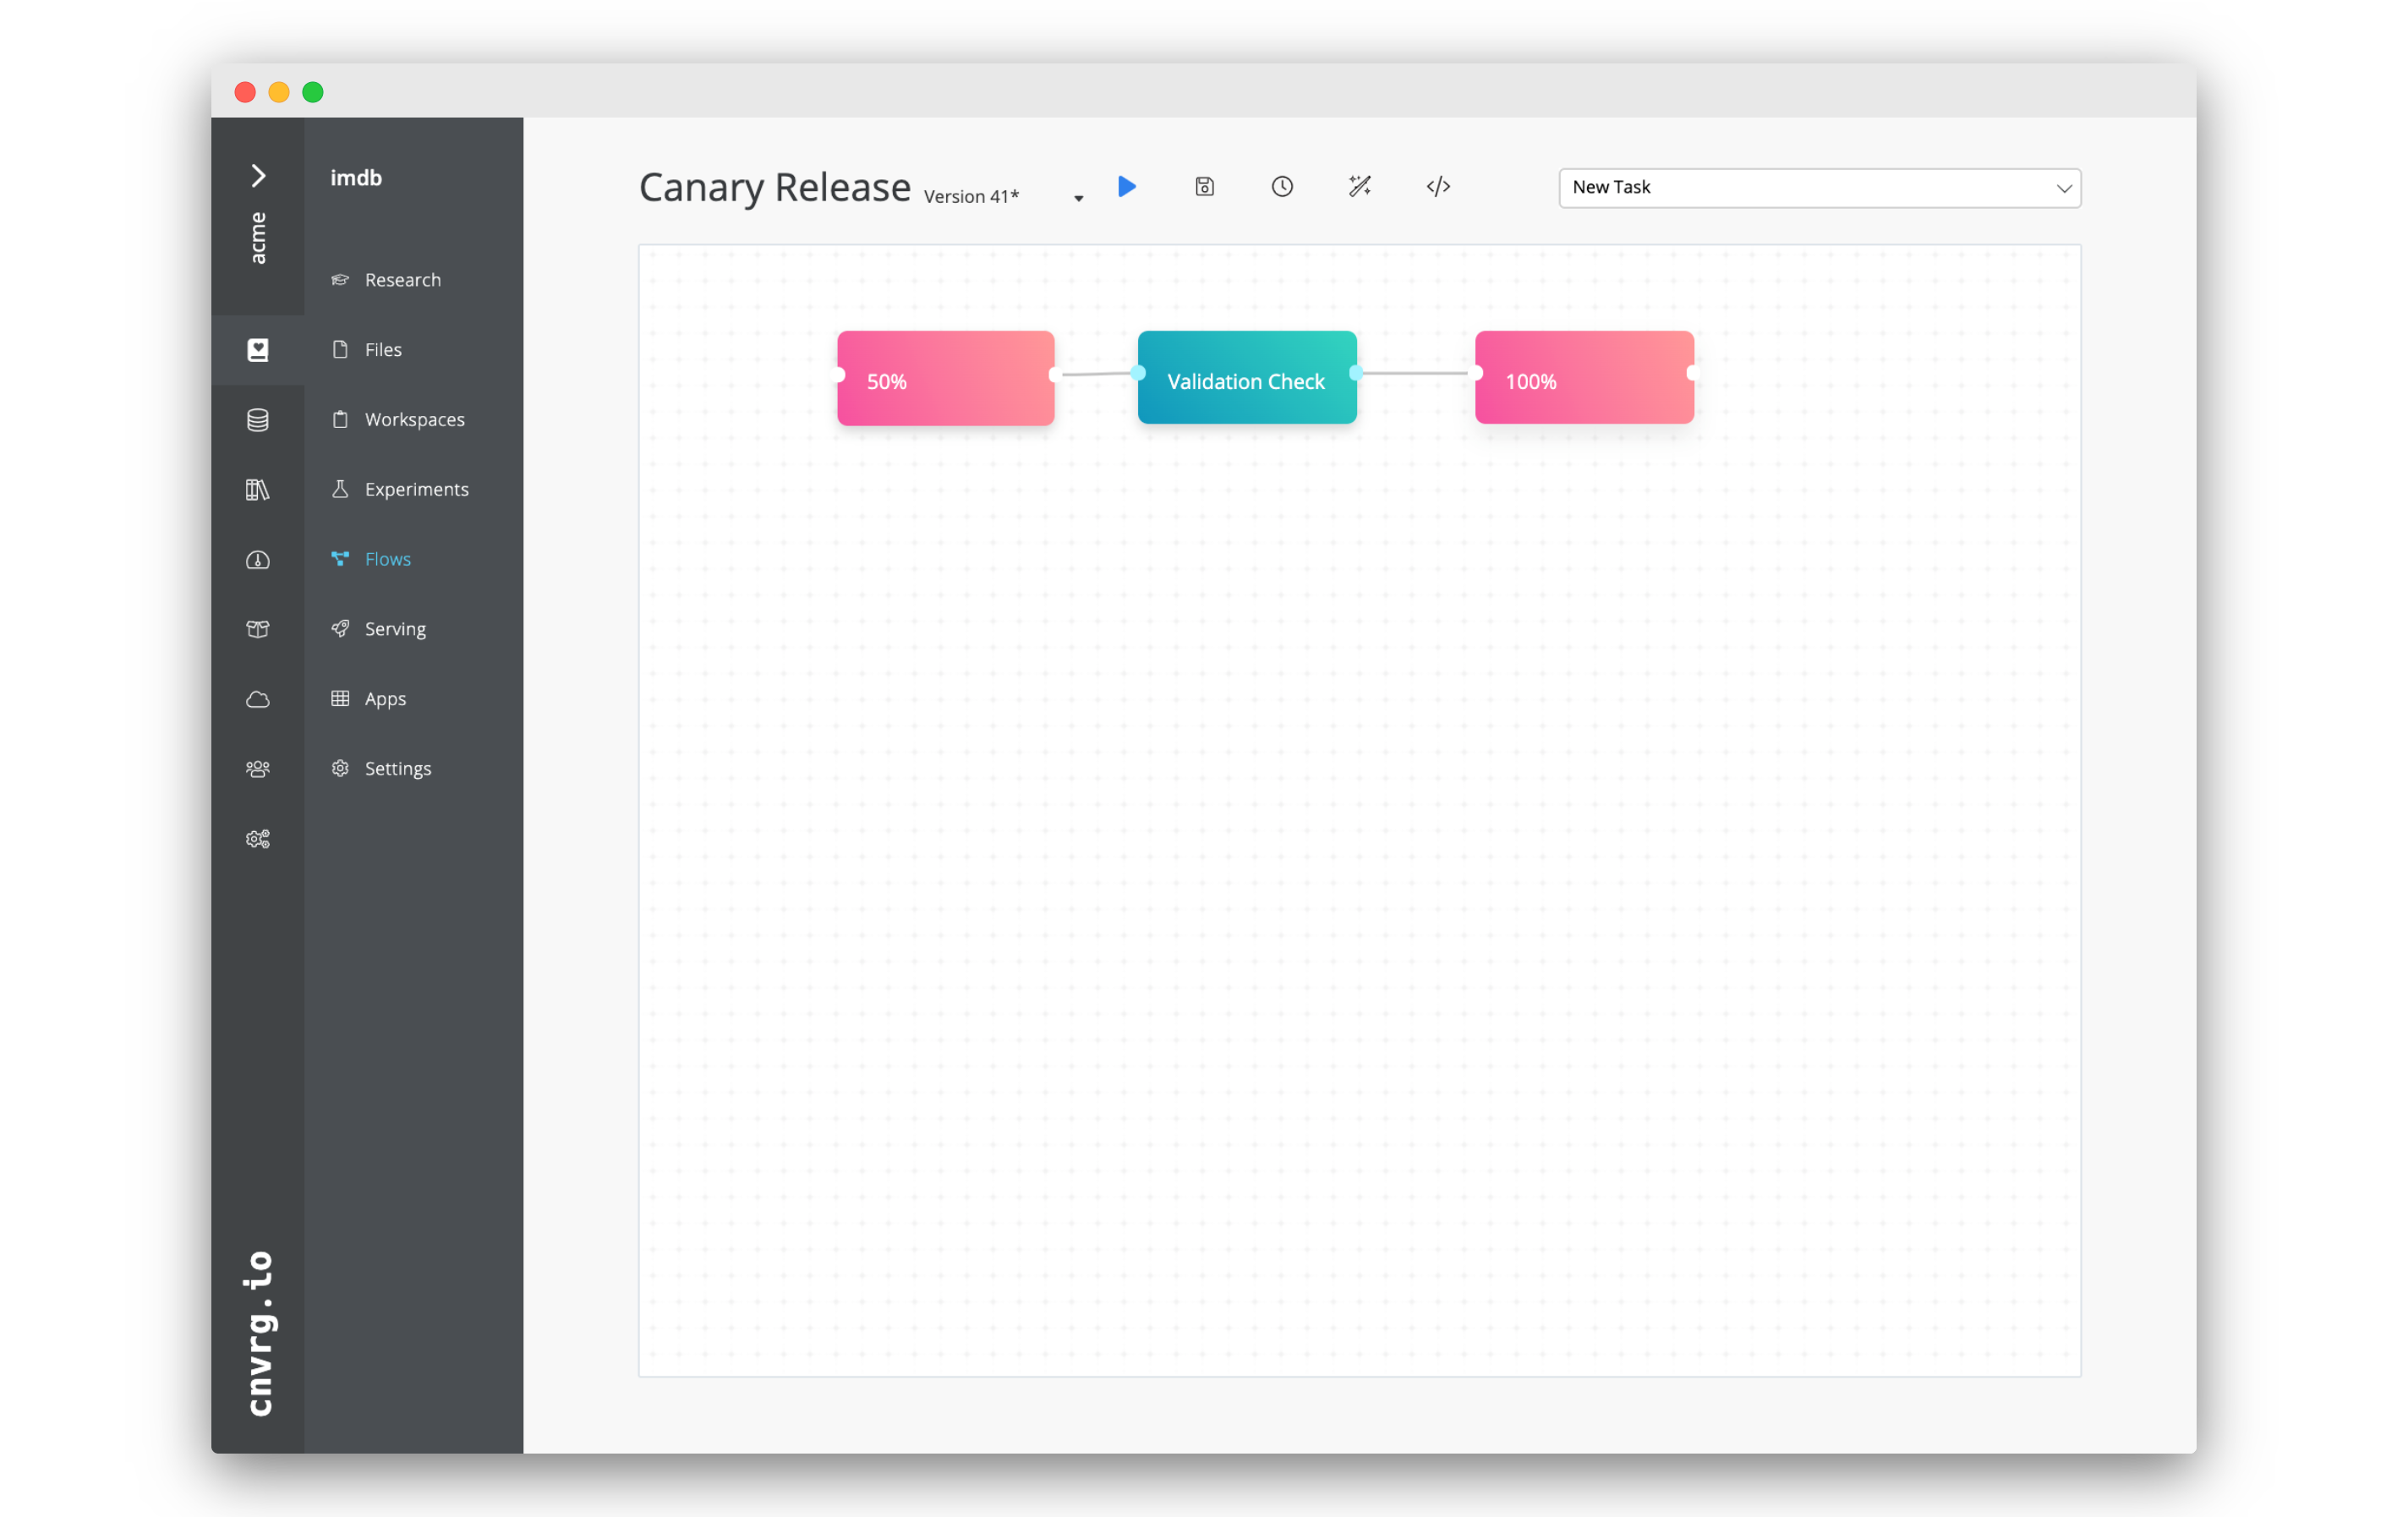
- Connect the the right dot of the Validation Check task to the left dot of the new 100% task.
# Rollback if validation fails
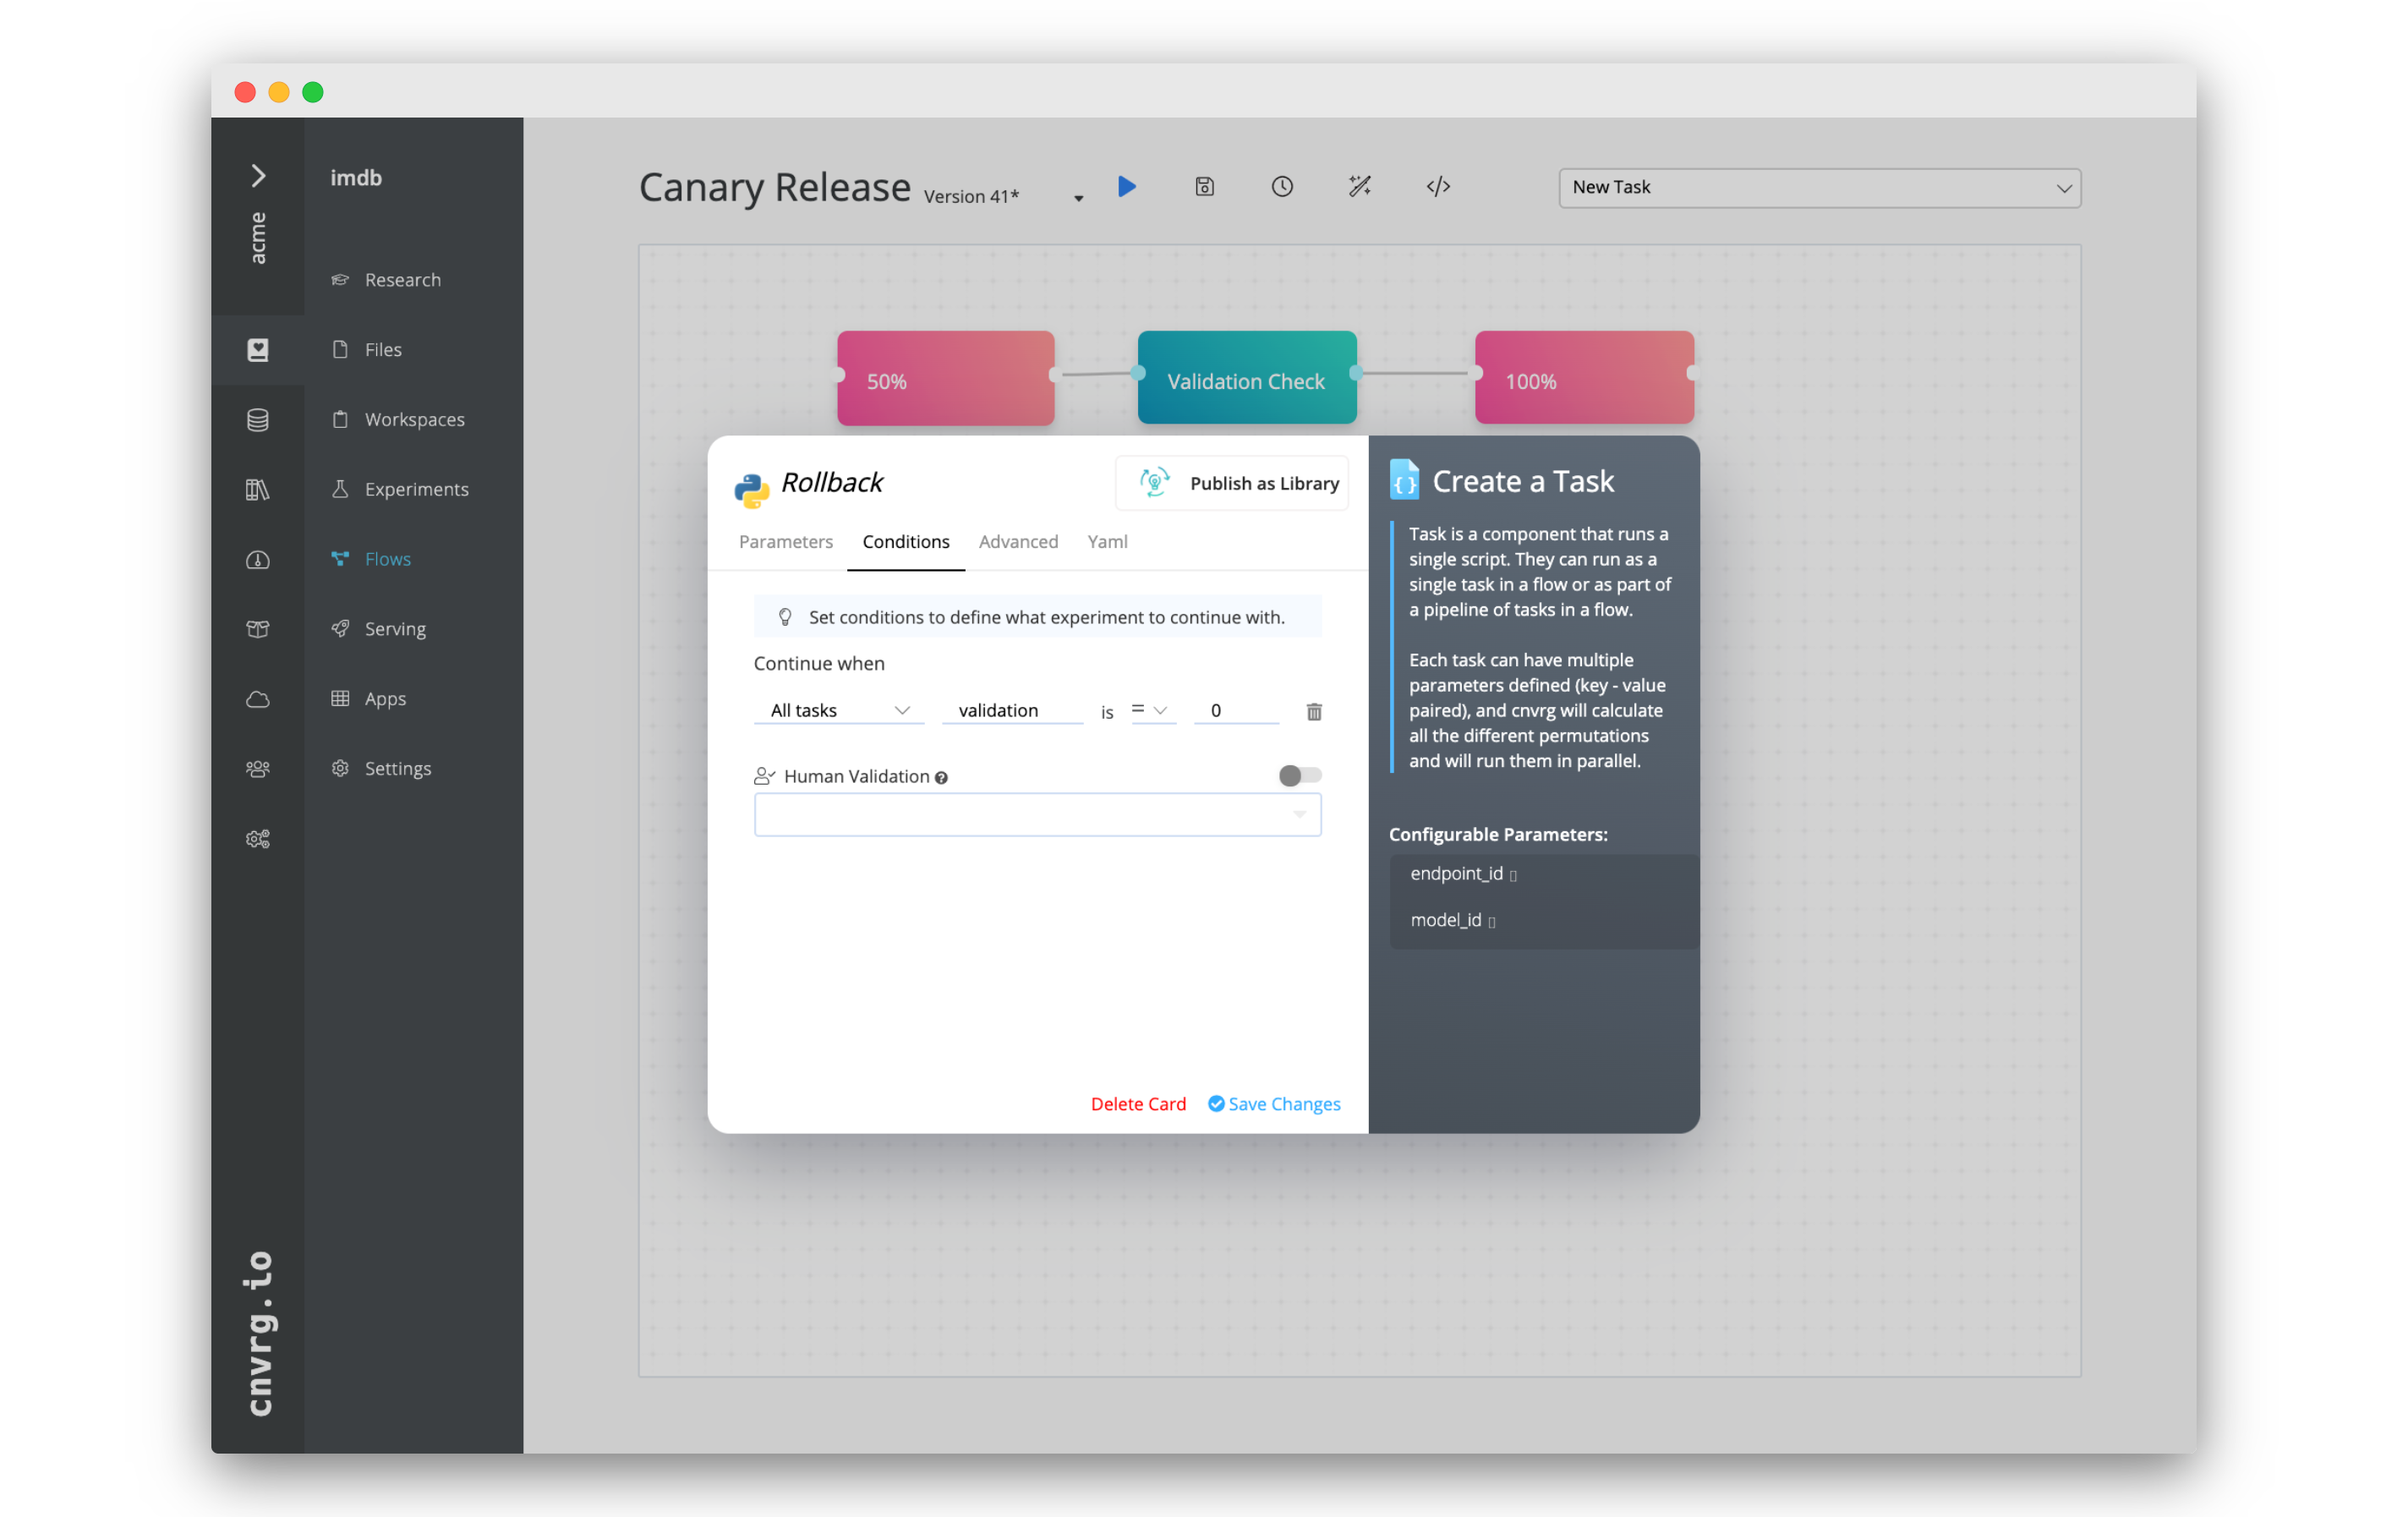 If the validation fails, we will want to roll back the model so that all traffic is served by the previous model. We will use the Rollback AI Library with a condition to create this capability.
- Click the New Task menu.
- Choose the Rollback AI Library from the menu.
- Fill in the parameters:
endpoint_id: The name of the endpoint that you are modifying.model_id: The number corresponding to the model that will be rolled back.
- Click on the Conditions tab.
- Click Add Condition. Set the condition as:
- All Tasks
- validation
- is = (equal)
- 0
- Click Save Changes.
- Connect the the right dot of the Validation Check task to the left dot of new Rollback task.
# Conclusion
When you run the newly created flow it will do the following:
- Deploy a new model in your existing service to 50% of the traffic.
- Run your validation check:
- If the validation check passes - roll out the new model to 100% of the traffic.
- If the validation check fails - rollback the new model entirely. You can of course modify this flow to roll out the model over more than 2 steps, and add processing/training steps to train a model before it is deployed.
This is the easiest way to create your own canary release flow.