# Train a Tensorflow Model over Multiple Nodes using MPI and Horovod
MPI is a communications protocol that allows distributed tasks to be run. This makes it a great tool for performing distributed deep learning tasks. cnvrg has implemented MPI into the platform, so you can leverage the power of MPI without any of the DevOps and MLOps complexity.
Horovod is a python package that implements versions of different deep learning frameworks for execution with MPI. This guide will show you how to run a Tensorflow experiment using Horovod running with MPI in cnvrg.
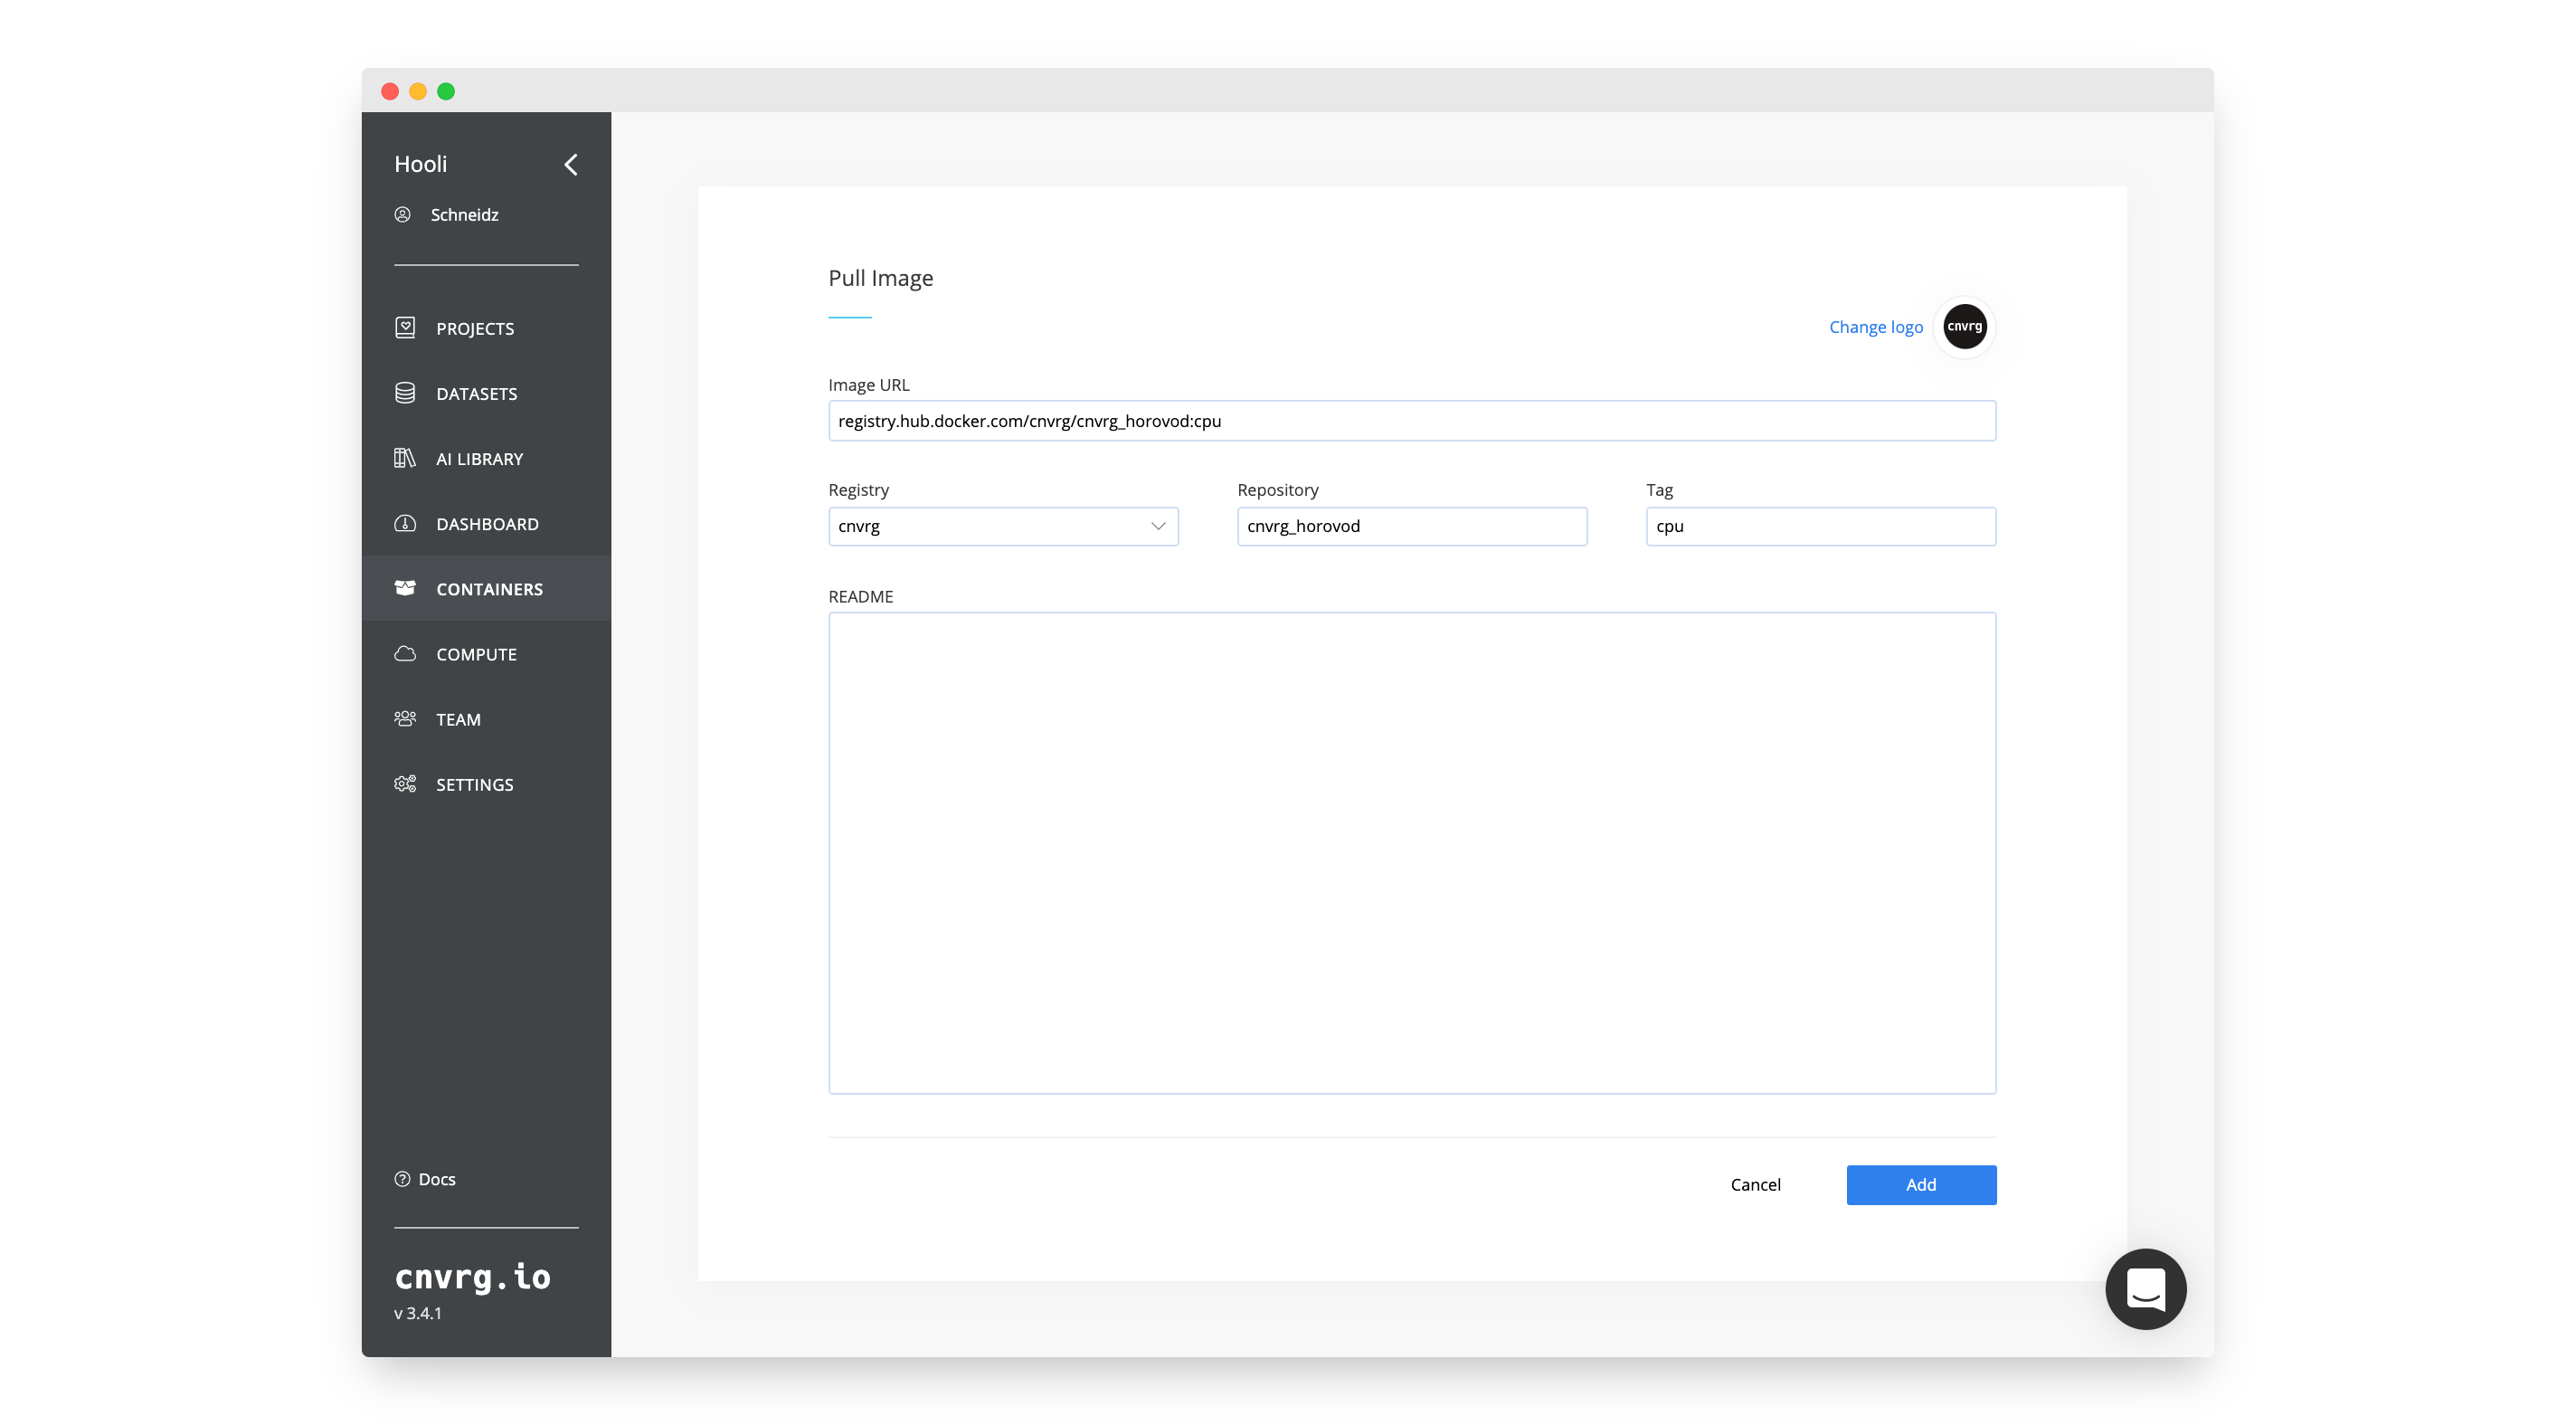
# Add the Image to your Organization
To run Horovod on MPI, you will need a Docker container with the correct packages. For this tutorial, we have created images based on the latest Horovod Dockerfiles. They contain Horovod, Tensorflow (and other frameworks), OpenMPI and some other required packages.
Add the image to your organization:

# Create the Compute Template
To run an MPI job you also need to use an Open MPI compute template. A template outlines the resource specifications for the master and worker nodes. By [creating a template] you can choose how many GPU nodes or otherwise you would like to use in the MPI job.
To create the template for this example:


# Create a Project and run the Experiment
With the container and template set up, we can create a project, add our code and run the experiment.
# Create a Project
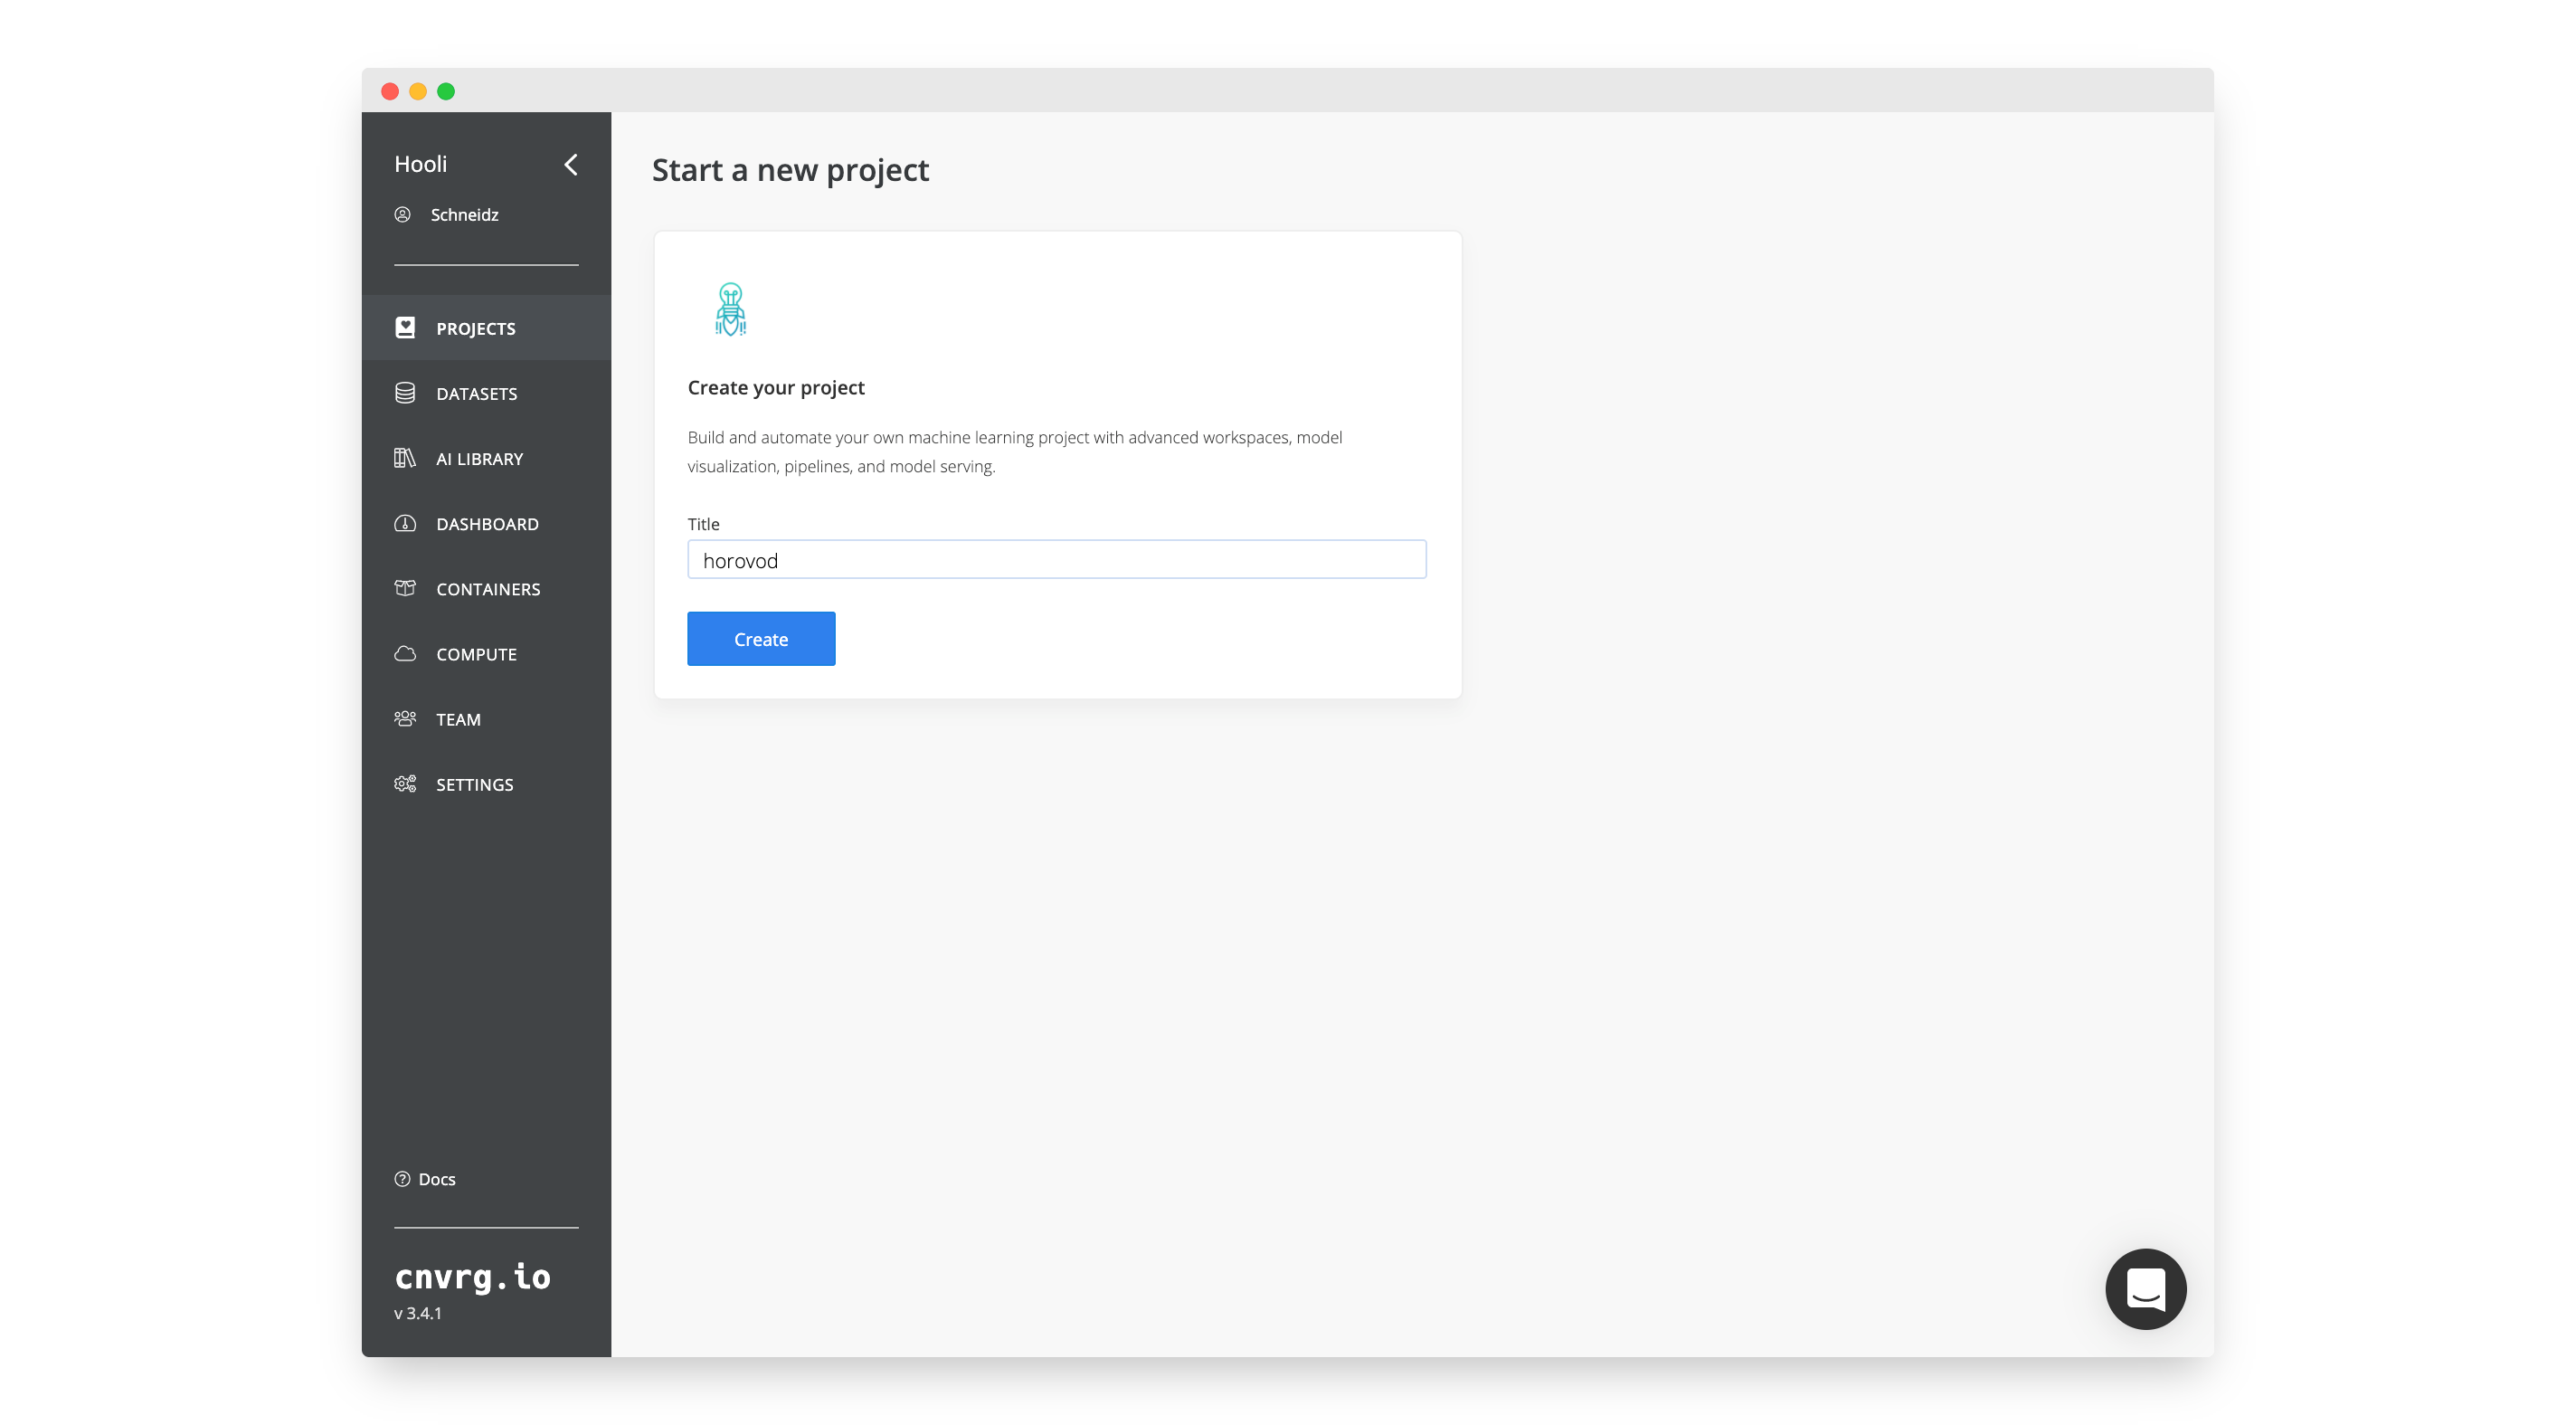
To create a new project:
- Go to Projects.
- Click Start Project.
- Name the project:
horovod - Click Create.
# Add the code
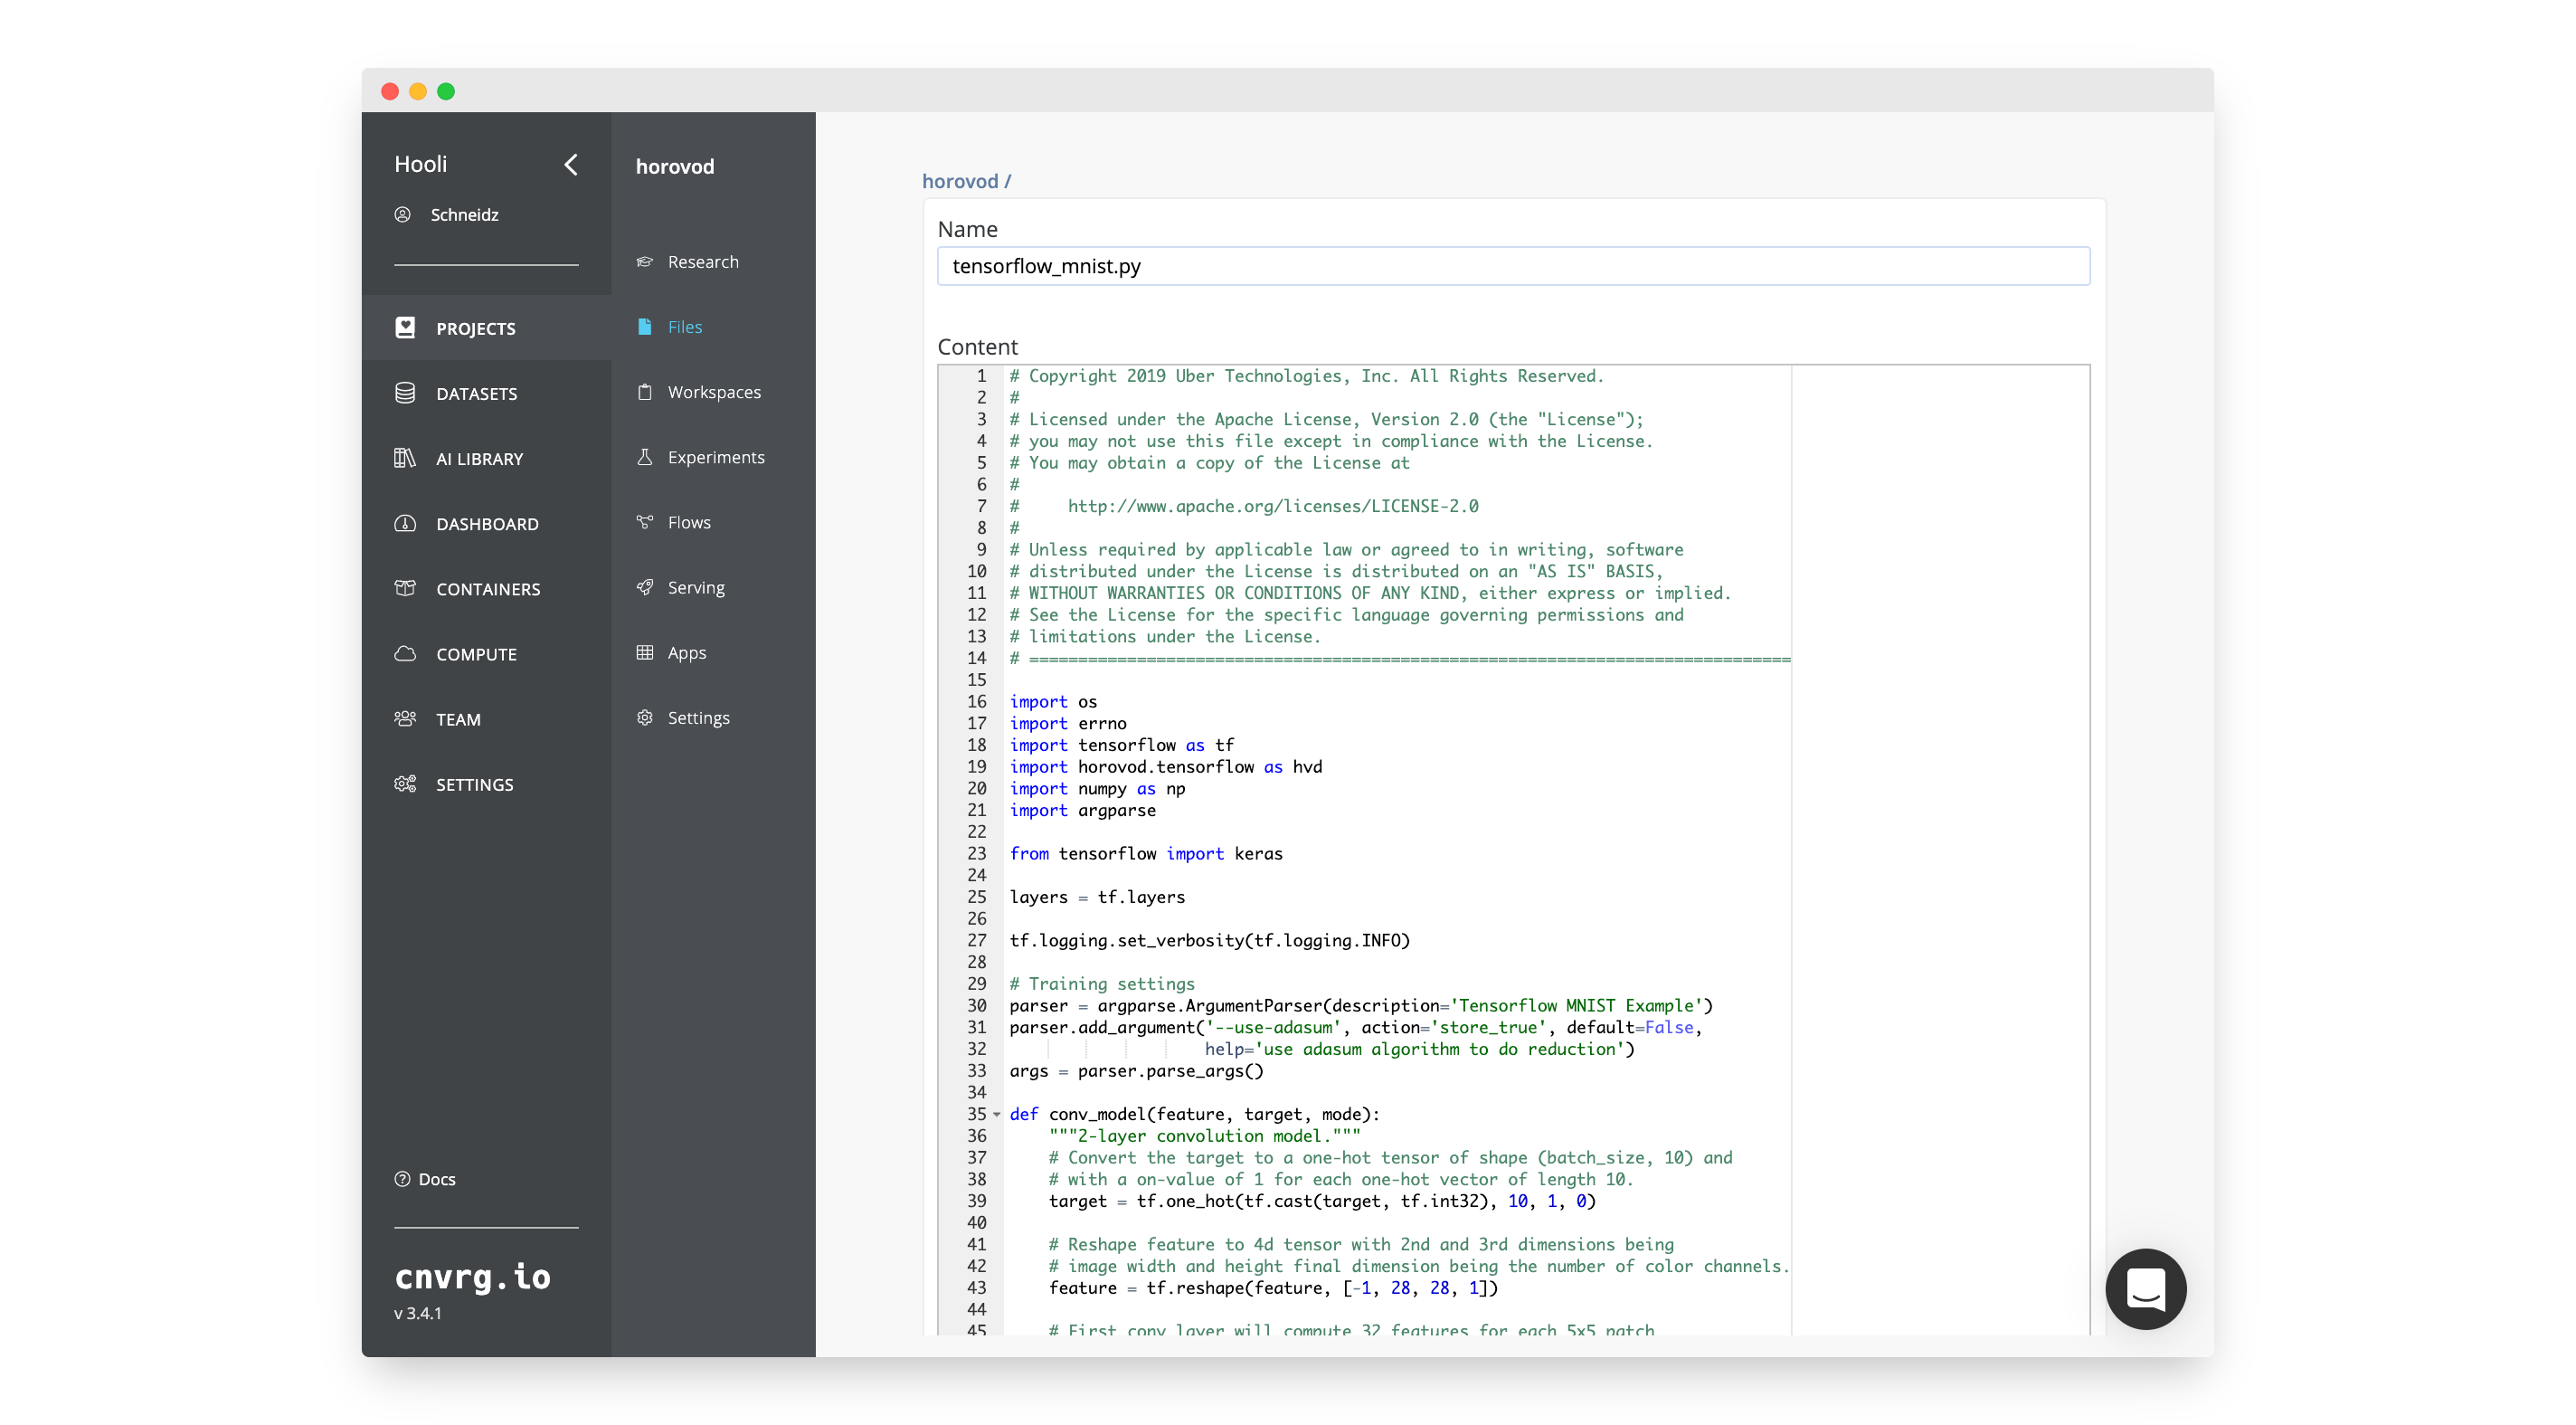
In the new project:
- Go to Files.
- Click New File.
- Name the file
tensorflow_mnist.py - Paste the following code:
# Copyright 2019 Uber Technologies, Inc. All Rights Reserved. # # Licensed under the Apache License, Version 2.0 (the "License"); # you may not use this file except in compliance with the License. # You may obtain a copy of the License at # # http://www.apache.org/licenses/LICENSE-2.0 # # Unless required by applicable law or agreed to in writing, software # distributed under the License is distributed on an "AS IS" BASIS, # WITHOUT WARRANTIES OR CONDITIONS OF ANY KIND, either express or implied. # See the License for the specific language governing permissions and # limitations under the License. # ============================================================================== import tensorflow as tf import horovod.tensorflow as hvd # Horovod: initialize Horovod. hvd.init() # Horovod: pin GPU to be used to process local rank (one GPU per process) gpus = tf.config.experimental.list_physical_devices('GPU') for gpu in gpus: tf.config.experimental.set_memory_growth(gpu, True) if gpus: tf.config.experimental.set_visible_devices(gpus[hvd.local_rank()], 'GPU') (mnist_images, mnist_labels), _ = \ tf.keras.datasets.mnist.load_data(path='mnist-%d.npz' % hvd.rank()) dataset = tf.data.Dataset.from_tensor_slices( (tf.cast(mnist_images[..., tf.newaxis] / 255.0, tf.float32), tf.cast(mnist_labels, tf.int64)) ) dataset = dataset.repeat().shuffle(10000).batch(128) mnist_model = tf.keras.Sequential([ tf.keras.layers.Conv2D(32, [3, 3], activation='relu'), tf.keras.layers.Conv2D(64, [3, 3], activation='relu'), tf.keras.layers.MaxPooling2D(pool_size=(2, 2)), tf.keras.layers.Dropout(0.25), tf.keras.layers.Flatten(), tf.keras.layers.Dense(128, activation='relu'), tf.keras.layers.Dropout(0.5), tf.keras.layers.Dense(10, activation='softmax') ]) loss = tf.losses.SparseCategoricalCrossentropy() # Horovod: adjust learning rate based on number of GPUs. opt = tf.optimizers.Adam(0.001 * hvd.size()) checkpoint_dir = './checkpoints' checkpoint = tf.train.Checkpoint(model=mnist_model, optimizer=opt) @tf.function def training_step(images, labels, first_batch): with tf.GradientTape() as tape: probs = mnist_model(images, training=True) loss_value = loss(labels, probs) # Horovod: add Horovod Distributed GradientTape. tape = hvd.DistributedGradientTape(tape) grads = tape.gradient(loss_value, mnist_model.trainable_variables) opt.apply_gradients(zip(grads, mnist_model.trainable_variables)) # Horovod: broadcast initial variable states from rank 0 to all other processes. # This is necessary to ensure consistent initialization of all workers when # training is started with random weights or restored from a checkpoint. # # Note: broadcast should be done after the first gradient step to ensure optimizer # initialization. if first_batch: hvd.broadcast_variables(mnist_model.variables, root_rank=0) hvd.broadcast_variables(opt.variables(), root_rank=0) return loss_value # Horovod: adjust number of steps based on number of GPUs. for batch, (images, labels) in enumerate(dataset.take(10000 // hvd.size())): loss_value = training_step(images, labels, batch == 0) if batch % 10 == 0 and hvd.local_rank() == 0: print('Step #%d\tLoss: %.6f' % (batch, loss_value)) # Horovod: save checkpoints only on worker 0 to prevent other workers from # corrupting it. if hvd.rank() == 0: checkpoint.save(checkpoint_dir) - Click Submit.
If you are interested to see how the code is set up, use this opportunity to look through the source code.
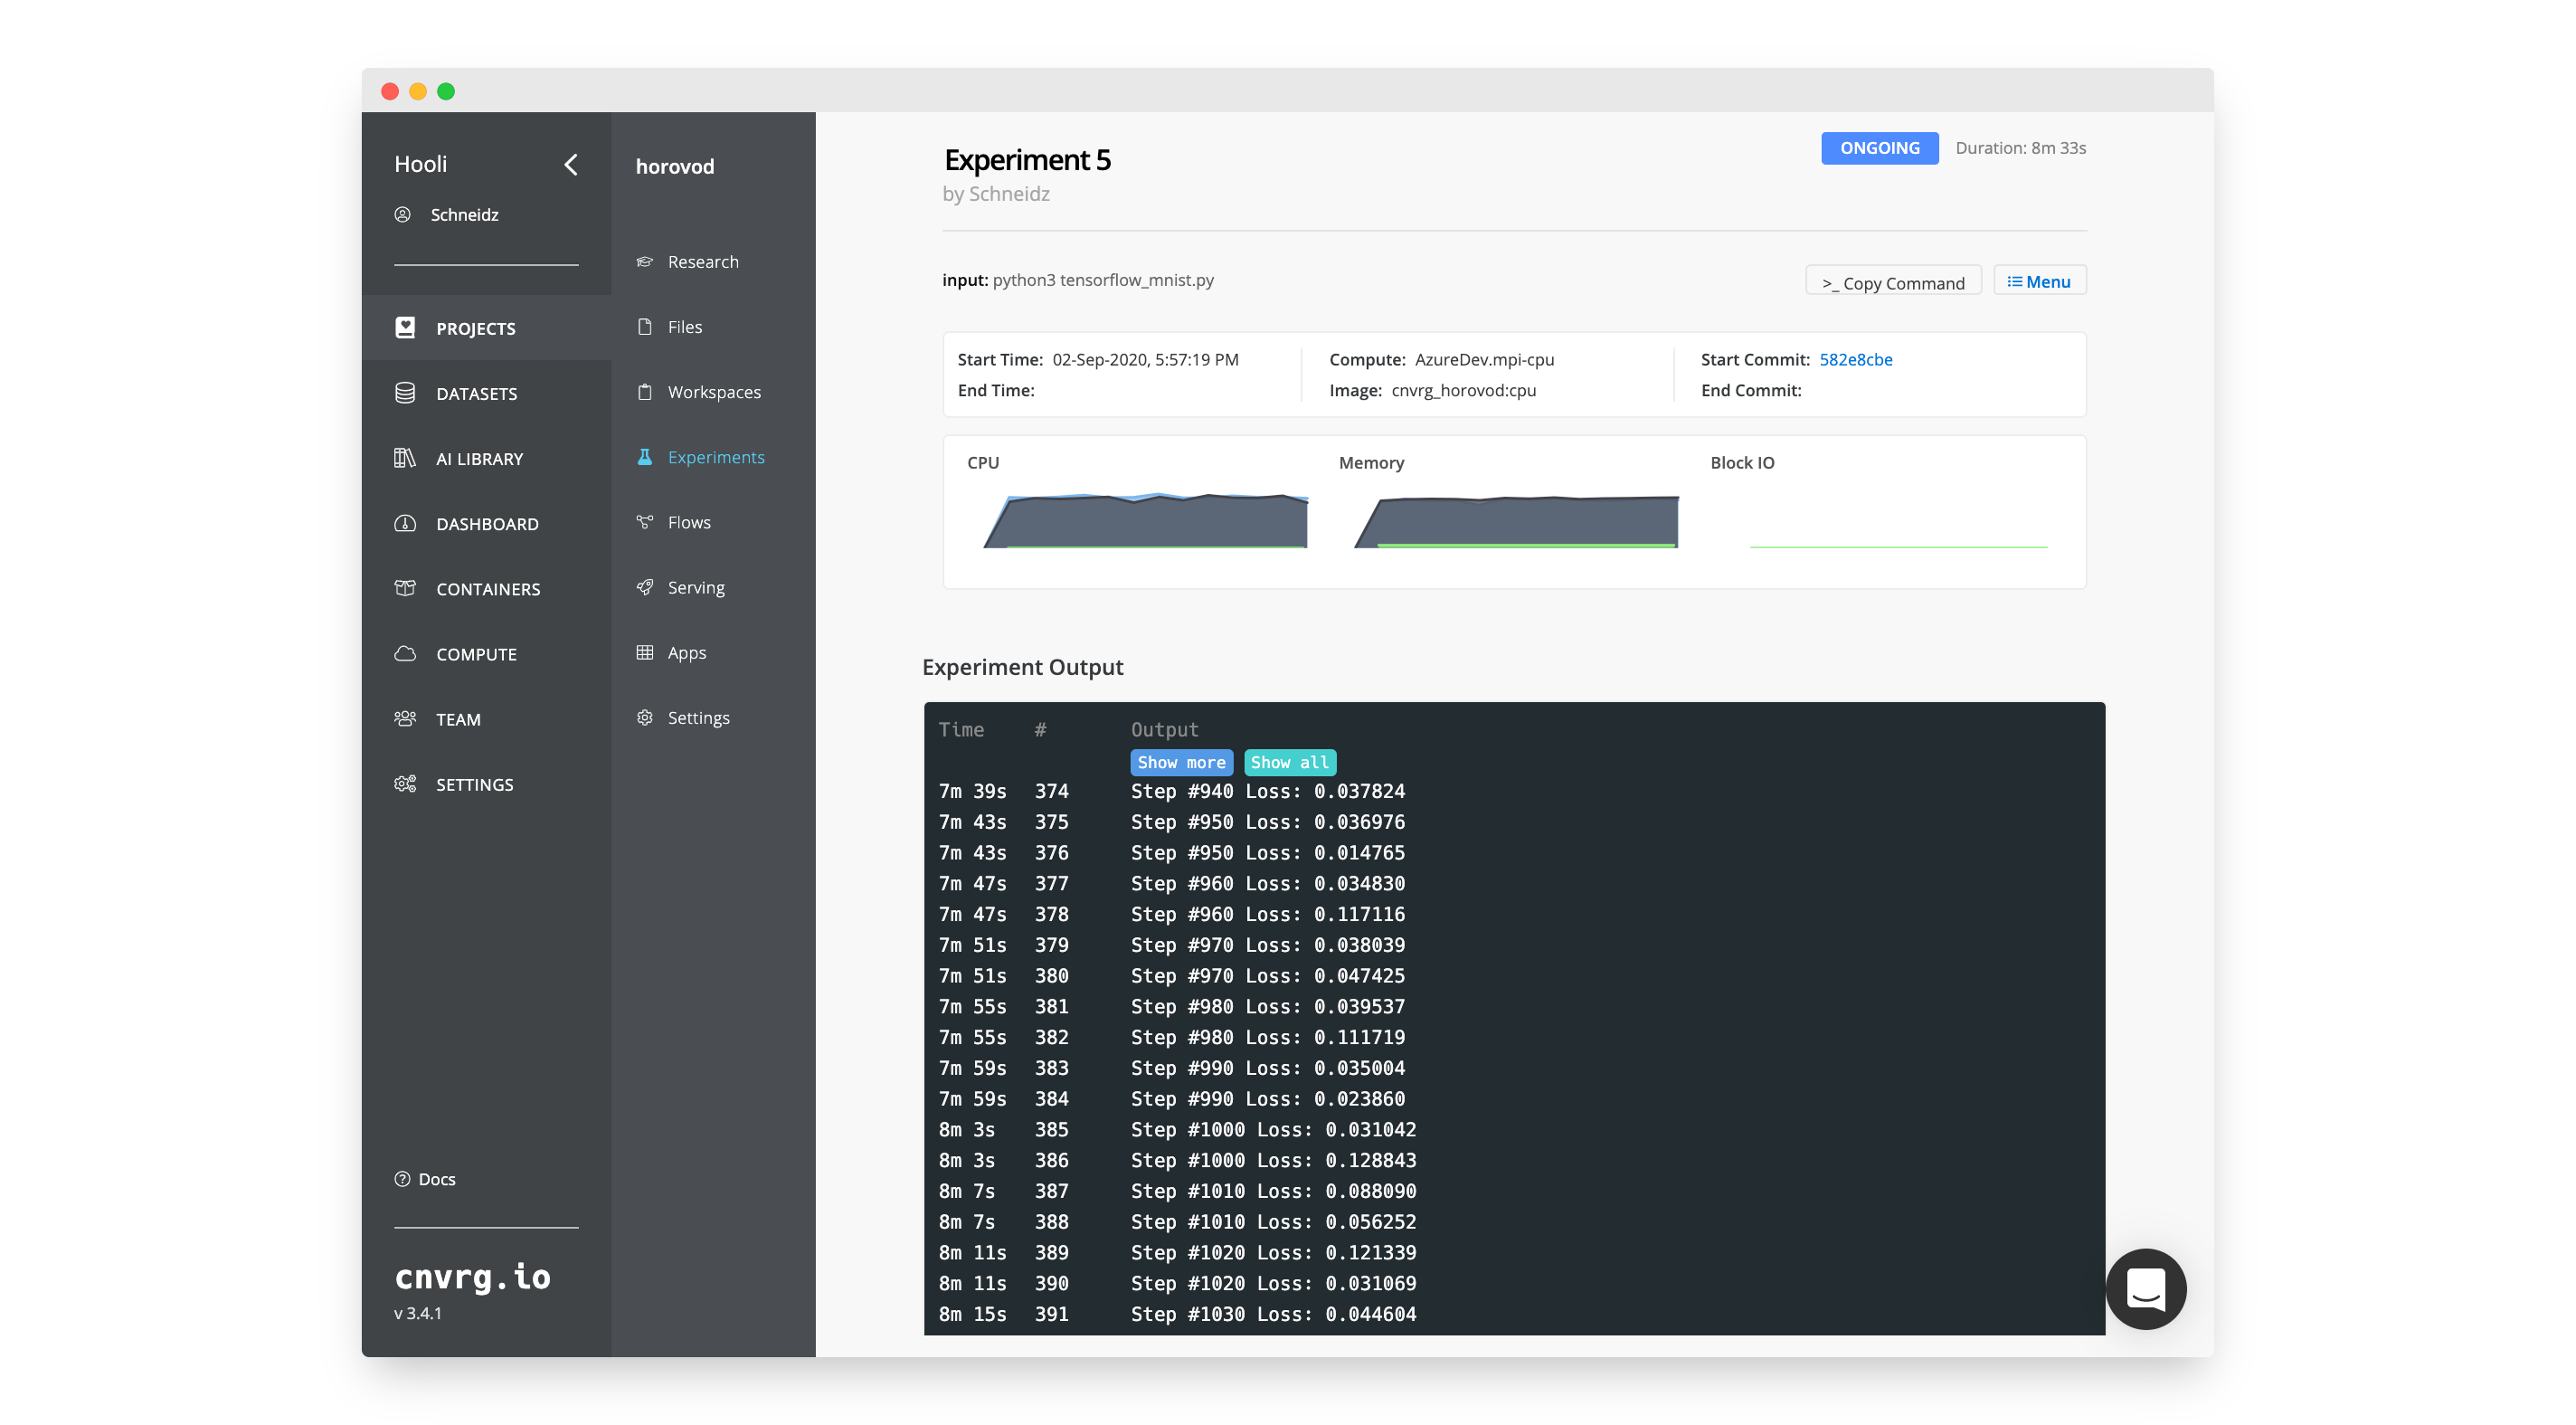
# Run an MPI Experiment
Inside your project:
- Go to Experiments.
- Click New Experiment.
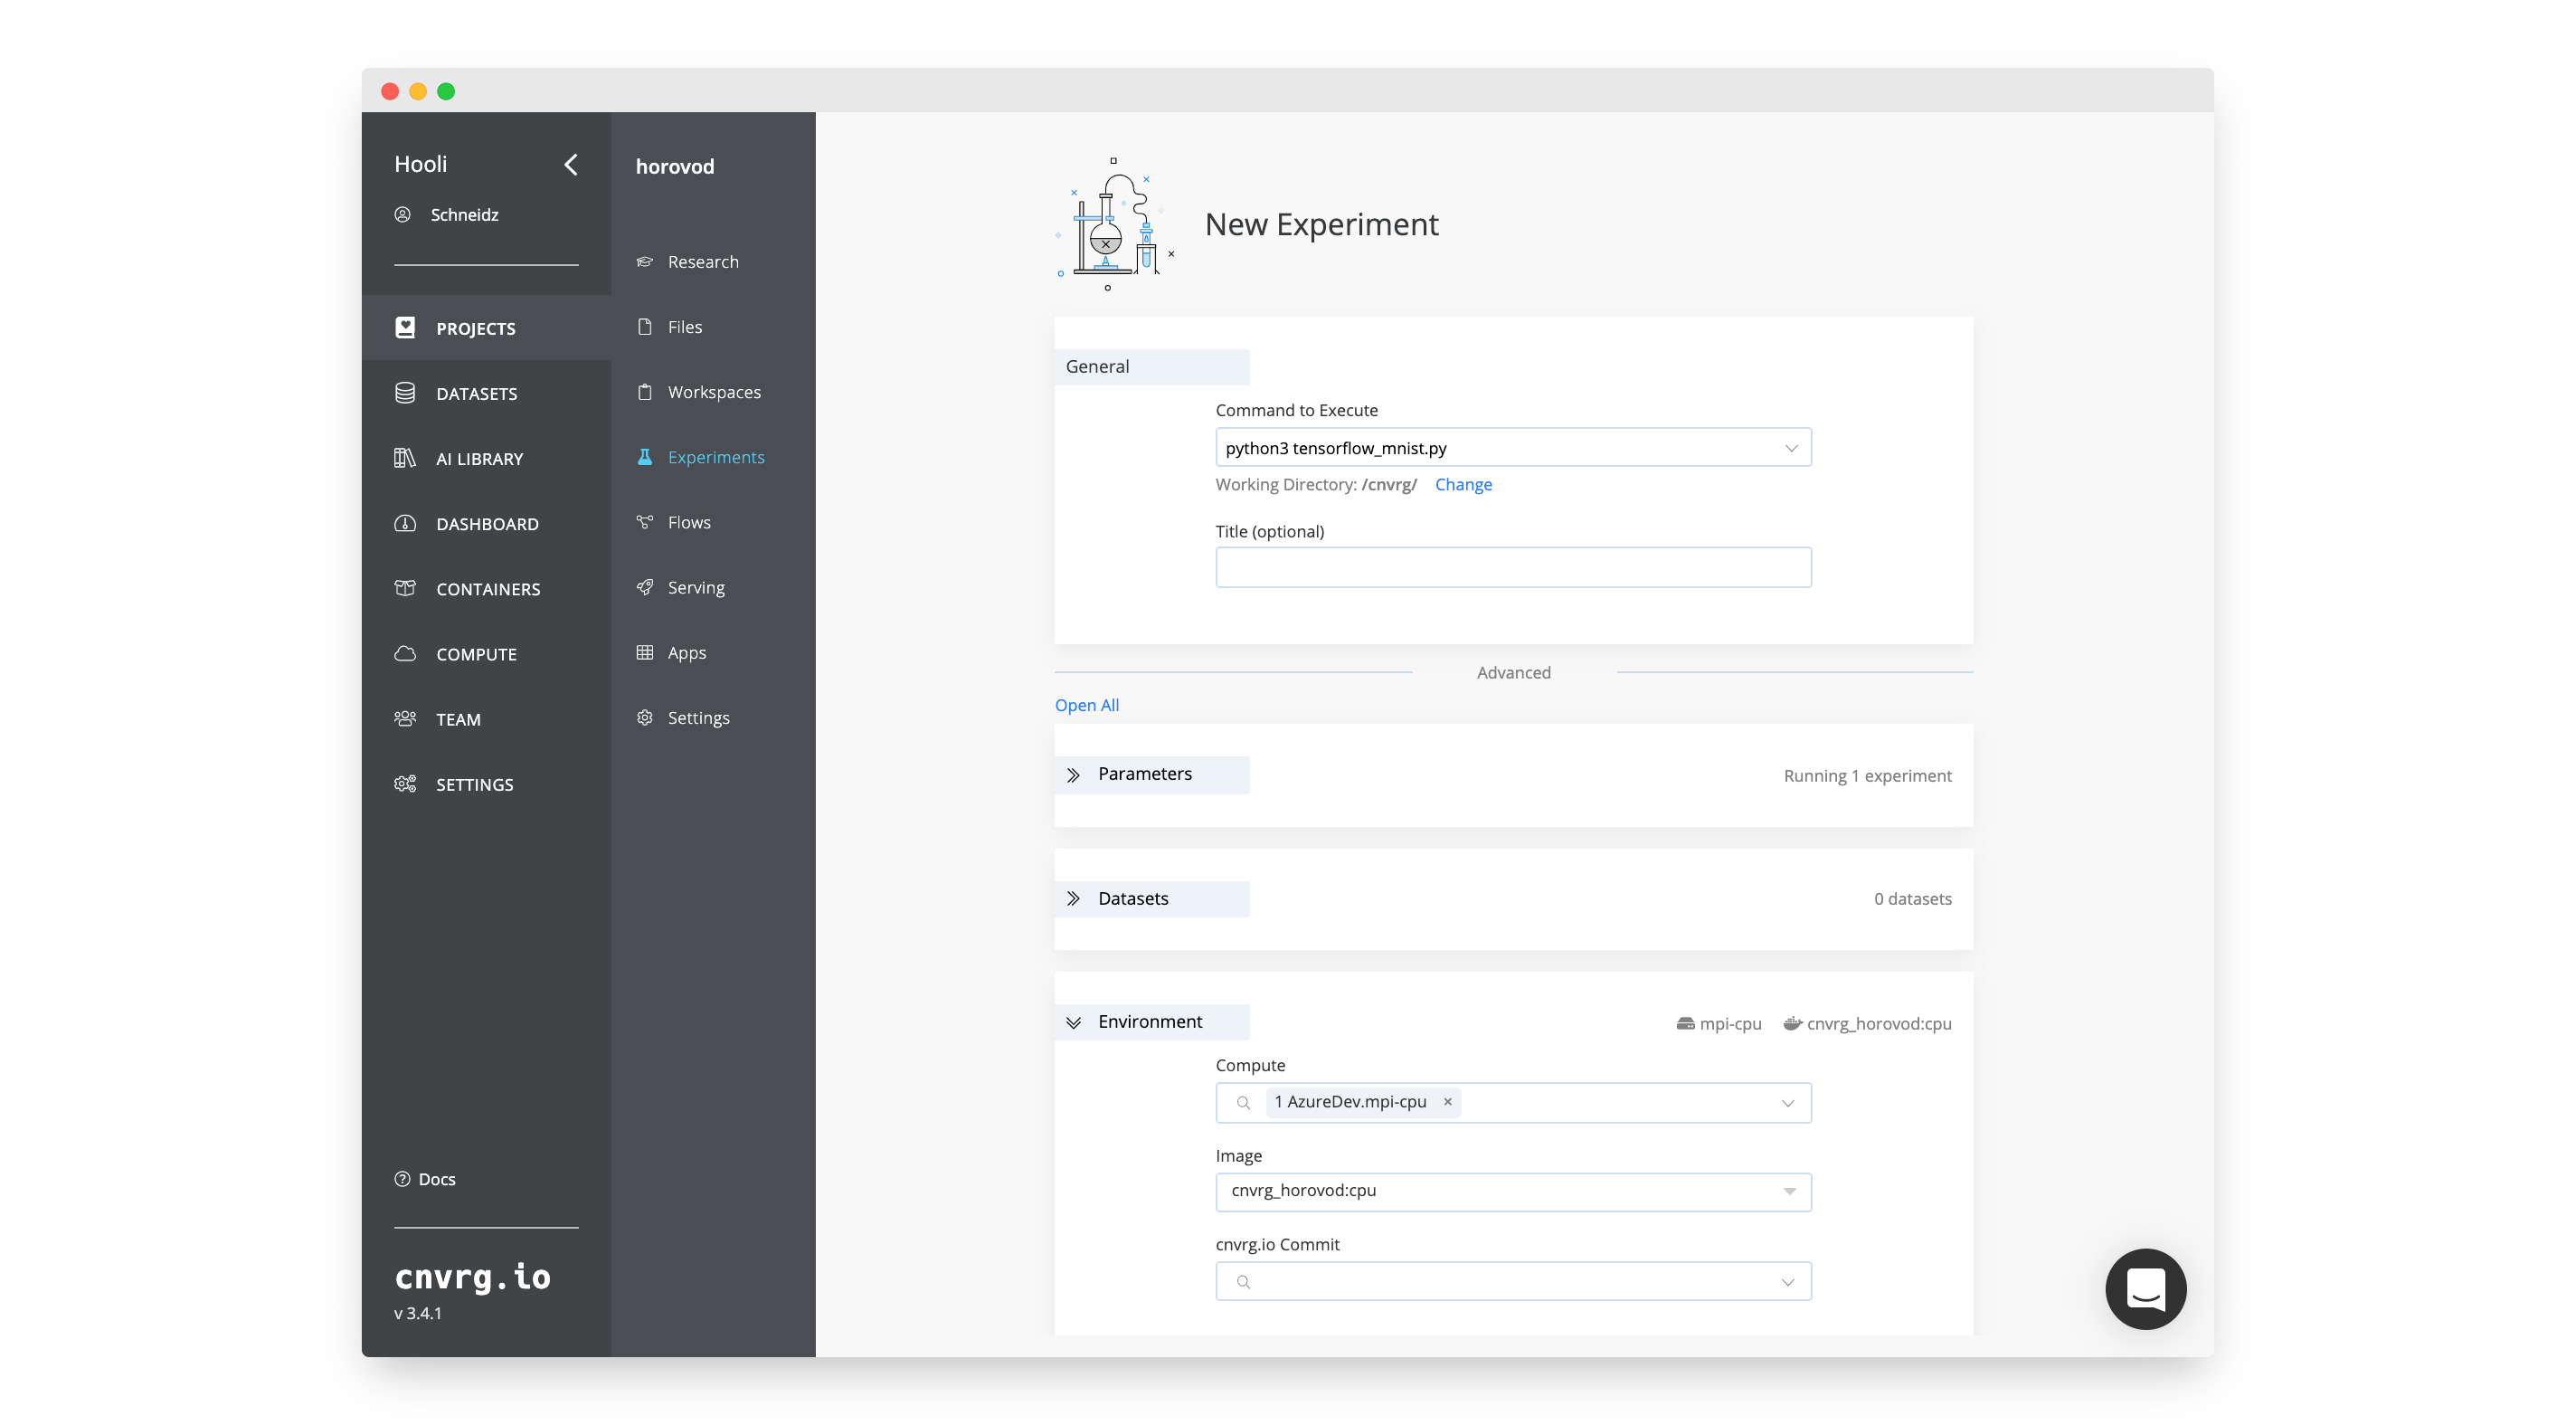
- Fill in the following details:
- General Section:
- Command to Execute:
python3 tensorflow_mnist.py.
- Command to Execute:
- Environment Section:
- Compute: The template you created above,
mpi-gpuormpi-cpu. - Image: The image you created above,
cnvrg_horovod:gpuorcnvrg_horovod:cpu.
- Compute: The template you created above,
- General Section:
- Click Run.
The experiment will start. You will be taken to the experiment's page where you can watch the experiment as it progresses. cnvrg will perform all of the MLOps and create the required pods and containers running on the MPI protocol. It will then begin to execute the Tensorflow code through the Horovod package.