# Convert and Run Python Notebooks using nbconvert
Notebooks and .ipynb files are incredible for research. They enable you to quickly run and explore your data, helping you build your MVP quickly. You can even train models inside a notebook, allowing you the flexibility to perfect your code and then build a real, functional model.
However, notebooks are not simple python scripts, and often times, when we move to executing more complicated ML pipeline and running grid searches in parallel, notebooks lose a lot of their lustre. In fact, having developed your code cell by cell in a notebook, extracting that into simple .py code can be a pain.
Luckily, the Jupyter team have developed a tool that can ease this process. Its called nbconvert - Notebook Convert. You can use nbconvert to run notebooks as experiments, or use the cnvrg created AI Library that makes this functionality as approachable as possible.
This tutorial will explain how to execute a notebook using nbconvert:
# Using the jupyter nbconvert AI Library
You can also use the Jupyter nbconvert library to achieve the same functionality:
If you have built a notebook and you want to run it on a remote compute, or at a specific schedule, you can easily do it with Flows. Flows allow you to build ML pipelines via code or UI. With the nbconvert AI Library, you can quickly use your notebook and integrate it as part of a pipeline. Furthermore, cnvrg will track the run the same way it does for all other scripts, allowing you to track your work easily.
- Go to the project that contains the notebook you will be using (either in the files or in the connected git).
- Go to Flows.
- Click New Flow.
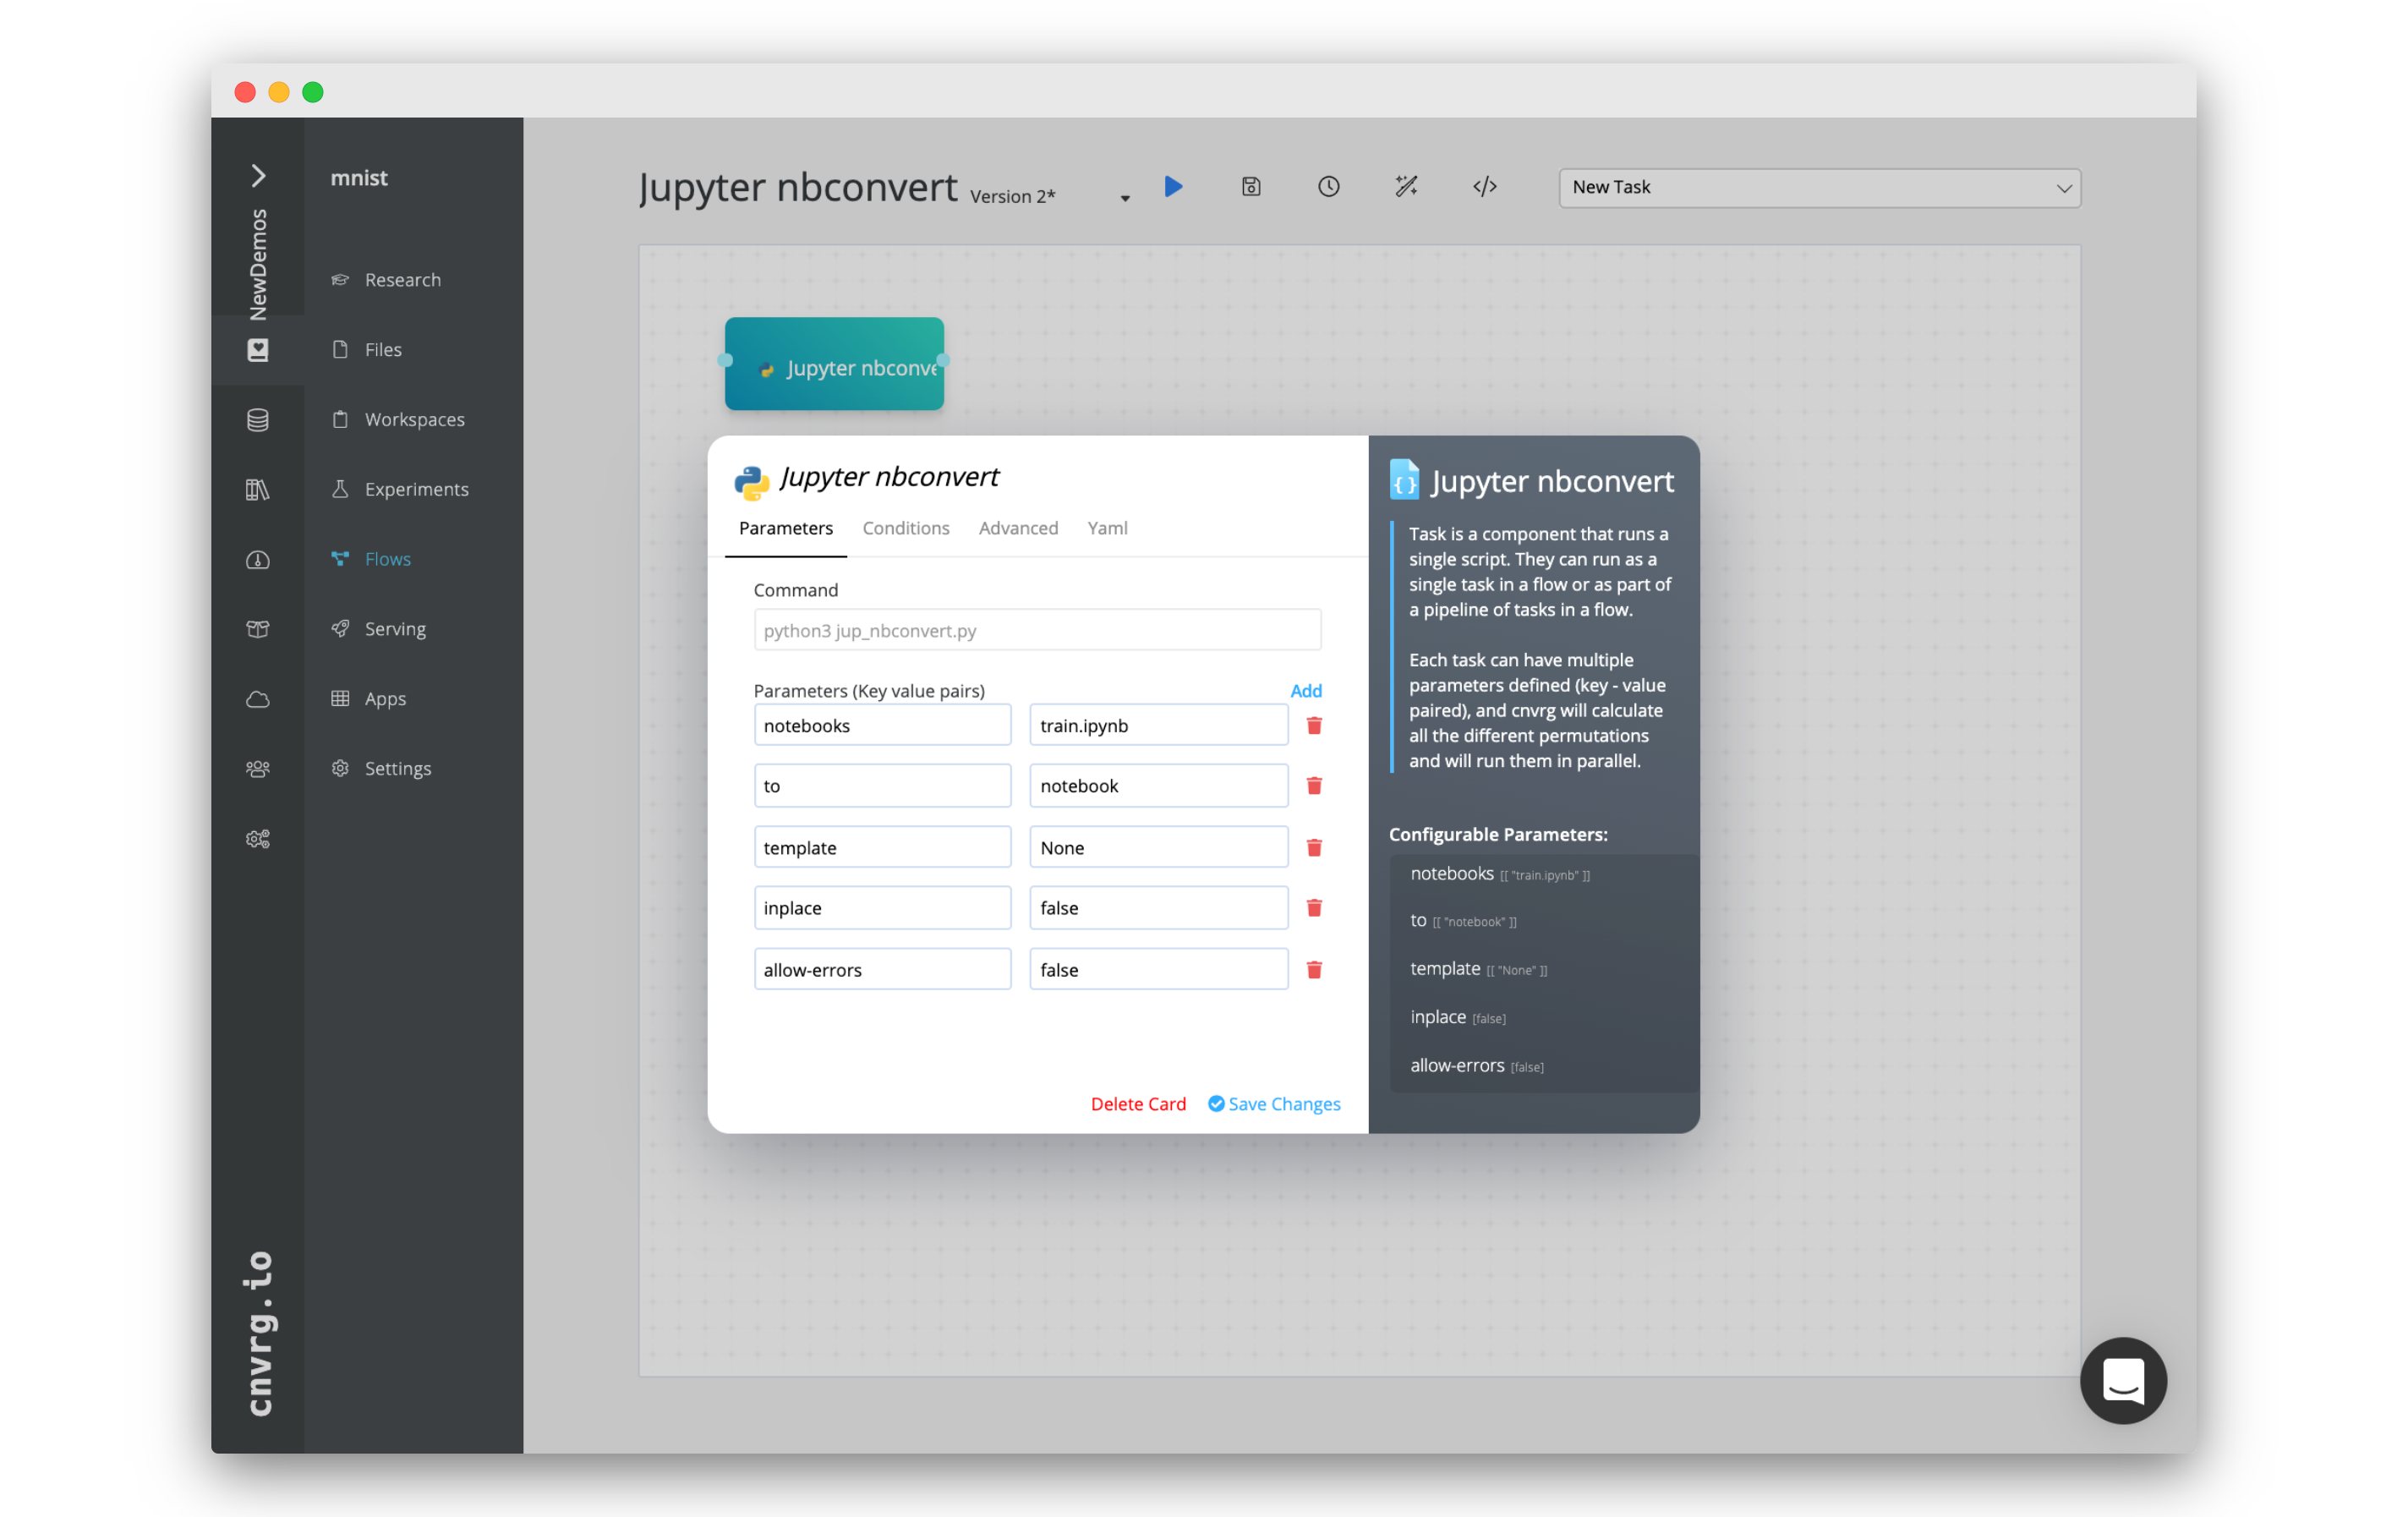
- Click New Task. From the menu, click Jupyter nbconvert (you may need to scroll/search to find it). A new panel will appear. In the new panel:
- Set the parameter notebooks to the path and name of your notebook. It should be in the format of
<path/name_of_notebook>.ipynb. - Set the parameter to to
notebook. - (If connected to git) Click the Advanced tab and set the correct Git Branch, Git Commit and Output Folder.
- Click Save Changes.
- Set the parameter notebooks to the path and name of your notebook. It should be in the format of
- Click Run.
The flow will run and the notebook will executed. You can track the process live from the flow runs' page.
Using the Jupyter nbconvert Ai Library as part of a flow can unlock lots of advanced use cases, allowing you to integrate your notebook with a complete end to end machine learning pipeline. For more information, consult the flows docs page.
TIP
Some notebooks can take too long to execute using the regular nbconvert command. Furthermore, often, the code developed in a notebook is only one part of a more complicated ML pipeline. In these cases and more, it can be prudent to convert the contents of your notebook into a regular .py Python script, and then execute it separately.
In that case, you can use the Jupyter nbconvert AI Library and set to as script. This will convert the notebook into a script which can be executed and second task.
# Running the Code in a Notebook as an Experiment using nbconvert
If you have built a notebook and simply want to execute it using the experiment functionality in cnvrg, you can use nbconvert to accomplish this goal. This allows you to forgo the time of opening a notebook in a workspace and then executing the code cell by cell. Furthermore, cnvrg will track the experiment the same way it does for all other scripts, allowing you to track you work easily.
The command we are using will run each cell in the notebook and save the updated version of the notebook. This is analogue to opening the notebook and executing every cell. cnvrg will version the notebook as part of the experiment, so nothing will overwritten. Any artifacts and models produced by the notebook will saved and versioned alongside the executed notebook.
To perform this kind of experiment:
- Go to the project that contains the notebook you will be using (either in the files or in the connected git).
- Go to Experiments.
- Click New Experiment
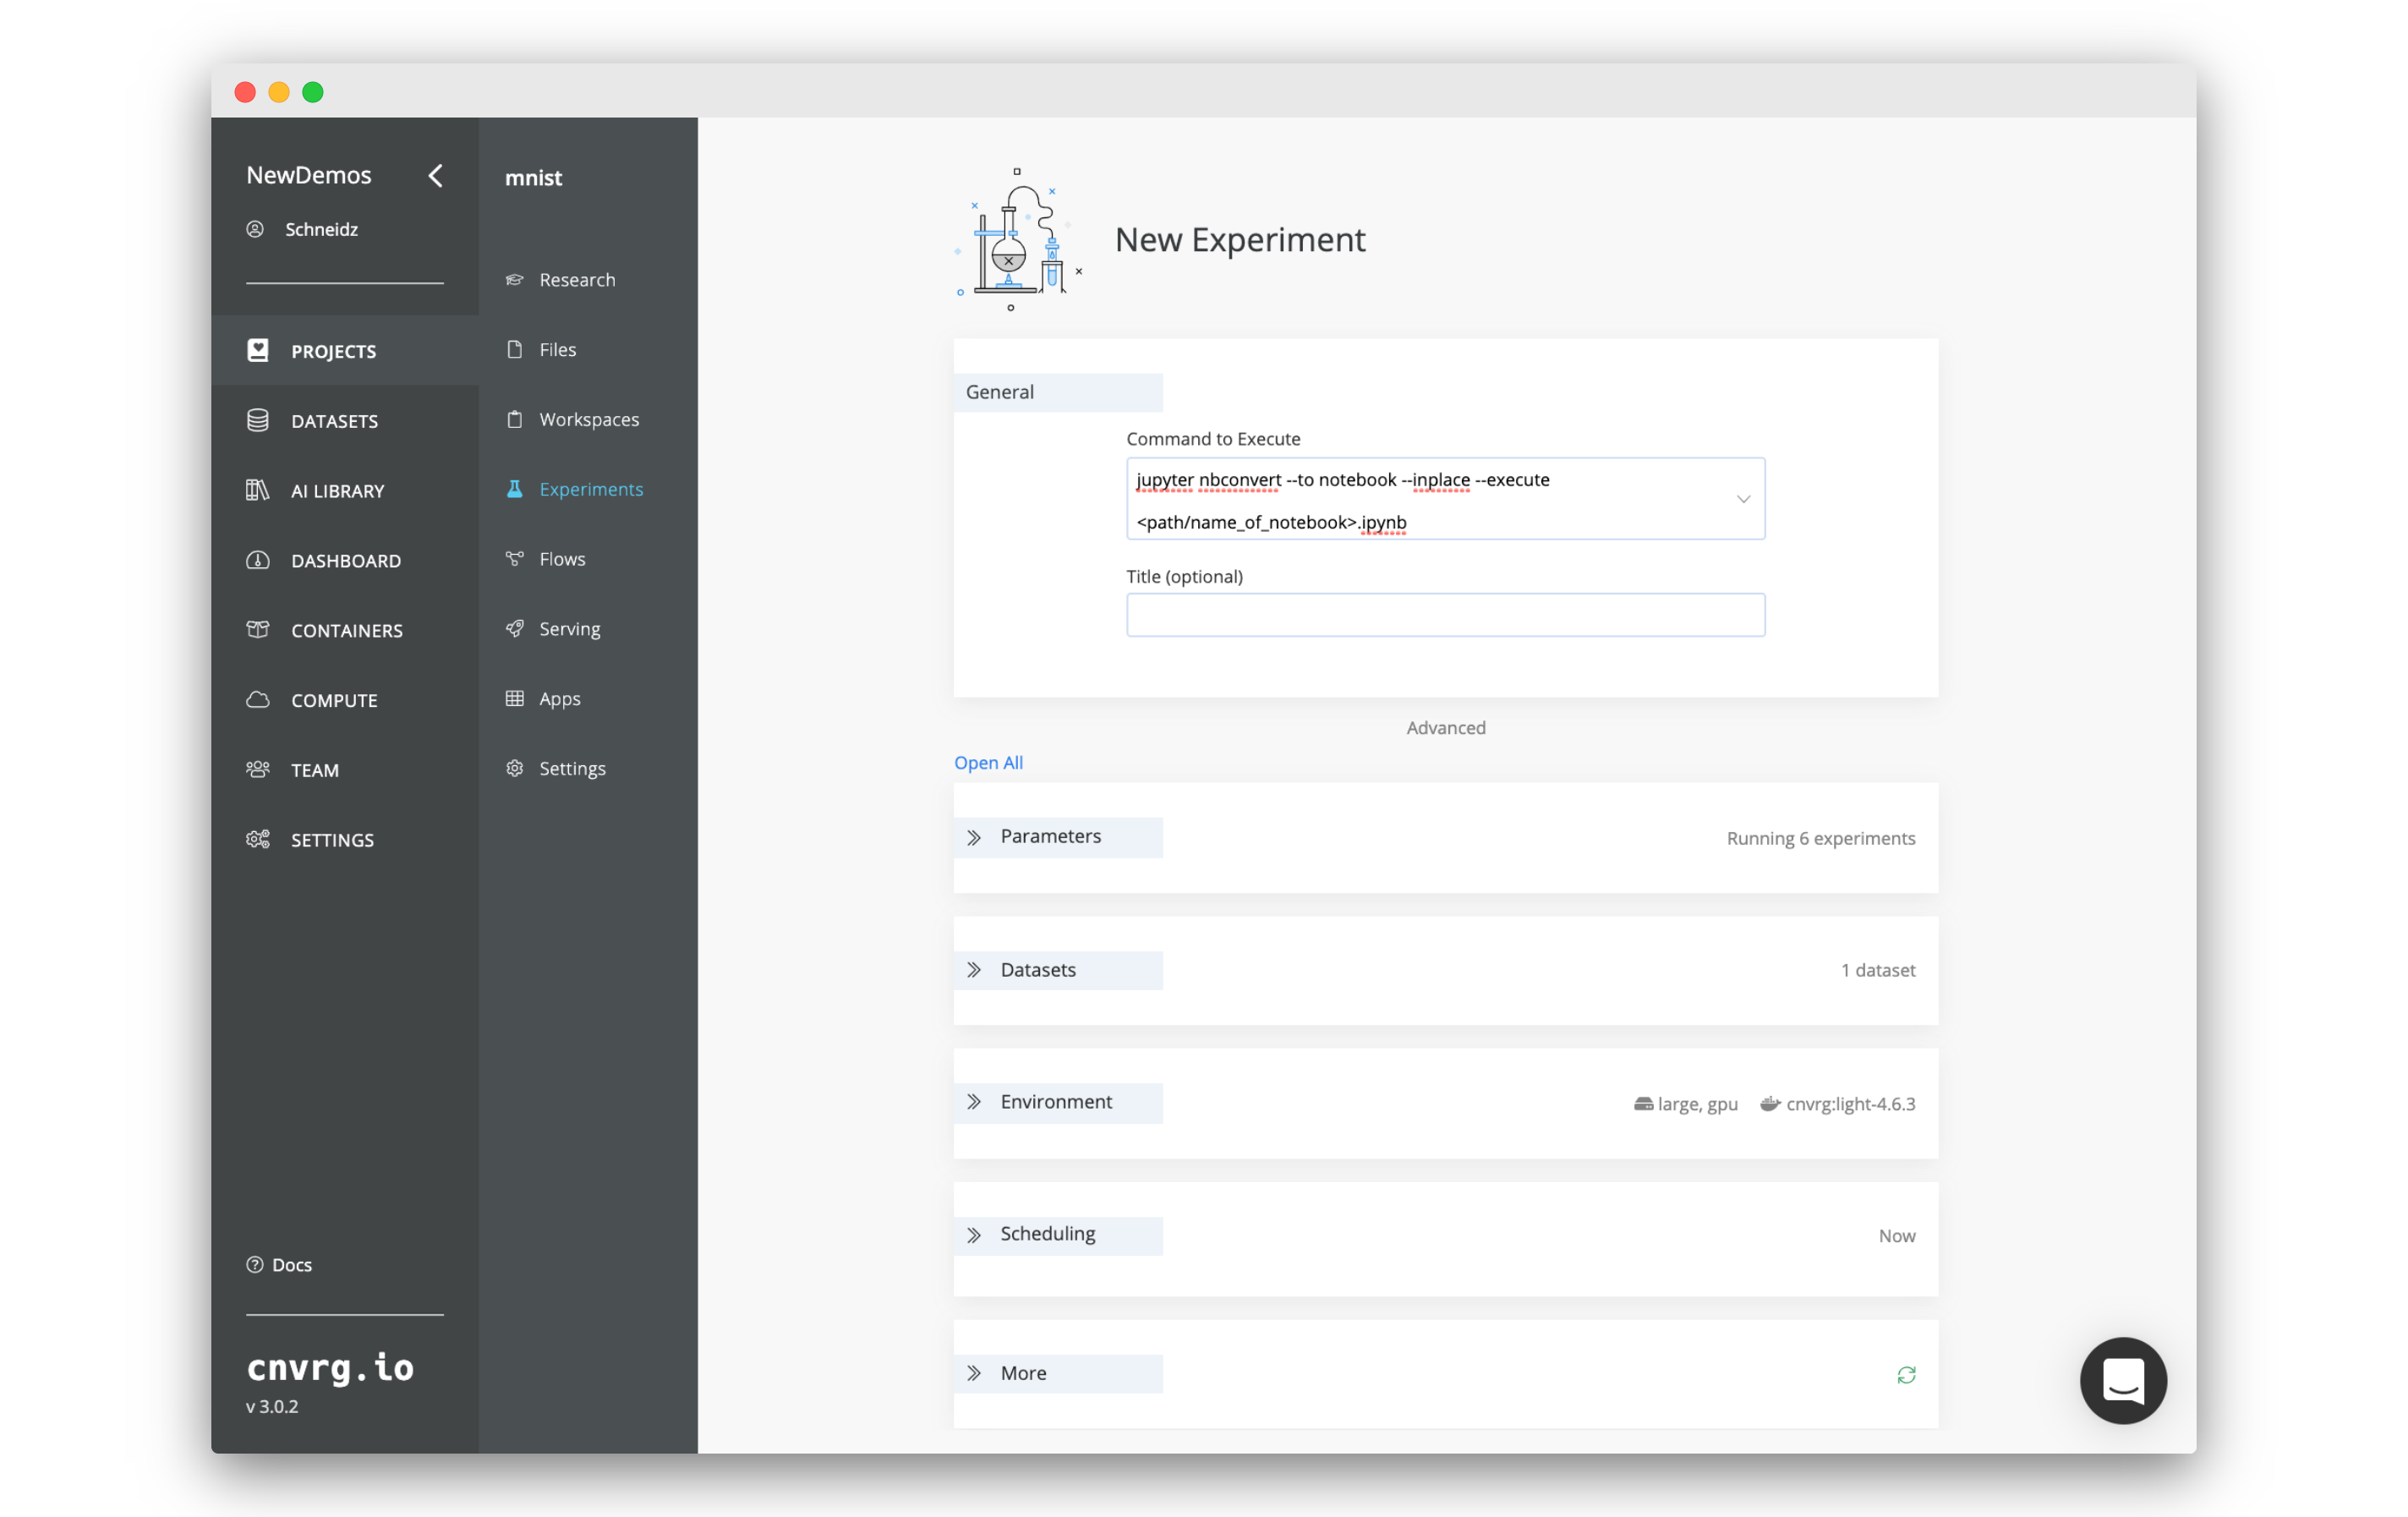
- Fill in the new experiment form:
- Set the Command to Execute to:
jupyter nbconvert --to notebook --inplace --execute <path/name_of_notebook>.ipynb
- Set the Environment > Image to the latest
cnvrgimage. - Set the rest of the fields to your required needs.
- Set the Command to Execute to:
- Click Run.
cnvrg will spin up the chosen compute and execute the notebook as explained above. You can track the process live from the experiment's page.