# Run an NNI Experiment in cnvrg
NNI is an incredibly powerful framework for training and tuning Neural Networks. It has many strengths including ease-of-use, scalability, flexibility and efficiency.
You can can use NNI in cnvrg to get the benefits of both: the dynamic machine learning of NNI and the powerful MLOps functionality of cnvrg. This tutorial will run through an example using the NNI mnist example project.
By following this tutorial, you will learn how to do it for yourself and run your new and existing NNI experiments in cnvrg.
# Add the NNI Docker Image
We will be using a pre-built public NNI image as part of this tutorial. Let's add it to your organization first.
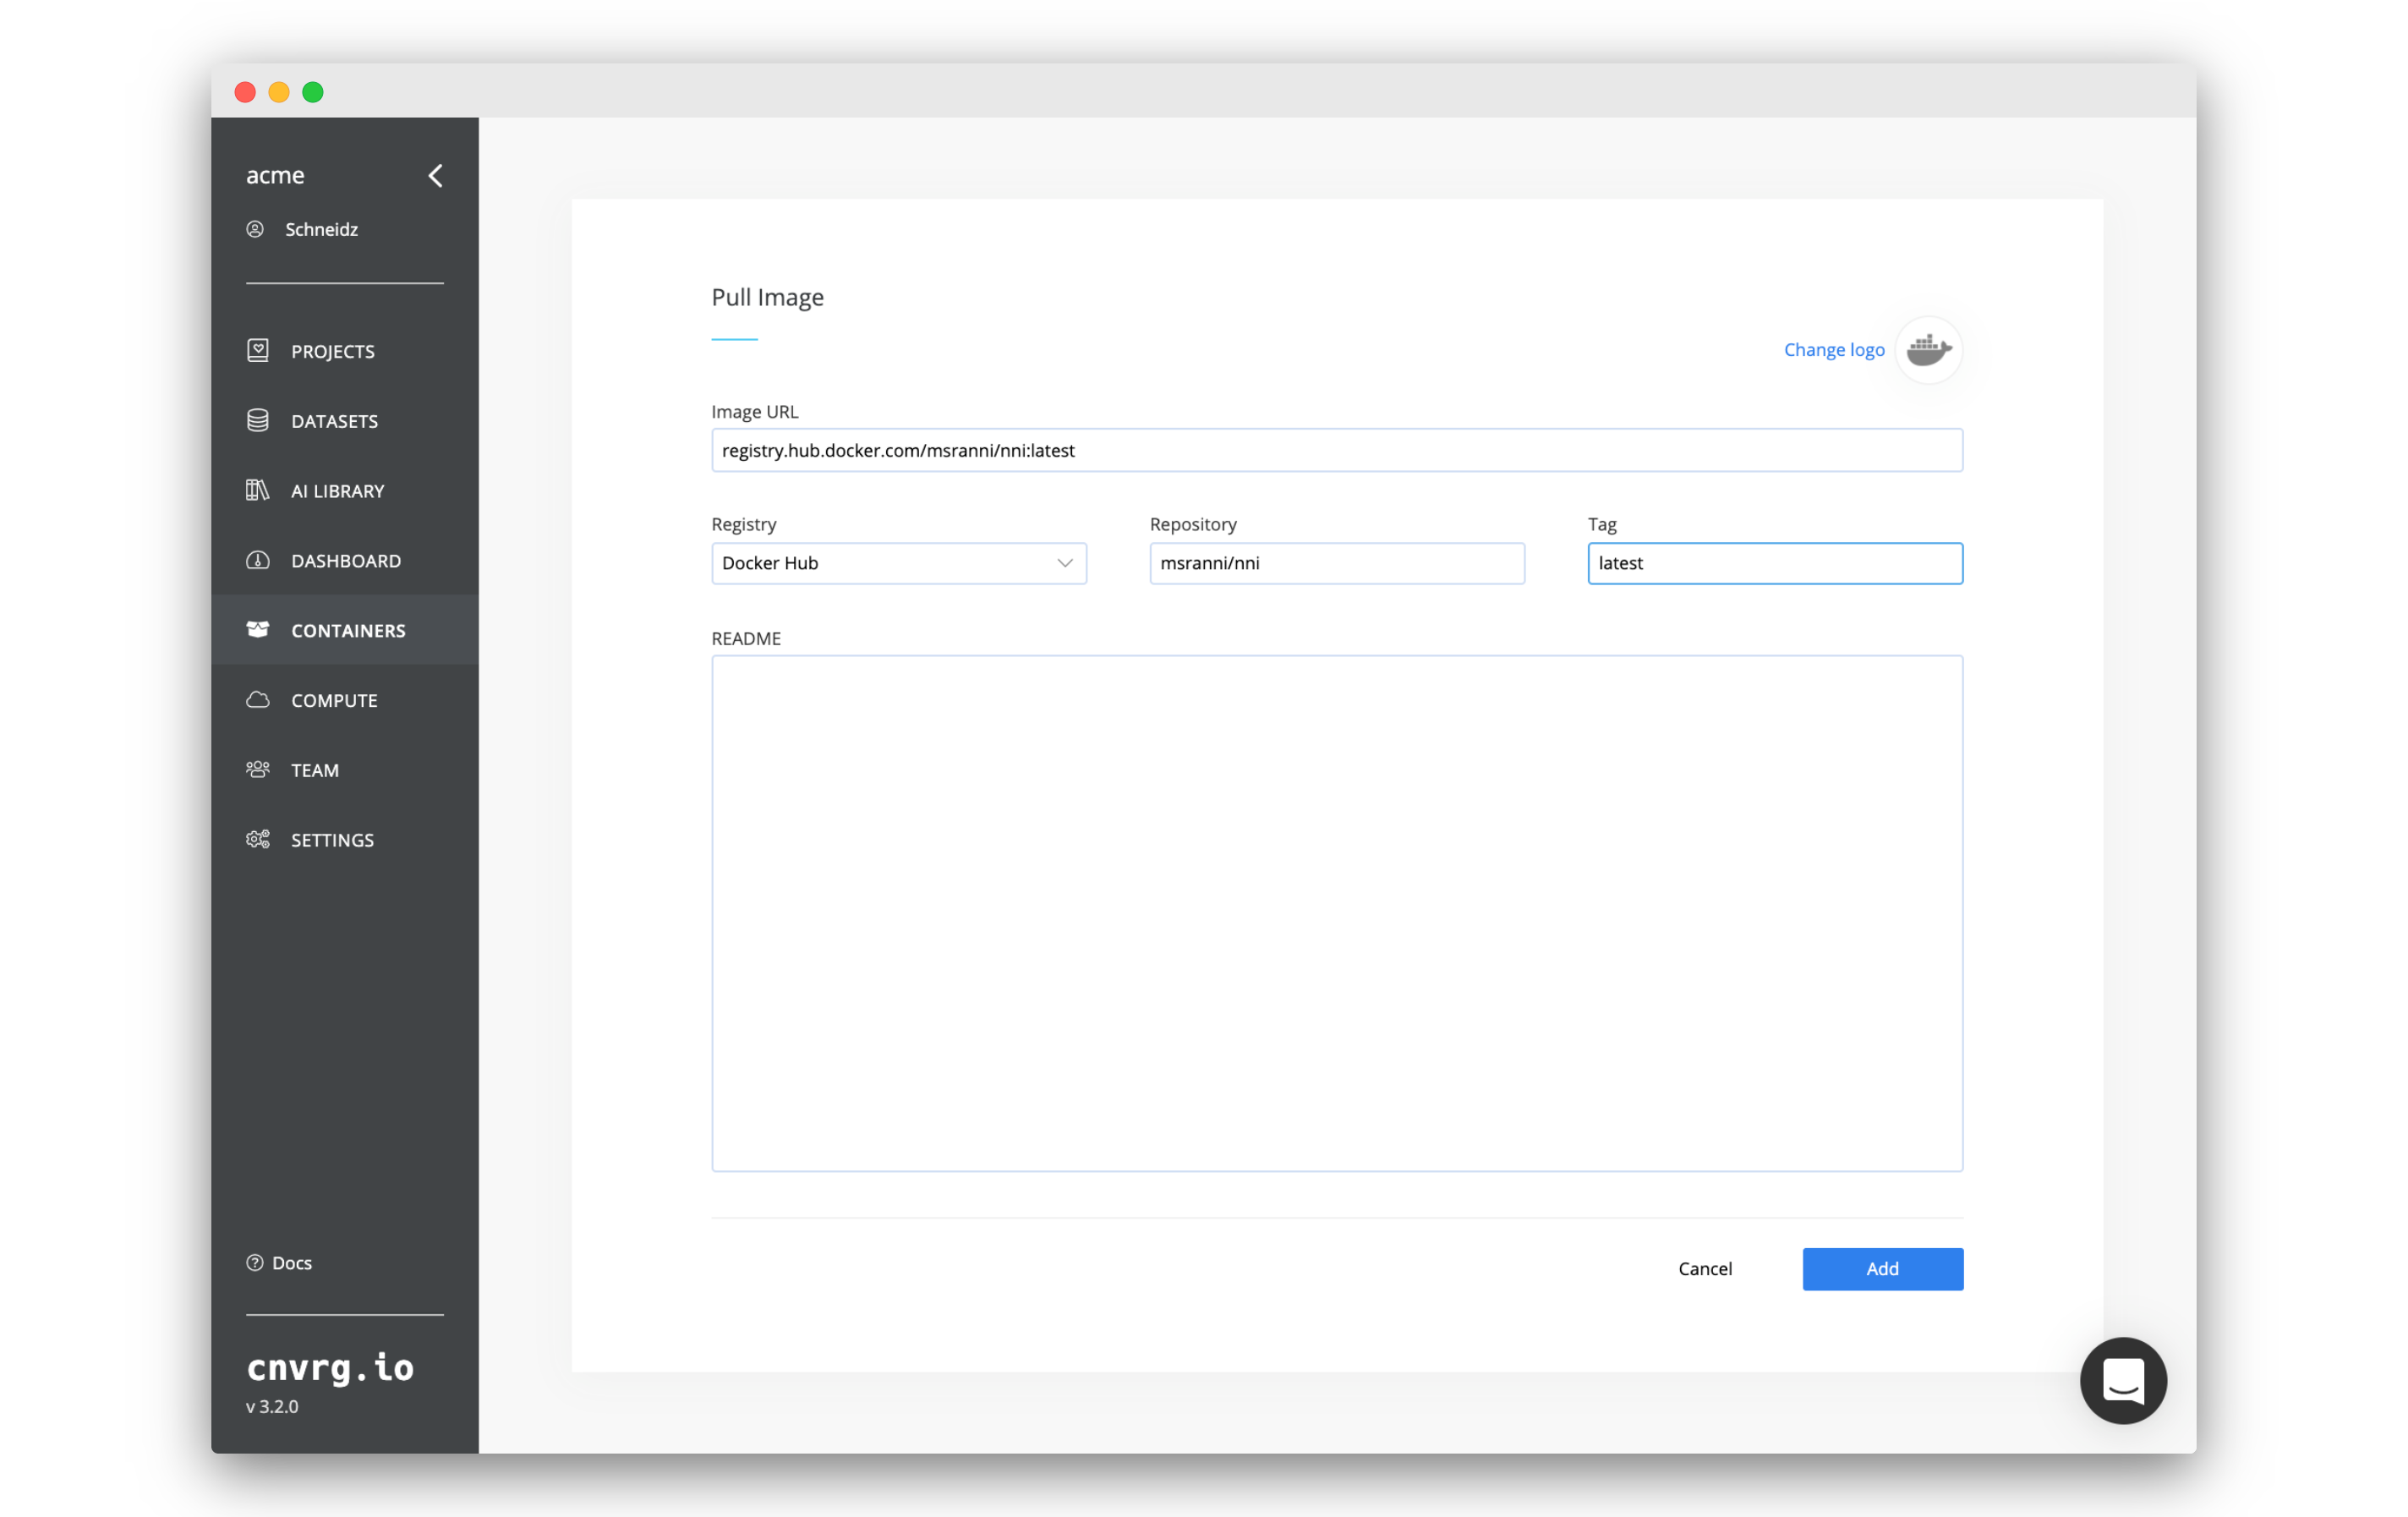
To add the required docker image, got to Containers:
- Click Add Image.
- Click Pull Image in the pop up window.
- On the next screen fill in the following details:
- Registry: Docker Hub
- Repository:
msranni/nni - Tag:
latest
- Click Add.
You will now have added the required Docker image to cnvrg.
# Create a New Project and Link it to Git
Now we will create a project and link it with the example NNI git repository.
Go to the Projects tab:
- Click New Project.
- Set the Title as
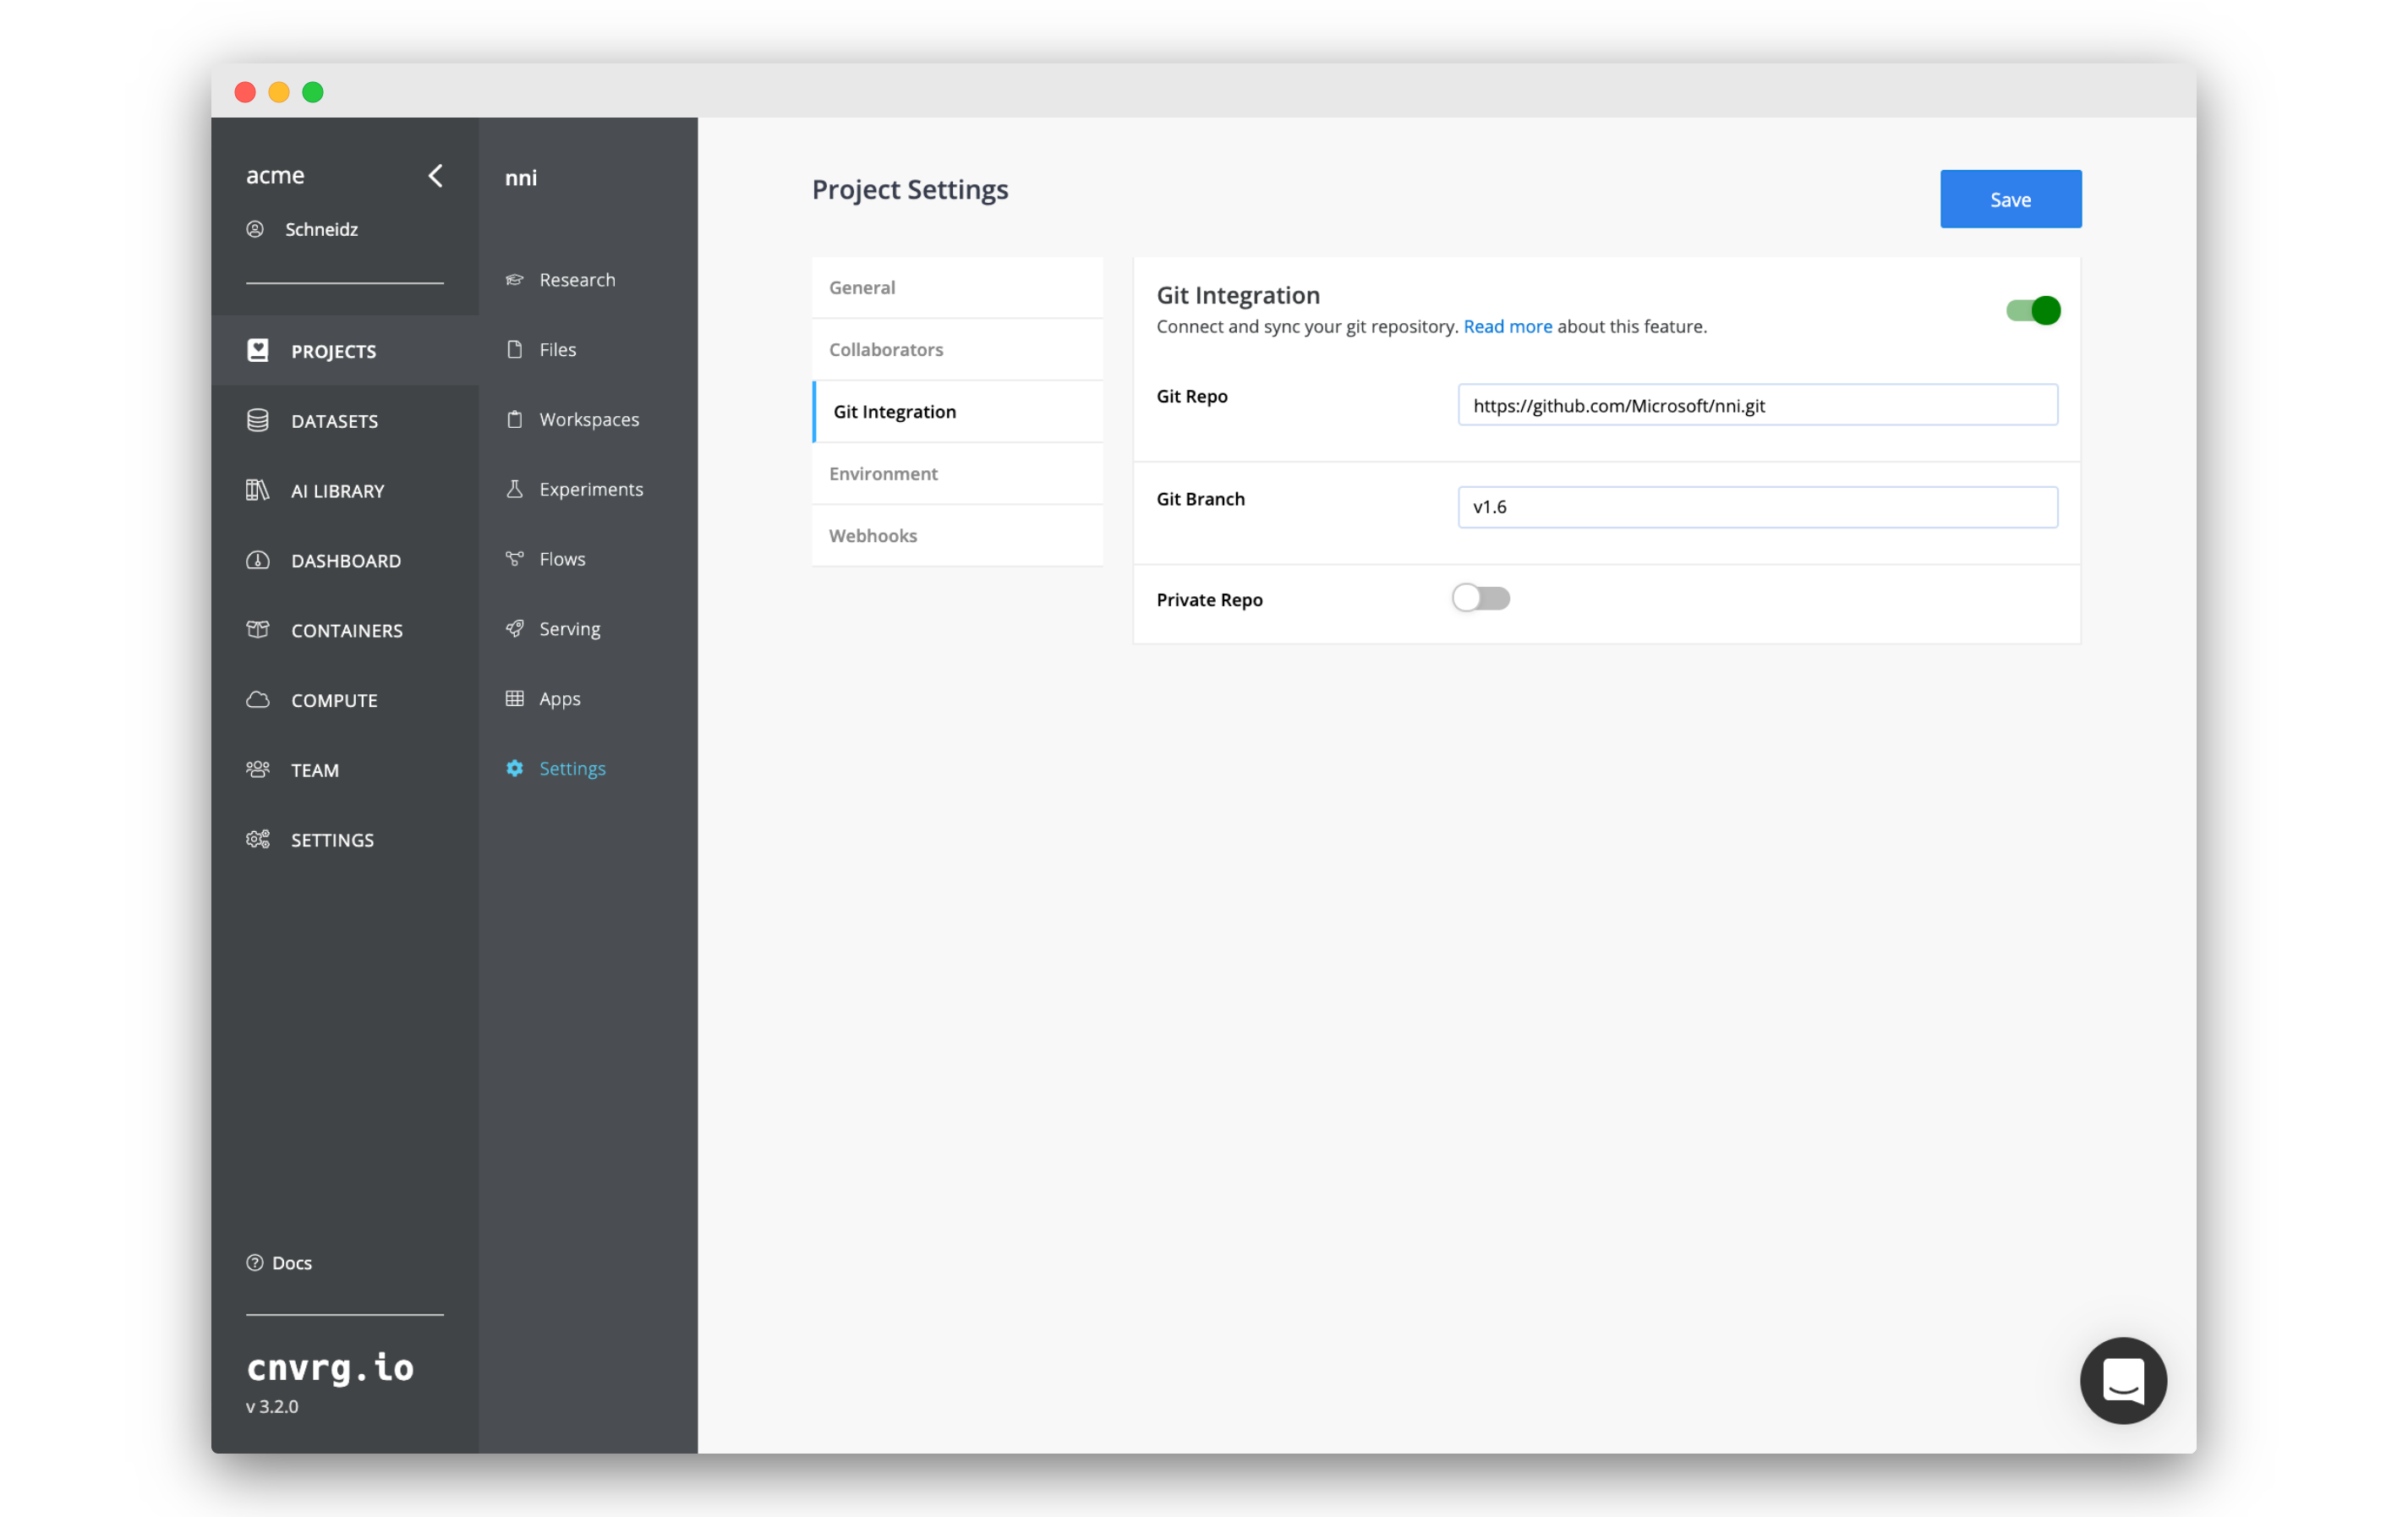
nni. - On the page that loads, click Link to git repository
- In the Git Integration panel, set:
- Git Repo:
https://github.com/Microsoft/nni.git - Git Branch:
v1.6
- Git Repo:
- Click Save.
After following the above steps, you have now got everything set up! We can open a workspace and get started using NNI.
# Start a JupyterLab Workspace
Let's start a workspace and get started using NNI.
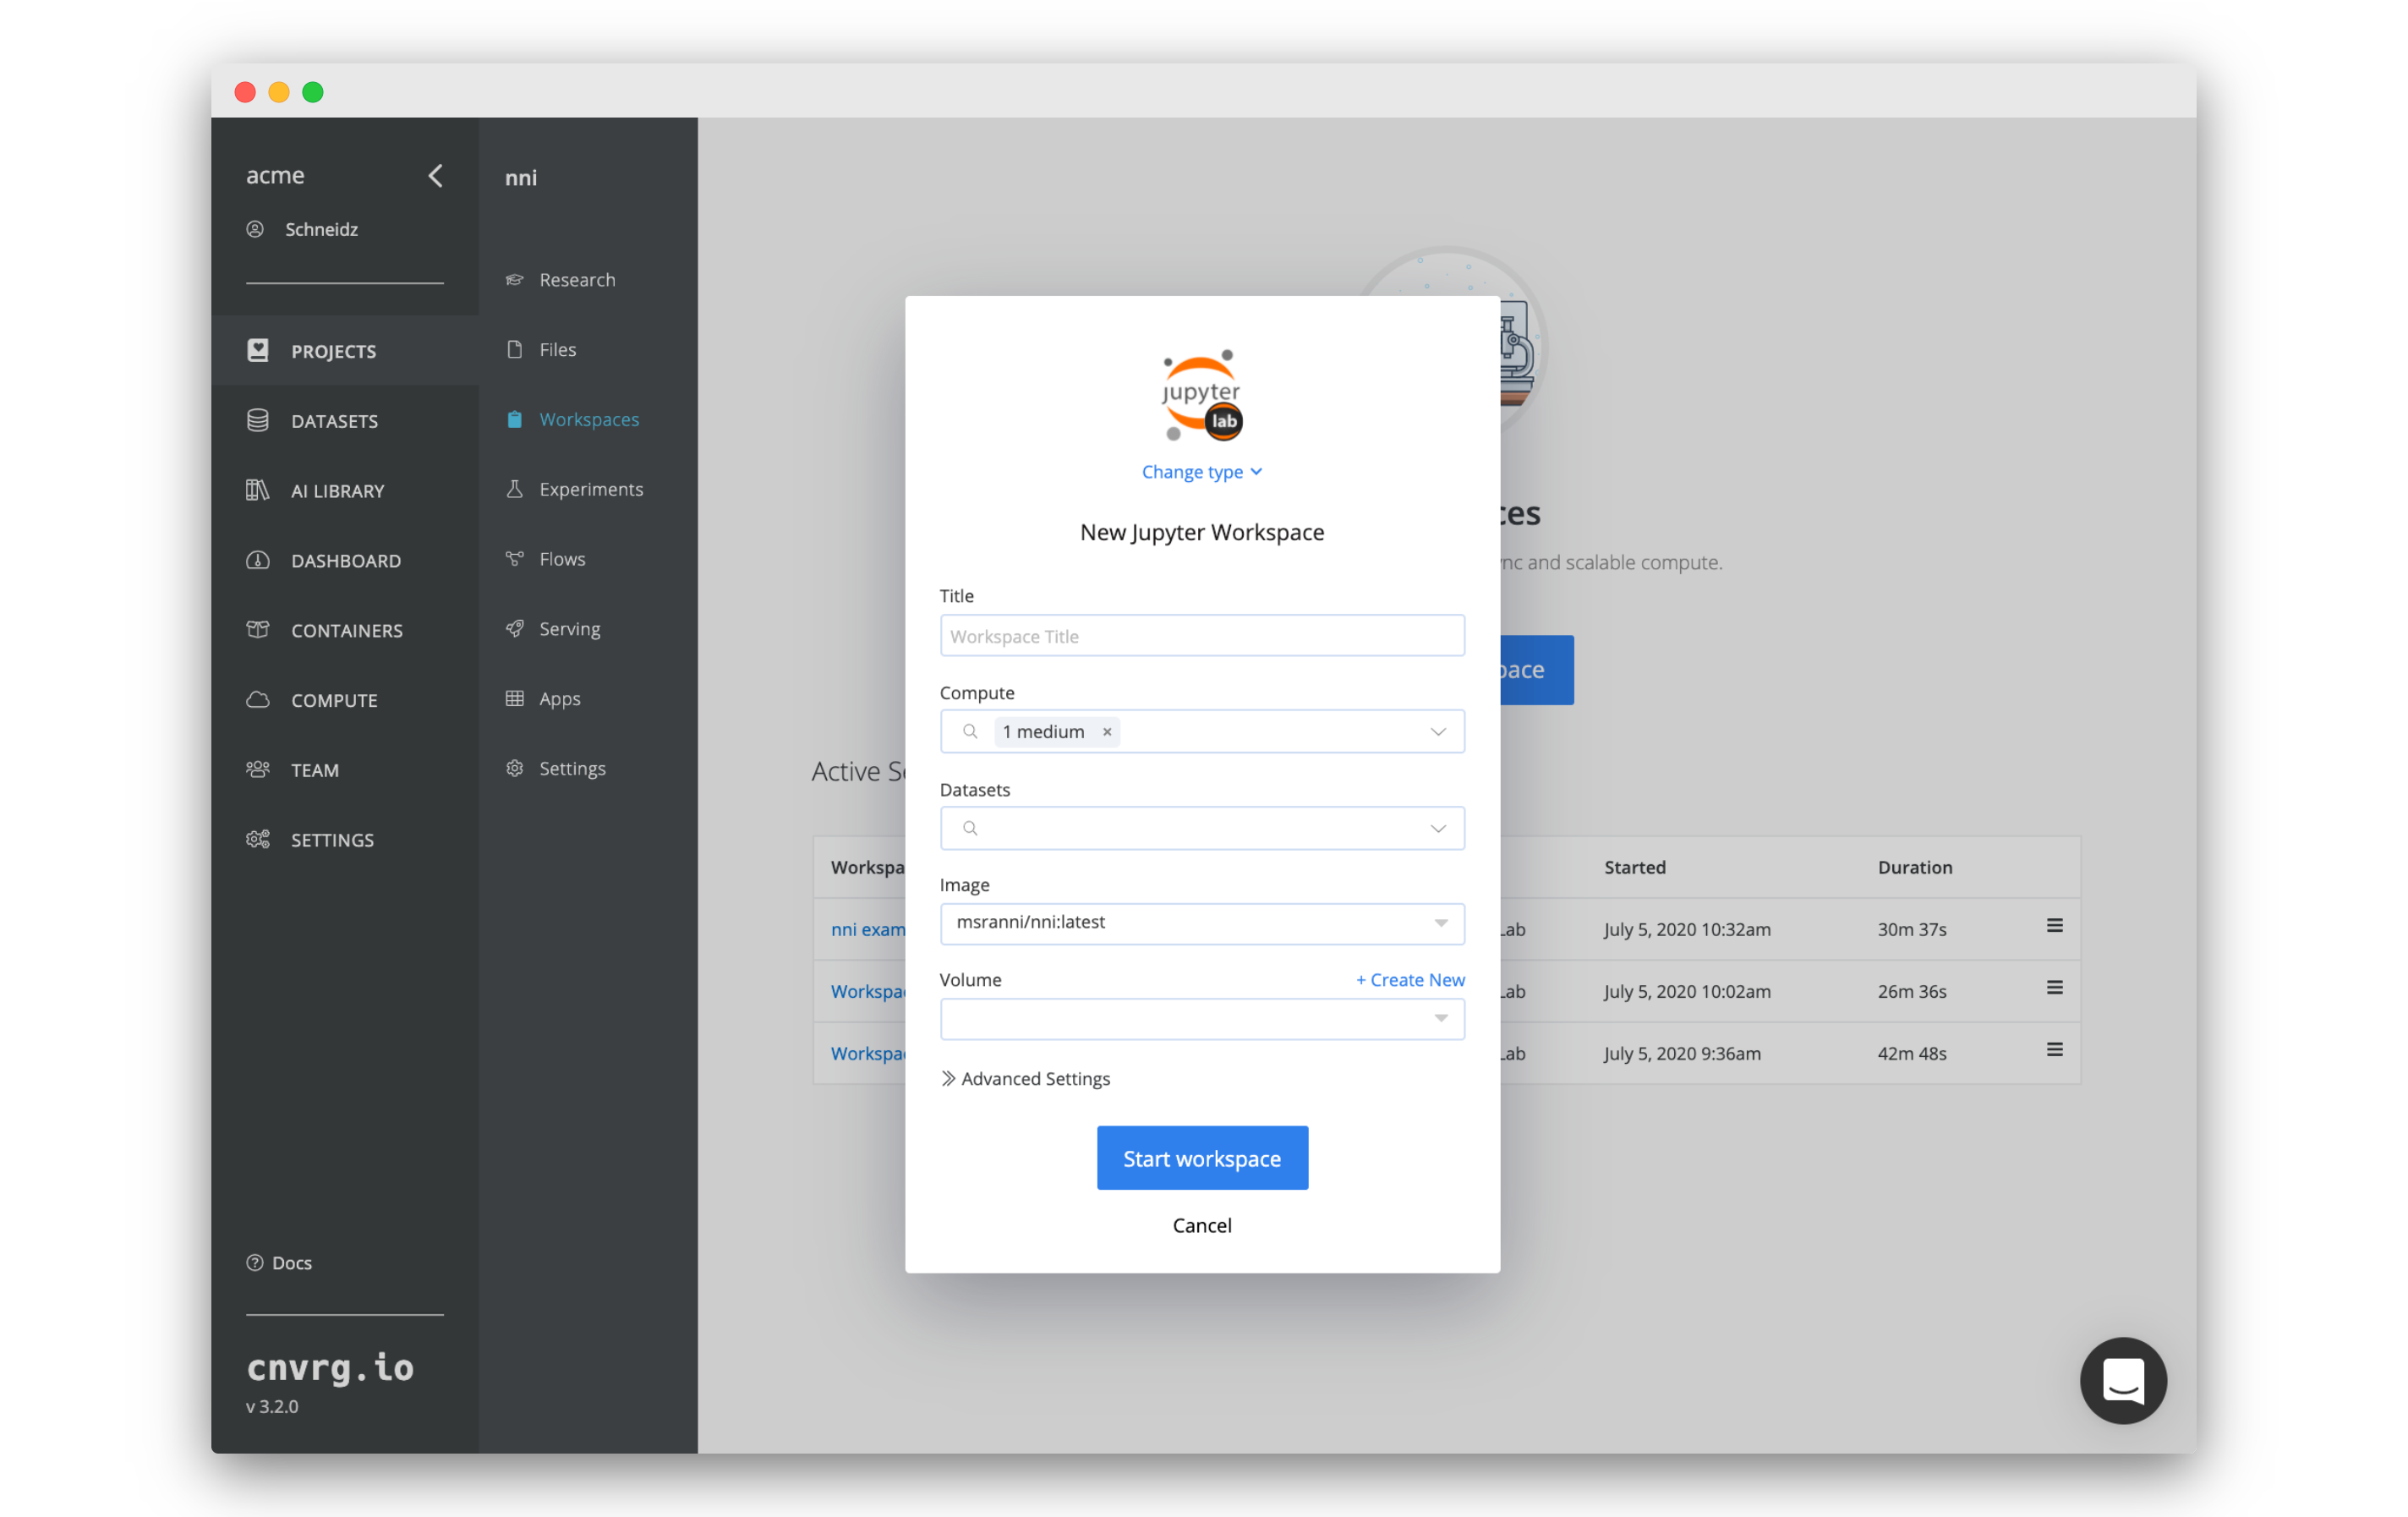
Go to the Workspaces tab of your nni project:
- Click Start a Workspace.
- In the panel that appears, set:
- Type: JupyterLab
- Compute:
medium - Image:
msranni/nni:latest
- Click Start workspace.
The workspace will now start initializing, cnvrg will do all of the MLOps work, connecting to the compute, pulling the required container, cloning the git repository and getting JupyterLab ready.
When JupyterLab is up and running, move on to the next step.
# Run an NNI Experiment
Now that you have JupyterLab running in an NNI environment, we can run an experiment.
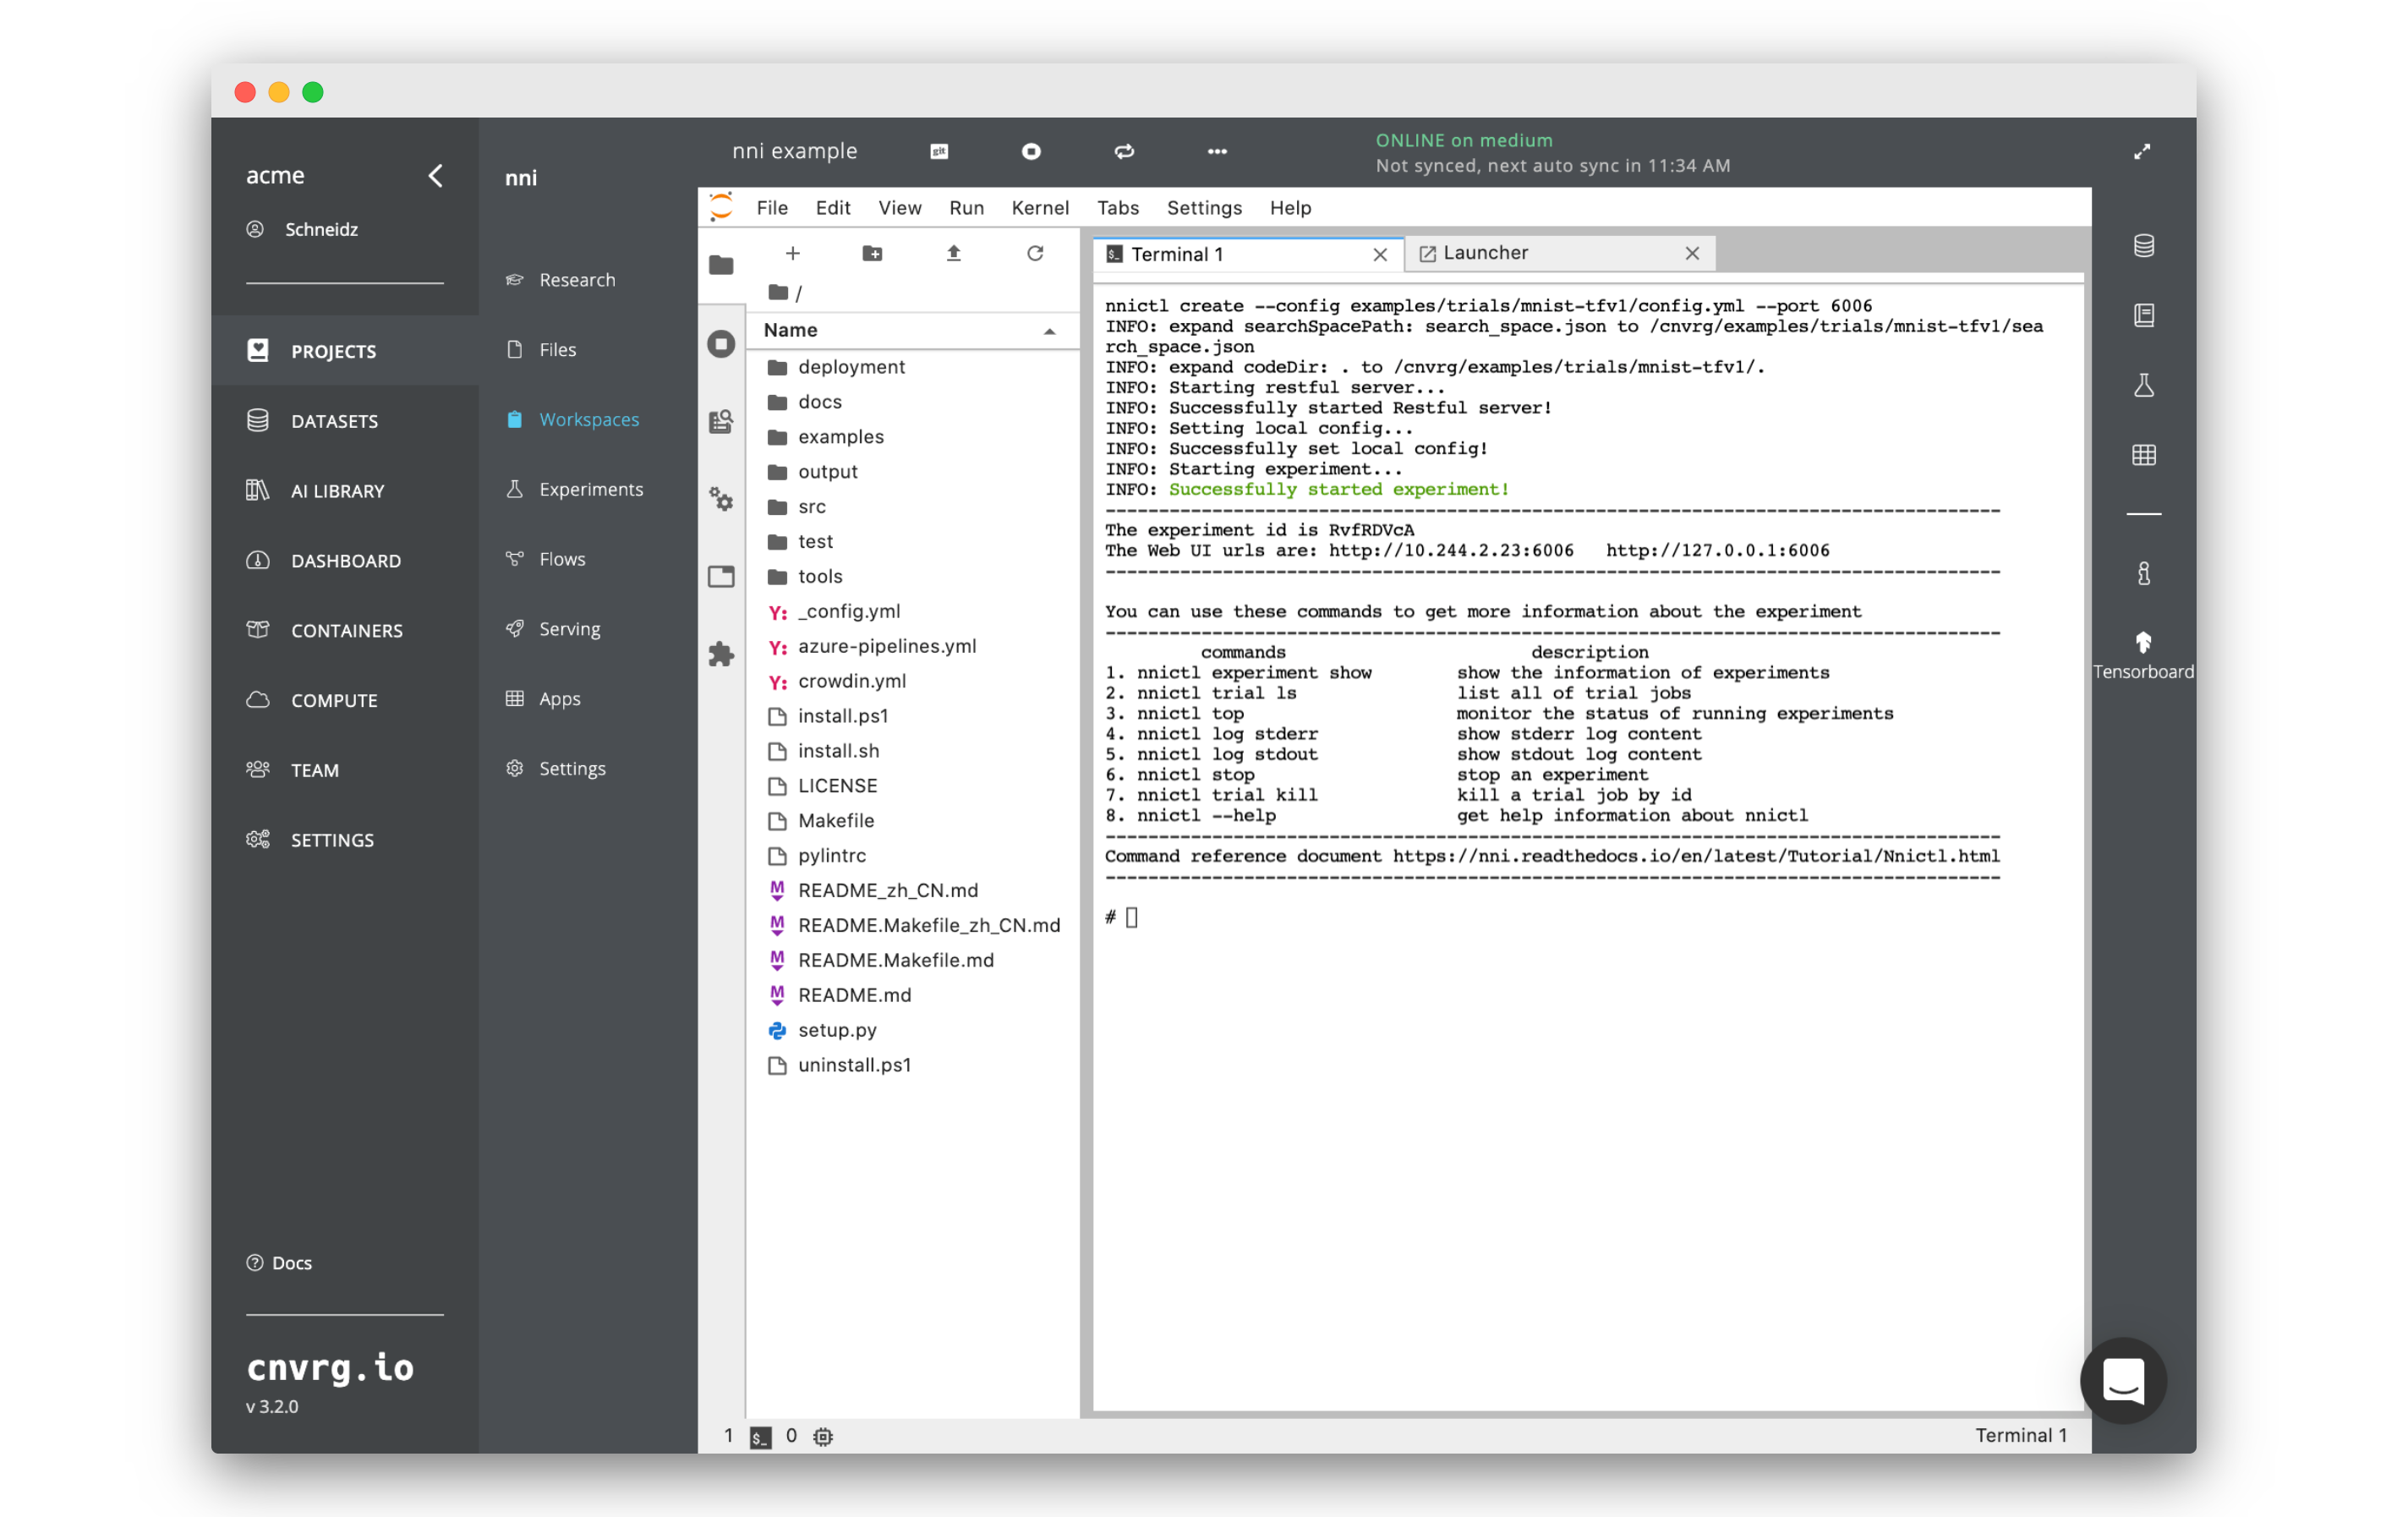
- Start a new Terminal session inside Jupyter.
- Enter and run the following command:
nnictl create --config examples/trials/mnist-tfv1/config.yml --port 6006 - Inside the terminal, you should see feedback. Once the logs say
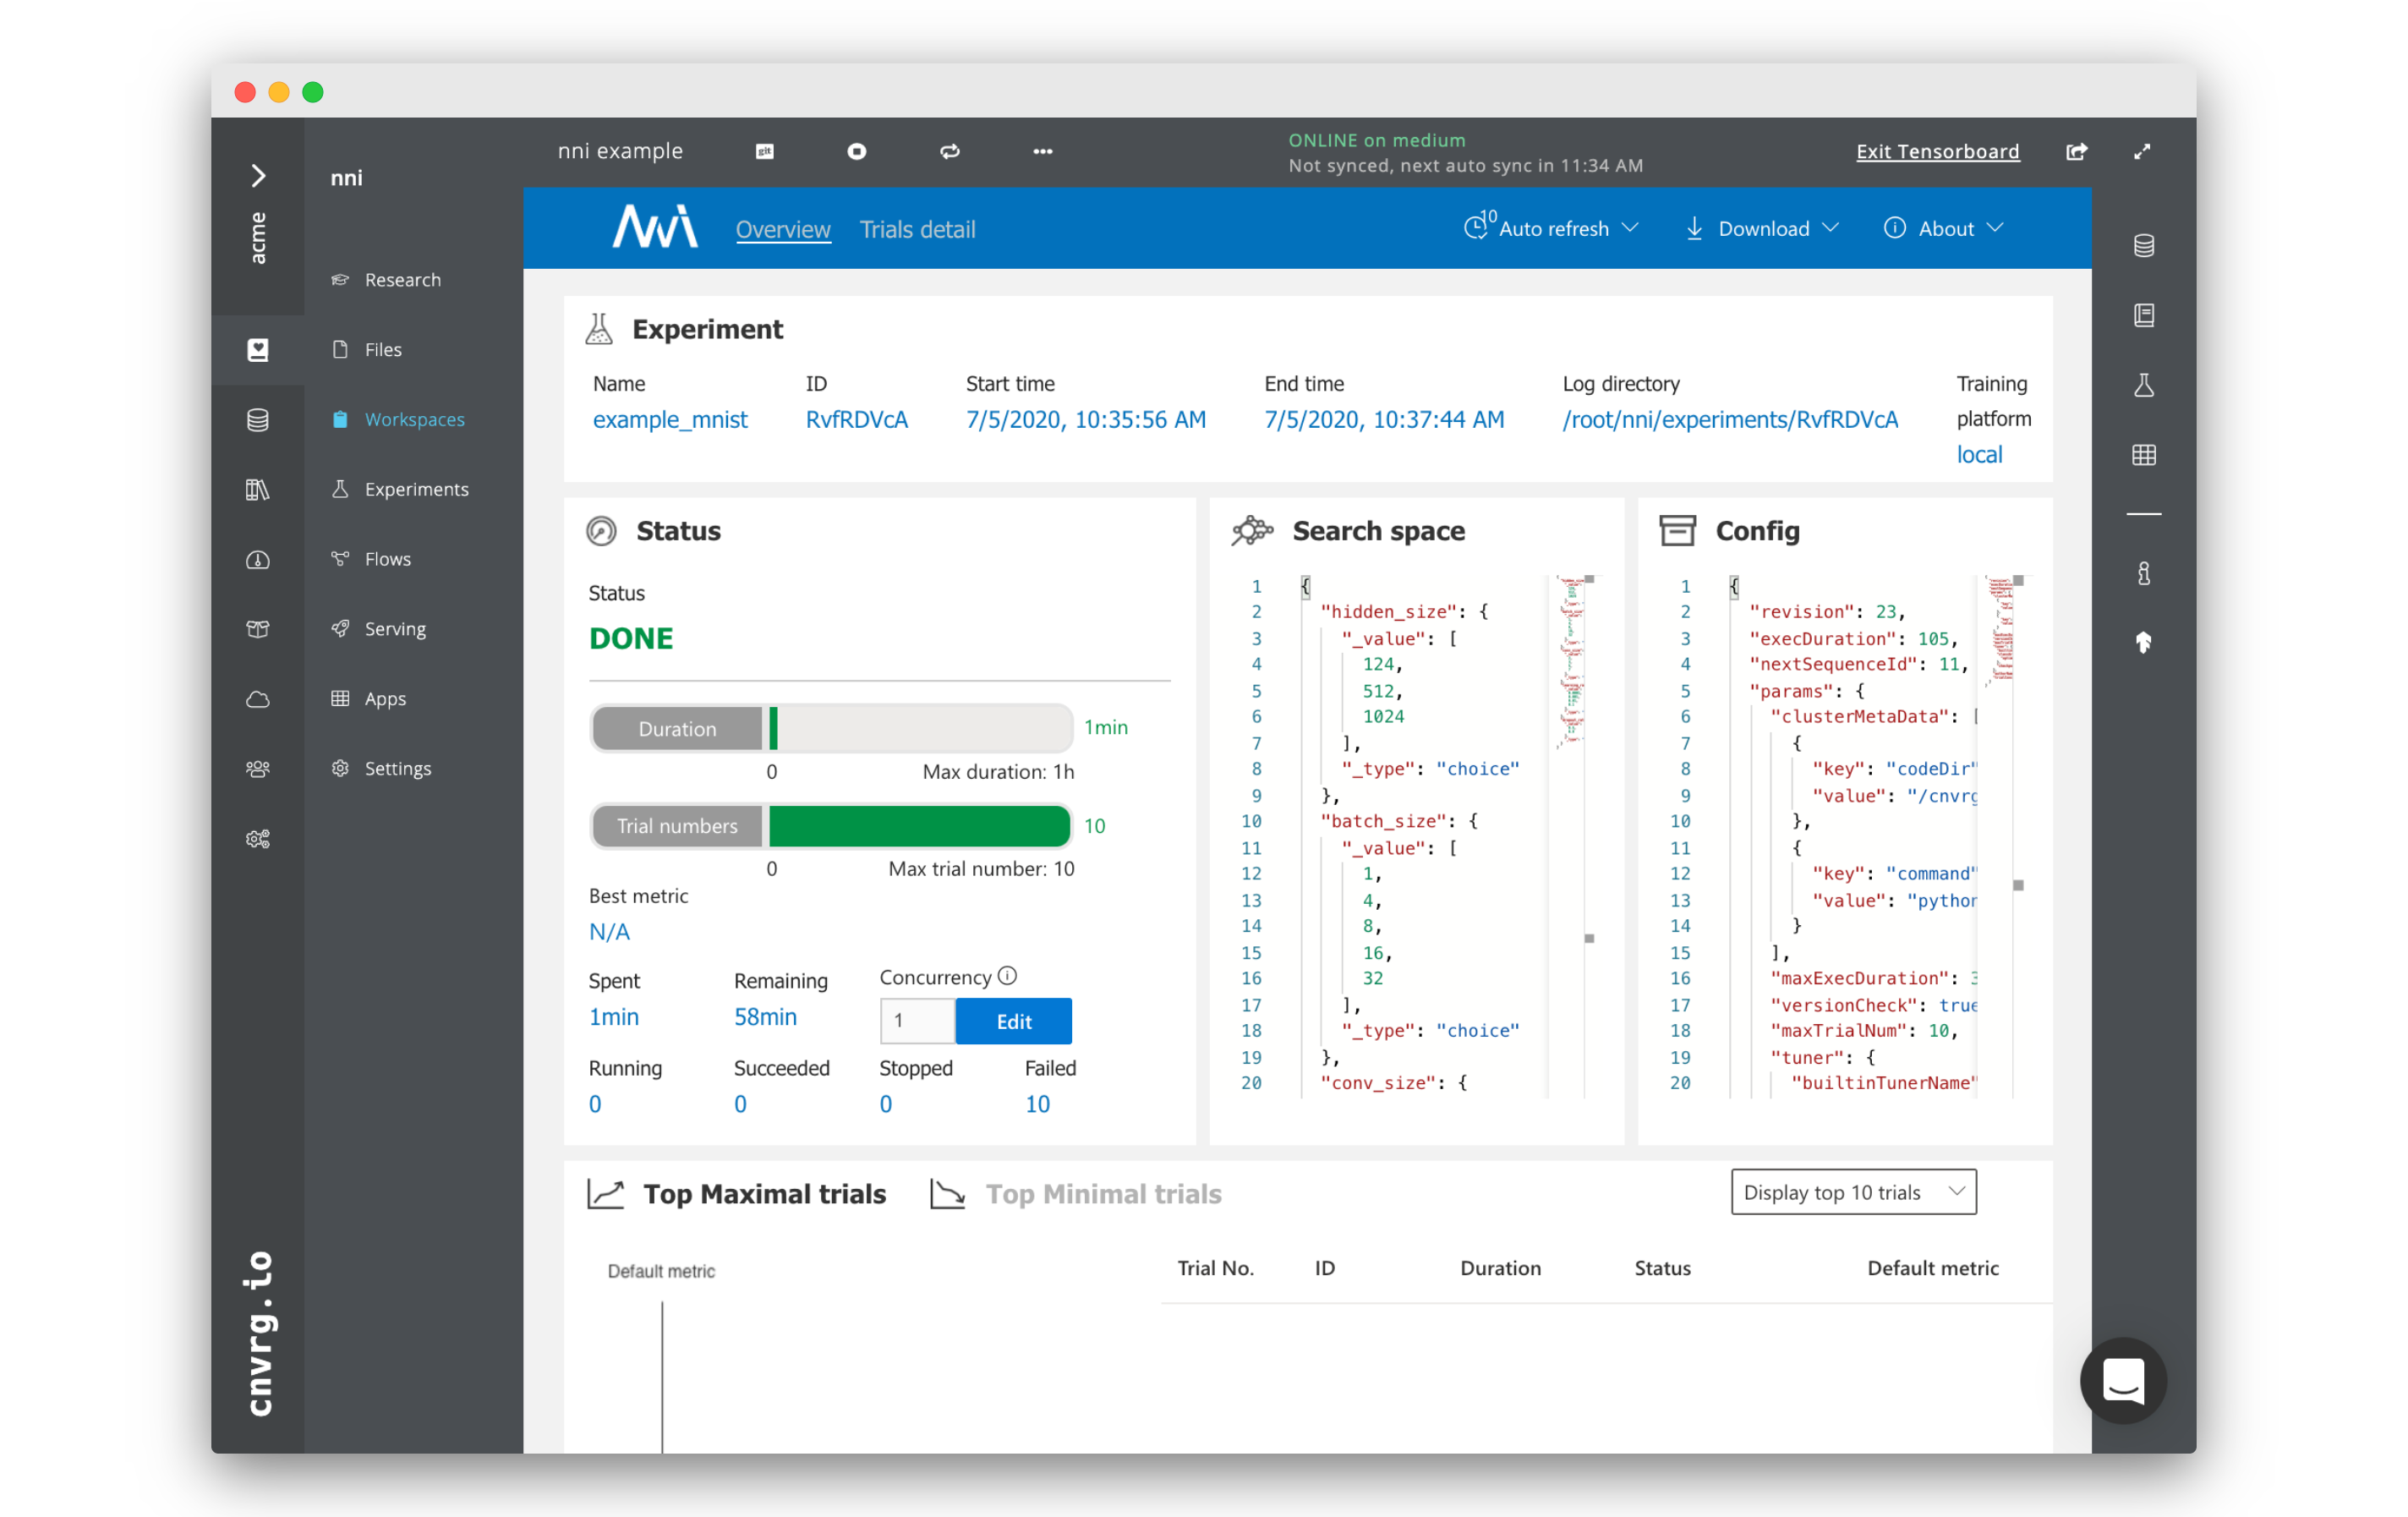
INFO: Successfully started experiment!, the experiment will have started. - Click on Tensorboard icon on the workspace's sidebar. The NNI web ui will appear.
There you go! Now you can keep track of the mnist NNI experiment from the ui!
# Conclusion
As you can see, using NNI in cnvrg is very easy. Now you can use your own custom code with the Docker image we added in this tutorial to run your own custom NNI experiments.