# Launch an Interactive R Shiny App
cnvrg is designed to help with all parts of your ML life cycle and that includes supporting comprehensive R functionality. One of the use cases supported by R is the ability to launch dynamic and interactive visualization dashboards using R Shiny. cnvrg has full support for R Shiny and in this tutorial, we will launch a simple example dashboard.
# Create a New Project
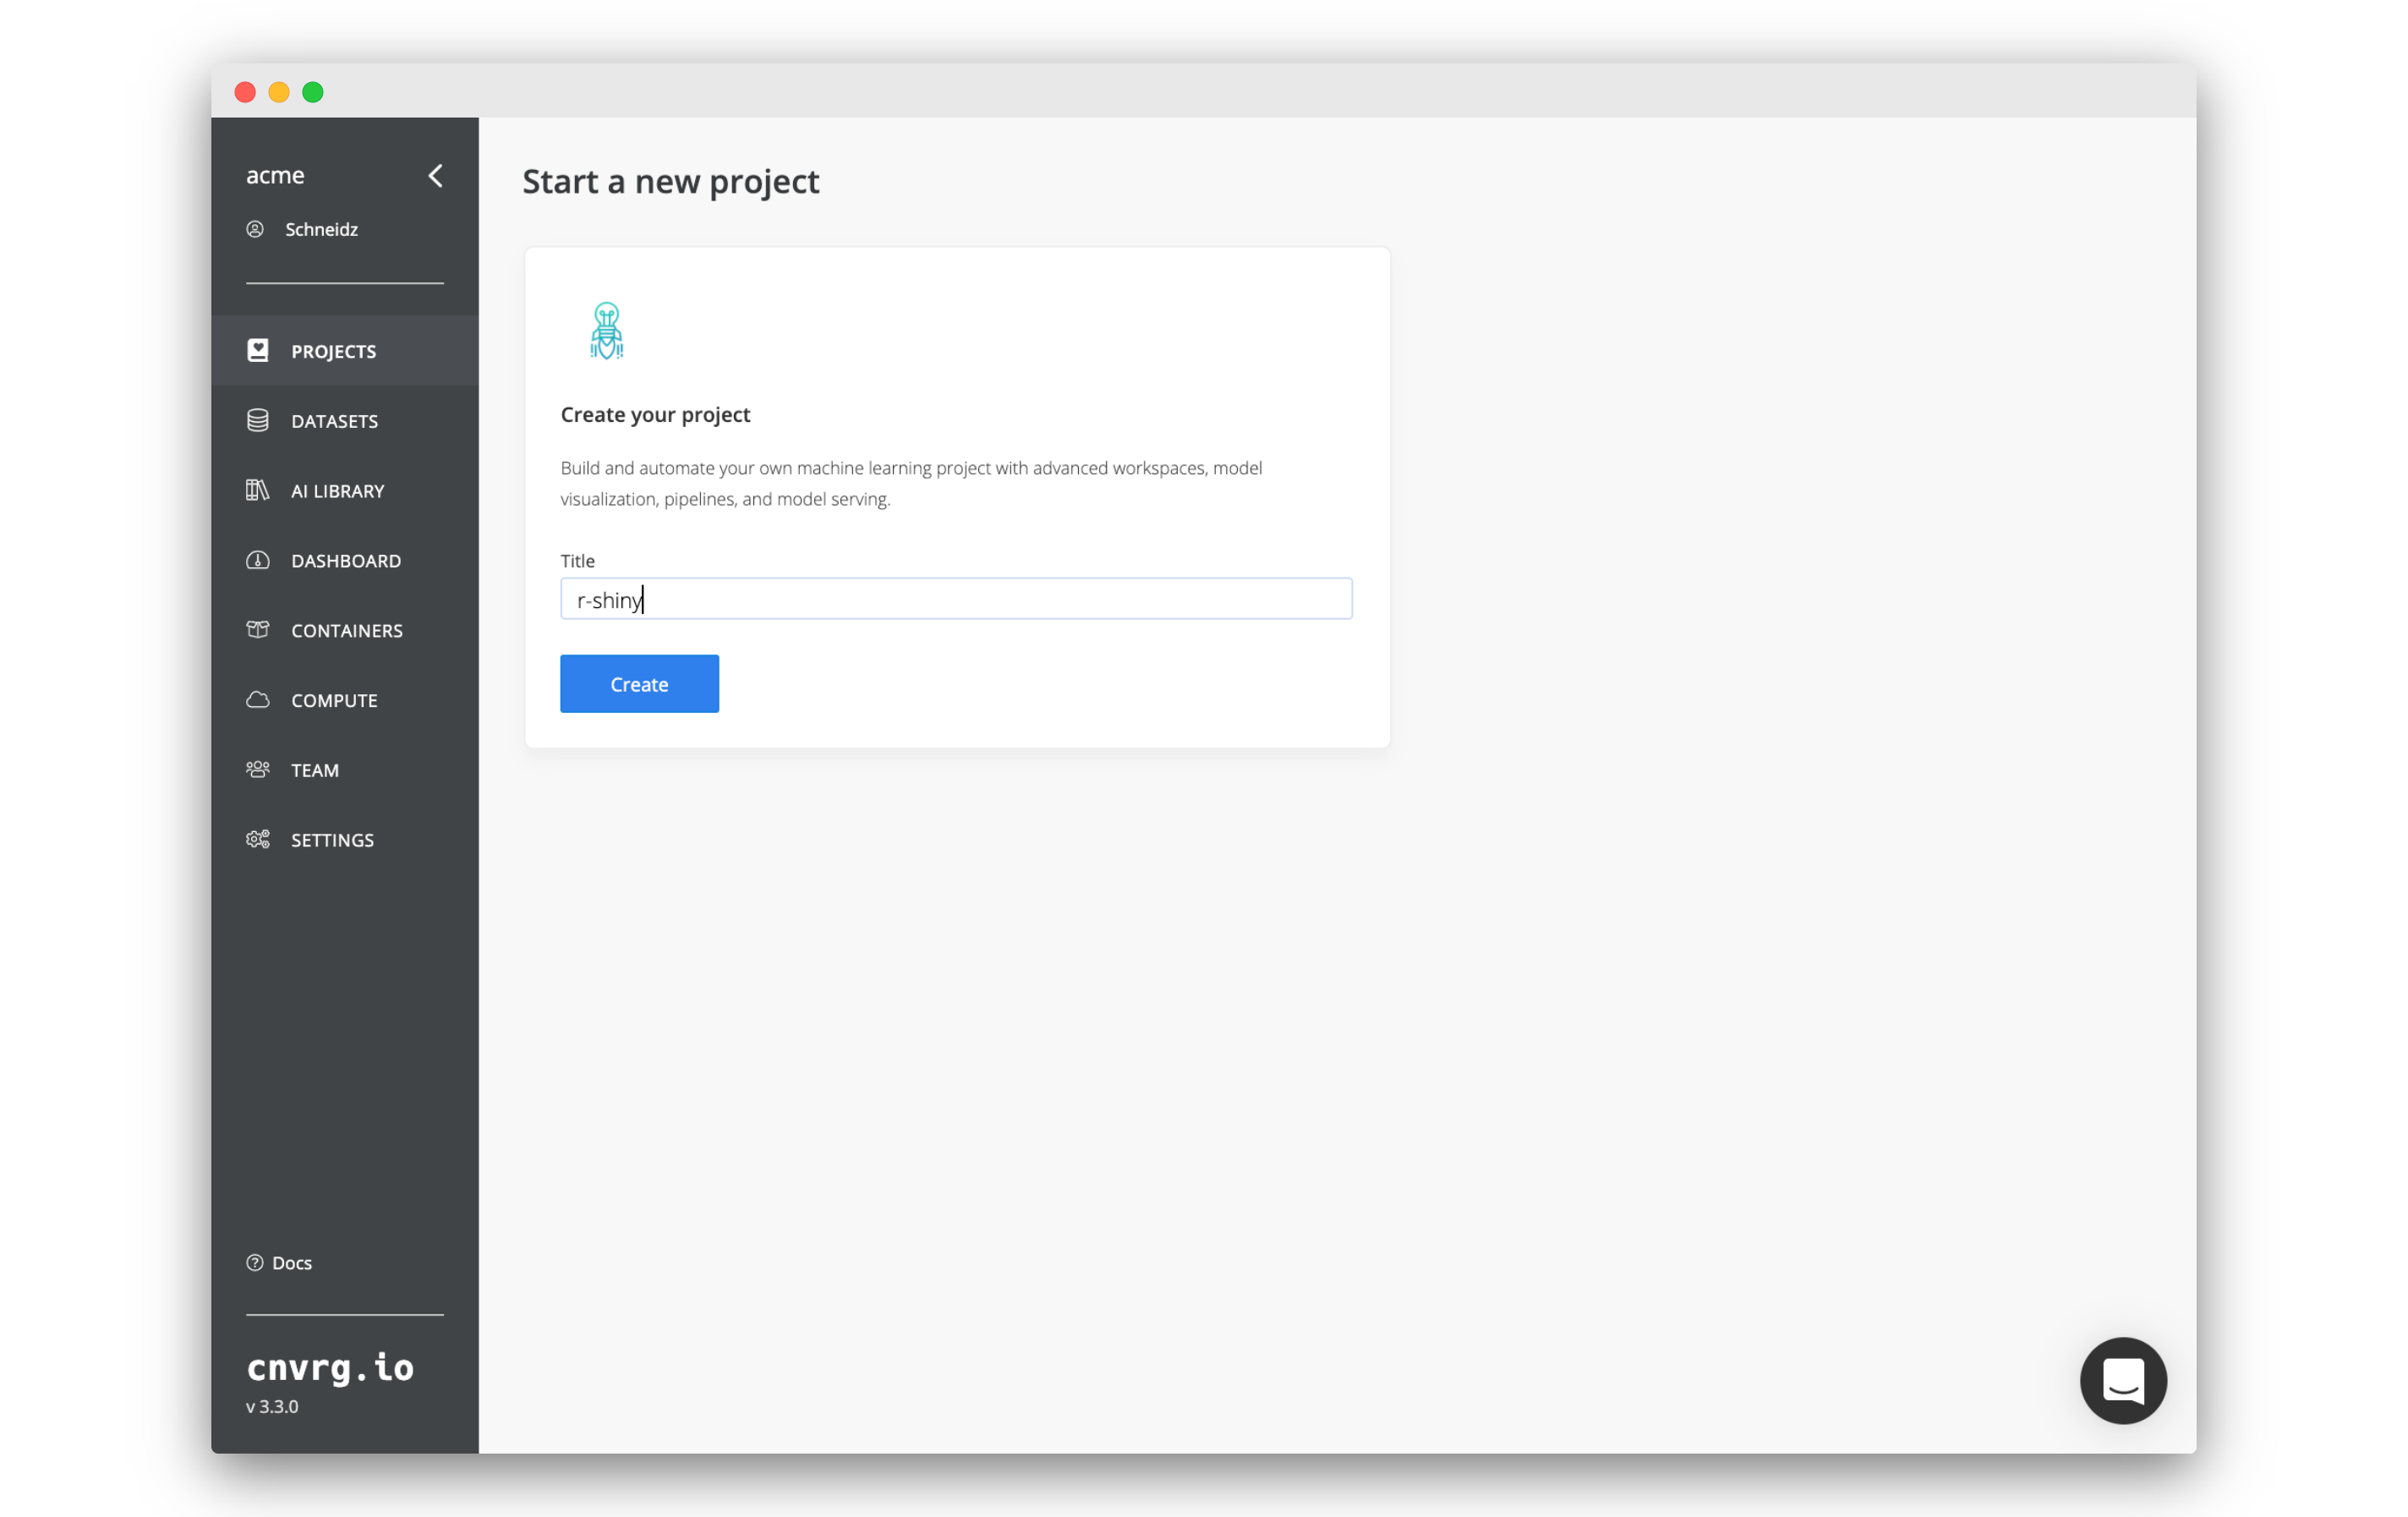
- Go to Projects and click Start Project.
- Name the project
r-shiny.
# Add the R Shiny code
 Before we can launch and R Shiny app, we need to add the example code. You can of course use the workspaces feature to spin up an R Studio workspace where you could build your R Shiny code. However, we will simply be using pre-prepared code.
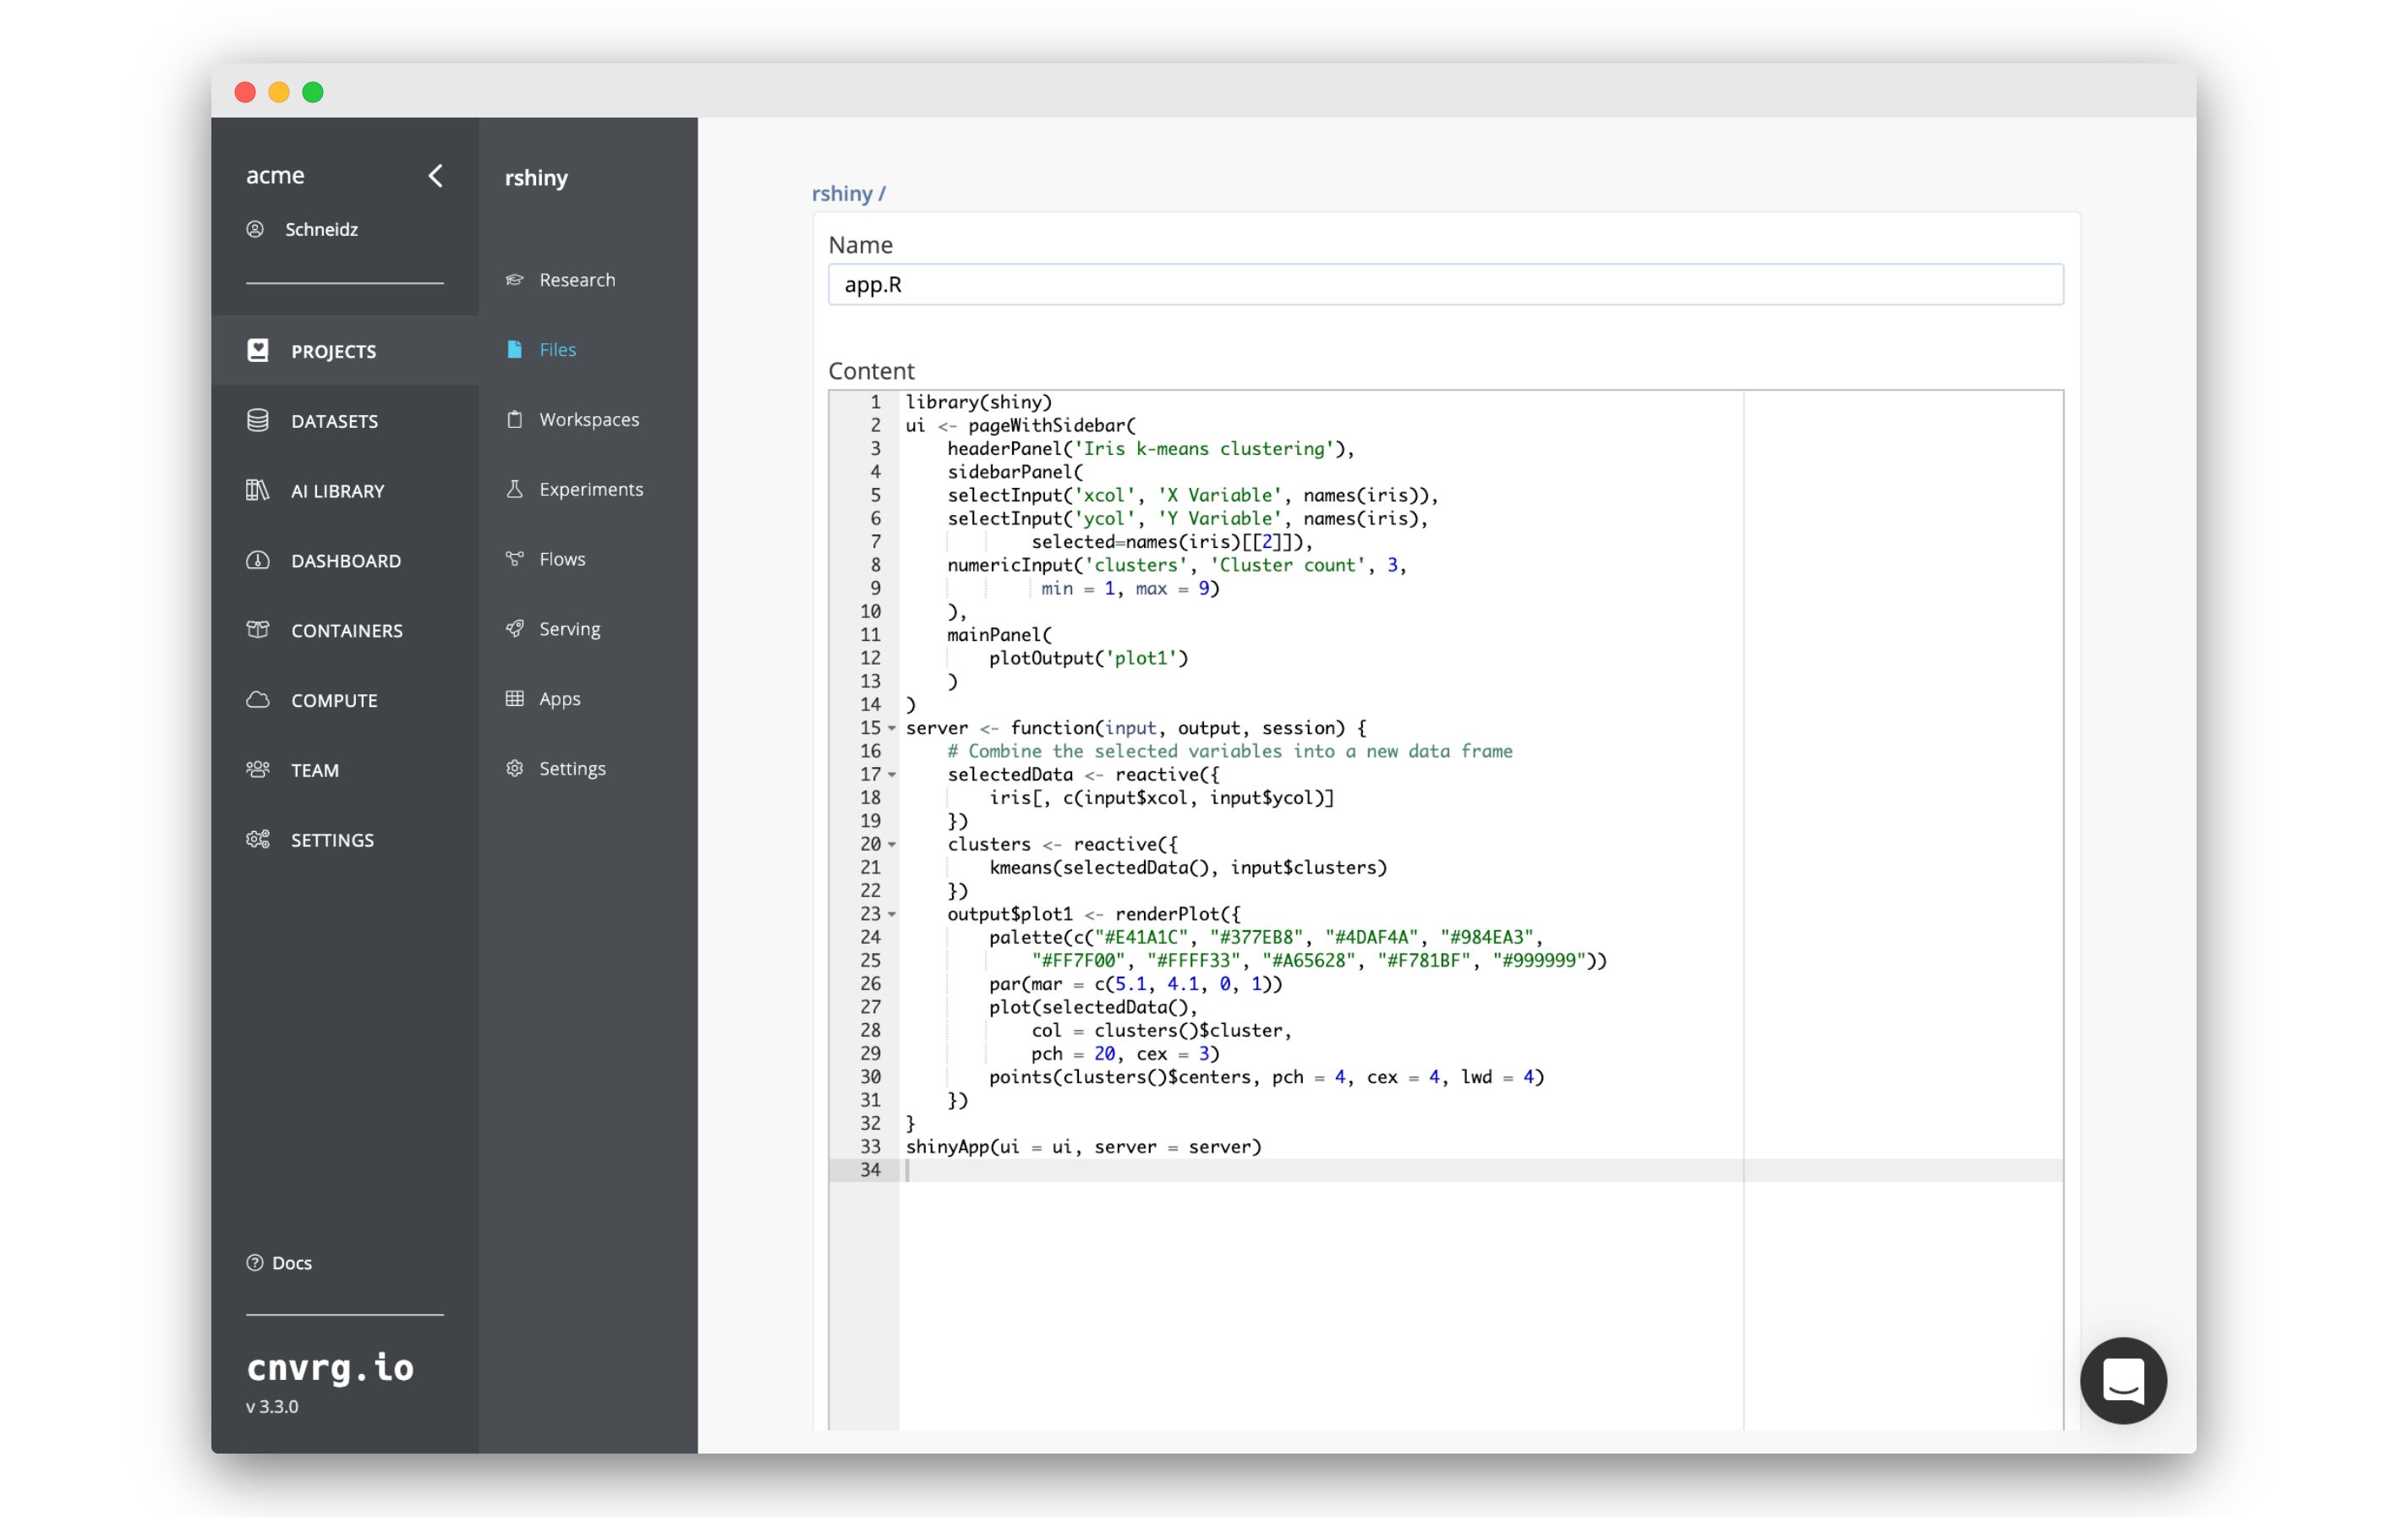
- Go to Files inside your
r-shinyproject. - Click New File.
- Copy and paste the following code into the code editor:
library(shiny) ui <- pageWithSidebar( headerPanel('Iris k-means clustering'), sidebarPanel( selectInput('xcol', 'X Variable', names(iris)), selectInput('ycol', 'Y Variable', names(iris), selected=names(iris)[[2]]), numericInput('clusters', 'Cluster count', 3, min = 1, max = 9) ), mainPanel( plotOutput('plot1') ) ) server <- function(input, output, session) { # Combine the selected variables into a new data frame selectedData <- reactive({ iris[, c(input$xcol, input$ycol)] }) clusters <- reactive({ kmeans(selectedData(), input$clusters) }) output$plot1 <- renderPlot({ palette(c("#E41A1C", "#377EB8", "#4DAF4A", "#984EA3", "#FF7F00", "#FFFF33", "#A65628", "#F781BF", "#999999")) par(mar = c(5.1, 4.1, 0, 1)) plot(selectedData(), col = clusters()$cluster, pch = 20, cex = 3) points(clusters()$centers, pch = 4, cex = 4, lwd = 4) }) } shinyApp(ui = ui, server = server) - Name the file:
app.R - Click Submit to save the file.
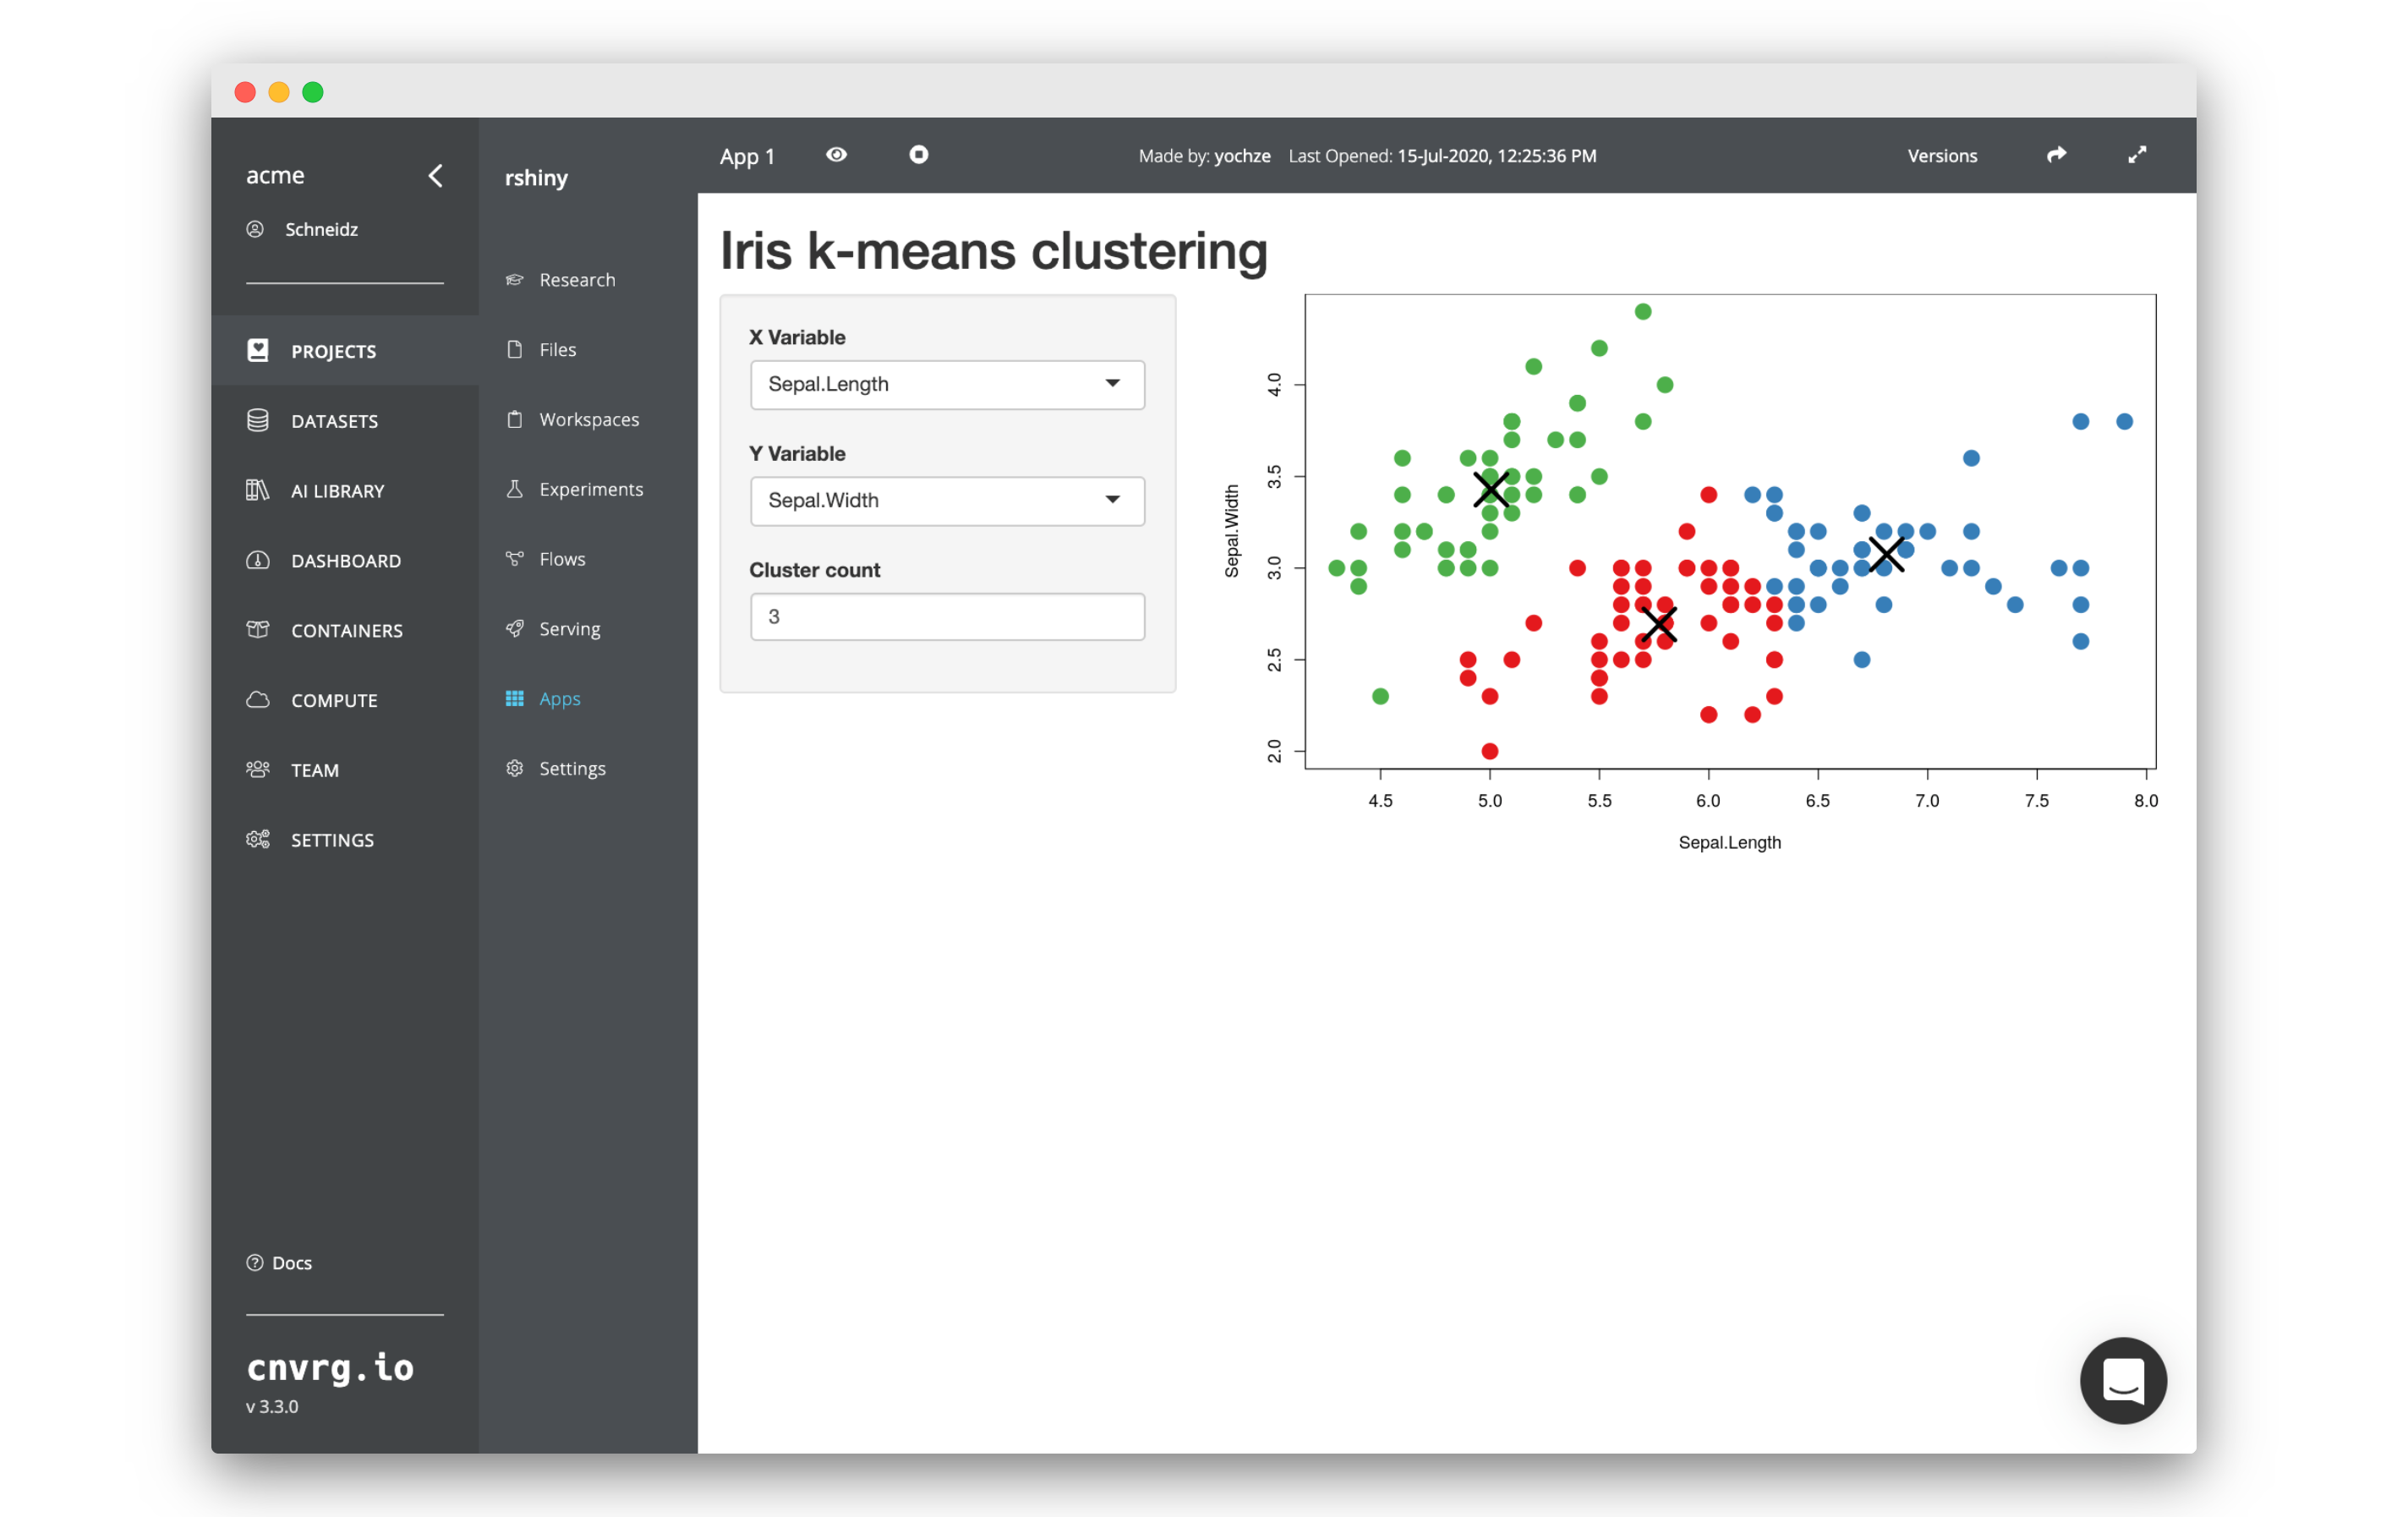
The above code will create a very simple R Shiny dashboard.
# Launch the R Shiny app
 Now we can launch the code we just added:
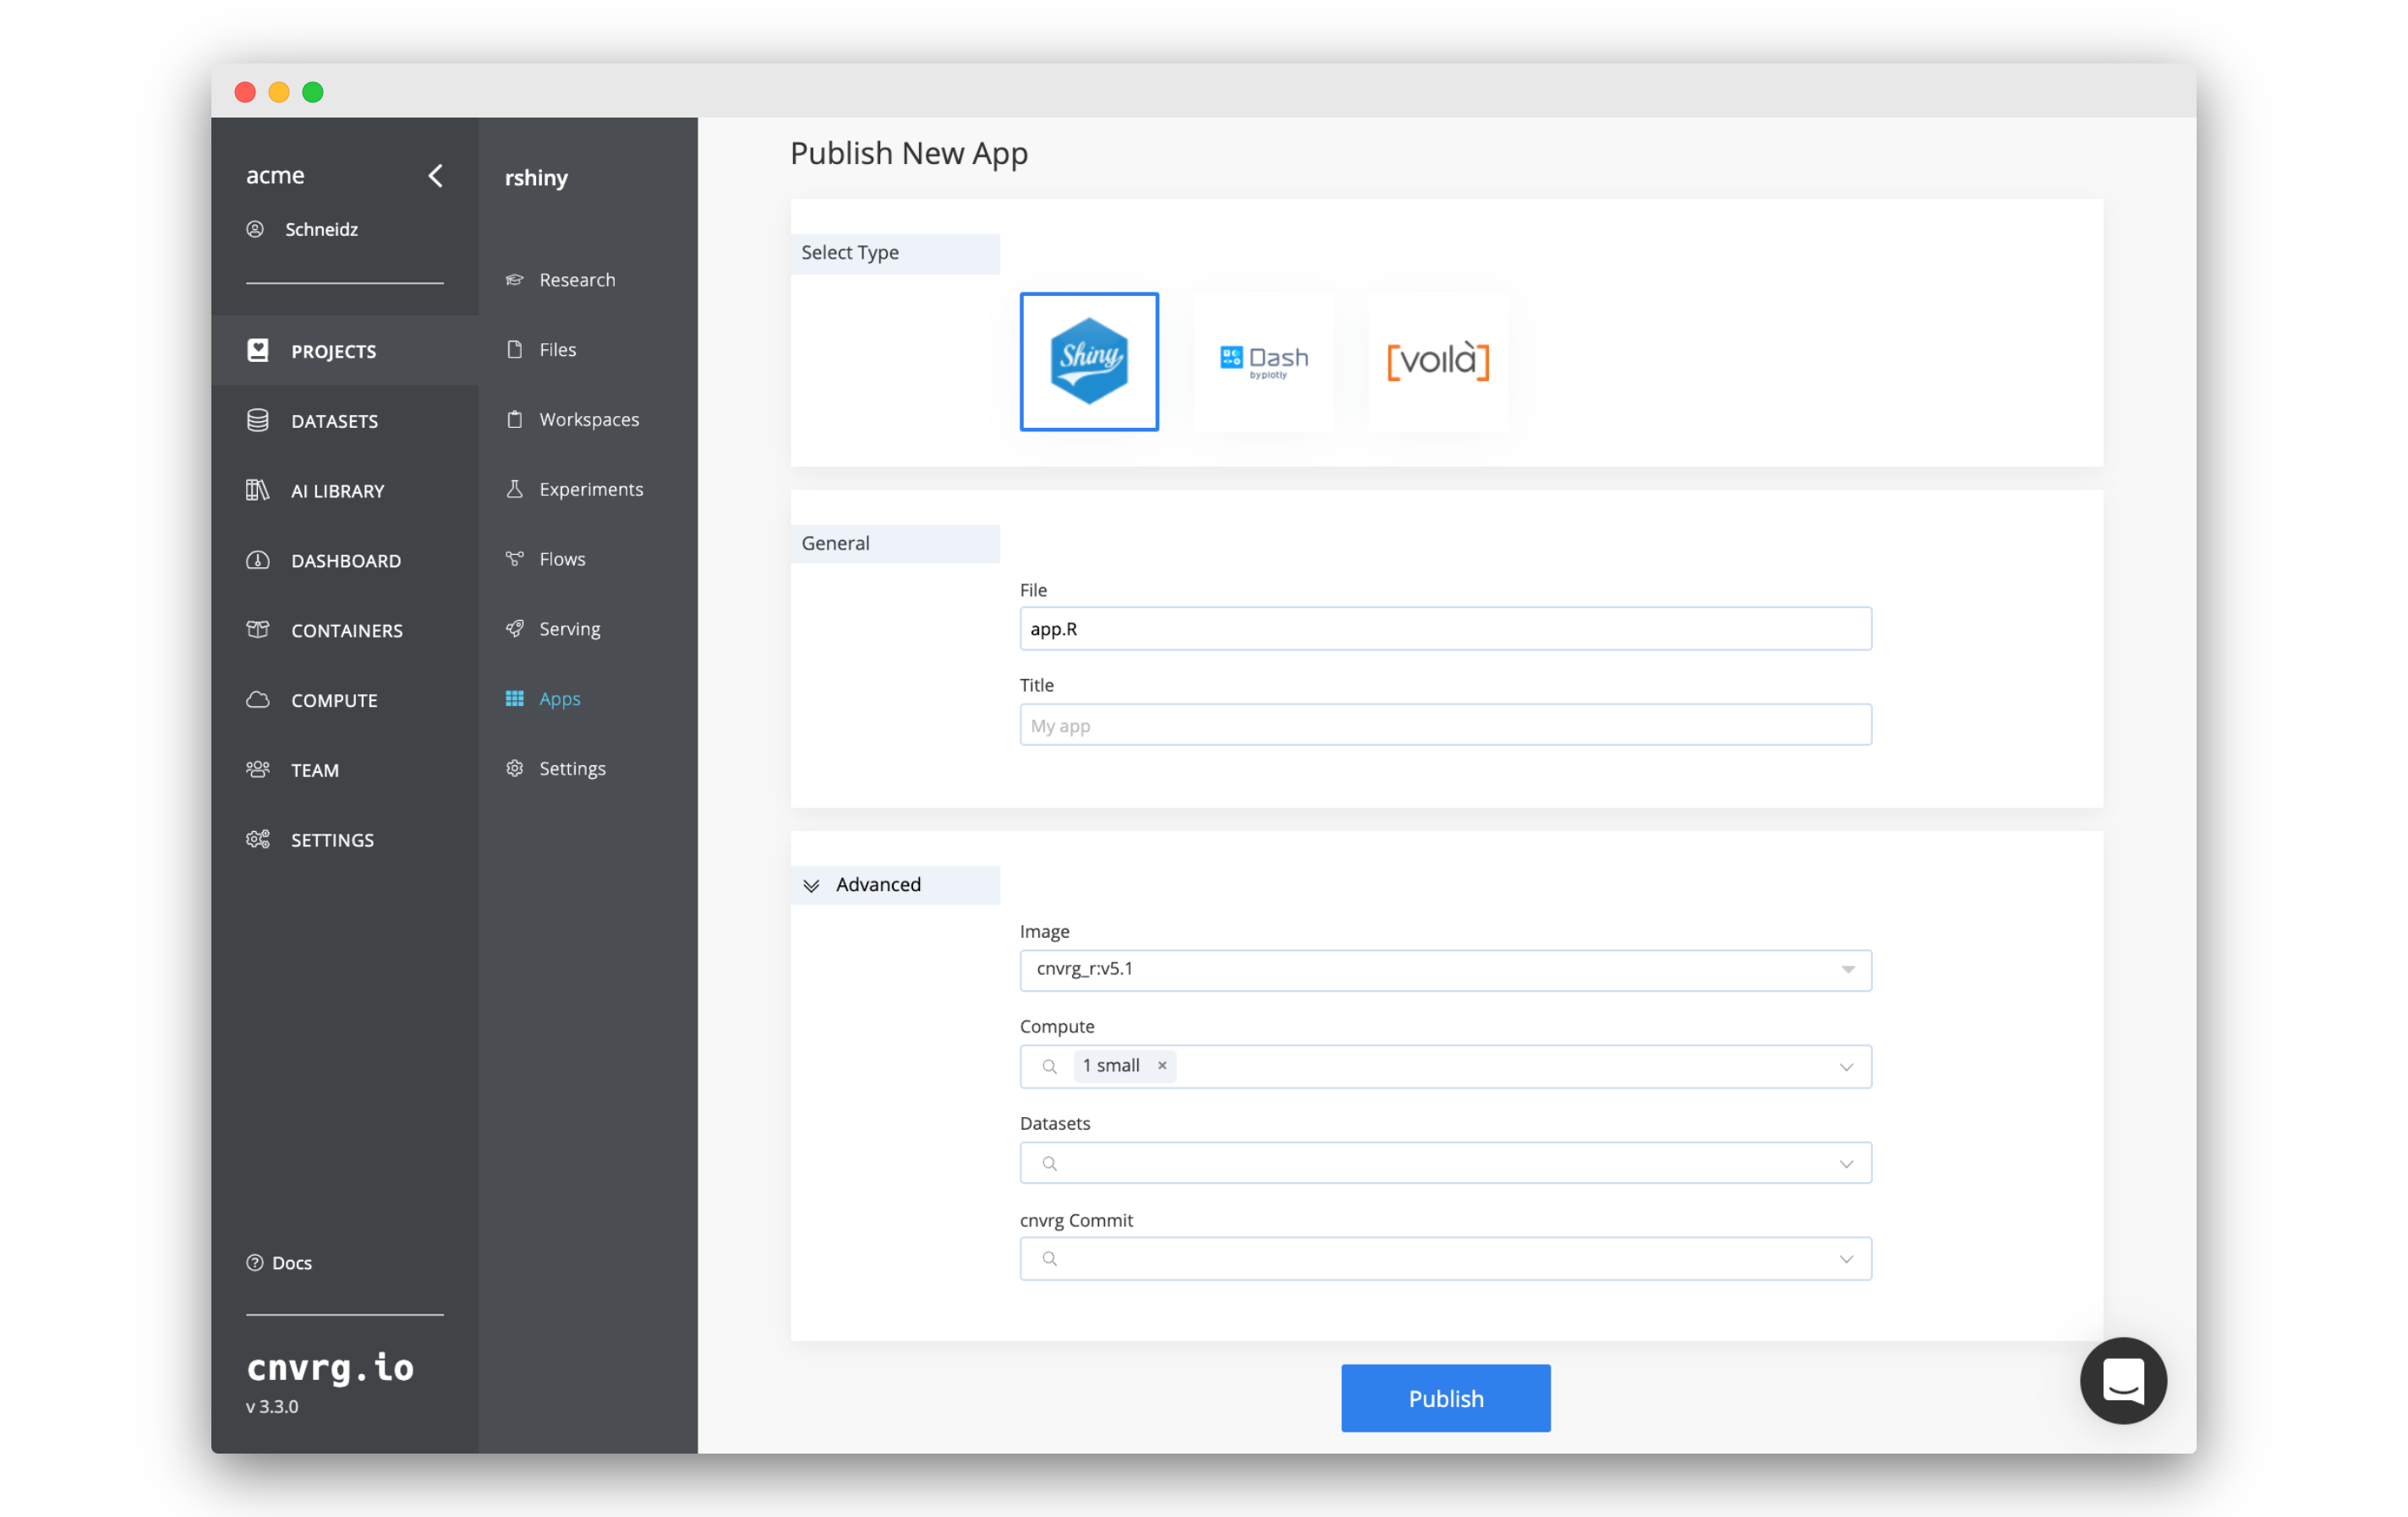
- Go to Apps.
- Click Publish New App.
- Make sure R Shiny is selected.
- Set File as
app.R. - Click Advanced to expand the sub-heading and enter the following information:
- Image: A compatible R image. For example the latest
cnvrg_rimage. - Compute: any compute of your choice.
- Image: A compatible R image. For example the latest
- Click Publish.
cnvrg will now start doing all of the MLOps work to create a fully dynamic and shareable R Shiny dashboard. In just a few minutes all the configuration will be completed and you will be able to play around with the simple visualization of clustering.