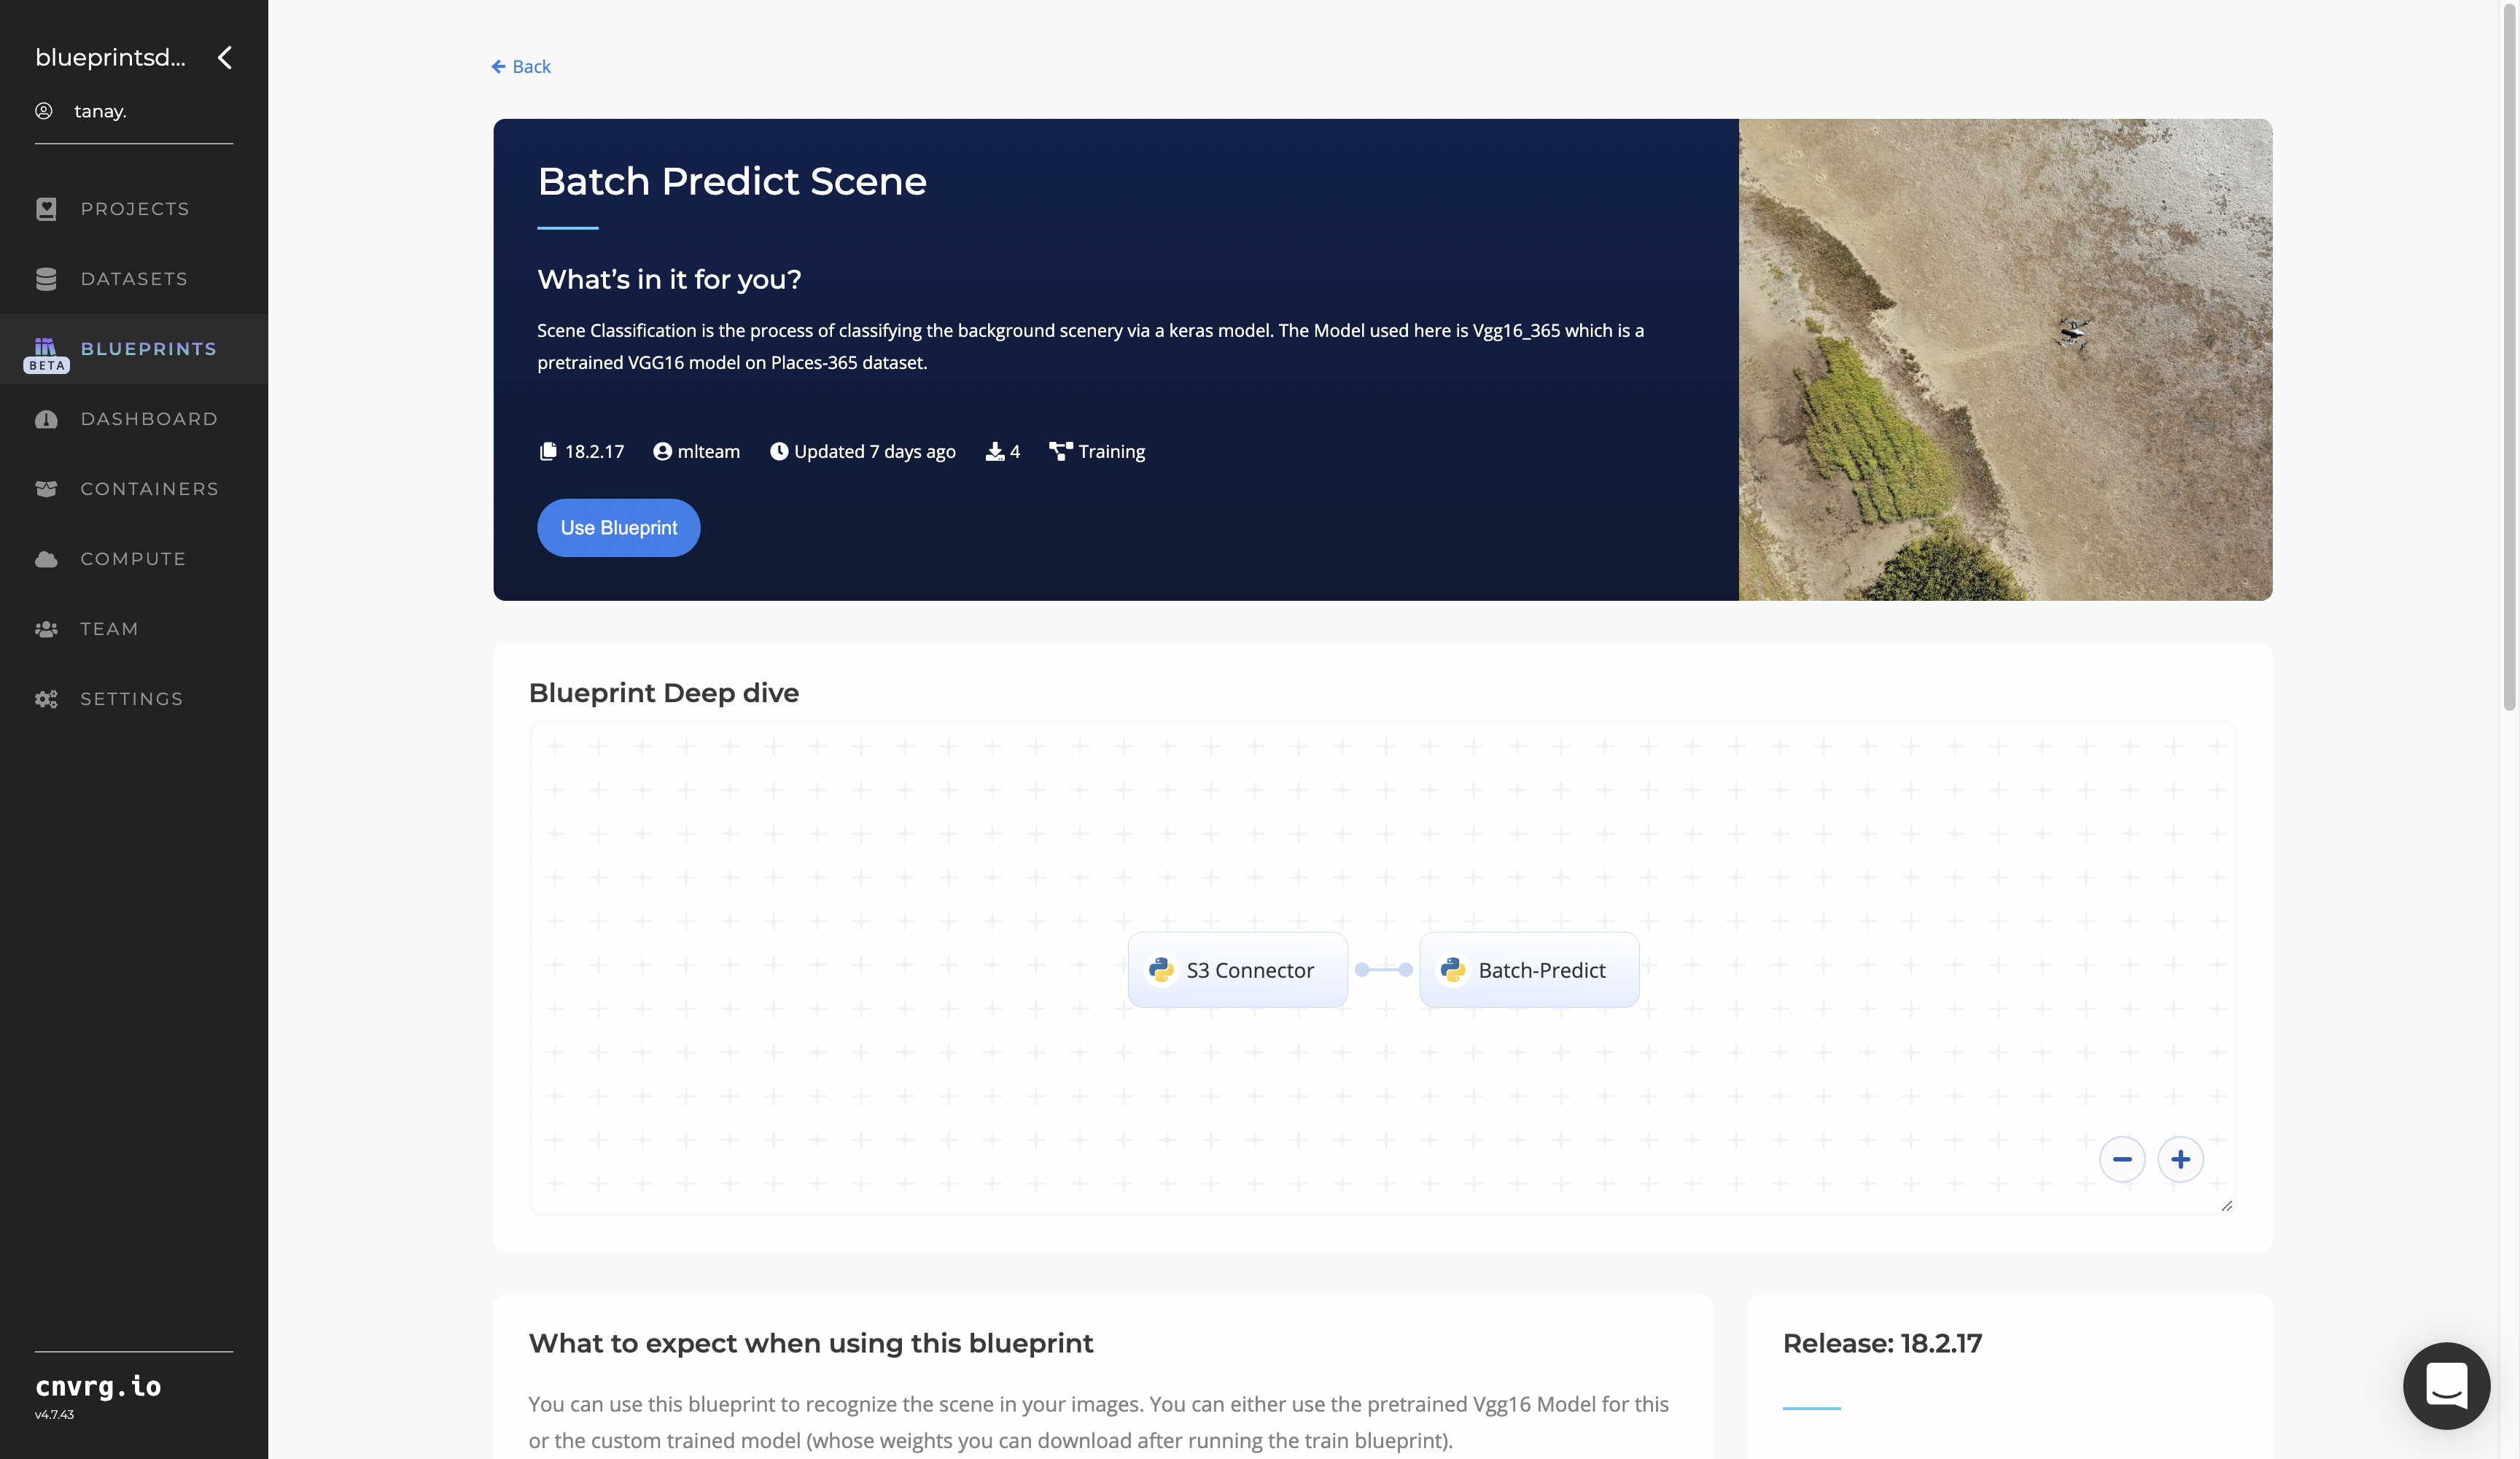
# Scene Classification AI Blueprint - deprecated from 11/2024
# Batch-Predict
Scene classification involves classifying an image’s background scenery to one of predefined scene categories. Large datasets including samplings of diverse real-world natural scenery enables such scene representations and classifications.
# Purpose
Use this batch-predict blueprint to classify natural scenes in a batch of images. It uses a pretrained model VGG16-365, which is a VGG16 model trained on the Places-365 dataset, but is flexible enough to use a custom-trained model, if required. The user uploads natural scenery images and the blueprint predicts the names of the places as output. The user can choose either generic scenery options or specific locations on which to train the model.
# Deep Dive
The following flow diagram illustrates this batch-predict blueprint’s pipeline:

# Flow
The following list provides a high-level flow of this blueprint’s run:
- In the S3 Connector, provide the data bucket name and the directory path where the images and models are located.
- In the Batch Predict task, provide the
img_dirandmodel_dirpaths to the S3 Connector’s image and model directories.
# Arguments/Artifacts
For more information and examples on this blueprint’s inputs and outputs, click here.
# Batch-Predict Inputs
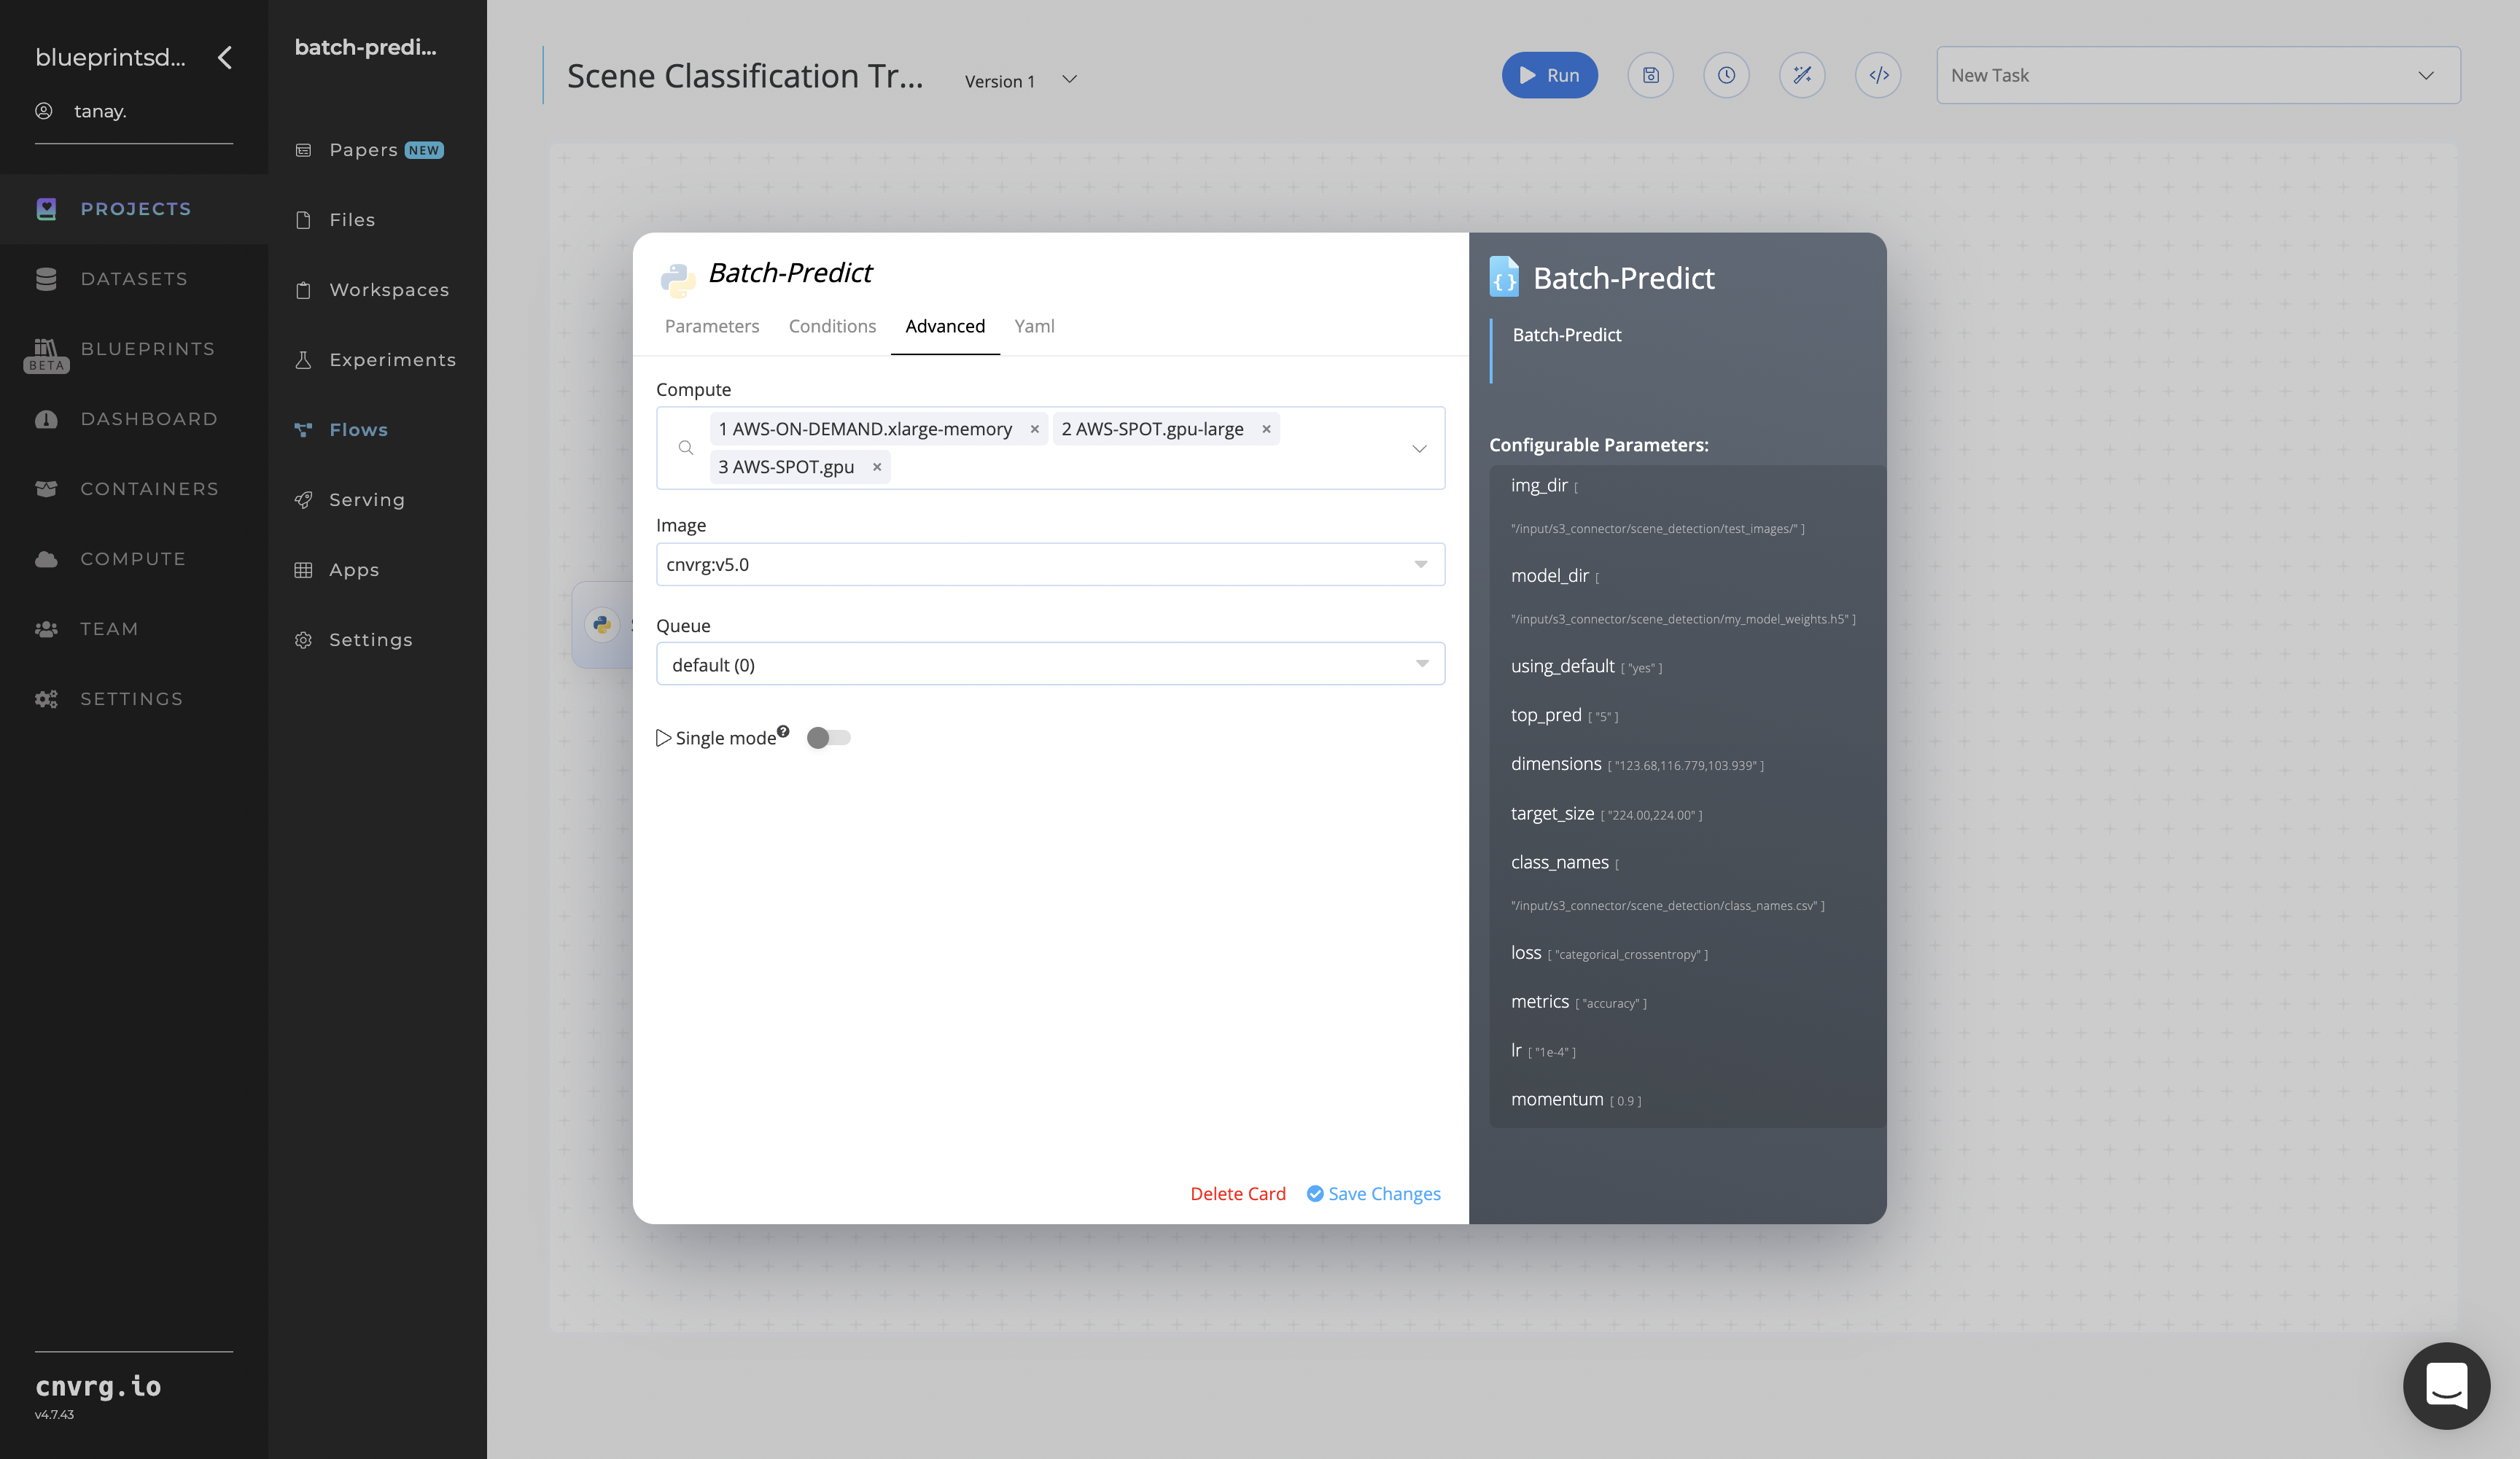
--img_diris the name of the directory path storing images to be classified.--model_diris the location of the directory with the custom model on which the user’s dataset is trained.--dimensionsare the mean values of the image data generator arguments (to which the images are resized) while being given as an input.--top_predis the number of predictions to make (only used with the default pretrained model).--using_defaultis a binary yes/no question as to whether to use the default model or the custom-trained model.--target_size(float) is the resolution the image is to be resized before implemented to the model. Default:0.5.--class_namesare the categories the custom-trained model outputs the results.--lossis the loss function on which the compiling takes place. Default:categorical_crossentropy.--metricsare the metrics on which the compiling takes place. Default:accuracy.--lris the learning rate schedule to help converge the optimization process. Default:1e-4.--momentumis used to accelerate training while compiling. Default:0.9.
# Batch-Predict Outputs
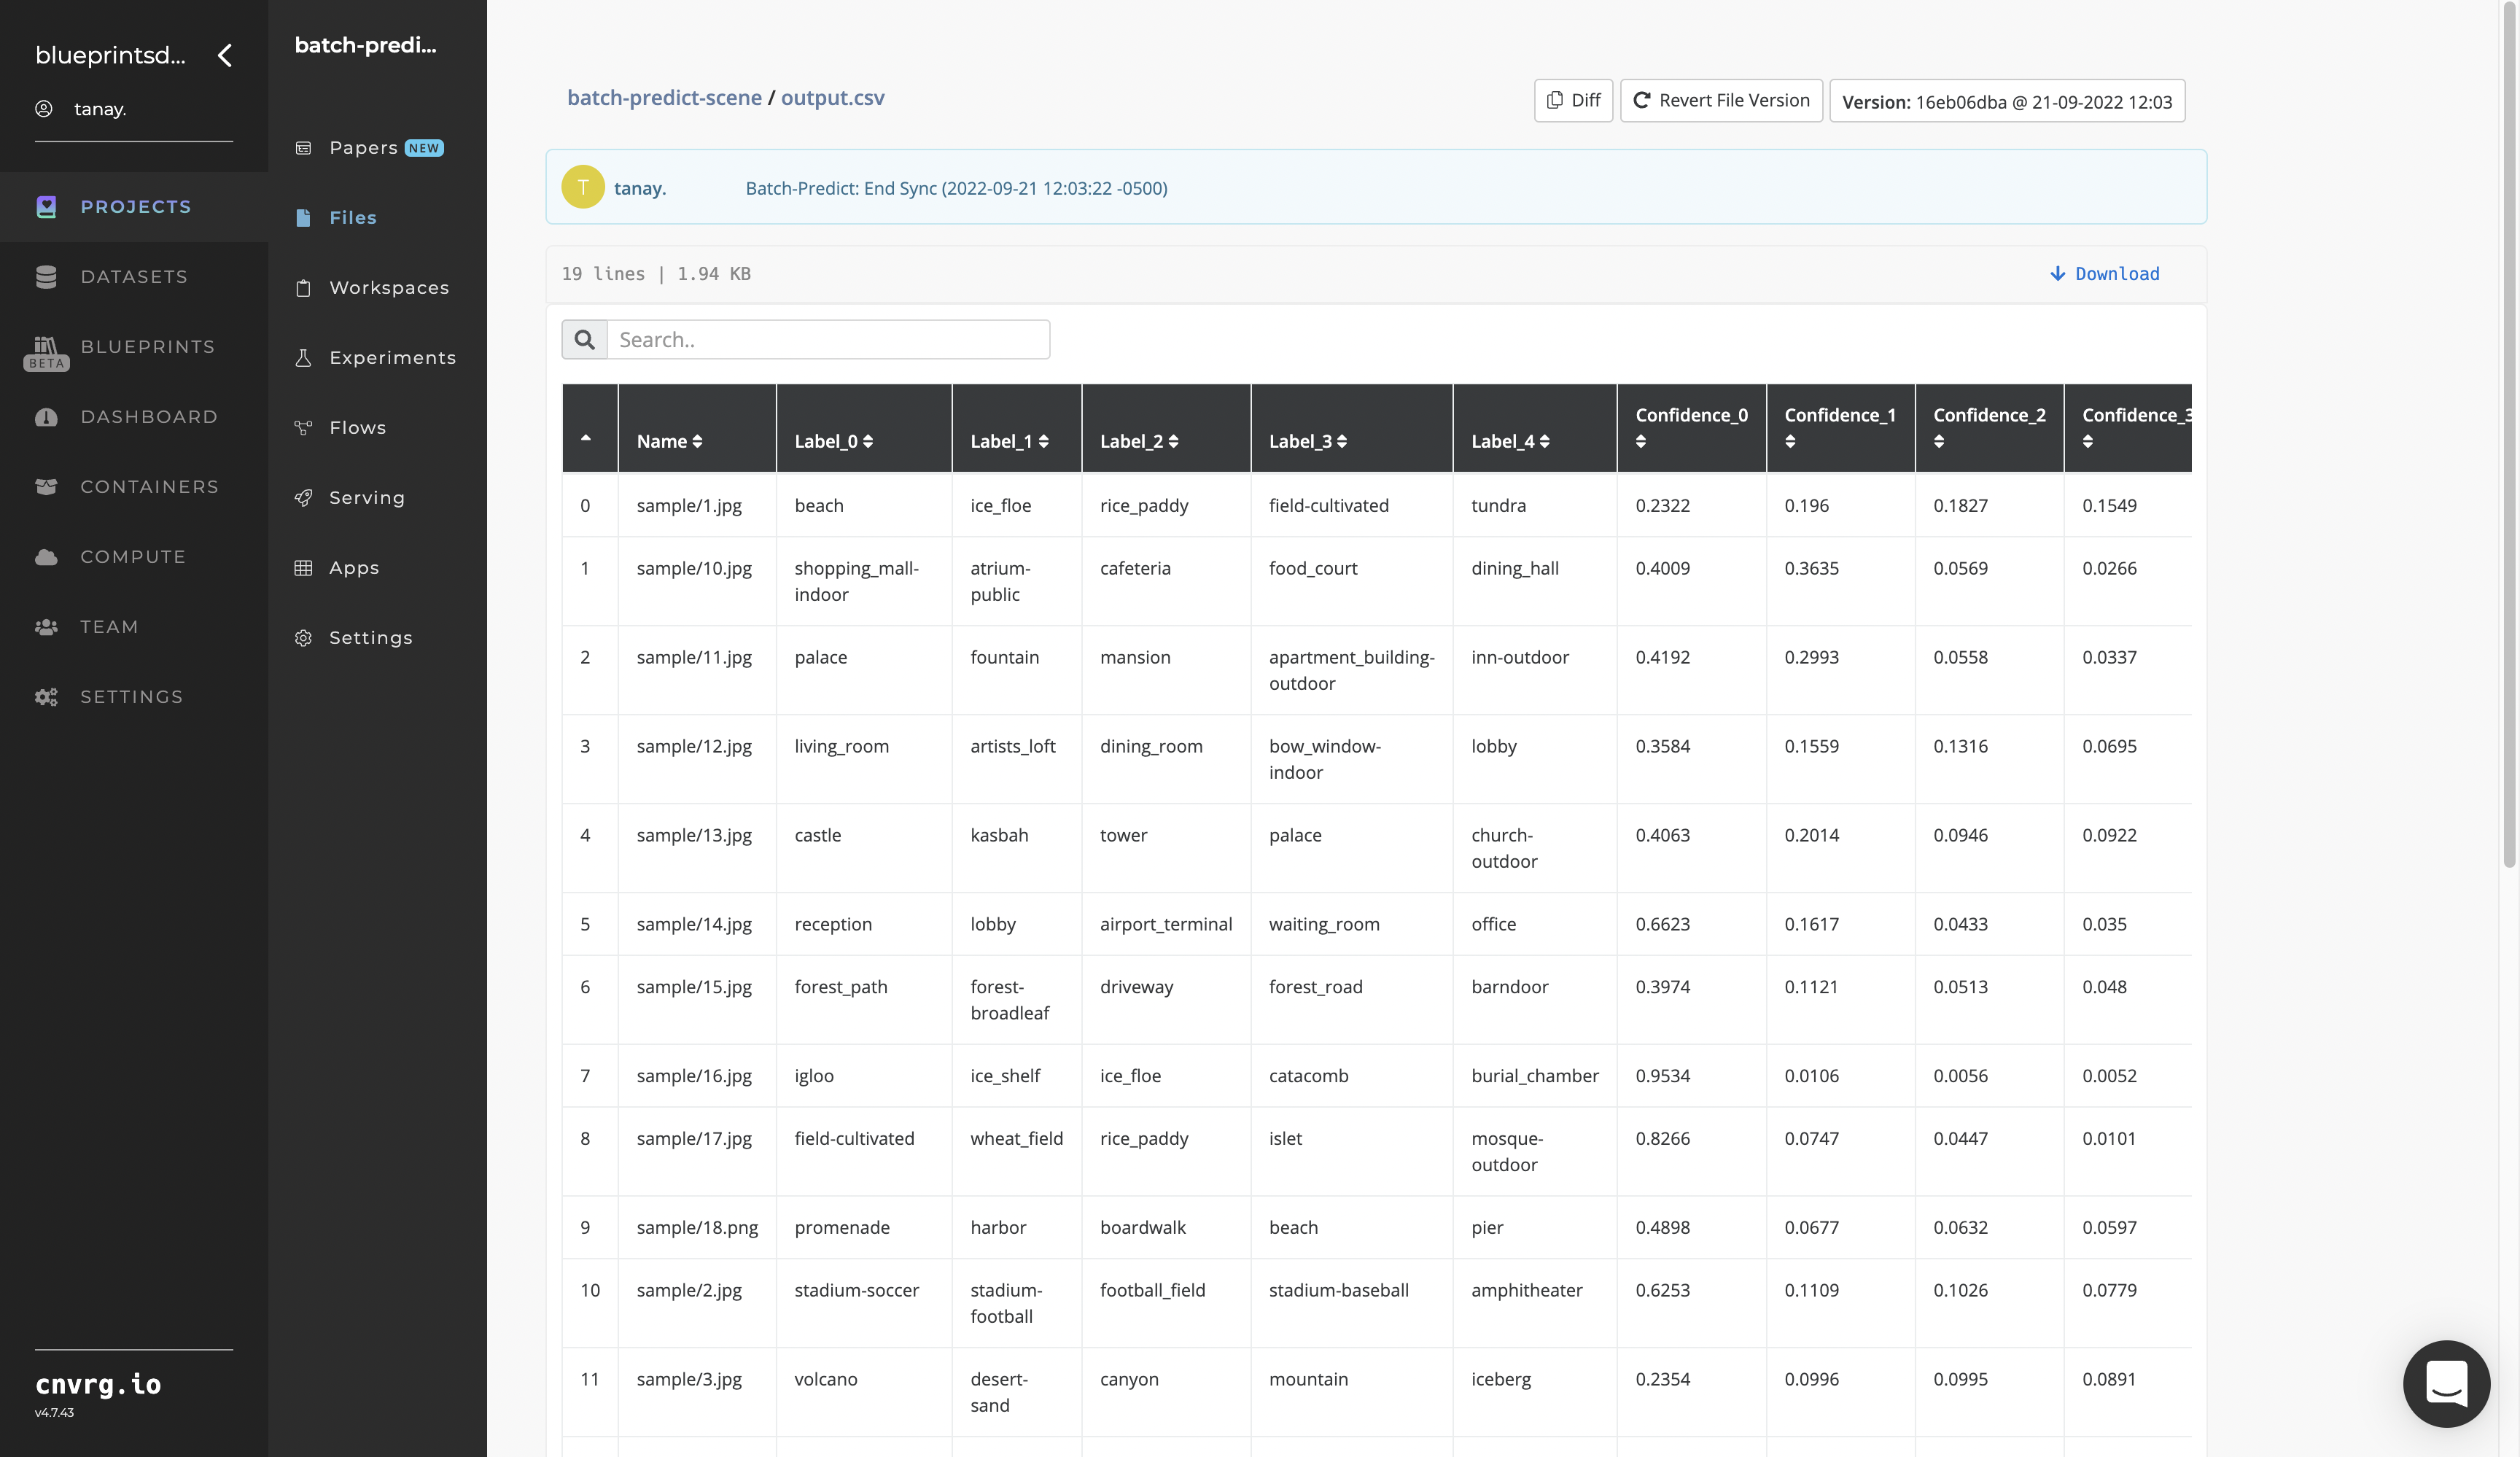
--output.csvis the name of the file containing the image names and the categories of their scenes.- The CSV file can be one of two formats depending on whether the user selects the default pretrained model or the custom-trained model. Examples of these two output file formats can be found here.
# Instructions
NOTE
The minimum resource recommendations to run this blueprint are 3.5 CPU and 8 GB RAM.
Complete the following steps to run the scene-classifier model in batch mode:
- Click the Use Blueprint button. The cnvrg Blueprint Flow page displays.
- Click the S3 Connector task to display its dialog.
- Within the Parameters tab, provide the following Key-Value pair information:
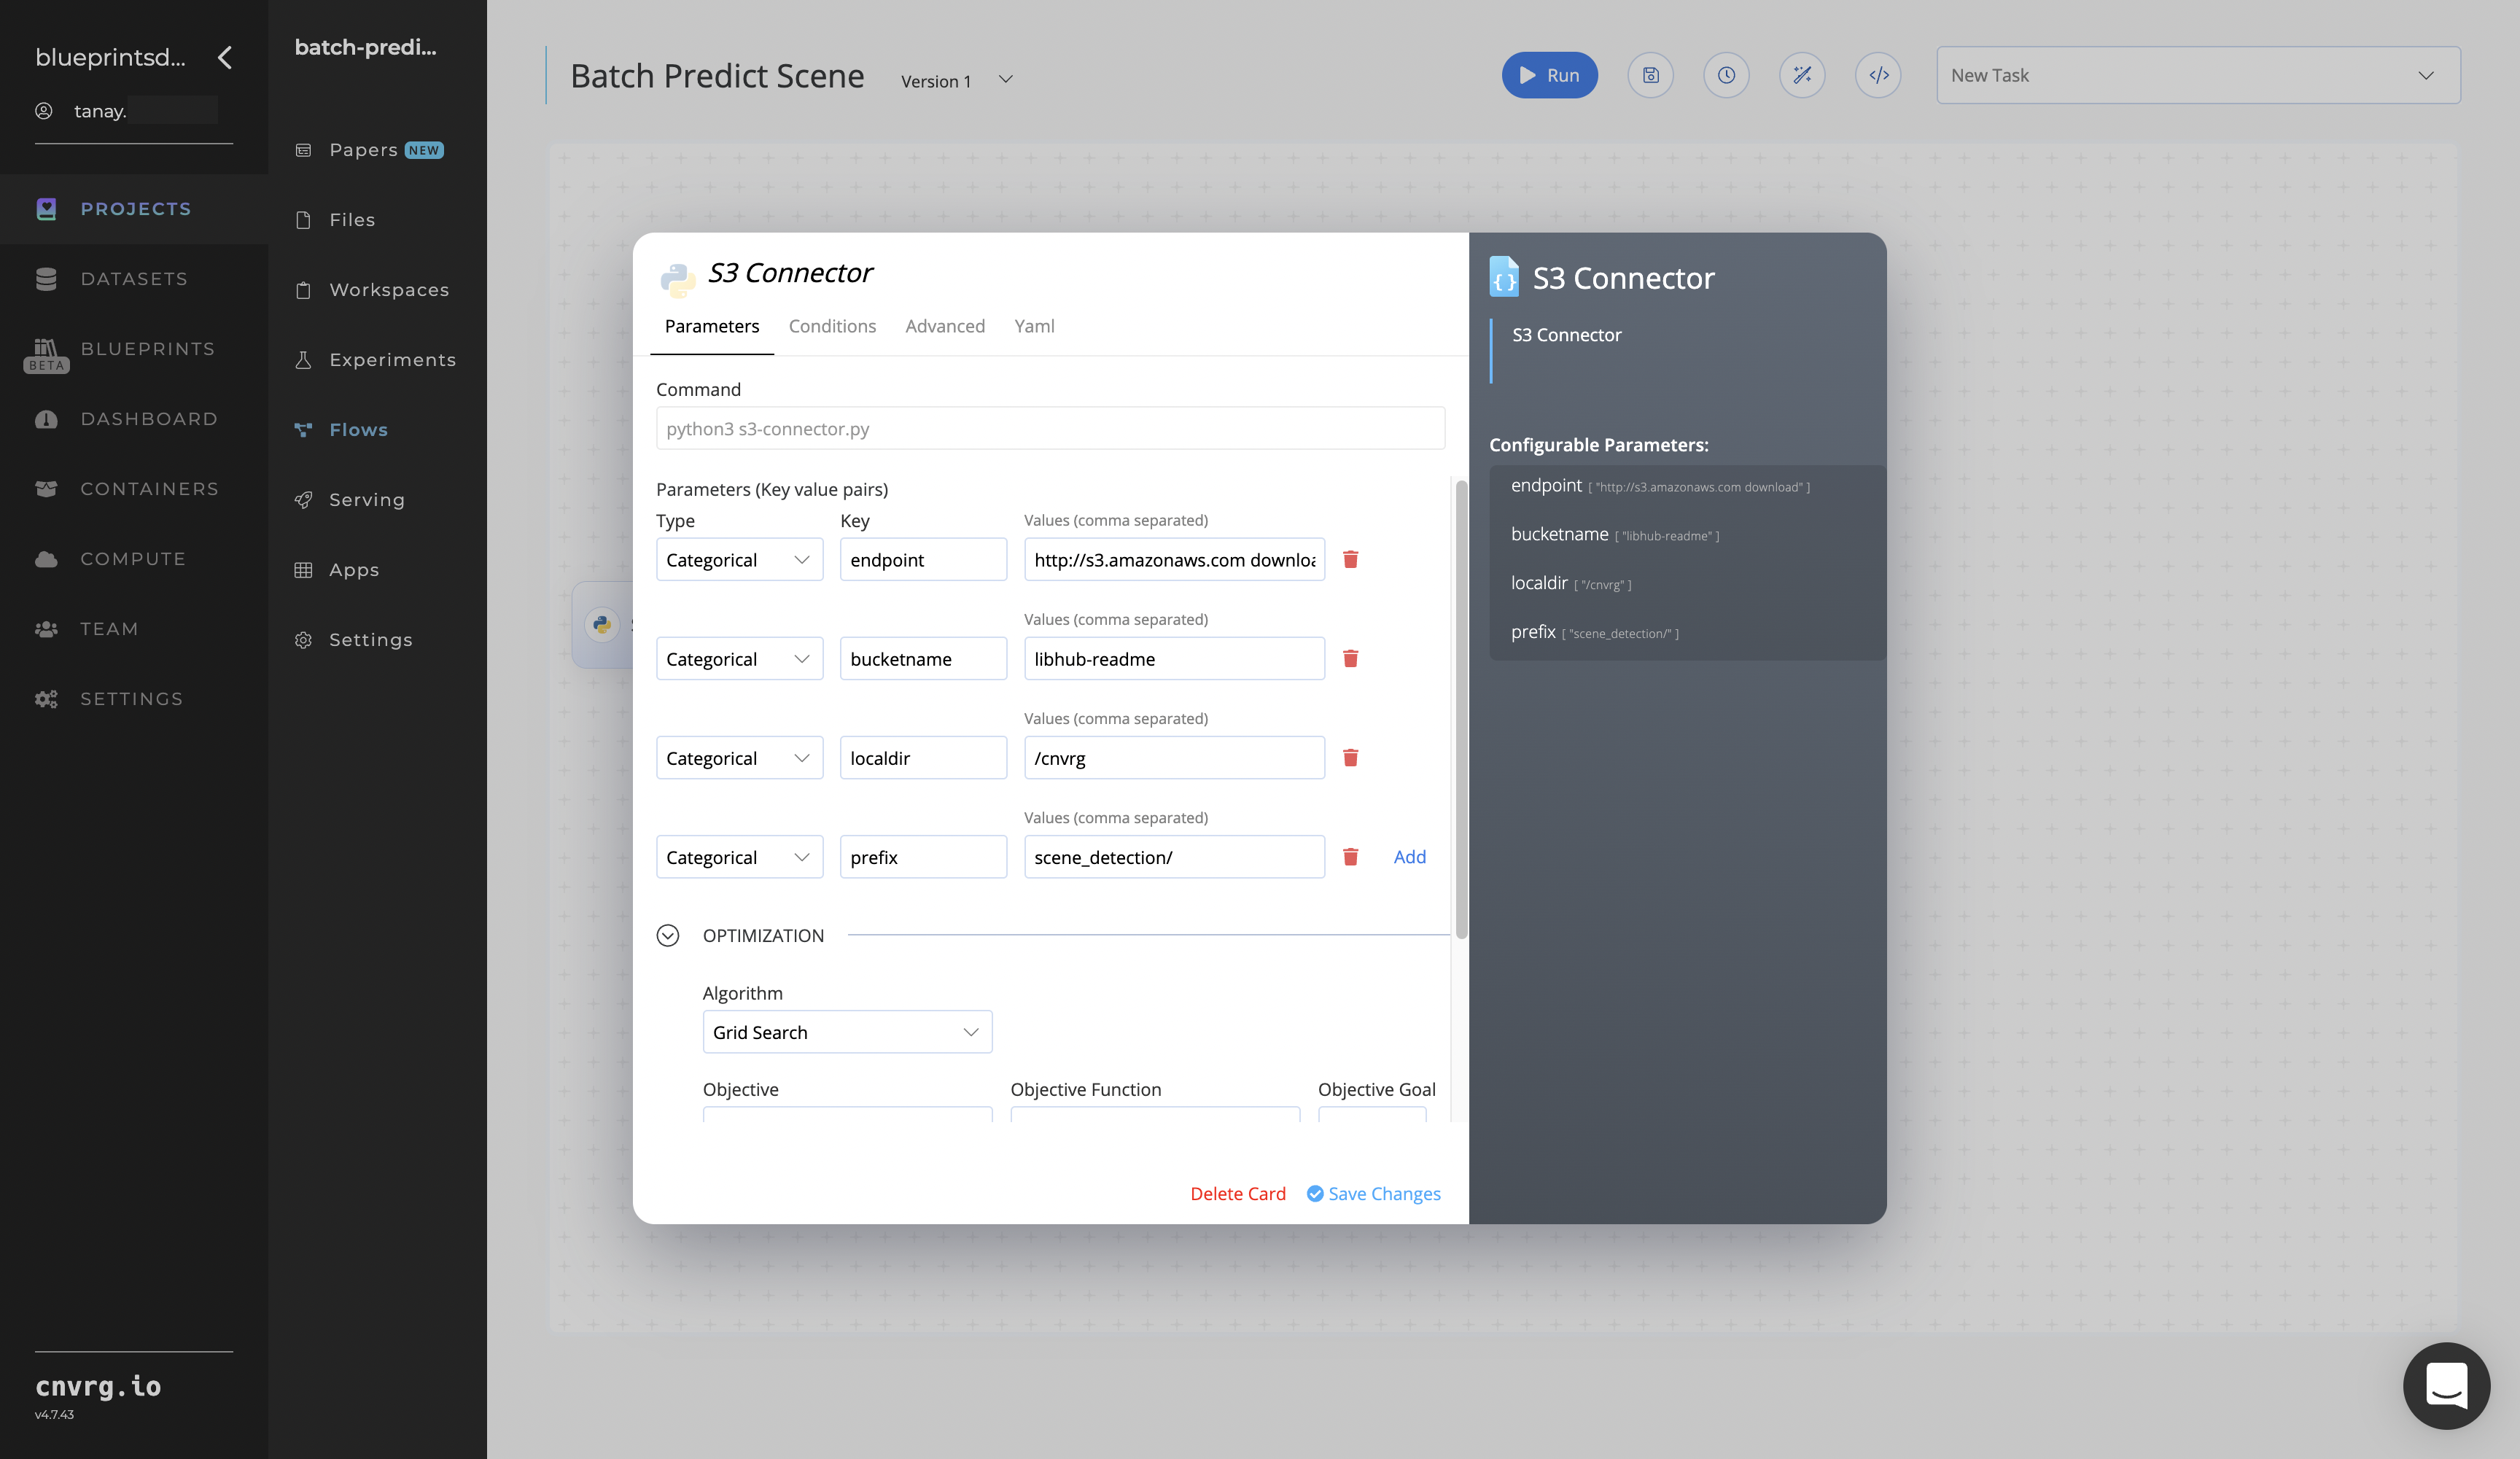
- Key:
bucketname− Value: provide the data bucket name - Key:
prefix− Value: provide the main path to the images folders
- Key:
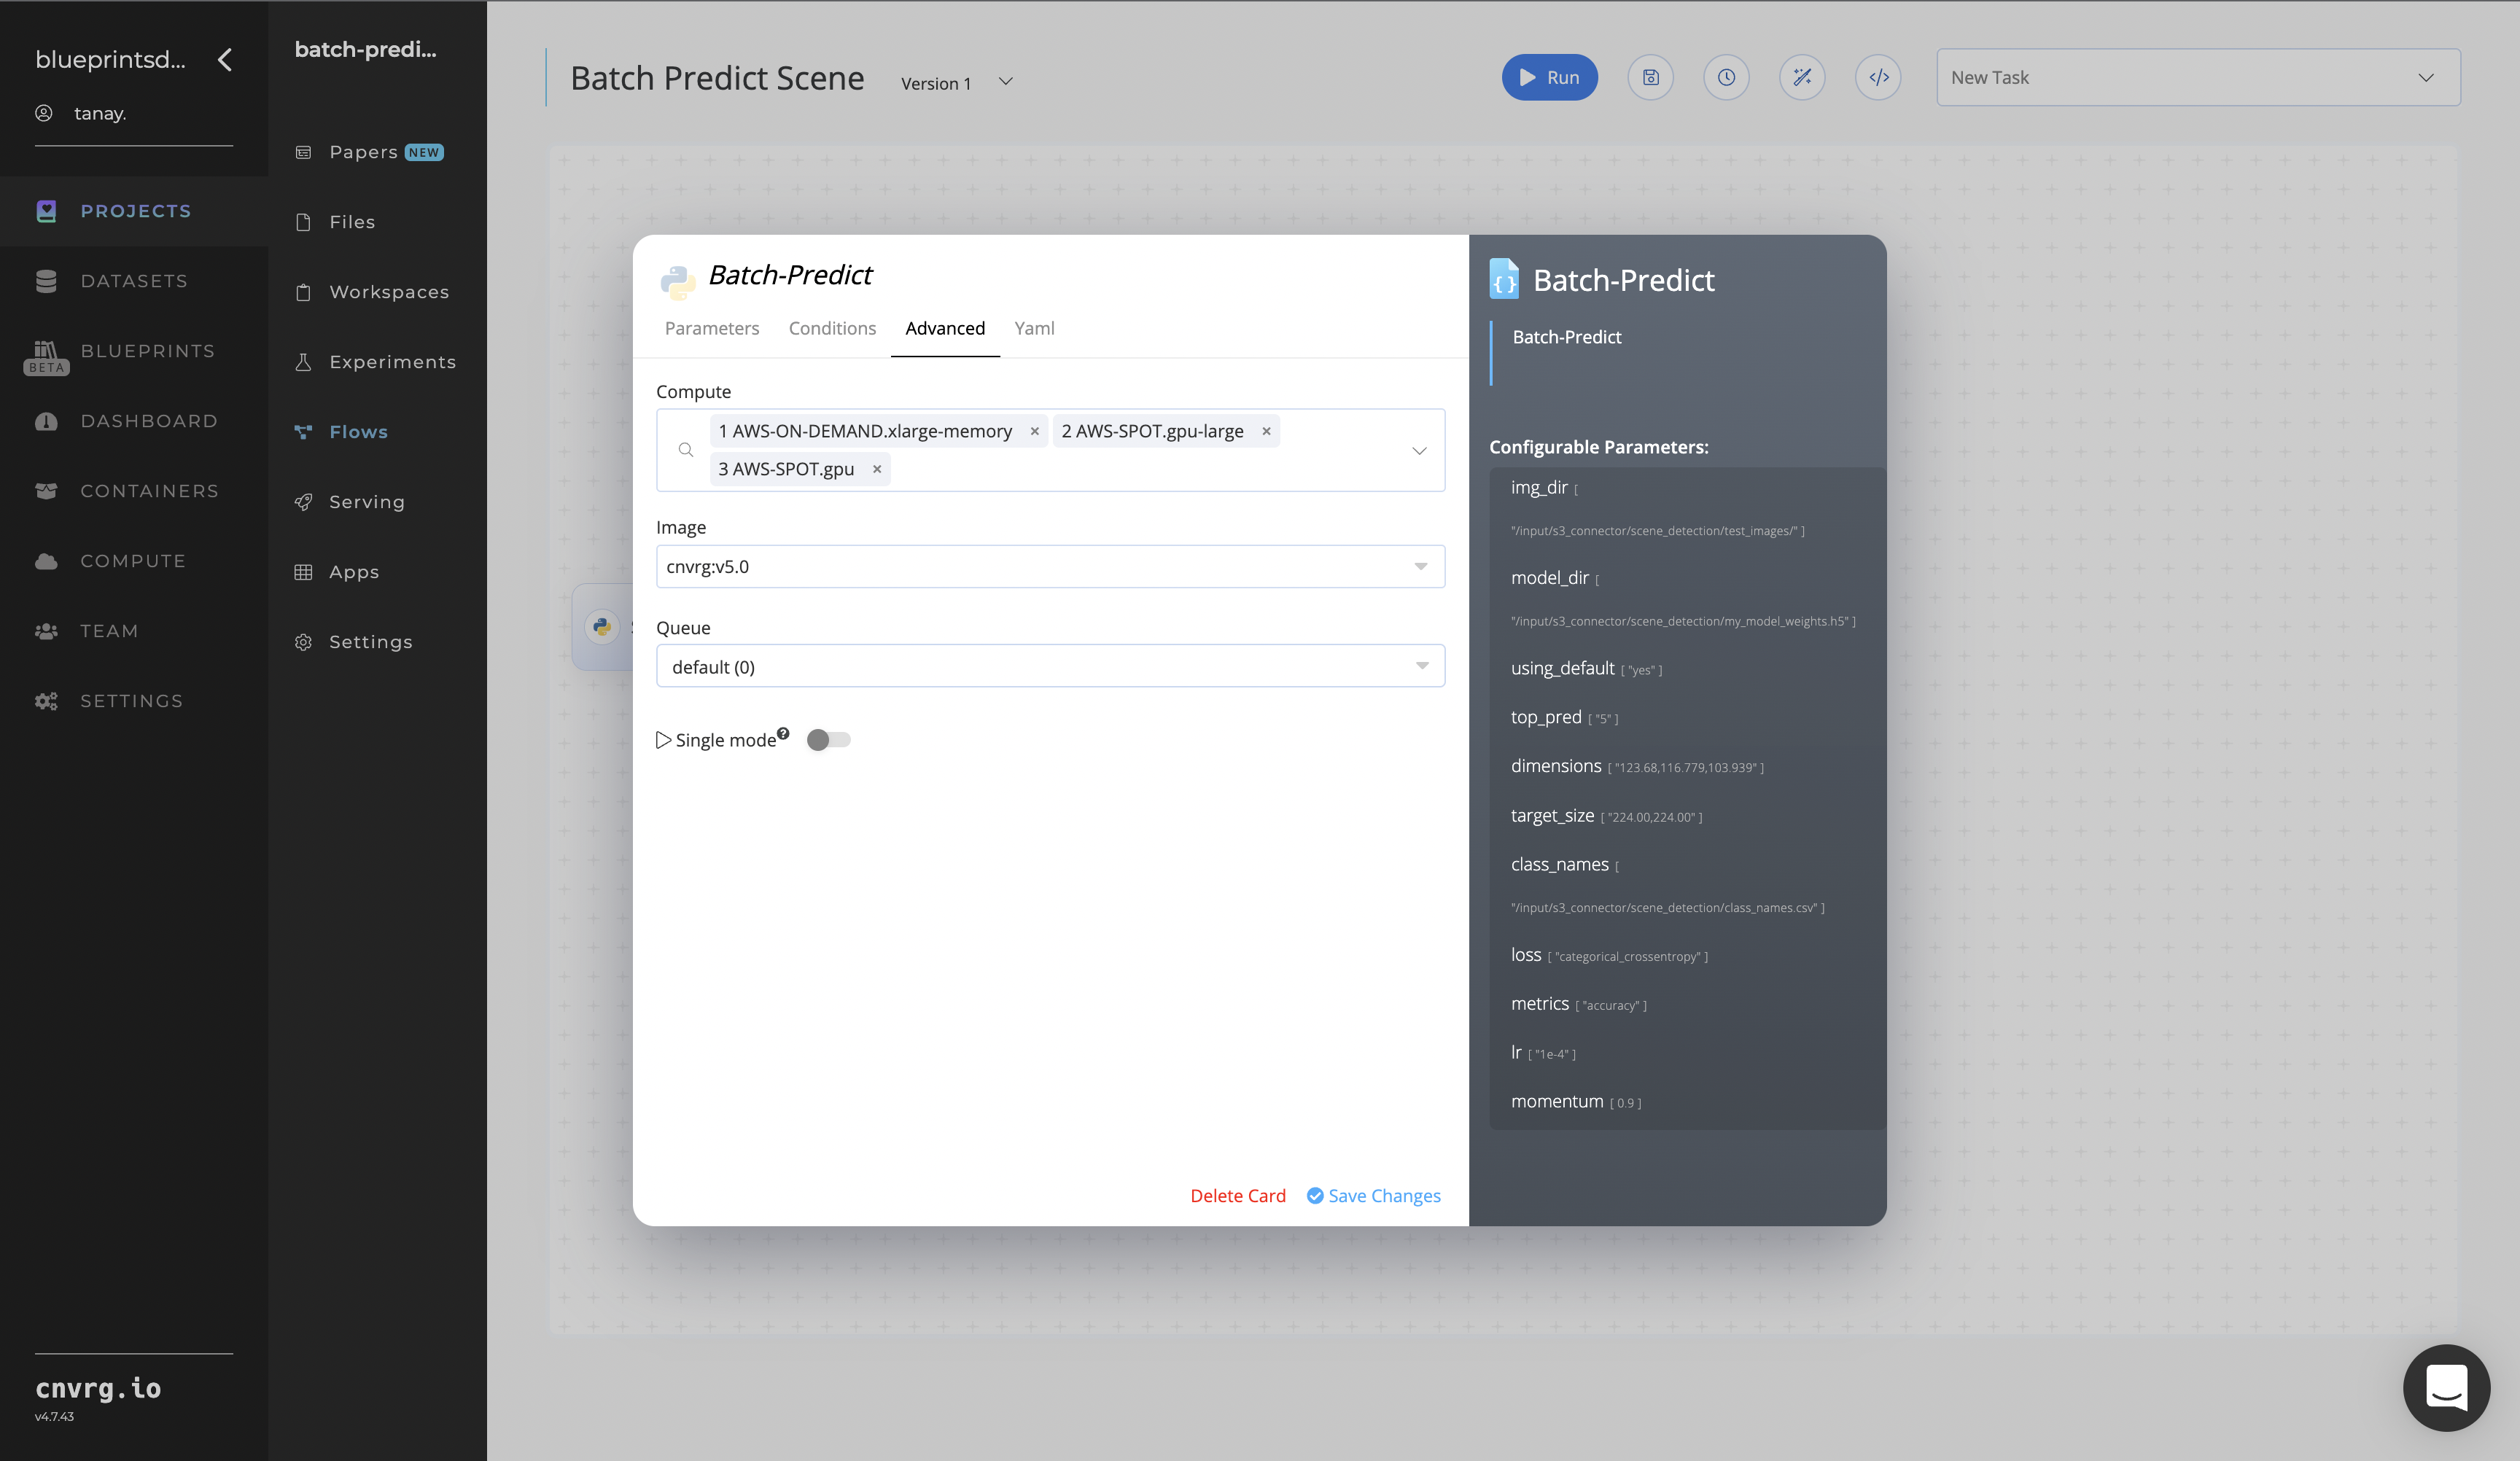
- Click the Advanced tab to change resources to run the blueprint, as required.

- Within the Parameters tab, provide the following Key-Value pair information:
- Click the Batch-Predict task to display its dialog.
Within the Parameters tab, provide the following Key-Value pair information:
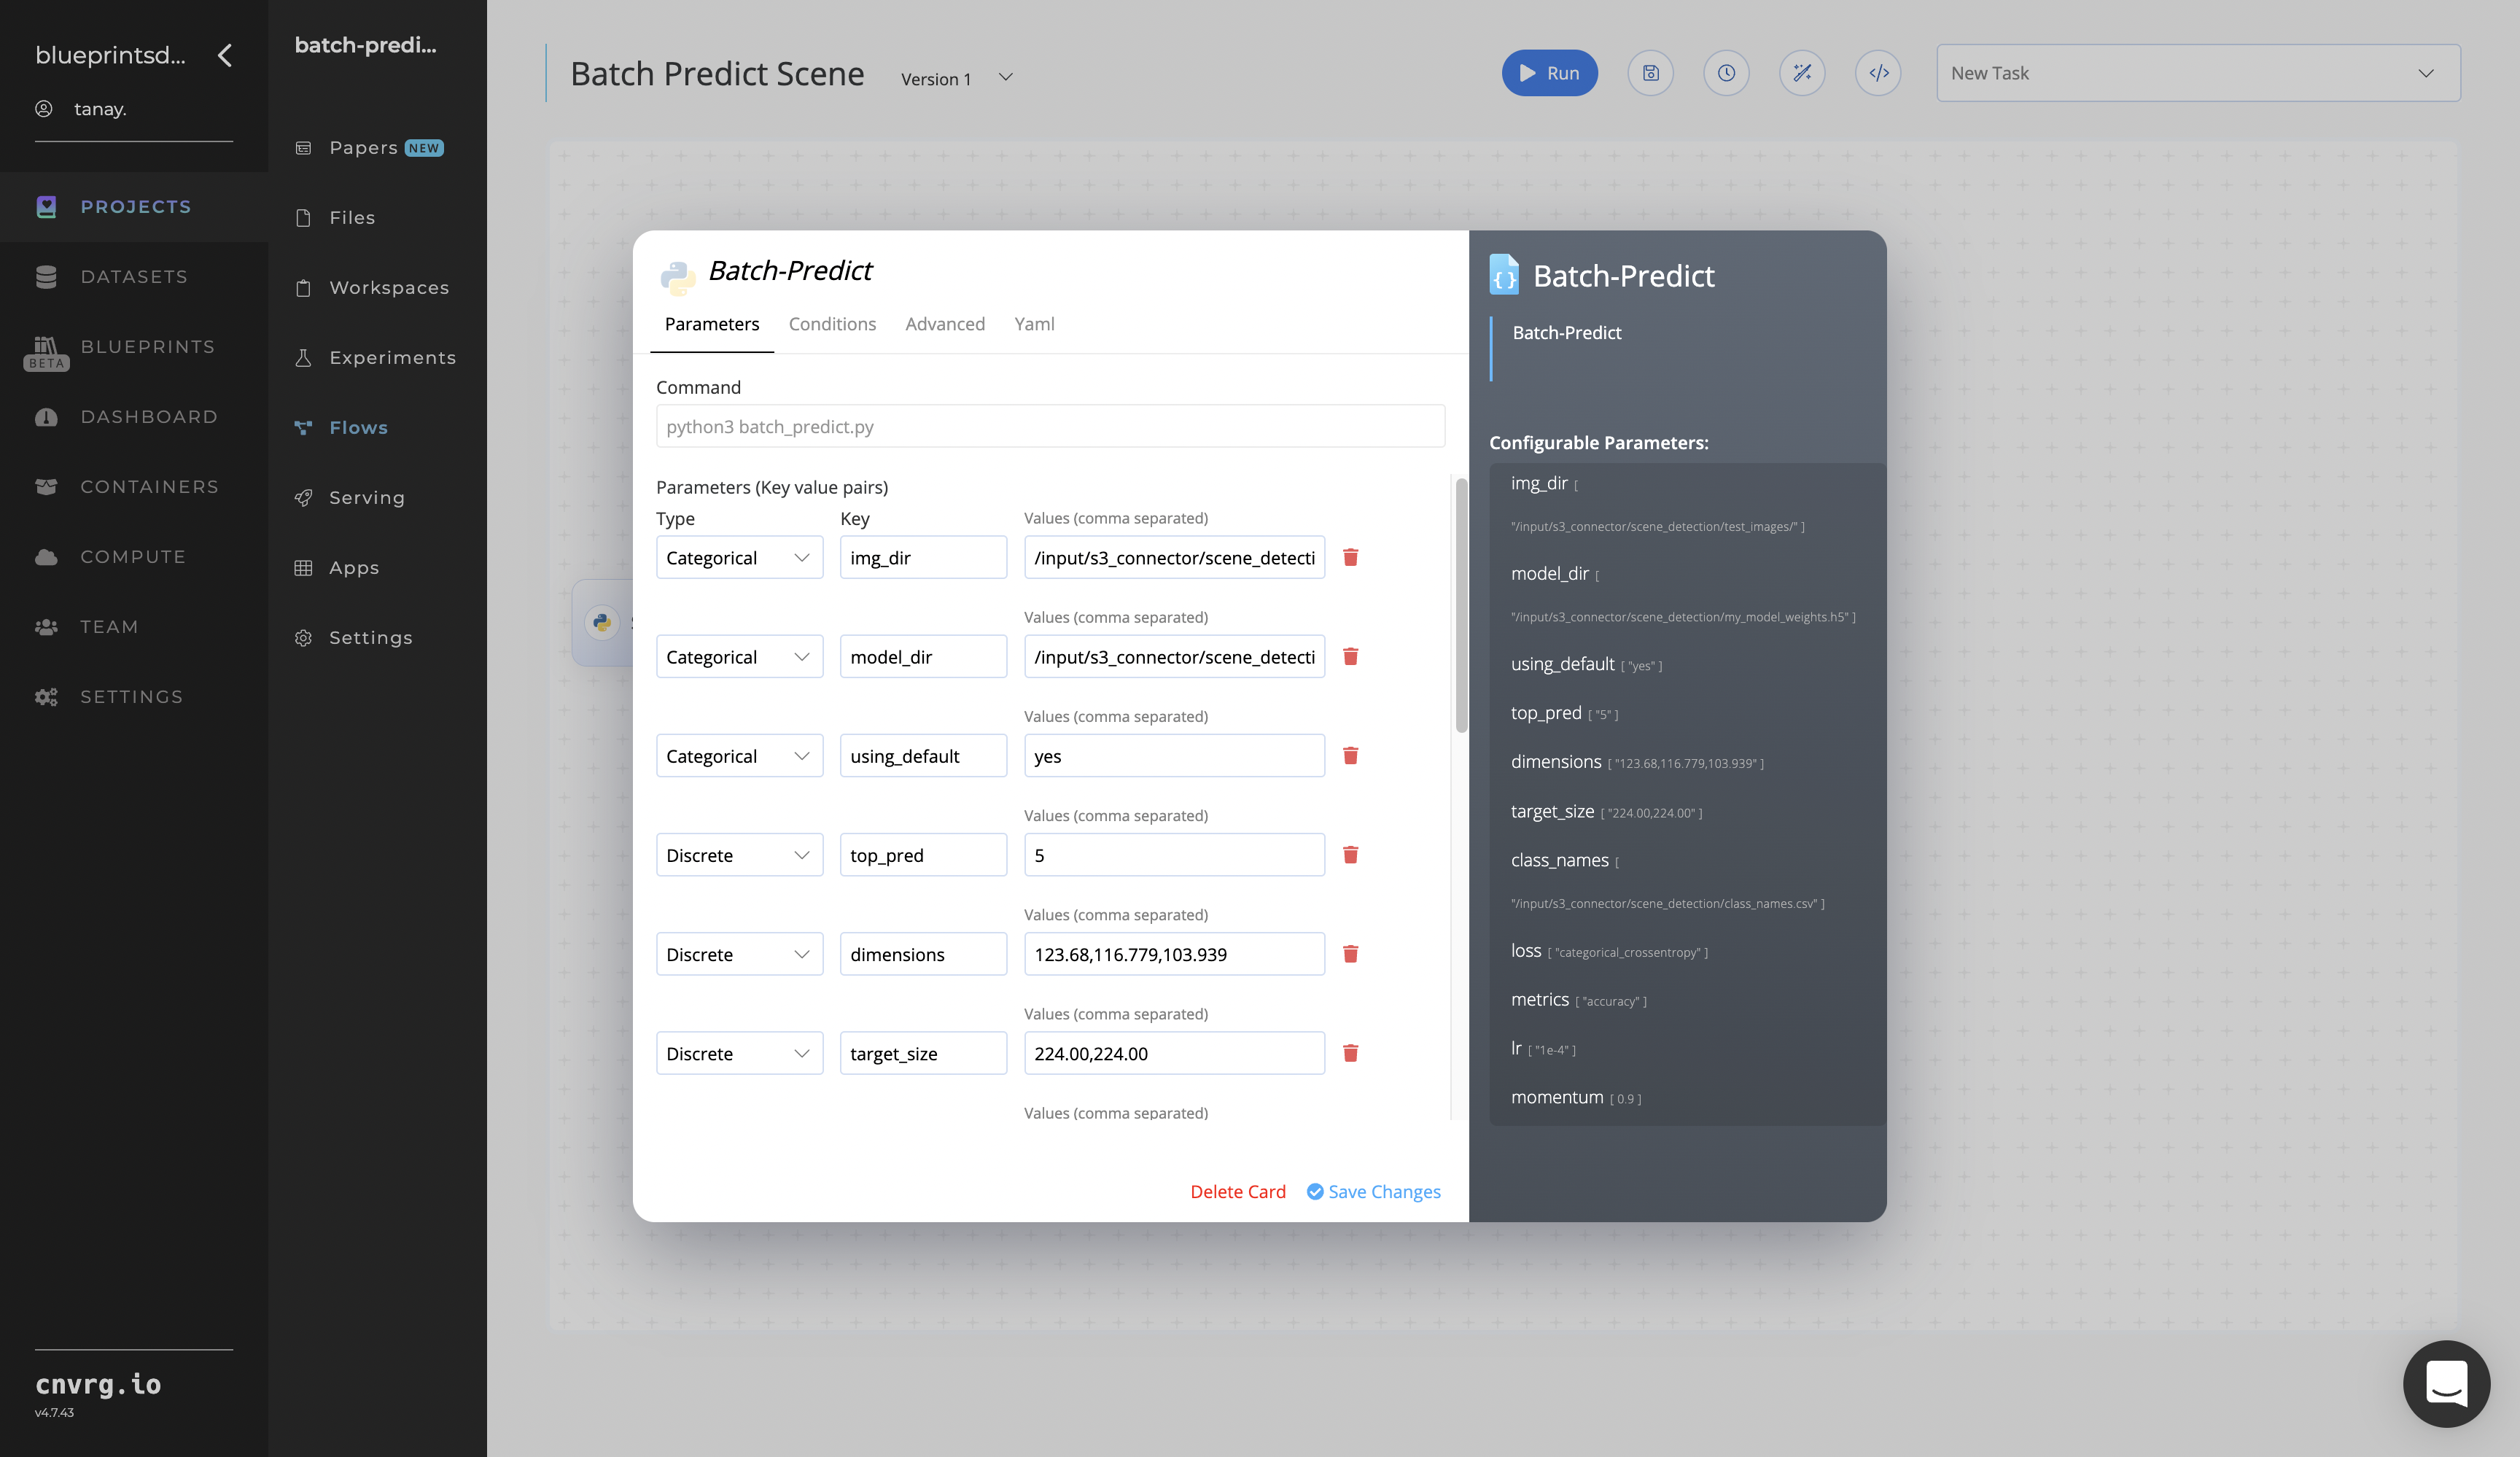
- Key:
img_dir− Value: provide the path to the S3 Connector’s image directory in the following format:/input/s3_connector/img_dir - Key:
model_dir− Value: provide the path to the S3 Connector’s model directory in the following format:/input/s3_connector/model_dir
NOTE
You can use the prebuilt example data paths provided.
- Key:
Click the Advanced tab to change resources to run the blueprint, as required.
- Click the Run button.
 The cnvrg software deploys a scene classification model that predicts scenes in a batch of images and outputs a CSV file with the information about the scenery.
 - Select Batch Predict > Experiments > Artifacts and locate the batch output CSV file.
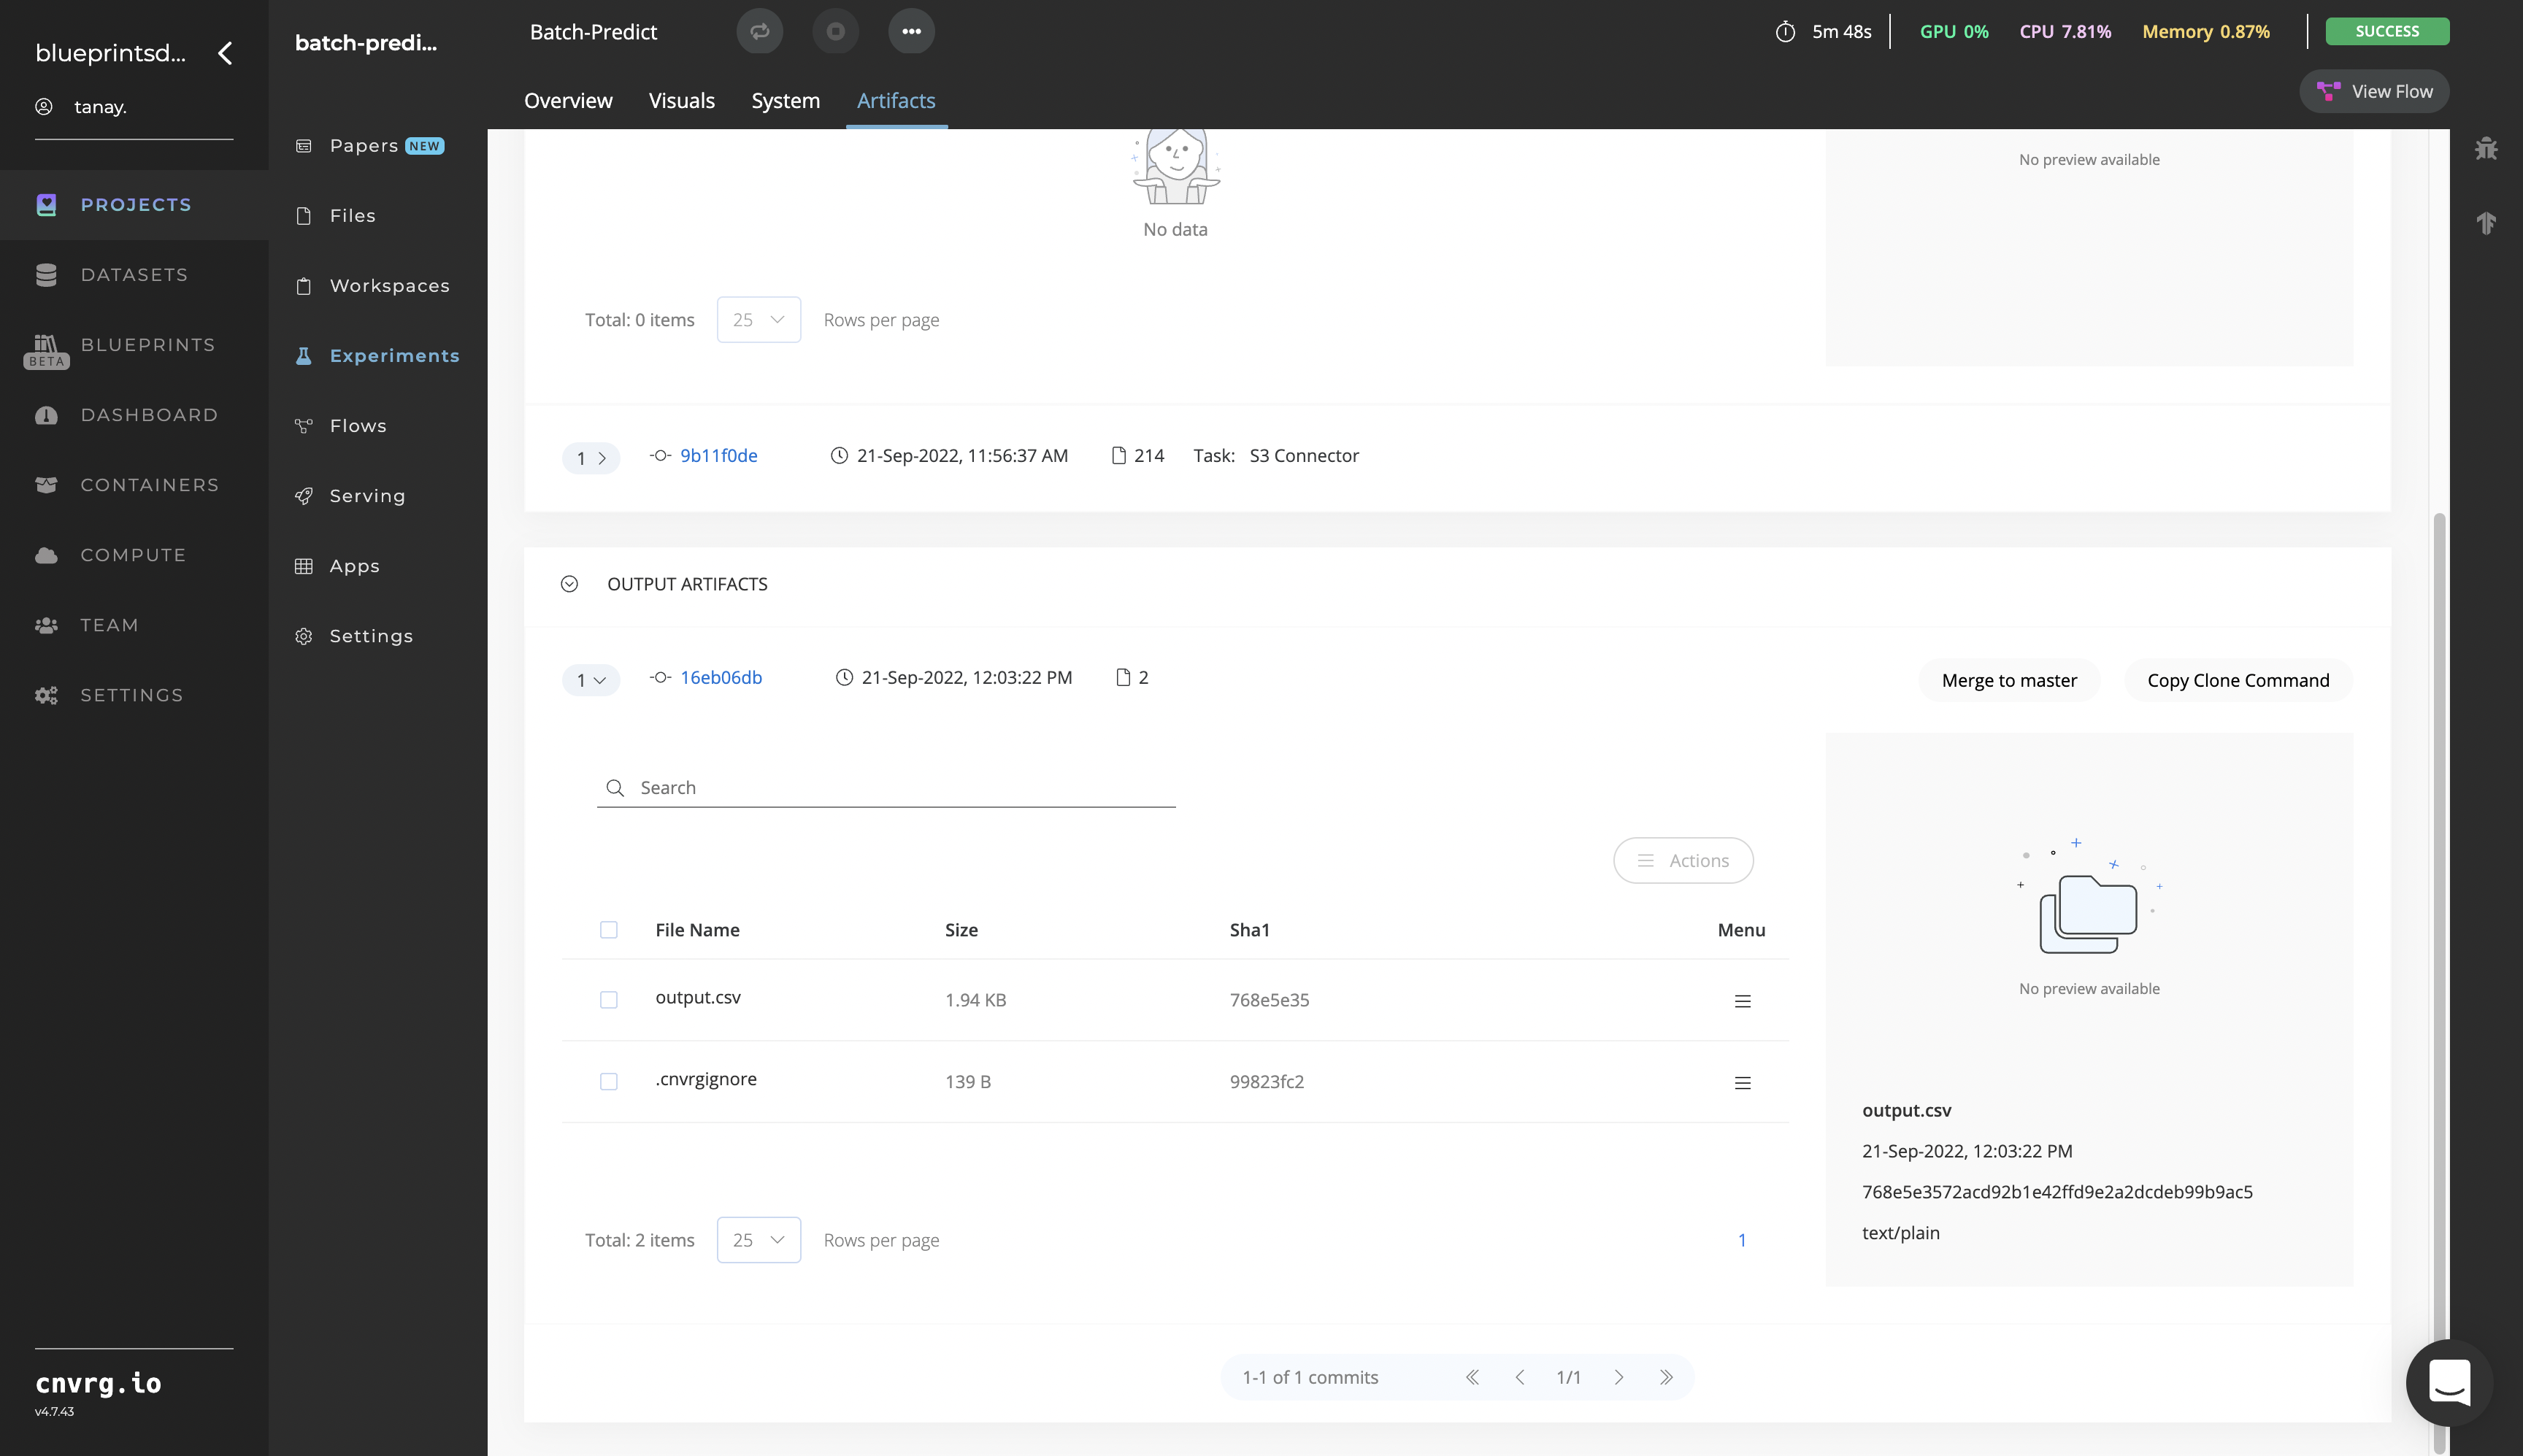
- Select the output.csv File Name, click the right menu icon, and select Open File to view the output CSV file.
A custom model that classifies natural scenery in images has now been deployed in batch mode. For information on this blueprint's software version and release details, click here.
# Connected Libraries
Refer to the following libraries connected to this blueprint:
# Related Blueprints
Refer to the following blueprints related to this batch-predict blueprint:
- Scene Classification Train
- Scene Classification Inference
- Object Detection Train
- Fire Detection Train
# Inference
Scene classification aims at classifying an image’s background scenery to one of predefined scene categories. Large datasets including samplings of diverse real-world natural scenery enables such scene representations and classifications.
# Purpose
Use this inference blueprint to immediately detect natural scenery in images. To use this pretrained scene classification model, create a ready-to-use API-endpoint that can be integrated with your data and application.
This inference blueprint uses a pretrained Vgg16_365 model, which is a VGG16 model trained on the Places-365 dataset. To use custom scene data according to your specific requirements, run this counterpart’s training blueprint, which trains the model and establishes an endpoint based on the newly trained model.
# Instructions
NOTE
The minimum resource recommendations to run this blueprint are 3.5 CPU and 8 GB RAM.
Complete the following steps to deploy this scene-classifier API endpoint:
- Click the Use Blueprint button.
- In the dialog, select the relevant compute to deploy the API endpoint and click the Start button.
- The cnvrg software redirects to your endpoint. Complete one or both of the following options:
- Use the Try it Live section with any natural scene image to check your model.
- Use the bottom integration panel to integrate your API with your code by copying in your code snippet.
- Use the Try it Live section with any natural scene image to check your model.
An API endpoint that classifies natural scenes in images has now been deployed. For information on this blueprint's software version and release details, click here.
# Related Blueprints
Refer to the following blueprints related to this inference blueprint:
- Scene Classification Training
- Scene Classification Batch Predict
- Object Detection Inference
- Fire Detection Inference
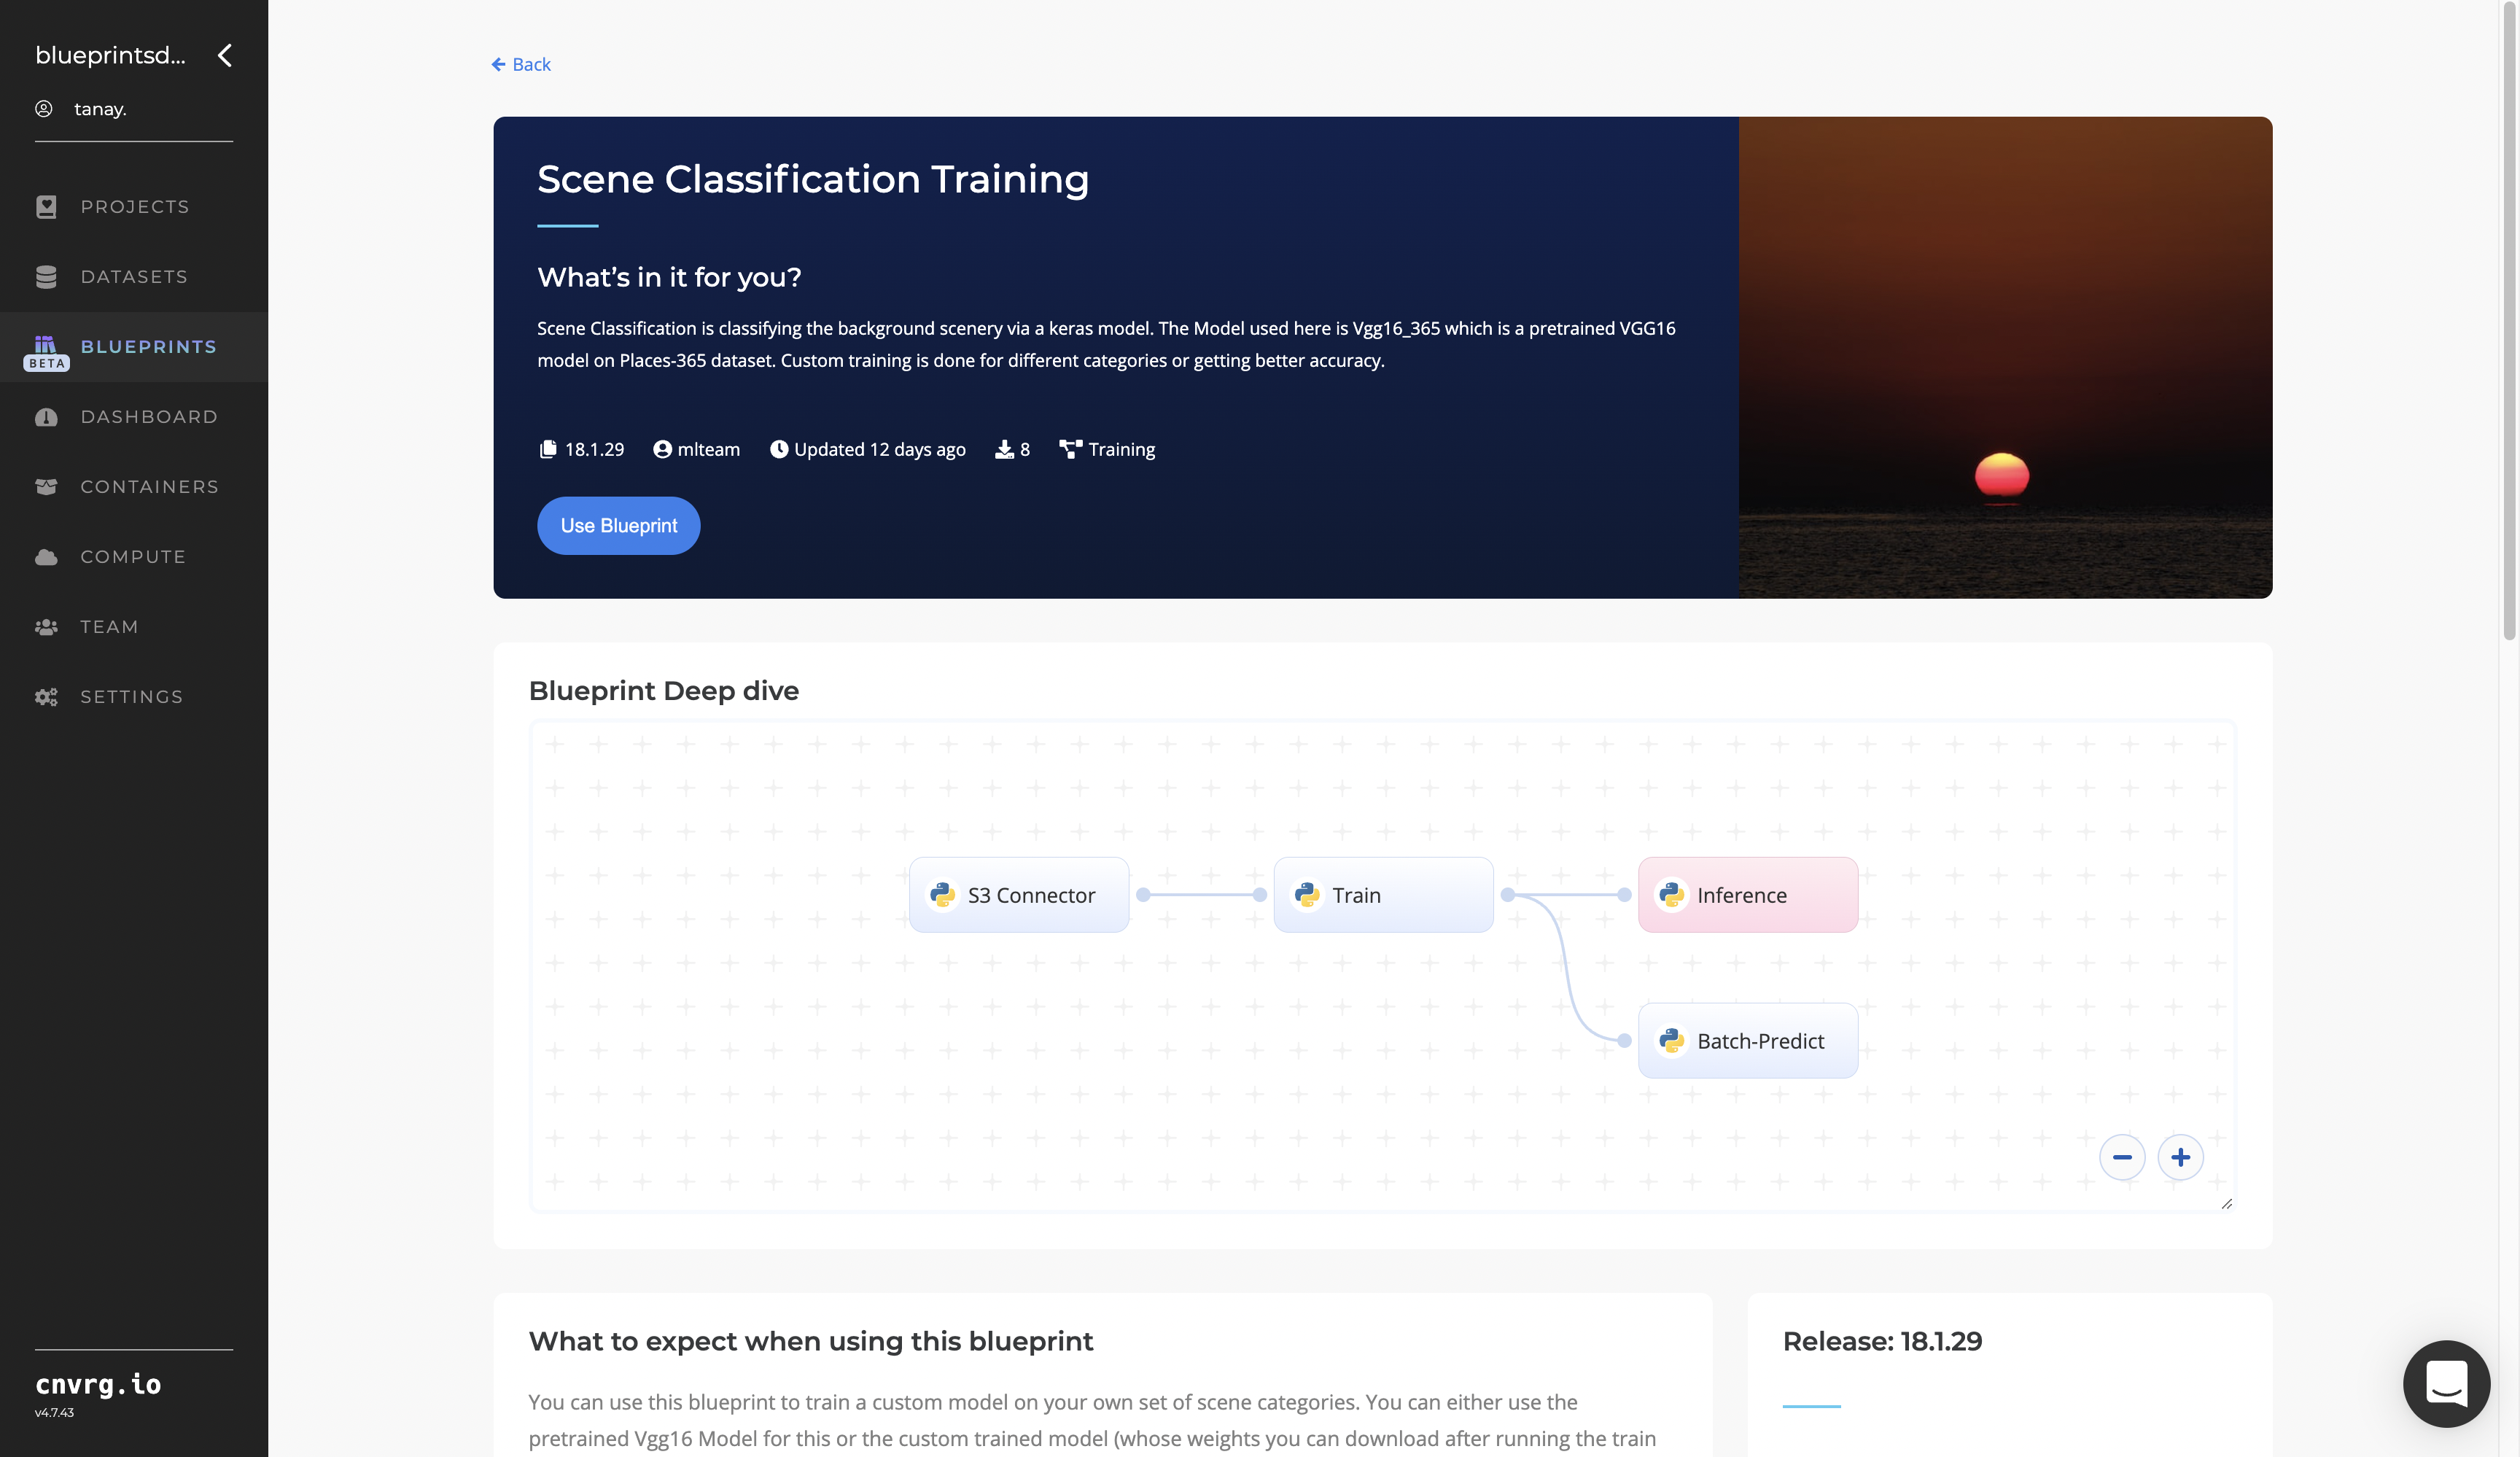
# Training
Scene classification involves classifying an image’s background scenery to one of predefined scene categories. Large datasets including samplings of diverse real-world natural scenery enables such scene representations and classifications.
# Overview
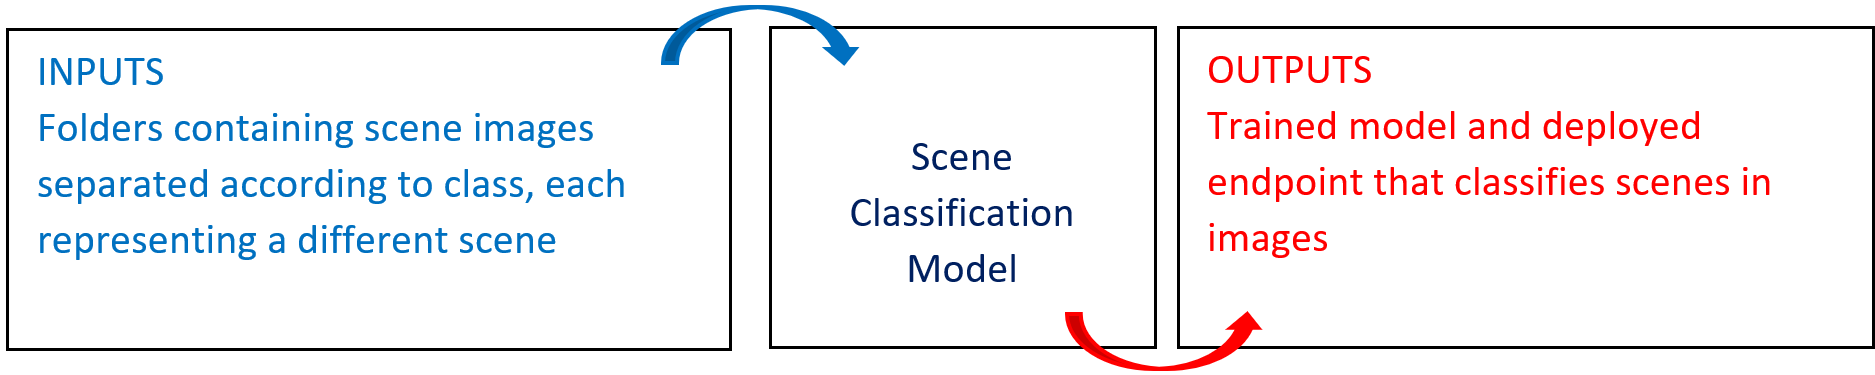
The following diagram provides an overview of this blueprint's inputs and outputs.
# Purpose
Use this training blueprint to train a custom model on your own set of scene categories. The training and fine-tuning are performed on the pretrained VGG16_365 model (VGG16 model trained on the Places-365 dataset) with the data file the user uploads as a dataset. This blueprint also establishes an endpoint that can be used to classify scenes in images based on the newly trained model.
Users can use either the pretrained VGG16_365 model or a custom-trained model, the latter’s weights of which can be downloaded after the blueprint run. To train this model with your data, provide in the S3 Connector an img-dir dataset directory with multiple subdirectories containing the different image classes, organized like the following:
- -class1 – first category of natural sceneries
- -class2 – second category of natural sceneries
- -class3 – third category of natural sceneries
# Deep Dive
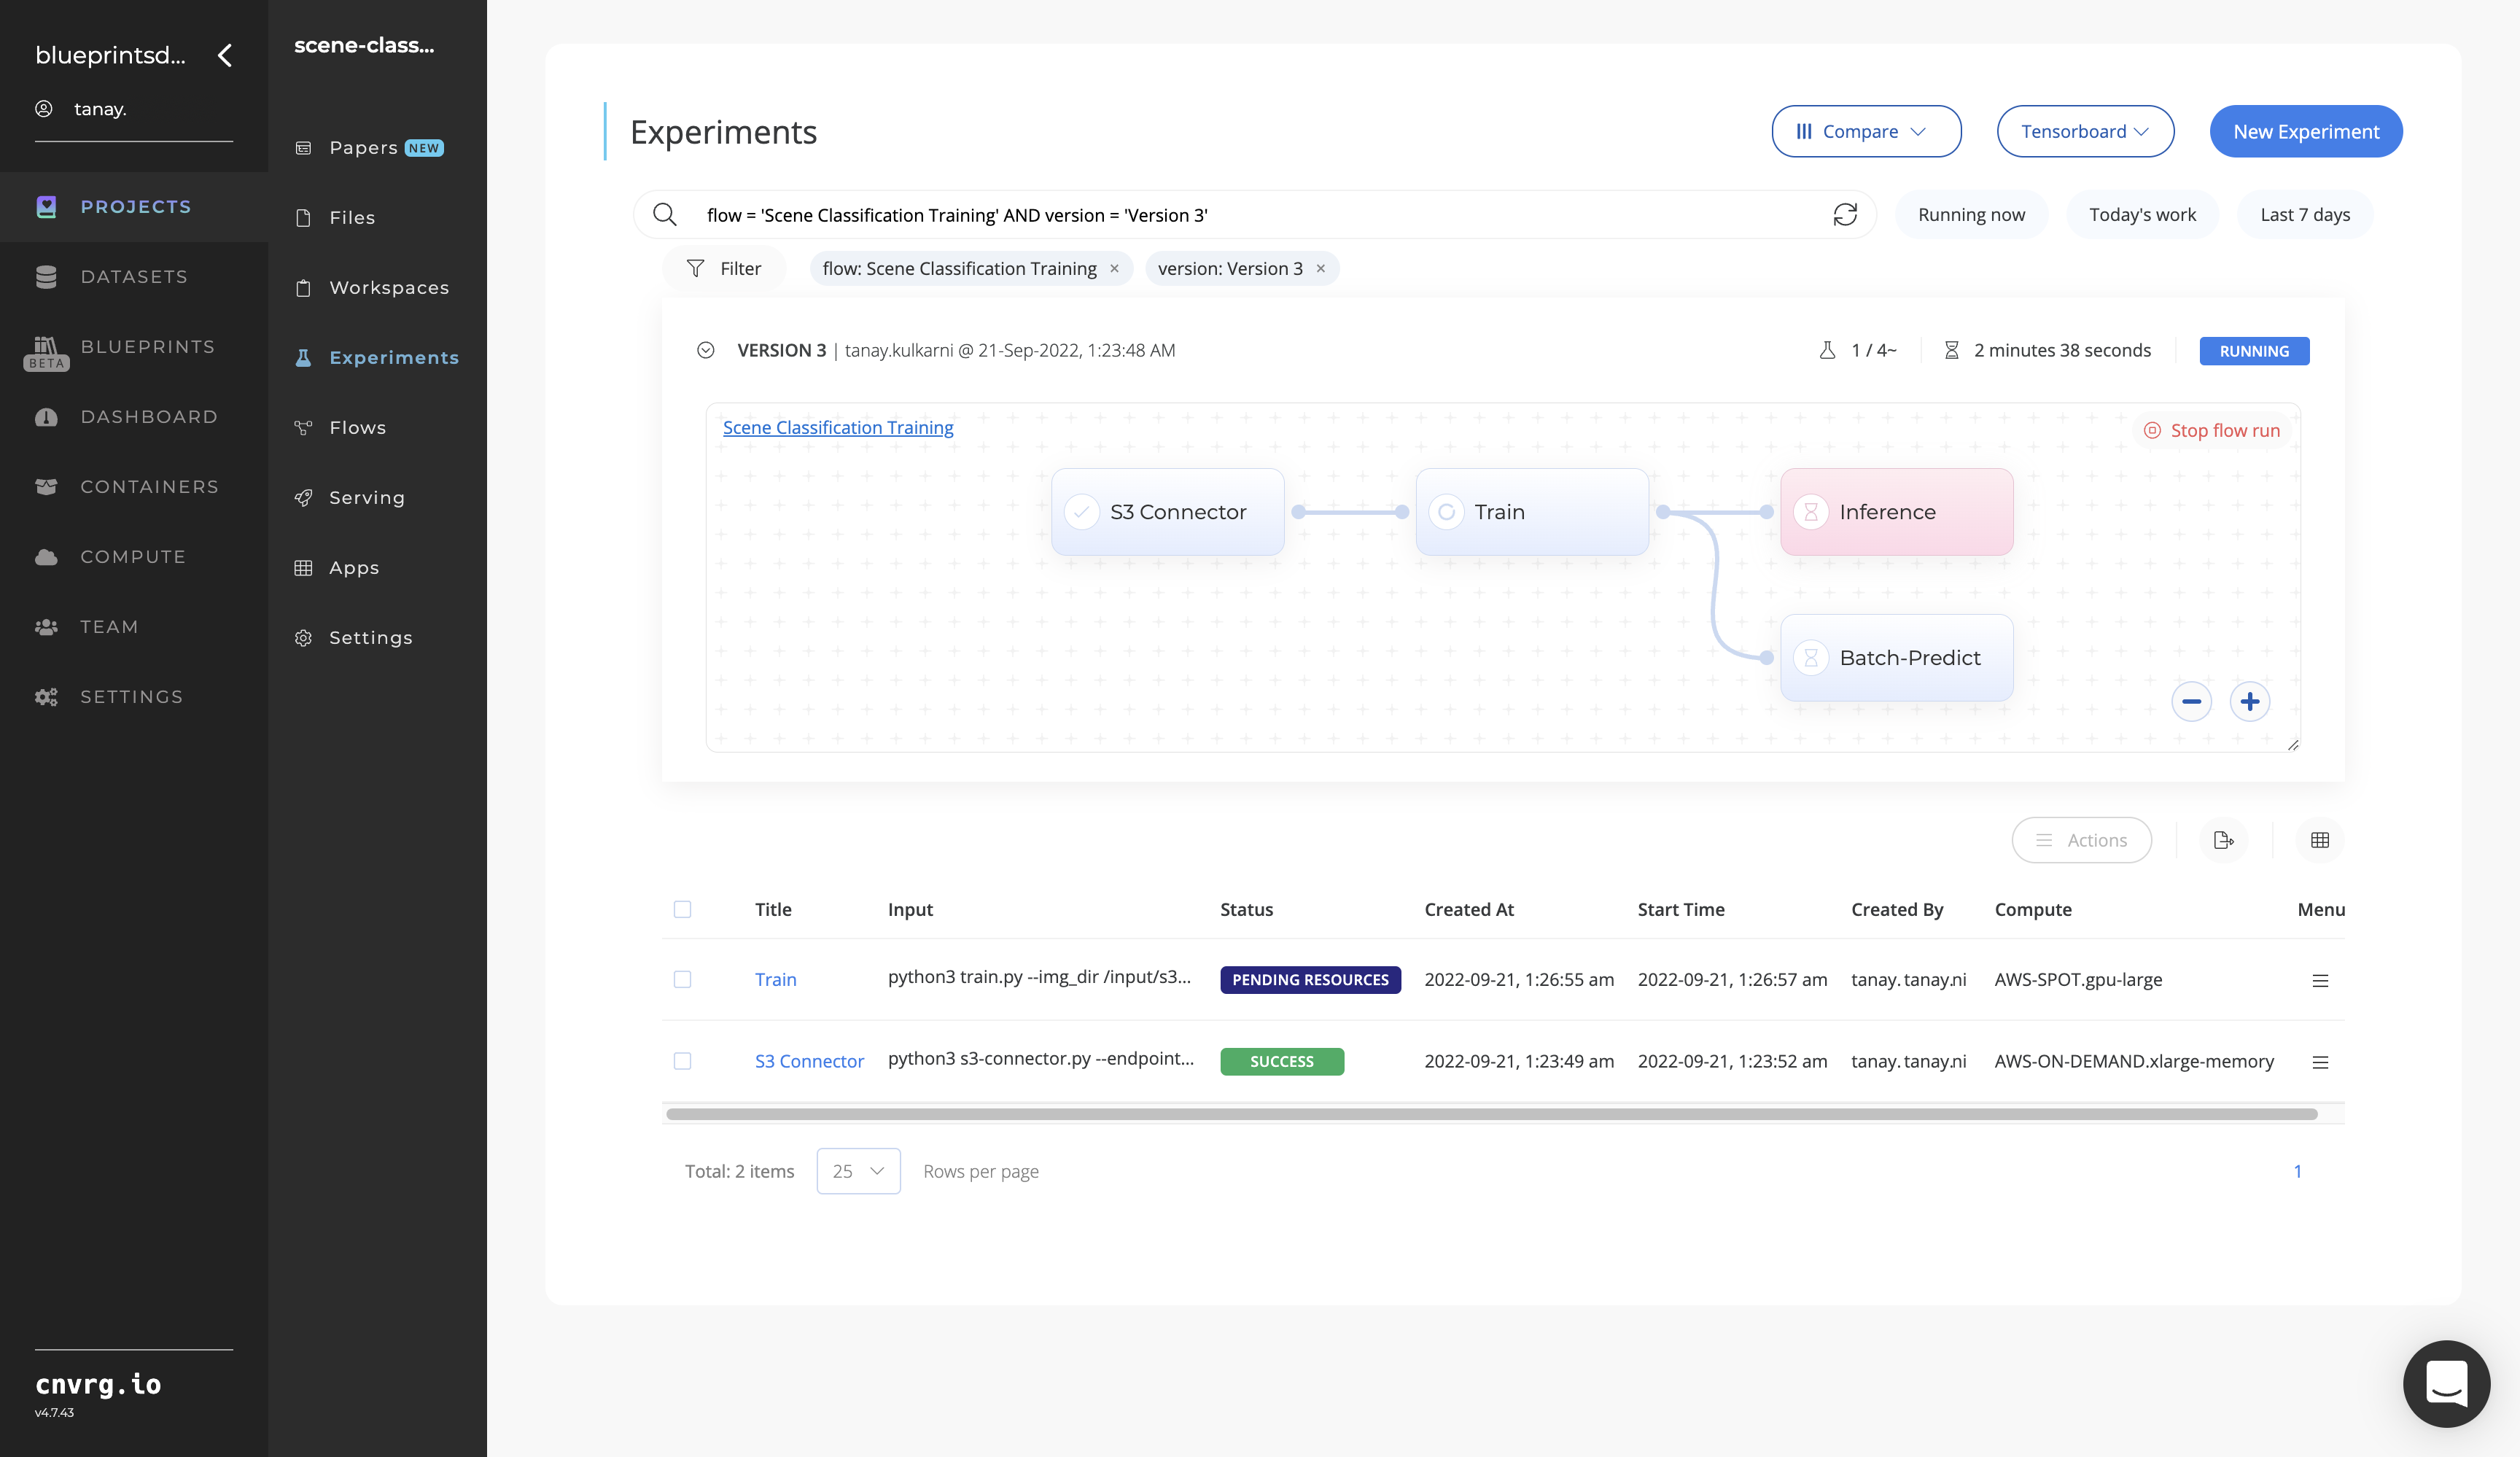
The following flow diagram illustrates this blueprint's pipeline:
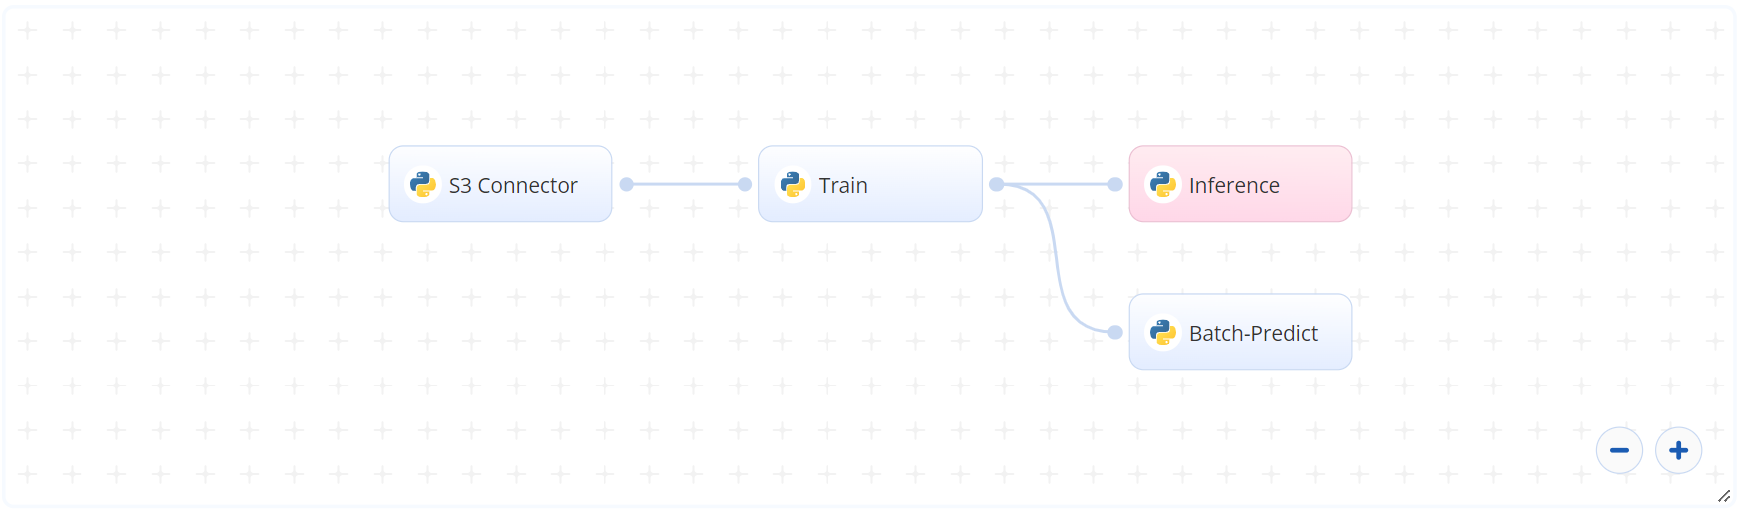
# Flow
The following list provides a high-level flow of this blueprint’s run:
- In the S3 Connector, provide the data bucket name and the directory path where the images are located.
- In the Train task, provide the
img_dirpath to the images directory including the previous S3 prefix. - In the Batch-Predict task, provide the
img_dirandmodel_dirdirectory paths to the S3 Connector and Train task, respectively.
# Arguments/Artifacts
For more information and examples of this blueprint's tasks, its inputs, and outputs, click here.
# Train Inputs
--img_diris the path name of the directory storing images to be classified.--epochsis number of iterations on which the model is trained.--dimensionsare the mean values of the image data generator arguments (where images are resized).--training_args(float) is a set of image preprocessing parameters to be used to preprocess the images. The important process of training data augmentation is usually recommended for small datasets. The parameters specify random rotations, zooms, translations, shears, and flips to the data during model training. Defaults:30,0.15,0.2,0.2,0.15.--target_size(float) is the resolution (in pixels) the image is resized to before implemented in the model. The VGG16 model was originally trained on 224×224 pixel images. Default:0.5.--class_namesare the categories the custom-trained model is to output its results.--lossis the loss function on which the compiling takes place. Other loss function options include binary_crossentropy, sparse_categorical_crossentropy, poisson, kl_divergence, mean_squared_error, mean_absolute_error, mean_absolute_percentage_error, mean_squared_logarithmic_error, cosine_similarity, huber, log_cosh. Default:categorical_crossentropy.--metricsare the metrics on which the compiling takes place. Options include BinaryAccuracy, CategoricalAccuracy, SparseCategoricalAccuracy, TopKCategoricalAccuracy, and SparseTopKCategoricalAccuracy. Default:accuracy.--lris the learning rate schedules that help converge the optimization process. Default:1e-4.--momentumis the momentum to accelerate training while compiling. Default:0.9.
# Train Outputs
--my_model_weights.h5is the name of the file containing the model weights that the training has saved. The Batch Predict task uses a model with these weights.--class_names.csvis the file that contains the mapping of the categories and their indices used for custom training.
# Instructions
NOTE
The minimum resource recommendations to run this blueprint are 3.5 CPU and 8 GB RAM.
Complete the following steps to train the scene-classifier model:
Click the Use Blueprint button. The cnvrg Blueprint Flow page displays.
In the flow, click the S3 Connector task to display its dialog.
- Within the Parameters tab, provide the following Key-Value pair information:
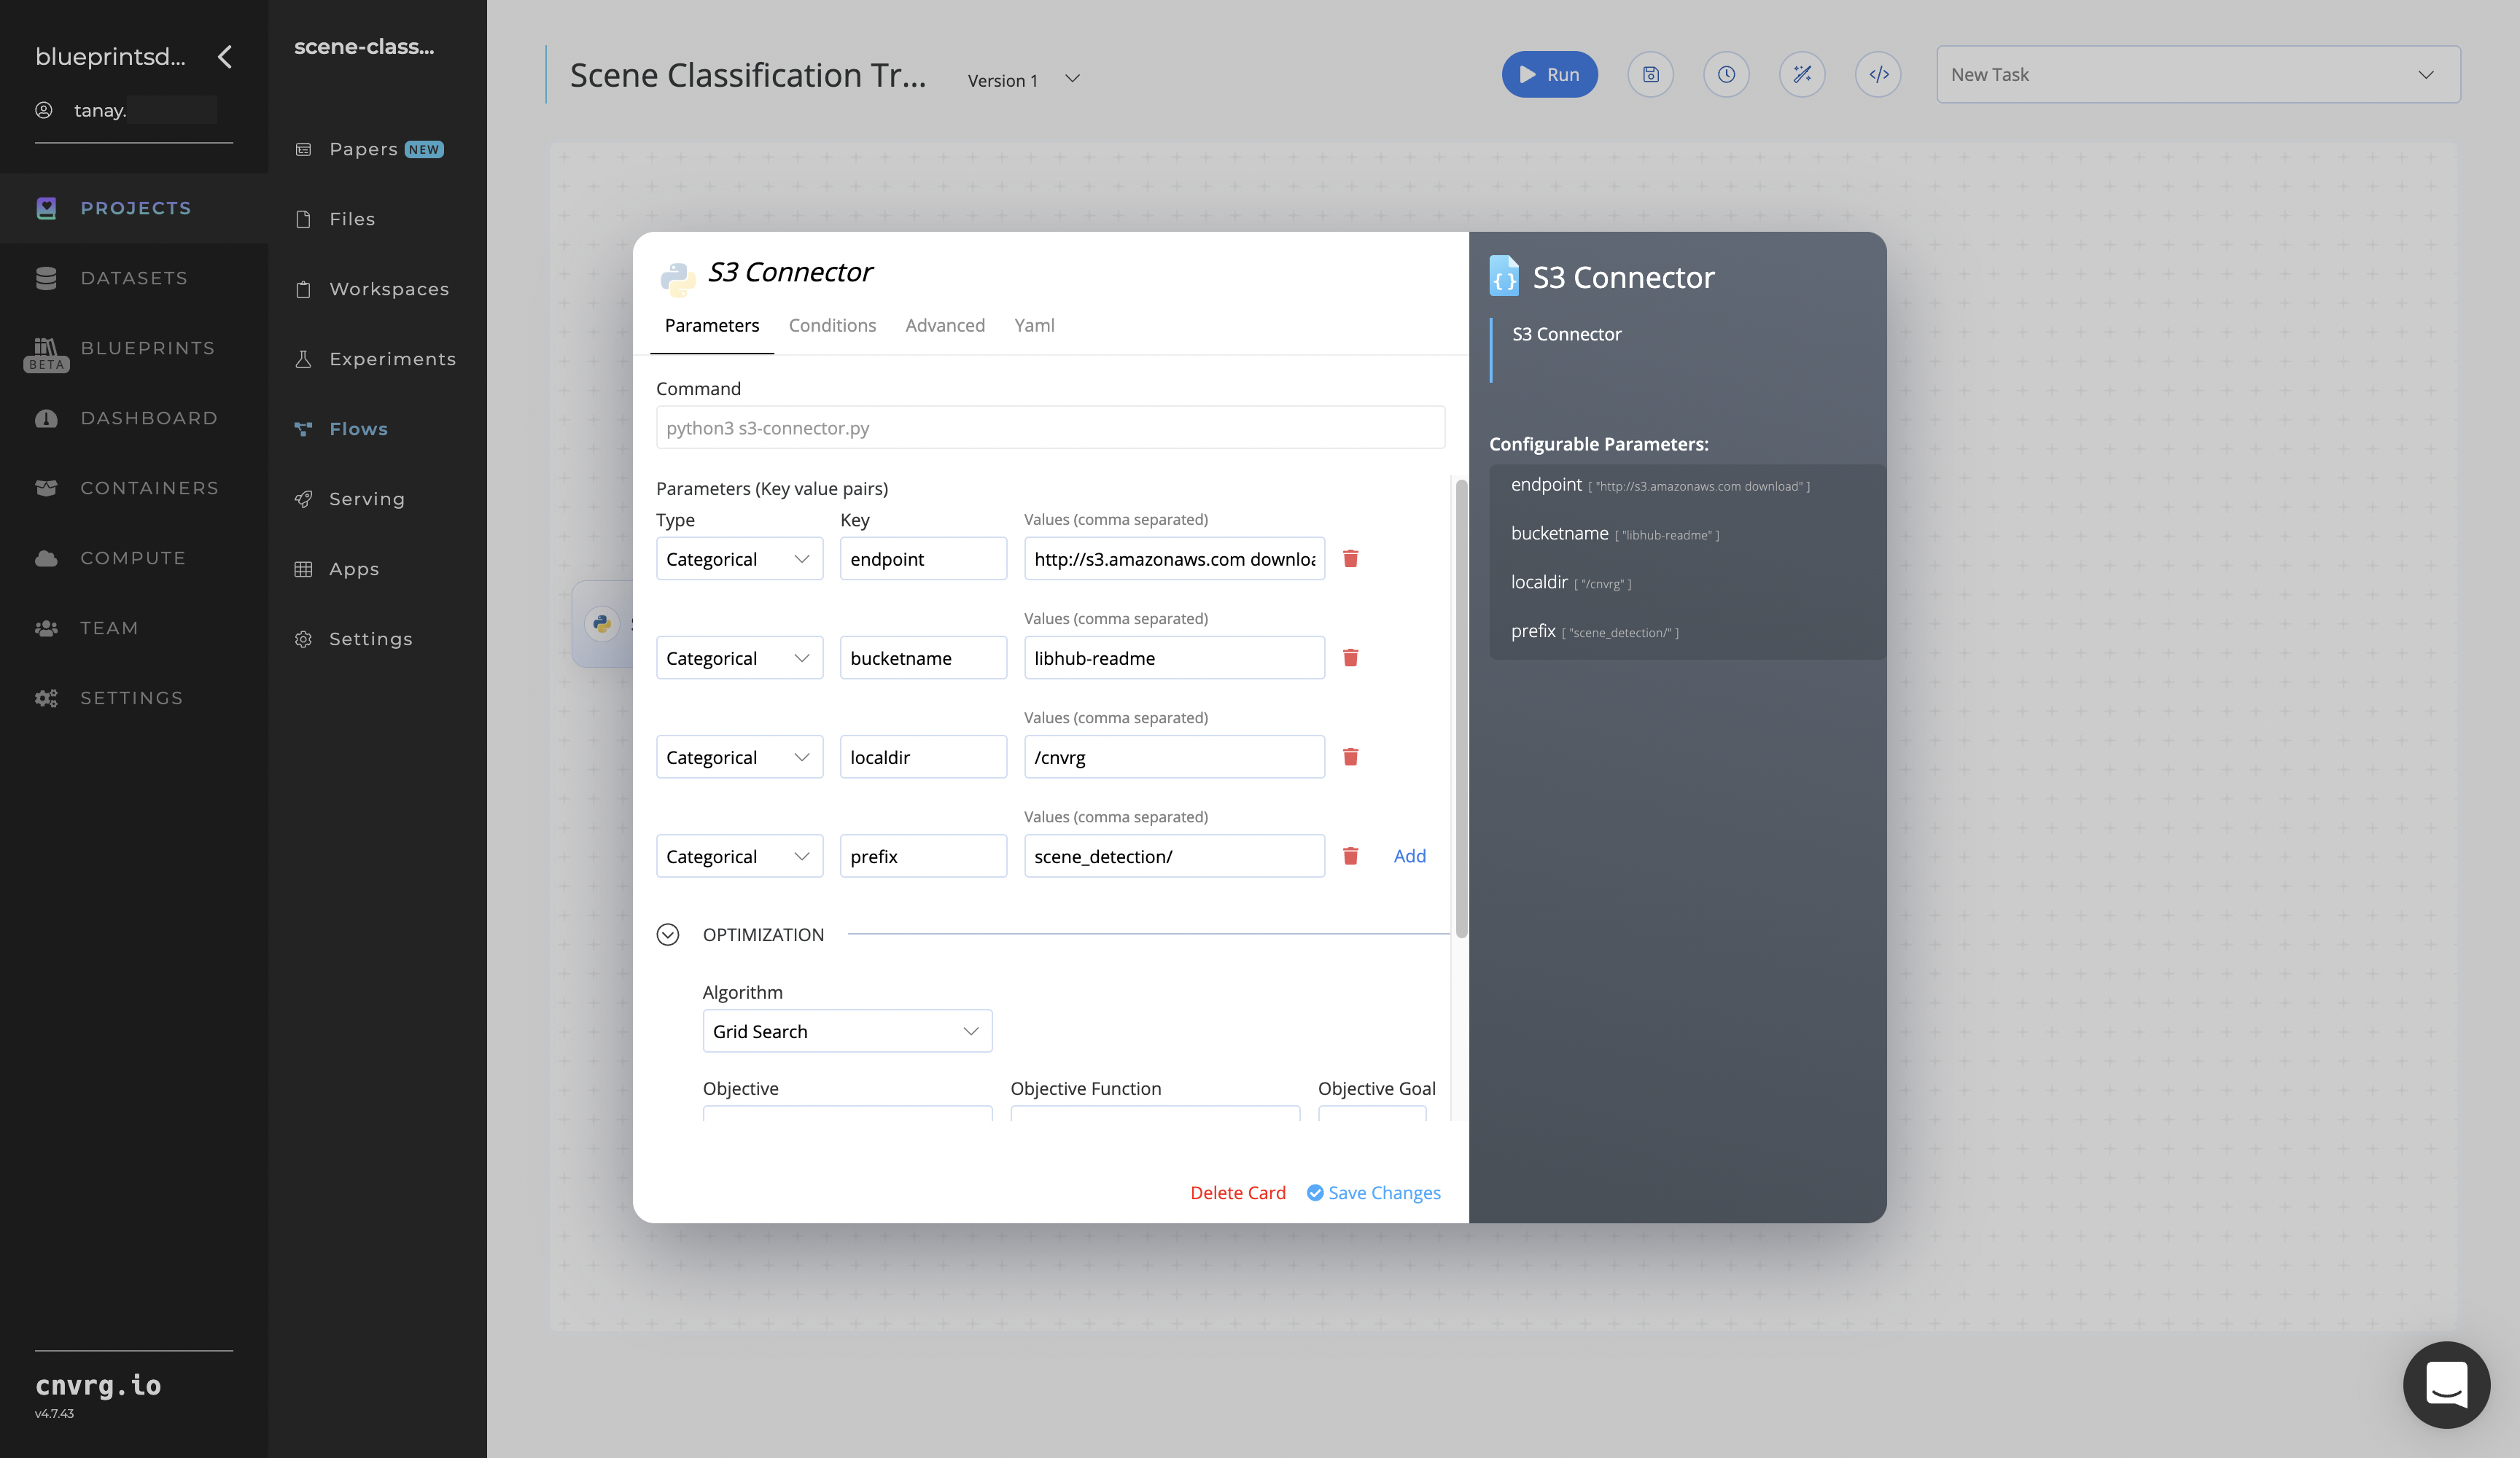
- Key:
bucketname- Value: enter the data bucket name - Key:
prefix- Value: provide the main path to the images folder
- Key:
- Click the Advanced tab to change resources to run the blueprint, as required.
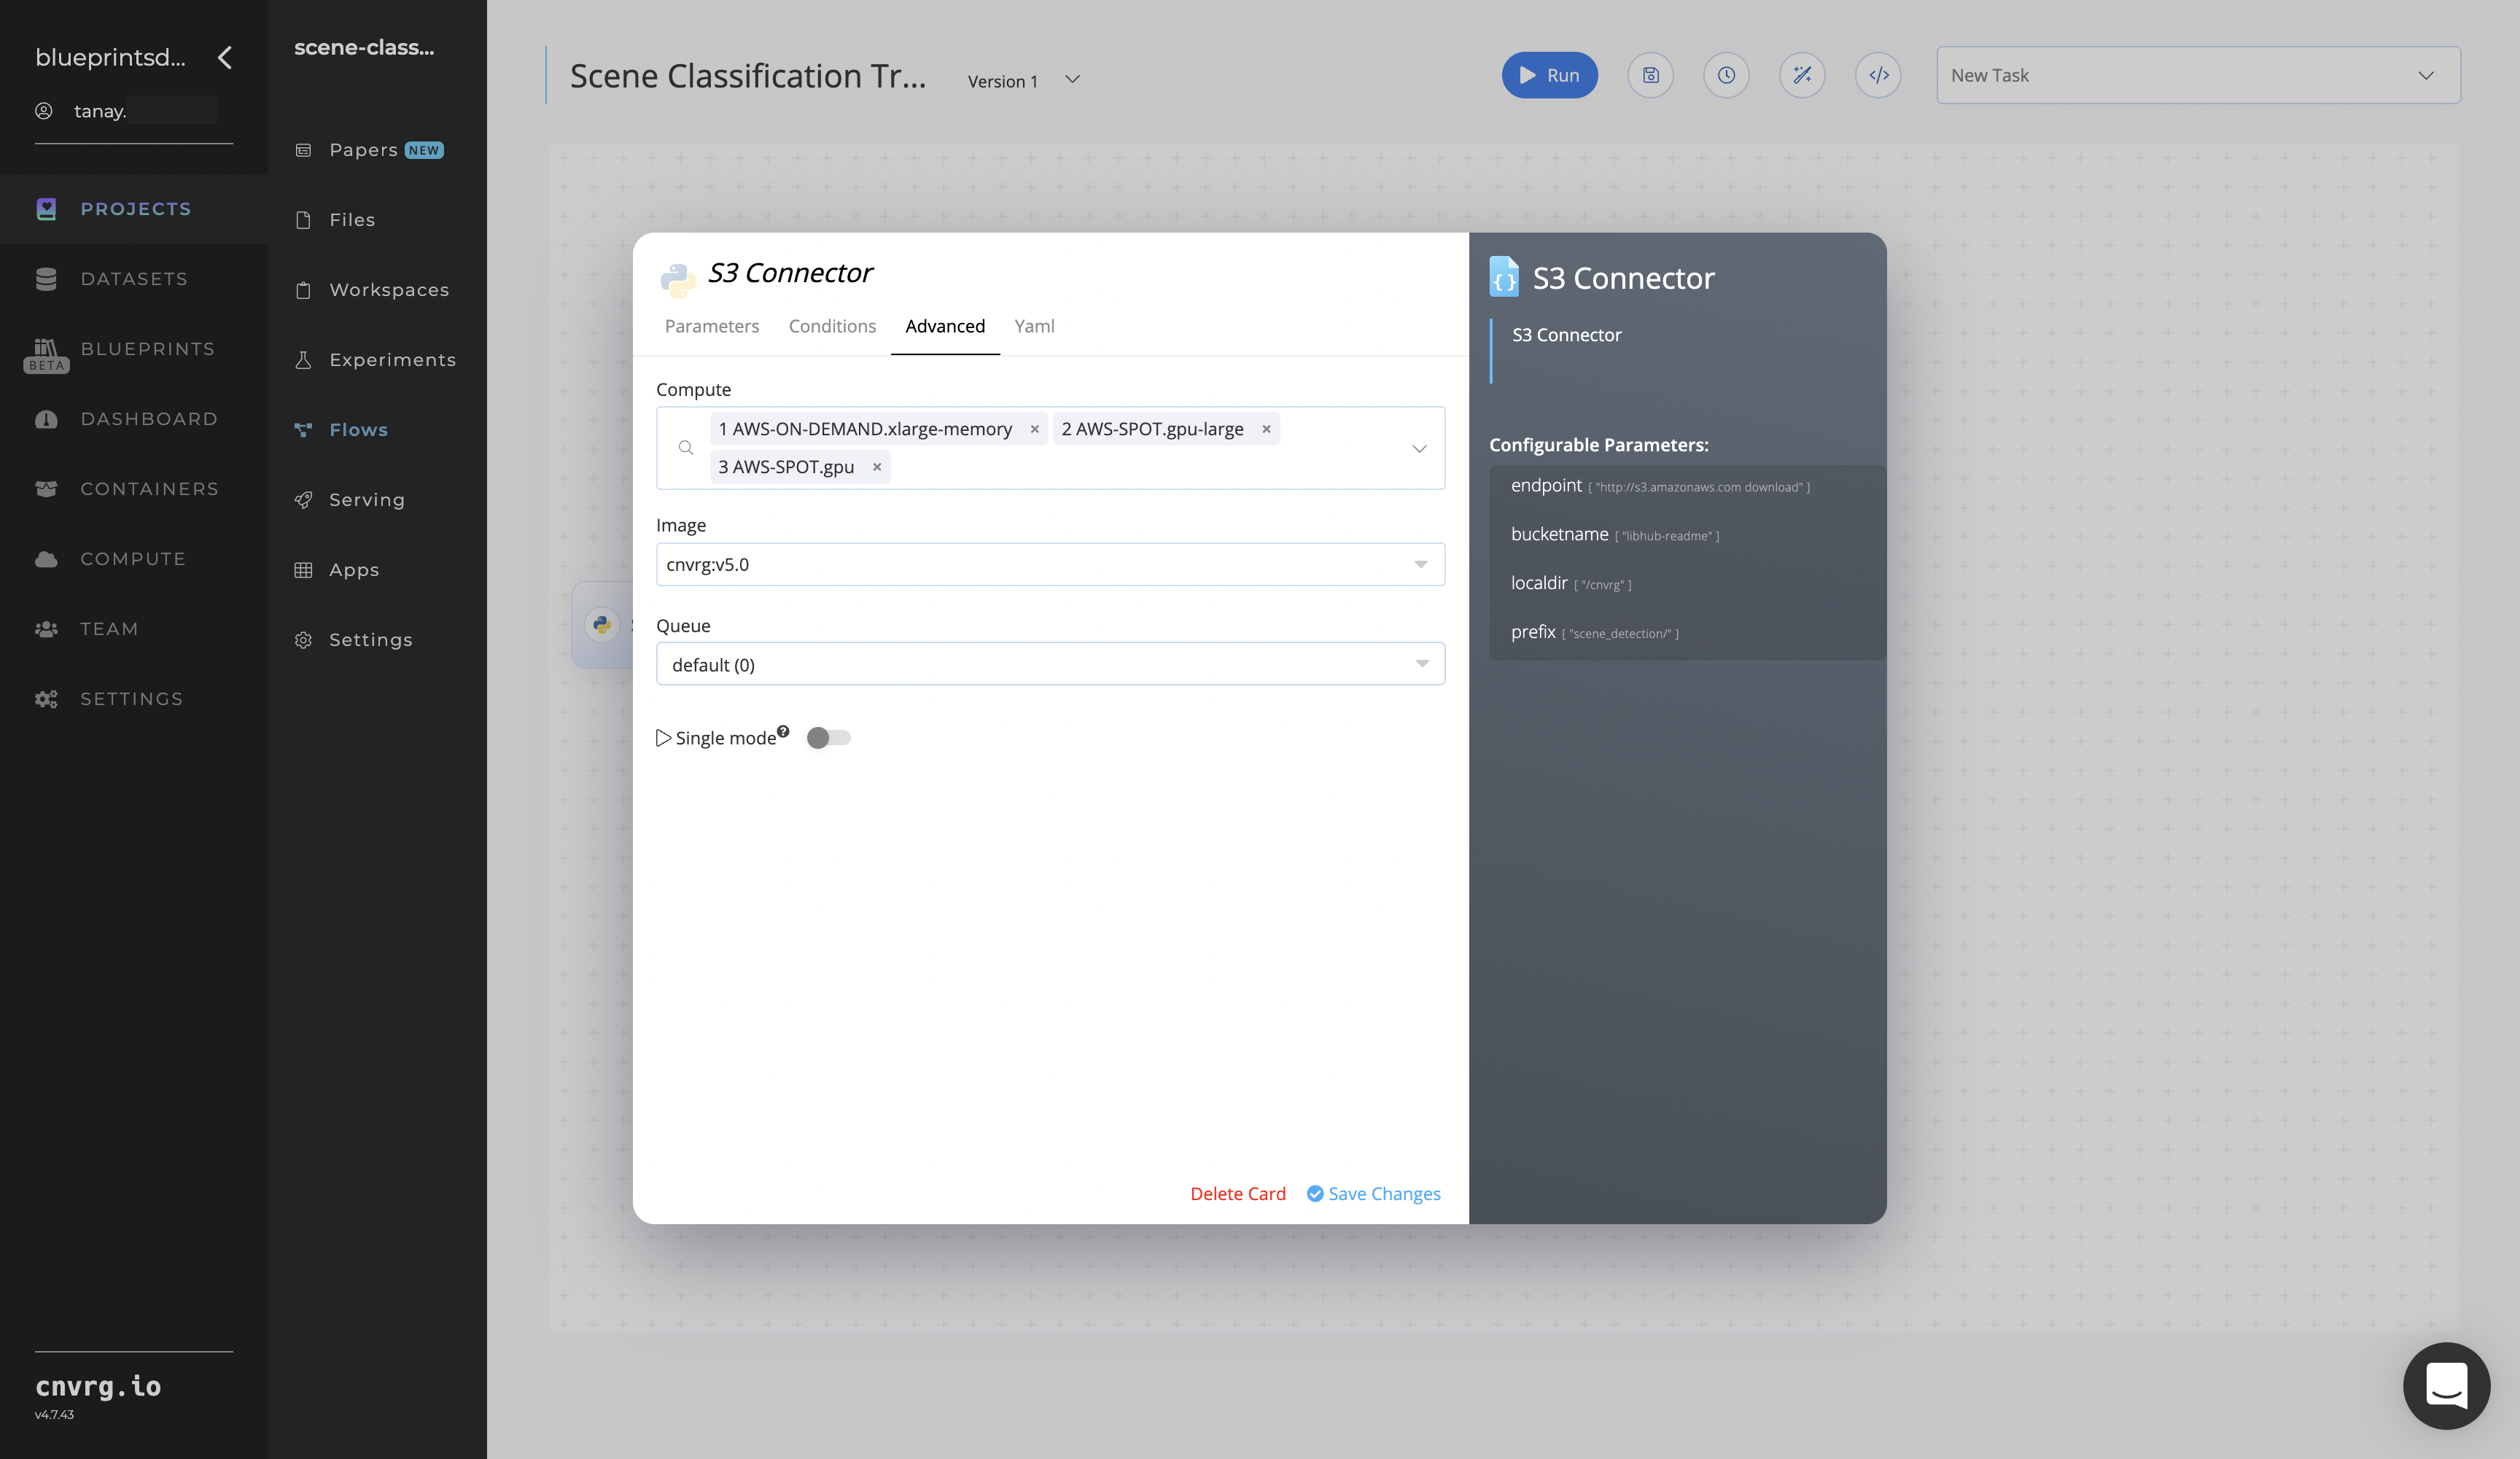
- Within the Parameters tab, provide the following Key-Value pair information:
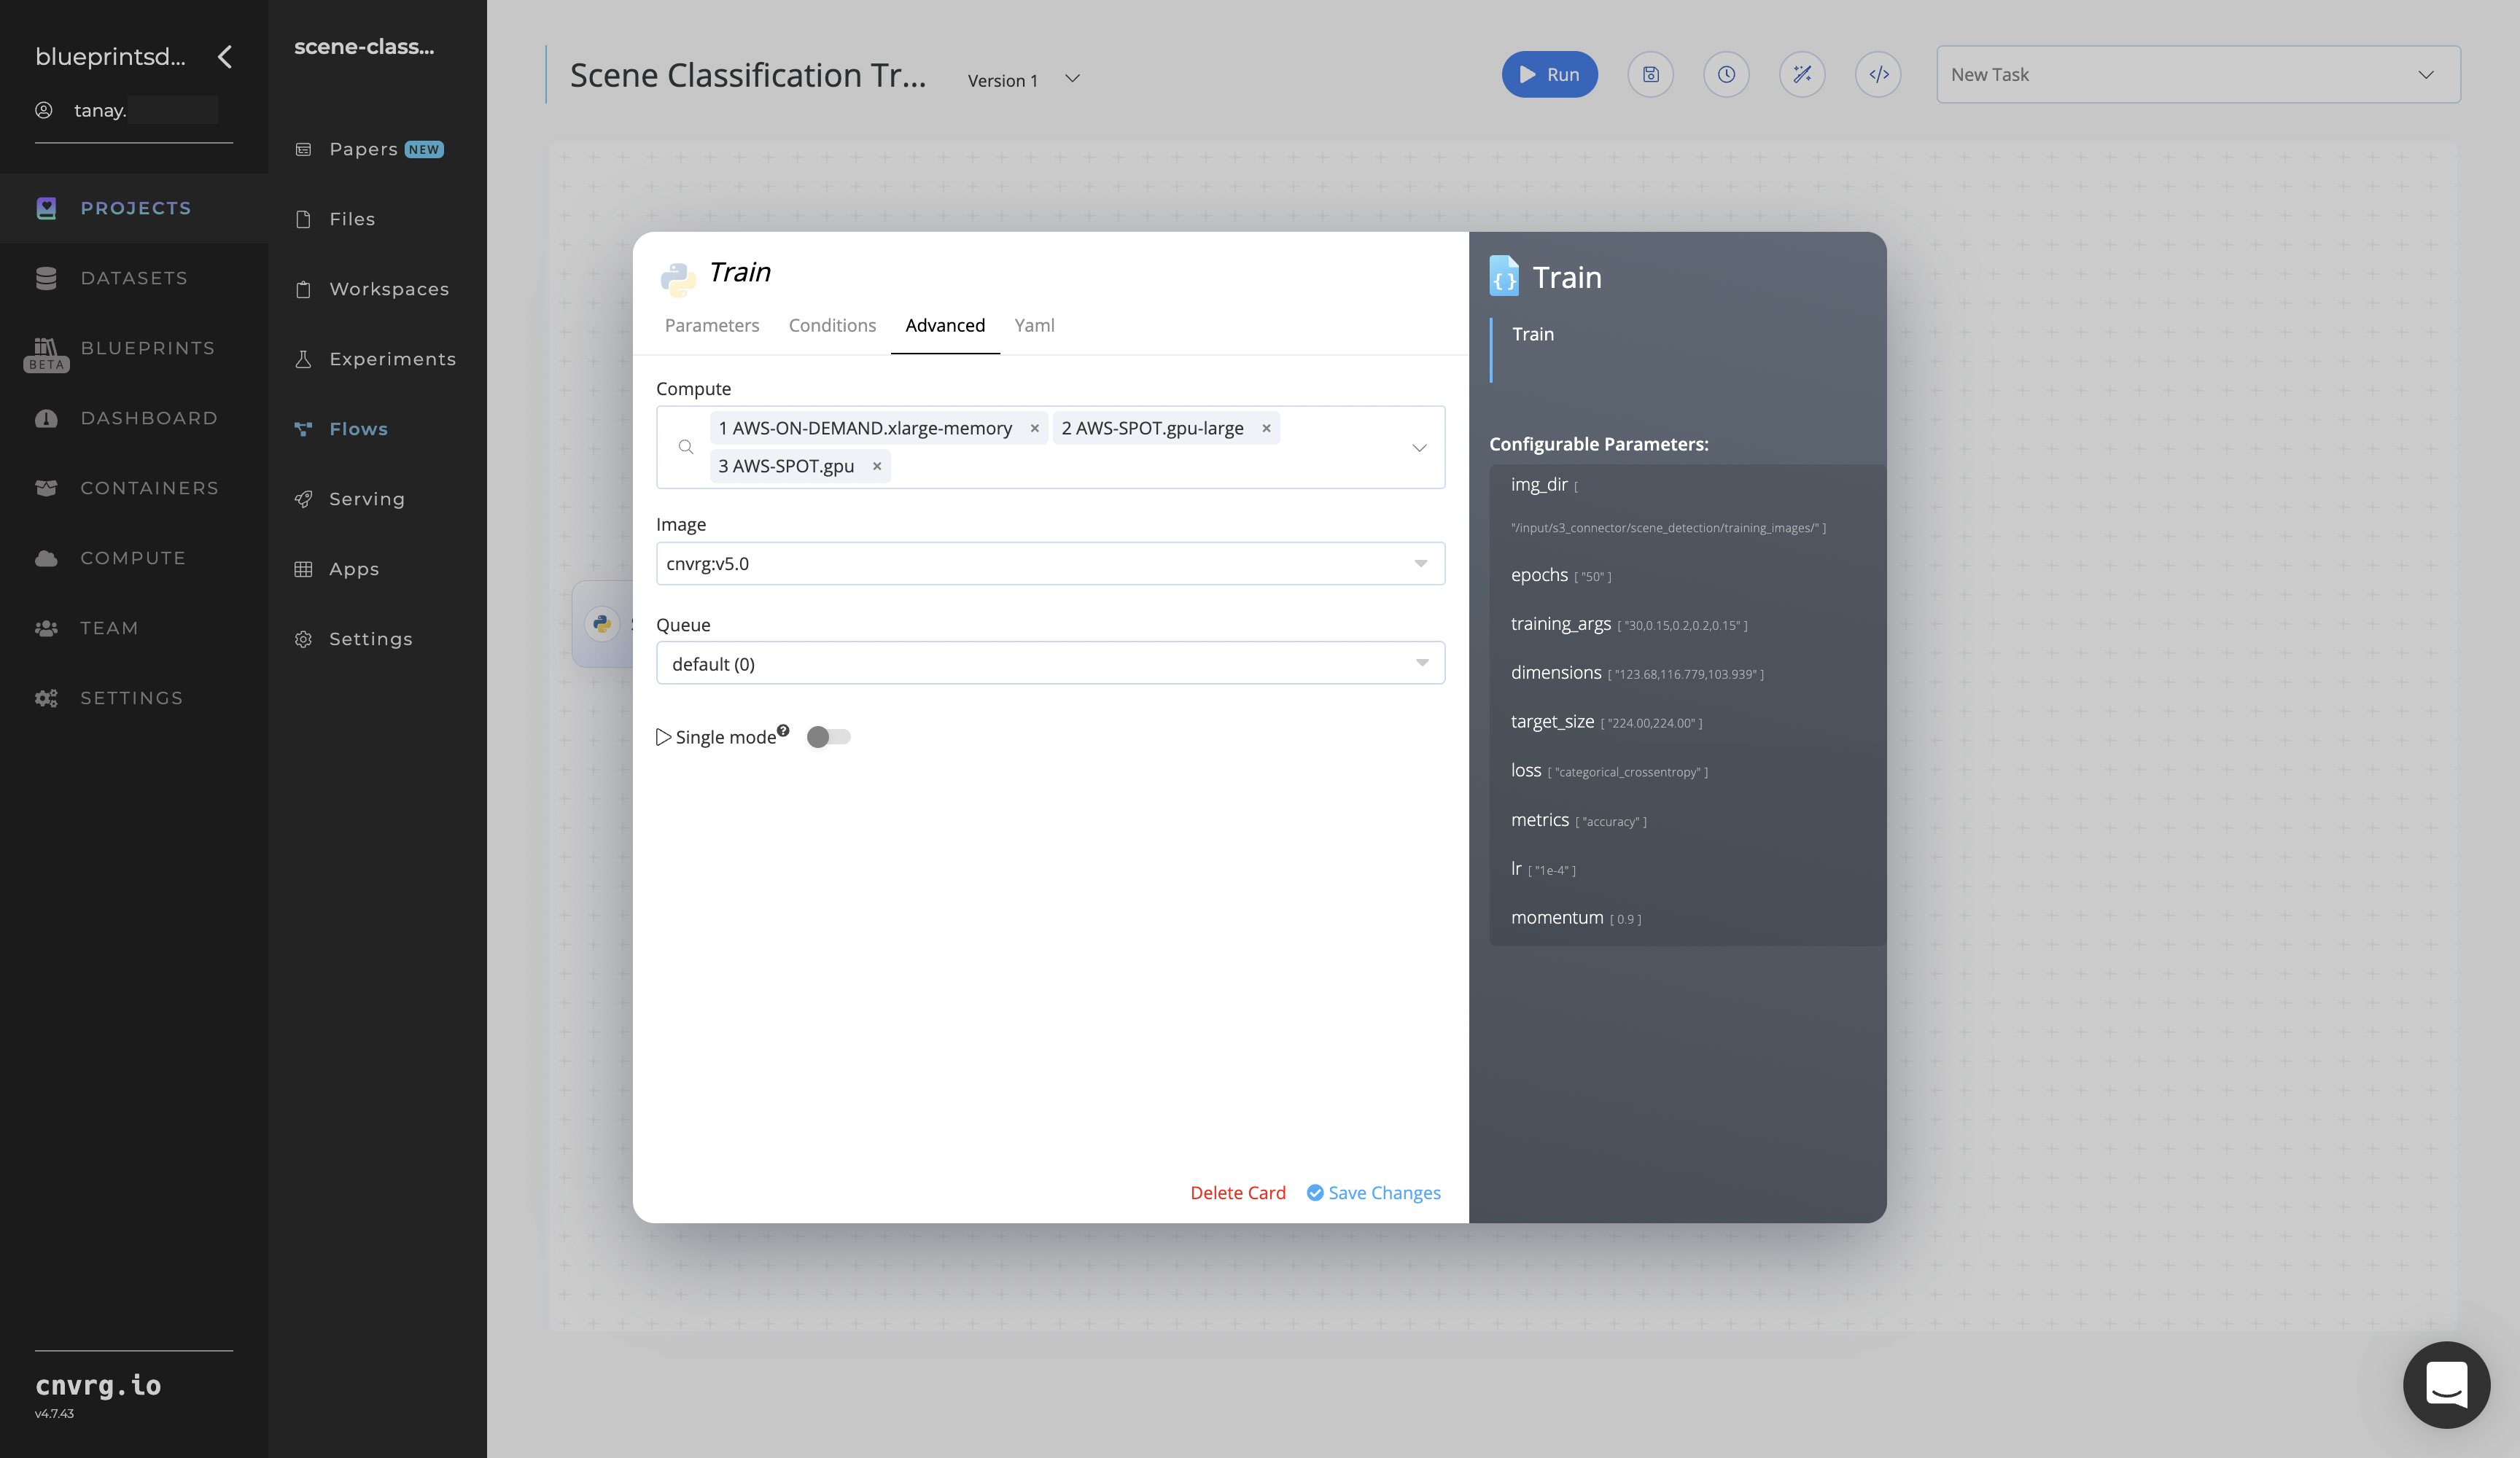
Return to the flow and click the Train task to display its dialog.
Within the Parameters tab, provide the following Key-Value pair information:

- Key:
img_dir– Value: provide the path to the images folder including the S3 prefix /input/s3_connector/<prefix>/scene_detection− ensure the path adheres this format
NOTE
You can use the prebuilt example data paths provided.
- Key:
Click the Advanced tab to change resources to run the blueprint, as required.
Click the Batch-Predict task to display its dialog.
Within the Parameters tab, provide the following Key-Value pair information:
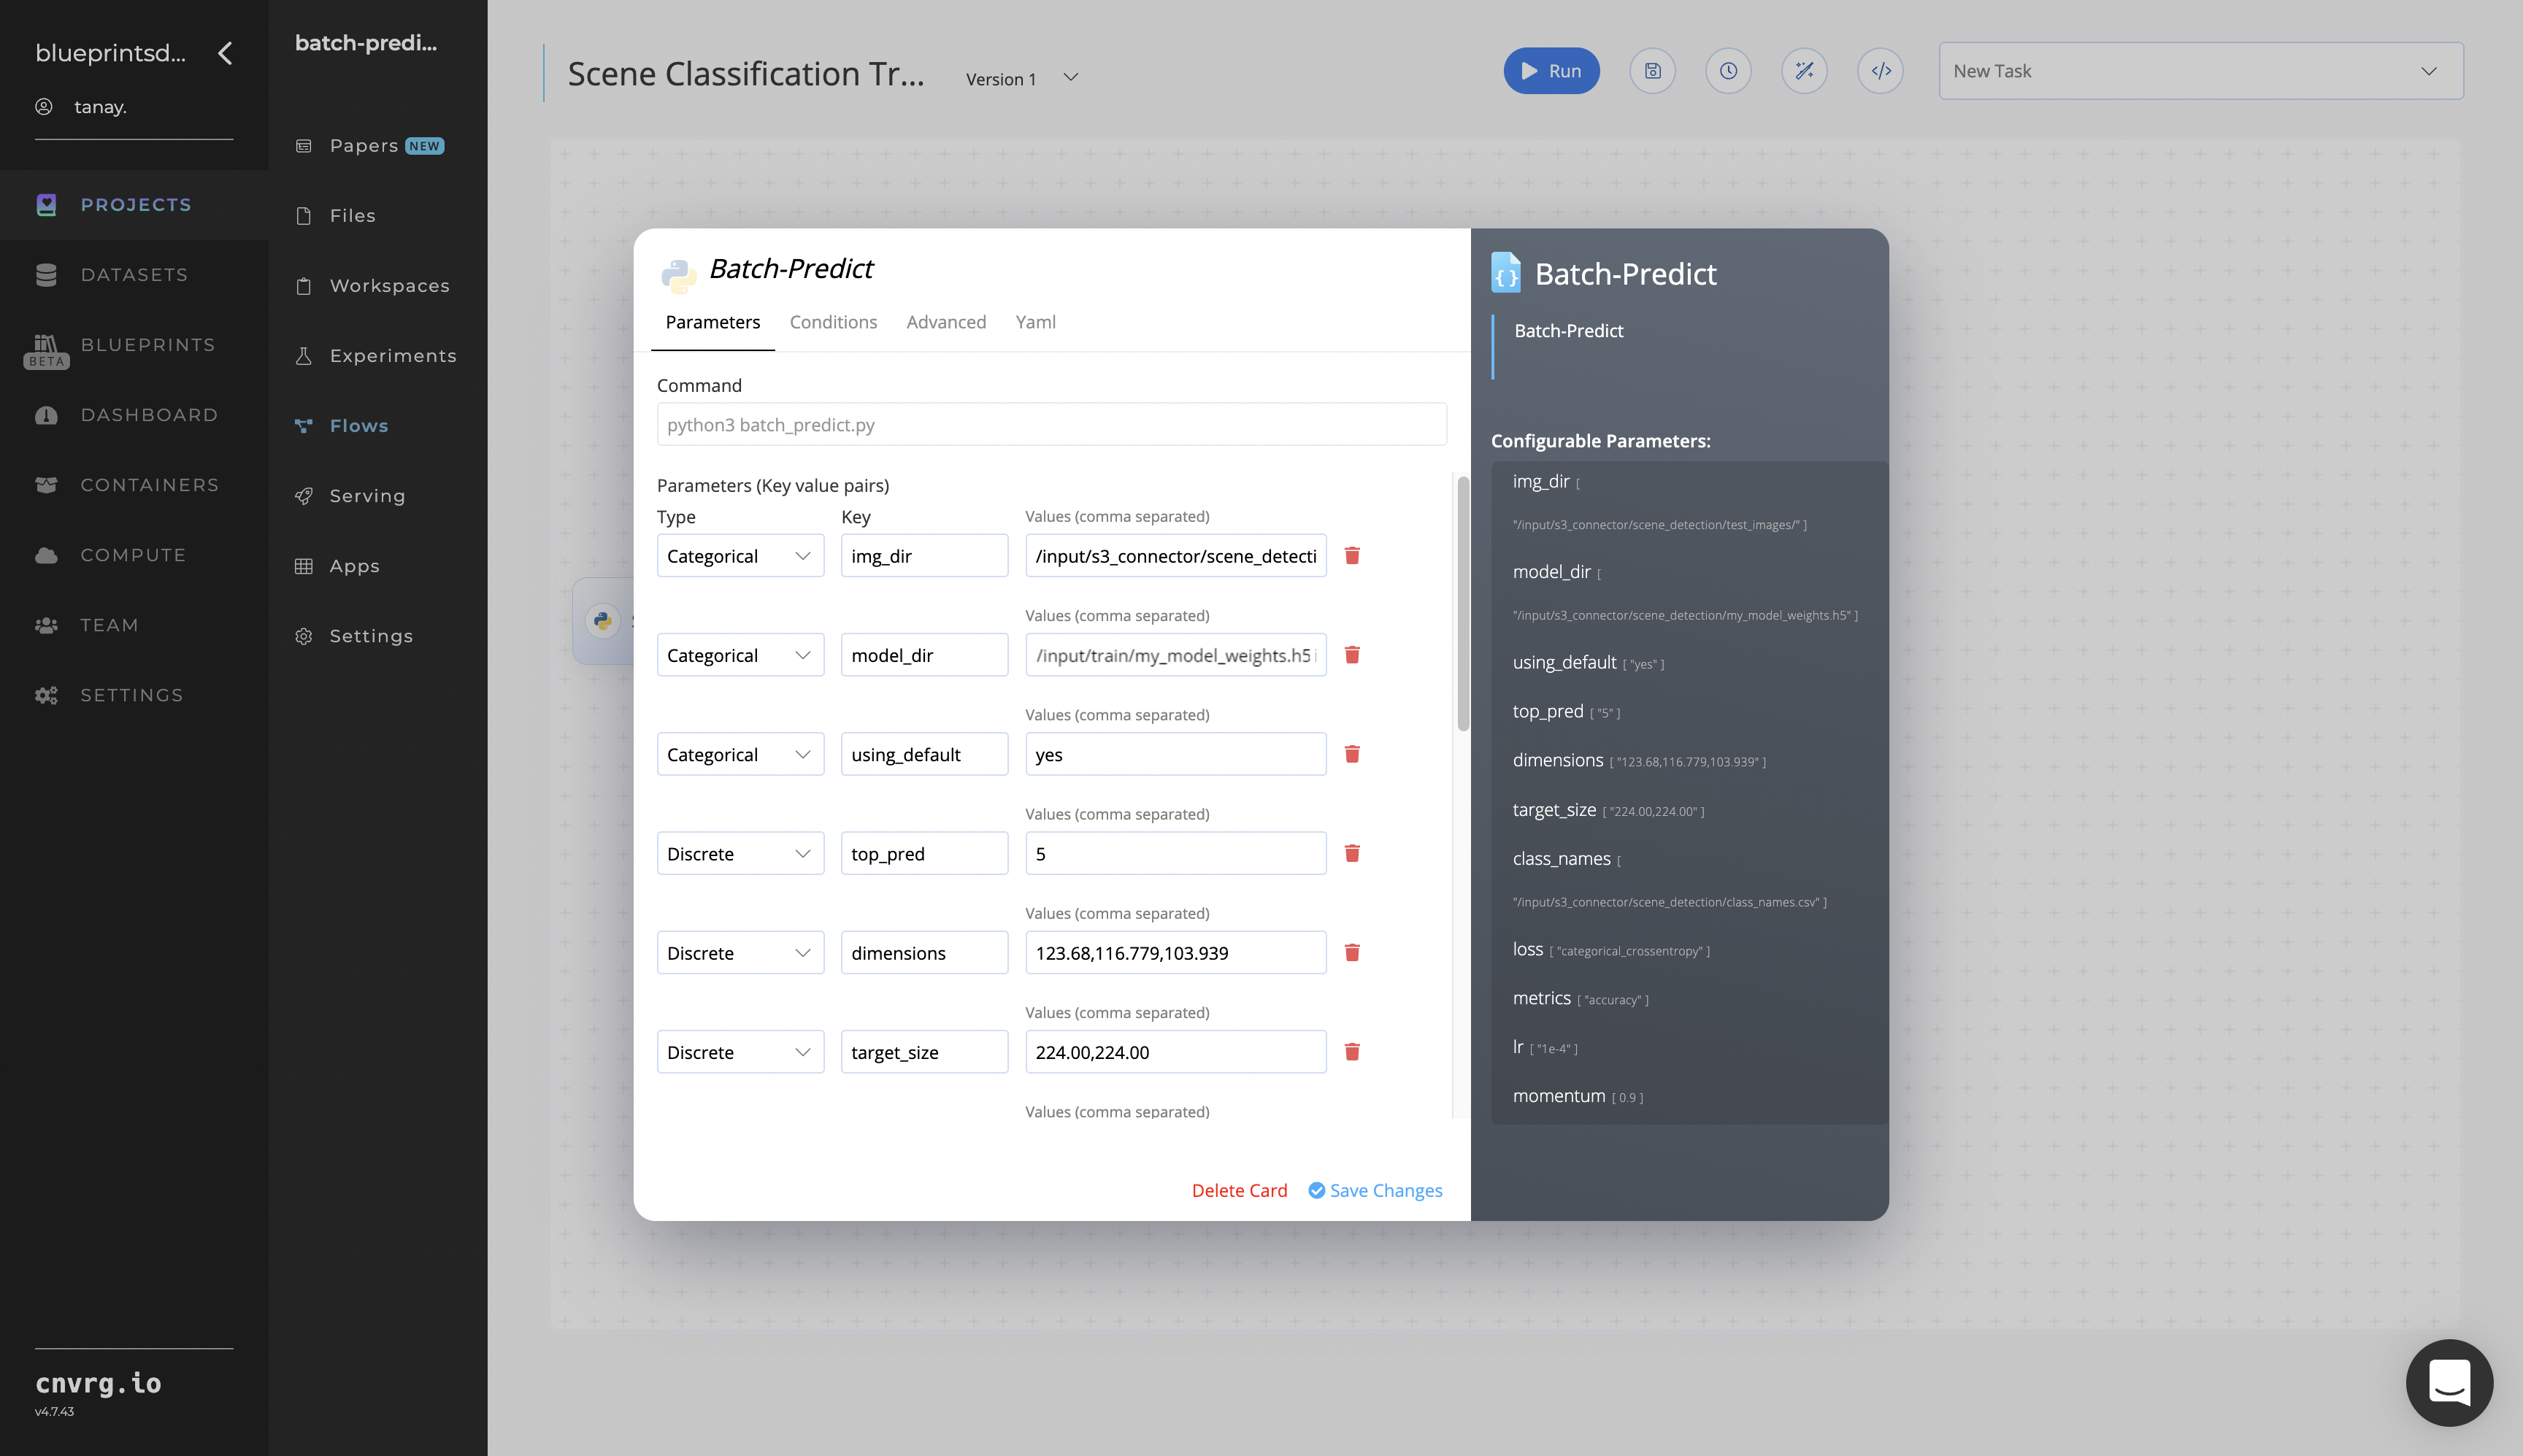
- Key:
img_dir− Value: provide the path to the S3 Connector’s images directory in the following format:/input/s3_connector/scene_detection/test_images/ - Key:
model_dir− Value: provide the path to the Train task’s custom model weights in the following format:/input/train/my_model_weights.h5
NOTE
You can use the prebuilt example data paths provided.
- Key:
Click the Advanced tab to change resources to run the blueprint, as required.
Click the Run button.
 The cnvrg software launches the training blueprint as set of experiments, generating a trained scene-classifier model and deploying it as a new API endpoint.
NOTE
The time required for model training and endpoint deployment depends on the size of the training data, the compute resources, and the training parameters.
For more information on cnvrg endpoint deployment capability, see cnvrg Serving.
Track the blueprint's real-time progress in its Experiments page, which displays artifacts such as logs, metrics, hyperparameters, and algorithms.
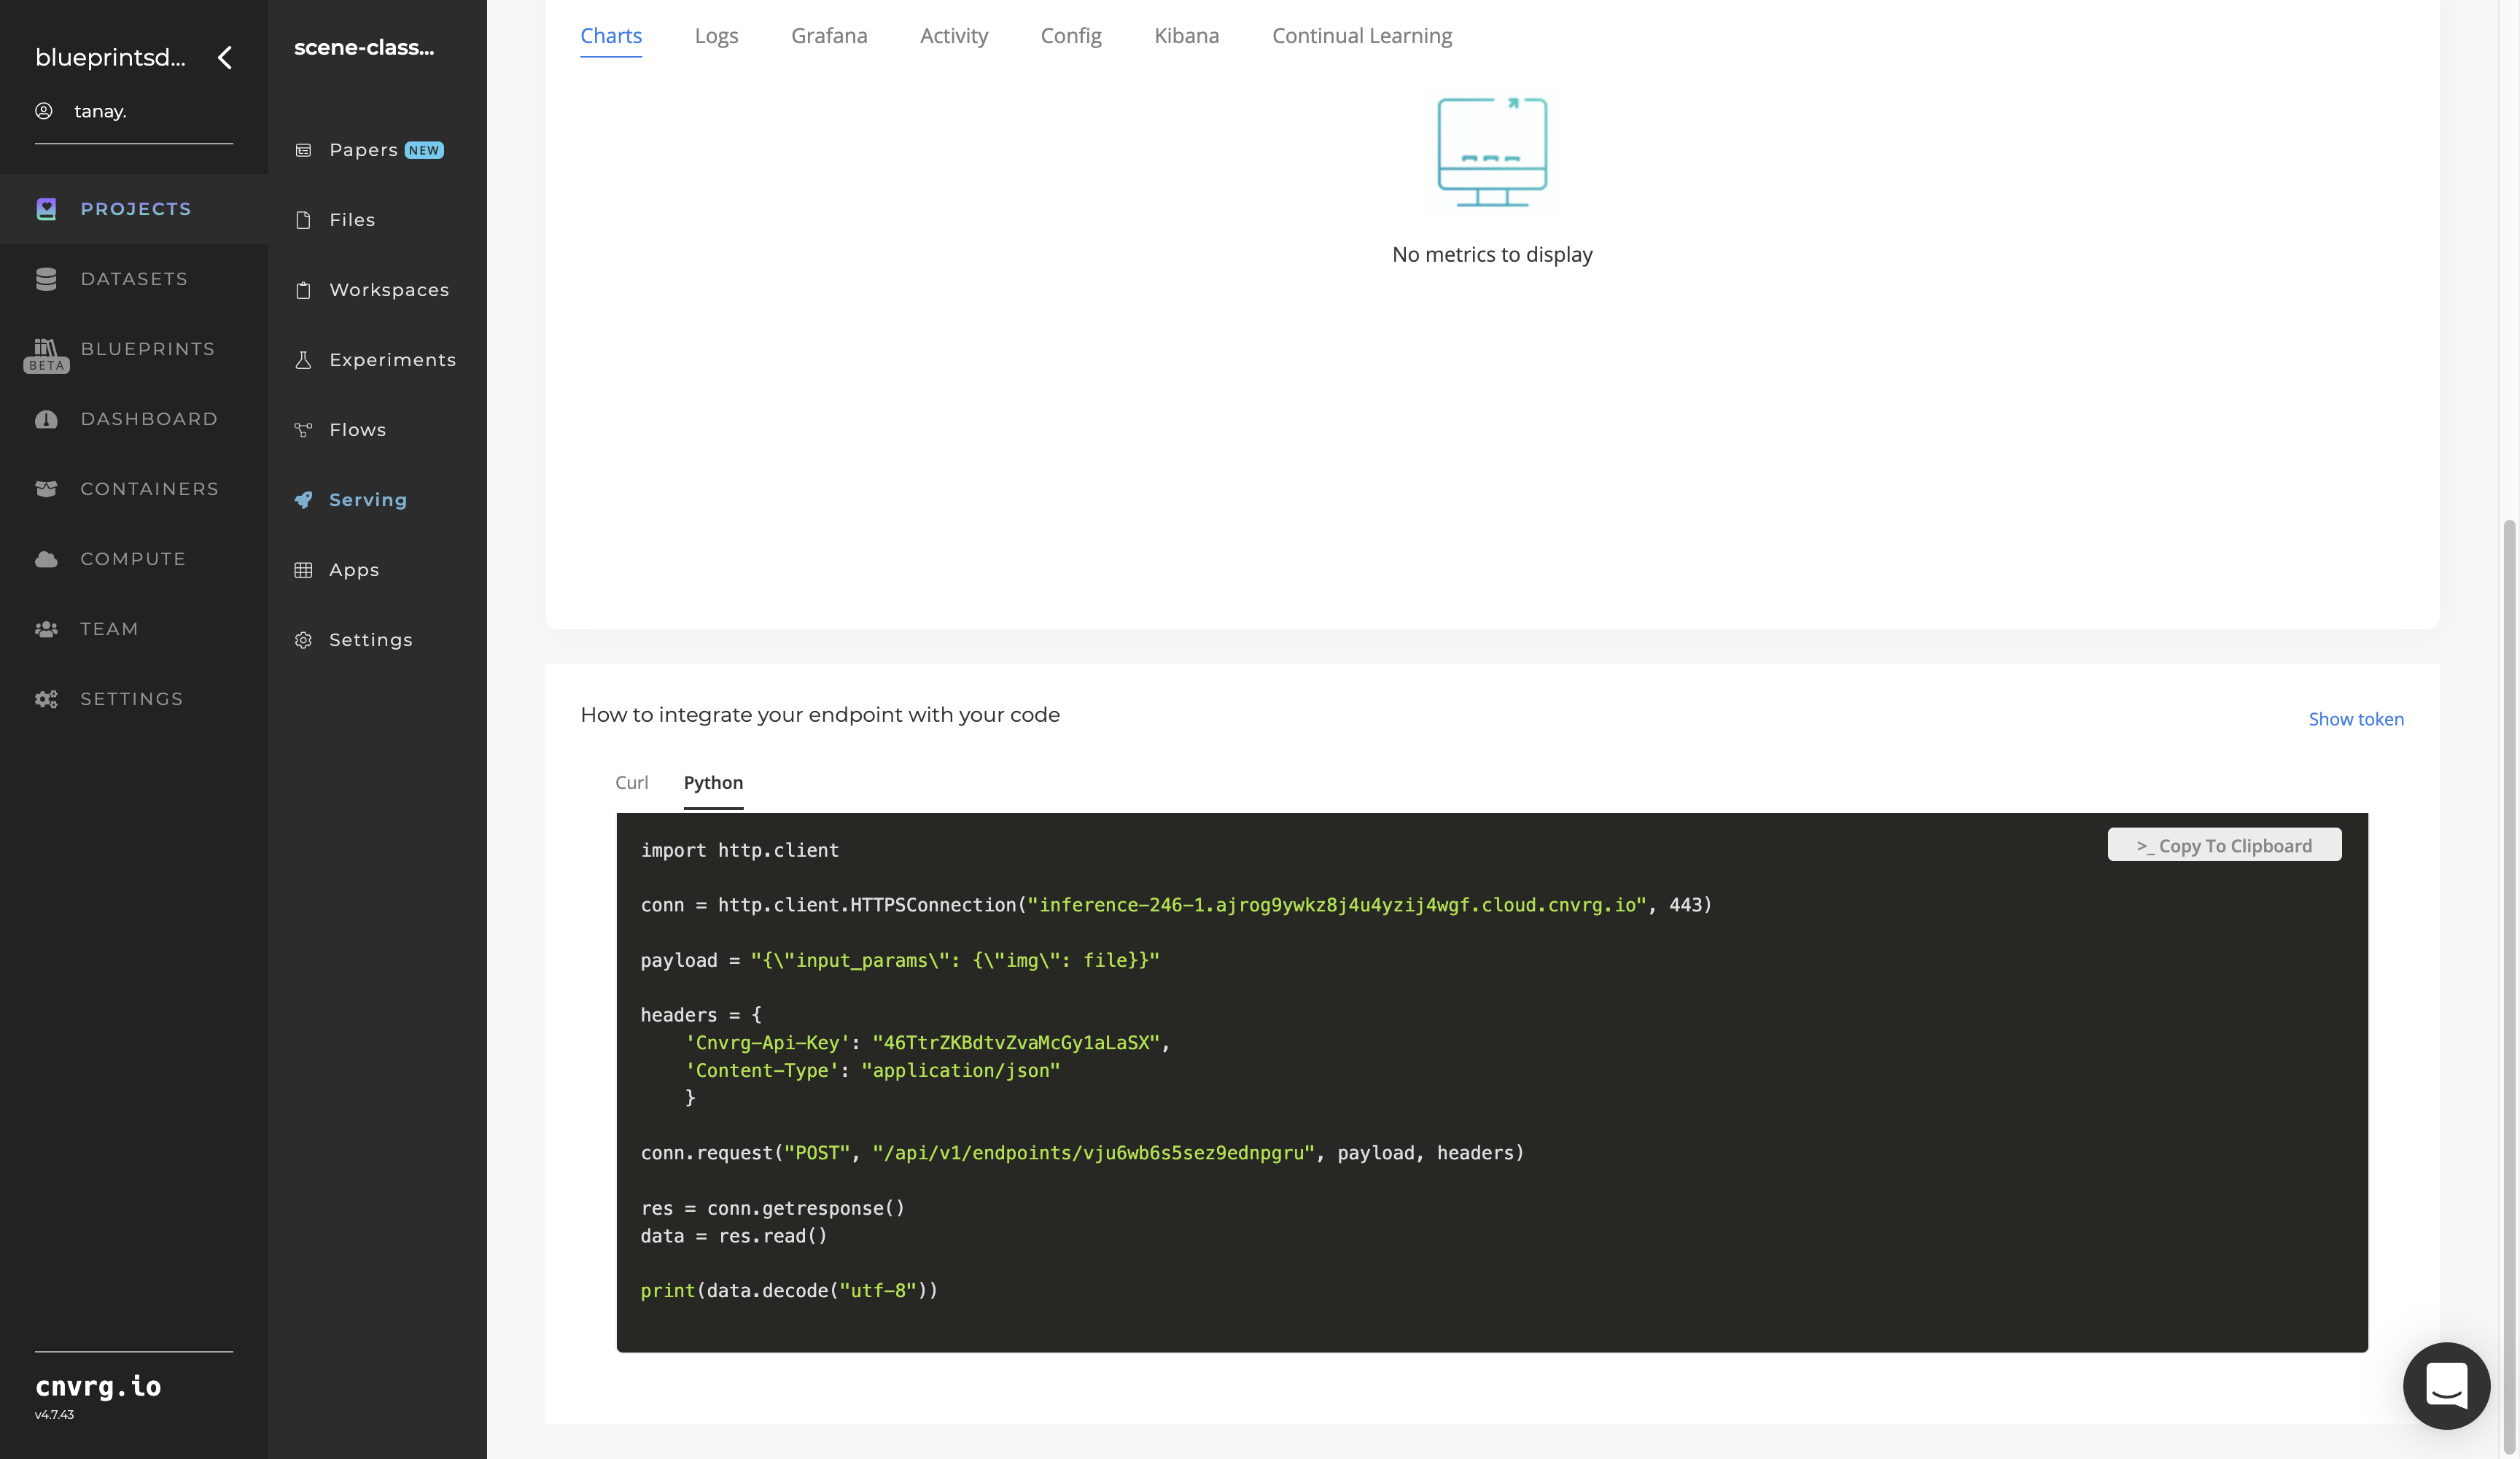
Click the Serving tab in the project and locate your endpoint.
Complete one or both of the following options:
- Use the Try it Live section with any natural scene image to check the model.
- Use the bottom integration panel to integrate your API with your code by copying in your code snippet.
- Use the Try it Live section with any natural scene image to check the model.
A custom model and API endpoint which can classify an image’s scenes have now been trained and deployed. For information on this blueprint's software version and release details, click here.
# Connected Libraries
Refer to the following libraries connected to this blueprint:
# Related Blueprints
Refer to the following blueprints related to this training blueprint: