# Apps

Intel® Tiber™ AI Studio is a comprehensive full-stack platform engineered to streamline every facet of your data science workflow.
A critical component of a data scientist's responsibilities involves effectively presenting their findings. Progress on your project may stall if you are unable to communicate your results clearly. AI Studio addresses this challenge by simplifying the presentation process.
The platform seamlessly integrates with three leading data communication platforms, allowing you to utilize the application that best suits your team's requirements and enhances operational efficiency.
The topics in this page:
# App Deployment

Complete the following steps to deploy an app:
- Enter the project to publish your app from.
- Click Apps on the sidebar.
- Select the app type, enter the file to be used for the app, and allocate a compute.
- If necessary, select a dataset and complete the other options.
- Click Publish.
AI Studio completes the remaining required tasks.
# Share App

AI Studio simplifies the task of sharing the work of data scientists with collaborators to effectively communicate achievements or progress.
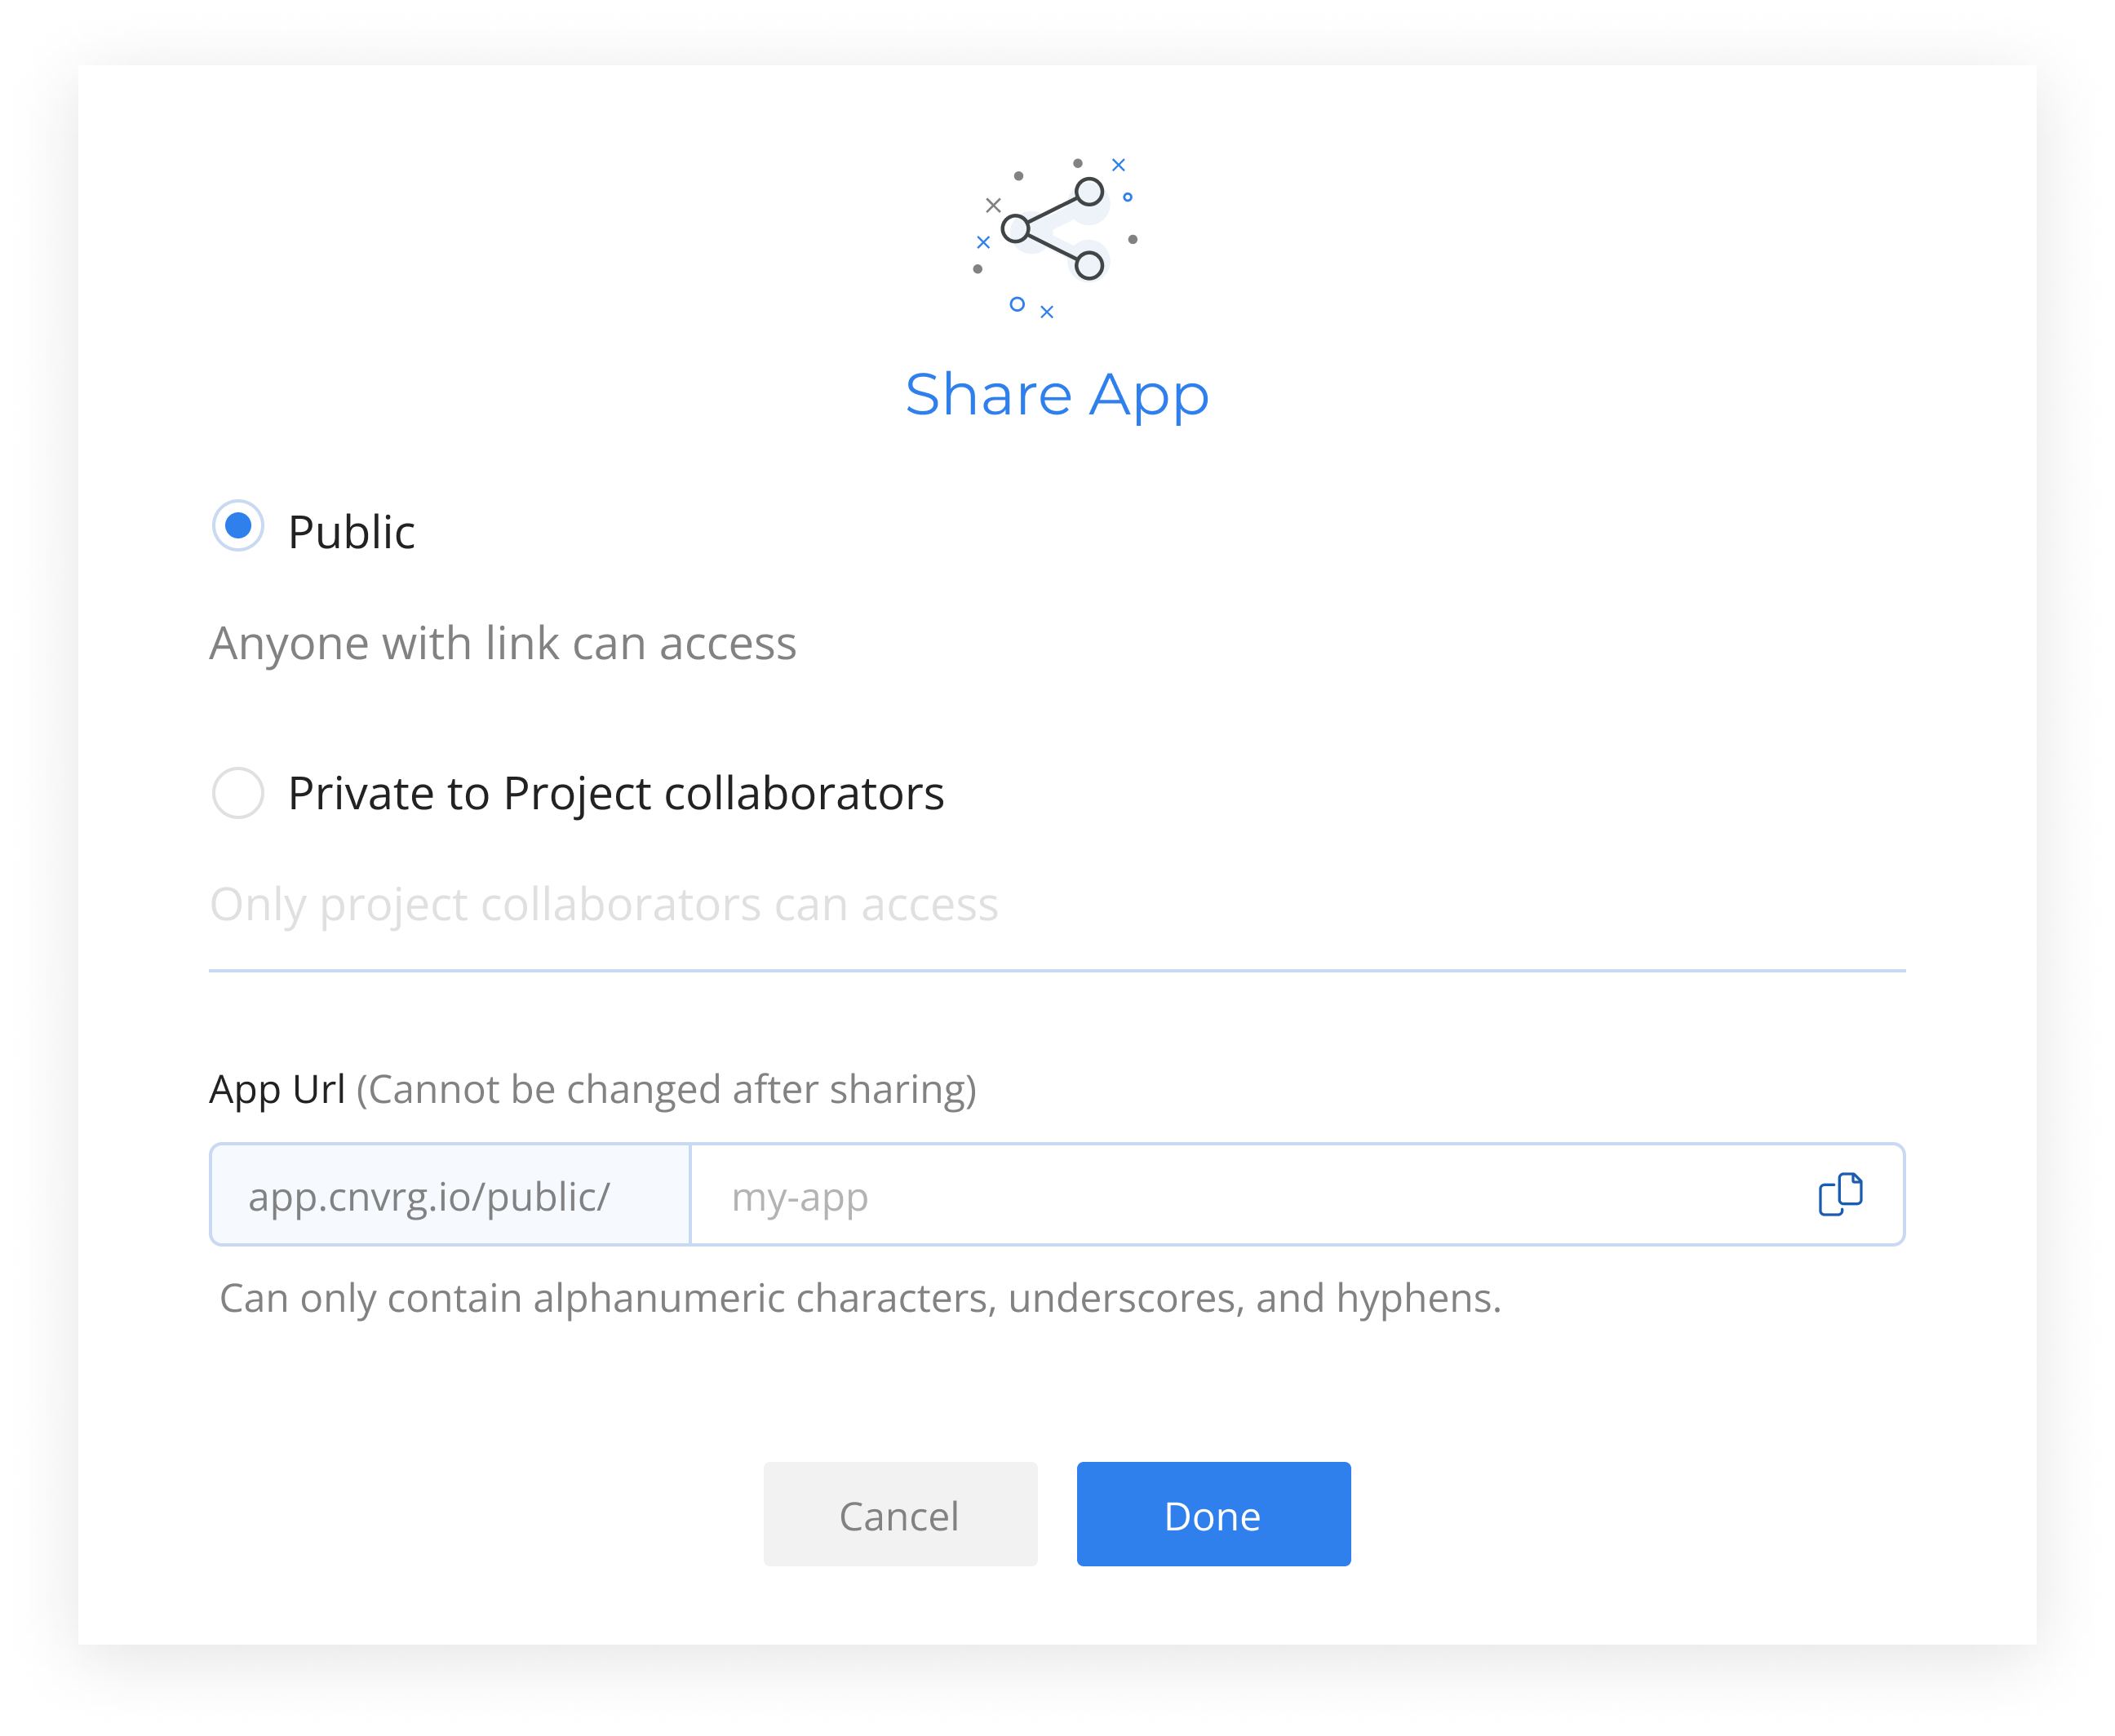
It offers the ability to customize your app’s URL or use the default web app slug, and provides options to choose permission levels, enabling precise control over who can access and interact with your web application.
- Click on the share button on the top right
- Choose permission level
- Project Scope - Only project collaborators can access
- Public - Anyone with link can access
- Customize your app’s URL or leave default
- Done and share
# Generic App
The Generic App feature in AI Studio provides the flexibility to connect and deploy any type of application within the AI Studio platform. This allows you to leverage various technologies and frameworks that best suit your project needs. In addition to custom apps, you can also start using popular frameworks like Gradio and Streamlit with minimal setup. These frameworks simplify the process of creating interactive applications for data science and machine learning projects. By selecting these examples and clicking apply, the example app will work out of the box. We’ve added these frameworks to support Generative AI use cases.
# Use Generic App
Follow these steps to set up a Generic App:
- Click Apps in your project.
- Select Generic App.
- For Command, type the command required to run your app.
- For Image, select a relevant Docker image or custom image that suits your application.
- For Compute, select the appropriate compute resources to run your application.
- Click Publish. AI Studio will deploy your application based on the provided configuration.
NOTE
The generic app needs to bind to port 9200
# Pre-configured Options (Examples)
# Gradio
Gradio is a Python framework that allows you to quickly create user-friendly web interfaces for your machine learning models. It is designed to help you build interactive demos and share them easily.
Use Gradio
- Click Apps in your project.
- Select Generic App.
- Select Gradio from the examples on the top right.
- Click Publish to deploy your Gradio app
By choosing Gradio and applying the example, the example application will be ready to use immediately, simplifying the process of showcasing your machine learning models. This is particularly beneficial for Generative AI use cases, enabling quick prototyping and deployment of interactive models.
Read more about how we created this example
# Streamlit
Streamlit is a powerful framework for creating data-driven web applications with Python. It simplifies the process of turning data scripts into shareable web apps, focusing on data exploration and visualization.
Use Streamlit
- Click Apps in your project.
- Select Generic App.
- Select Streamlit from the examples on the top right.
- Click Publish to start your Streamlit app.
Selecting Streamlit and applying the example ensures that example app will be up and running immediately, providing a robust solution for data exploration and visualization. This ease of use accelerates Generative AI development, making it easier to visualize and interact with complex data models.
Read more about how we created this example
# R Shiny
Shiny is an R package that simplifies building interactive web apps straight from R. You can host standalone apps on a webpage, embed them in R markdown documents, or build dashboards. You can also extend your Shiny apps with CSS themes, htmlwidgets, and JavaScript actions.
# Use R Shiny
Complete the following steps to set up an R Shiny dashboard:
- Click Apps in your project.
- Select R Shiny.
- For File, enter the full path of the R Shiny
app.Rfile. - In Advanced Settings, set the following image and compute:
- For Image, select the default
cnvrg_rimage. - For Compute, select the compute to use.
- For Image, select the default
- Click Publish. AI Studio accesses the compute and starts running the R Shiny server.
NOTE
The R Shiny file must be called app.R.
If no path is given, app.R is assumed to be in the project's parent directory. If you enter the full path (in the project) for File, for example, my_folder/app.R, then that file loads from the correct subdirectory.
# R Shiny logs
The logs for the R Shiny server can be found within the compute at /var/log/shiny-server.
# Customize the R Shiny configuration with a custom image
You can modify the R Shiny configuration to meet your requirements. By default, AI Studio starts the R Shiny server using the command exec shiny-server 2>&1 and runs using the following configuration:
# Instruct Shiny Server to run applications as the user "shiny"
run_as shiny;
# Define a server that listens on port 3838
server {
  listen 3838;
  # Define a location at the base URL
  location / {
    # Host the directory of Shiny Apps stored in this directory
    site_dir /cnvrg; #or a path of the app.R file
    # Log all Shiny output to files in this directory
    log_dir /var/log/shiny-server;
    # When a user visits the base URL rather than a particular application,
    # an index of the applications available in this directory will be shown.
    directory_index on;
  }
}
If you want to start the server in a customized way, create a custom image and save your custom configuration file as /init. If /init exists, AI Studio uses it to start the Shiny server. Otherwise, it runs with the default server startup:
#!/bin/sh
# Make sure the directory for individual app logs exists
mkdir -p /var/log/shiny-server
chown shiny.shiny /var/log/shiny-server
if [ "$APPLICATION_LOGS_TO_STDOUT" != "false" ];
then
    # push the "real" application logs to stdout with xtail in detached mode
    exec xtail /var/log/shiny-server/ &
fi
# start shiny server
exec shiny-server 2>&1
# Dash
Dash is a productive Python framework for building web apps.
Written on top of Flask, Plotly.js, and React.js, Dash is ideal for building data visualization apps with highly custom user interfaces in pure Python. It's particularly suited for anyone who works with data in Python.
Through a few simple patterns, Dash abstracts away all of the technologies and protocols that are required to build an interactive web-based app. Dash is simple enough that you can bind a user interface around your Python code in a few hours.
Dash apps are rendered in the web browser. You can deploy your apps to servers and then share them through URLs. Since Dash apps are viewed in the web browser, Dash is inherently cross-platform and mobile-ready.
# Voilà
Voilà converts Jupyter notebooks into standalone web apps.
Not only does Voilà create visual graphs to make reporting easier, it also democratizes Jupyter notebooks for nontechnical users. With it, every notebook can be converted into a Voilà app. Better yet, you can create a customized dashboard with results of your machine learning project. Voilà supports Jupyter interactive widgets, including roundtrips to the kernel. It improves the conciseness by prohibiting arbitrary code execution by dashboard consumers.
Other benefits of Voilà are that it is built upon Jupyter standard protocols and file formats, and works with any Jupyter kernel (C++, Python, Julia). This makes Voilà a language-agnostic dashboard system. Additionally, extensible Voilà includes a flexible template system to produce rich application layouts. That means you can easily customize your dashboard based on the Jupyter notebook being deployed.
# Deployed App Updates
 You can update a deployed app without redeploying from scratch. Complete the following steps to update an app:
- Go to the app to update.
- Click Versions on the top menu bar.
- Select a new AI Studio Commit to update the service to.
- Click Update. AI Studio updates the app to use the newly chosen commit.
When connected to Git, clicking Update also pulls the latest Git commit for your branch (even if you do not choose a new AI Studio Commit).
← Serving Environments →
