# Containers
The Intel® Tiber™ AI Studio platform uses Docker containers to create environments that ensure reproducibility throughout machine learning (ML) pipelines. A Docker container image is one of the main building blocks that AI Studio requires to execute a job. AI Studio job can be a workspace, experiment, flow, endpoint, or web app.
The AI Studio software affords its users the flexibility to set their environment exactly as required by providing them the ability to:
- Manage and utilize a versatile set of computes that meet a range of requirements, as documented here.
- Add and use custom Docker images to run experiments, launch workspaces, build flows, and configure endpoints and apps, as described here.
Every team and user has full control to build or use custom Docker images. In some cases, a user may want to use a custom library without building a Docker image. To do so, use requirements.txt and prerun.sh files.
The topics in this page:
# Environment Variables
The execution environment for each AI Studio job is configured with a predefined set of environment variables that users can leverage within their scripts and experiments.
The complete list of environment variables (ENV) available is as follows:
CNVRG_COMPUTE_CPU
CNVRG_COMPUTE_MEMORY
CNVRG_COMPUTE_GPU

CNVRG_COMPUTE_TEMPLATE
CNVRG_COMPUTE_CLUSTER

CNVRG_JOB_ID
CNVRG_JOB_URL
CNVRG_JOB_NAME
CNVRG_JOB_TYPE
# Use Cases
Different use cases require access to a custom library instead of a new custom Docker image.
# requirements.txt (Python)
There are some cases when a user wants to use a different version of a library or a package that isn't installed on the machine or included in the Docker image.
To support this use case, AI Studio offers an easy solution. If a requirements.txt file exists in the project root directory, AI Studio installs the packages listed in the file before the workspace or experiment starts.
Complete the following steps to use a requirements.txt file:
- Create a file named
requirements.txtand save it in the project head tree (in the main project directory). - Specify the Python libraries to use.
WARNING
If creating the file in a local environment, ensure to sync the file to AI Studio or the Git repository.
The following provides an example requirements.txt file:
docutils==0.11
Jinja2==2.7.2
MarkupSafe==0.19
Pygments==1.6
Sphinx==1.2.2
numpy
tensorflow
To generate requirements.txt of the similar format for custom libraries in a project, run:
pip freeze > requirements.txt
# prerun.sh Script
When using AI Studio to run experiments or to start a notebook, there are some cases when a user wants to run a bash script before starting the experiment or notebook.
To support this use case, AI Studio platform offers an easy solution. When the job starts, it searches for a prerun.sh file and automatically runs it before the experiment or notebook starts.
Complete the following steps to use a prerun.sh script:
- Create a file named
prerun.shand save it in the project head tree (in the main project directory). Include all the commands to execute before the experiment starts. - Sync or push the file before starting an experiment or a notebook.
# Container Registries
The AI Studio platform provides several default Docker container registries. Furthermore, users can integrate additional external container registries beyond those offered by default. This feature enables users to pull images from designated public registries and to add custom images to AI Studio. In the context of private registries, users can build new images locally and push them to the specified private registry as needed.
In AI Studio, container registries are categorized into two types:
Public Registries: This category encompasses registries such as AI Studio, Docker Hub, and NVIDIA. These registries are indicated by a globe icon. Users can perform image pull operations from these public registries; however, push operations are restricted, meaning users cannot upload new images to these registries.
Private Registries: This category includes Azure Container Registry (ACR), Amazon Elastic Container Registry (ECR), Google Container Registry (GCR), along with NVIDIA's private registry and private instances of Docker Hub. Users have the capability to both pull and push images to these registries, facilitating greater flexibility in image management.
# Access default registries in AI Studio
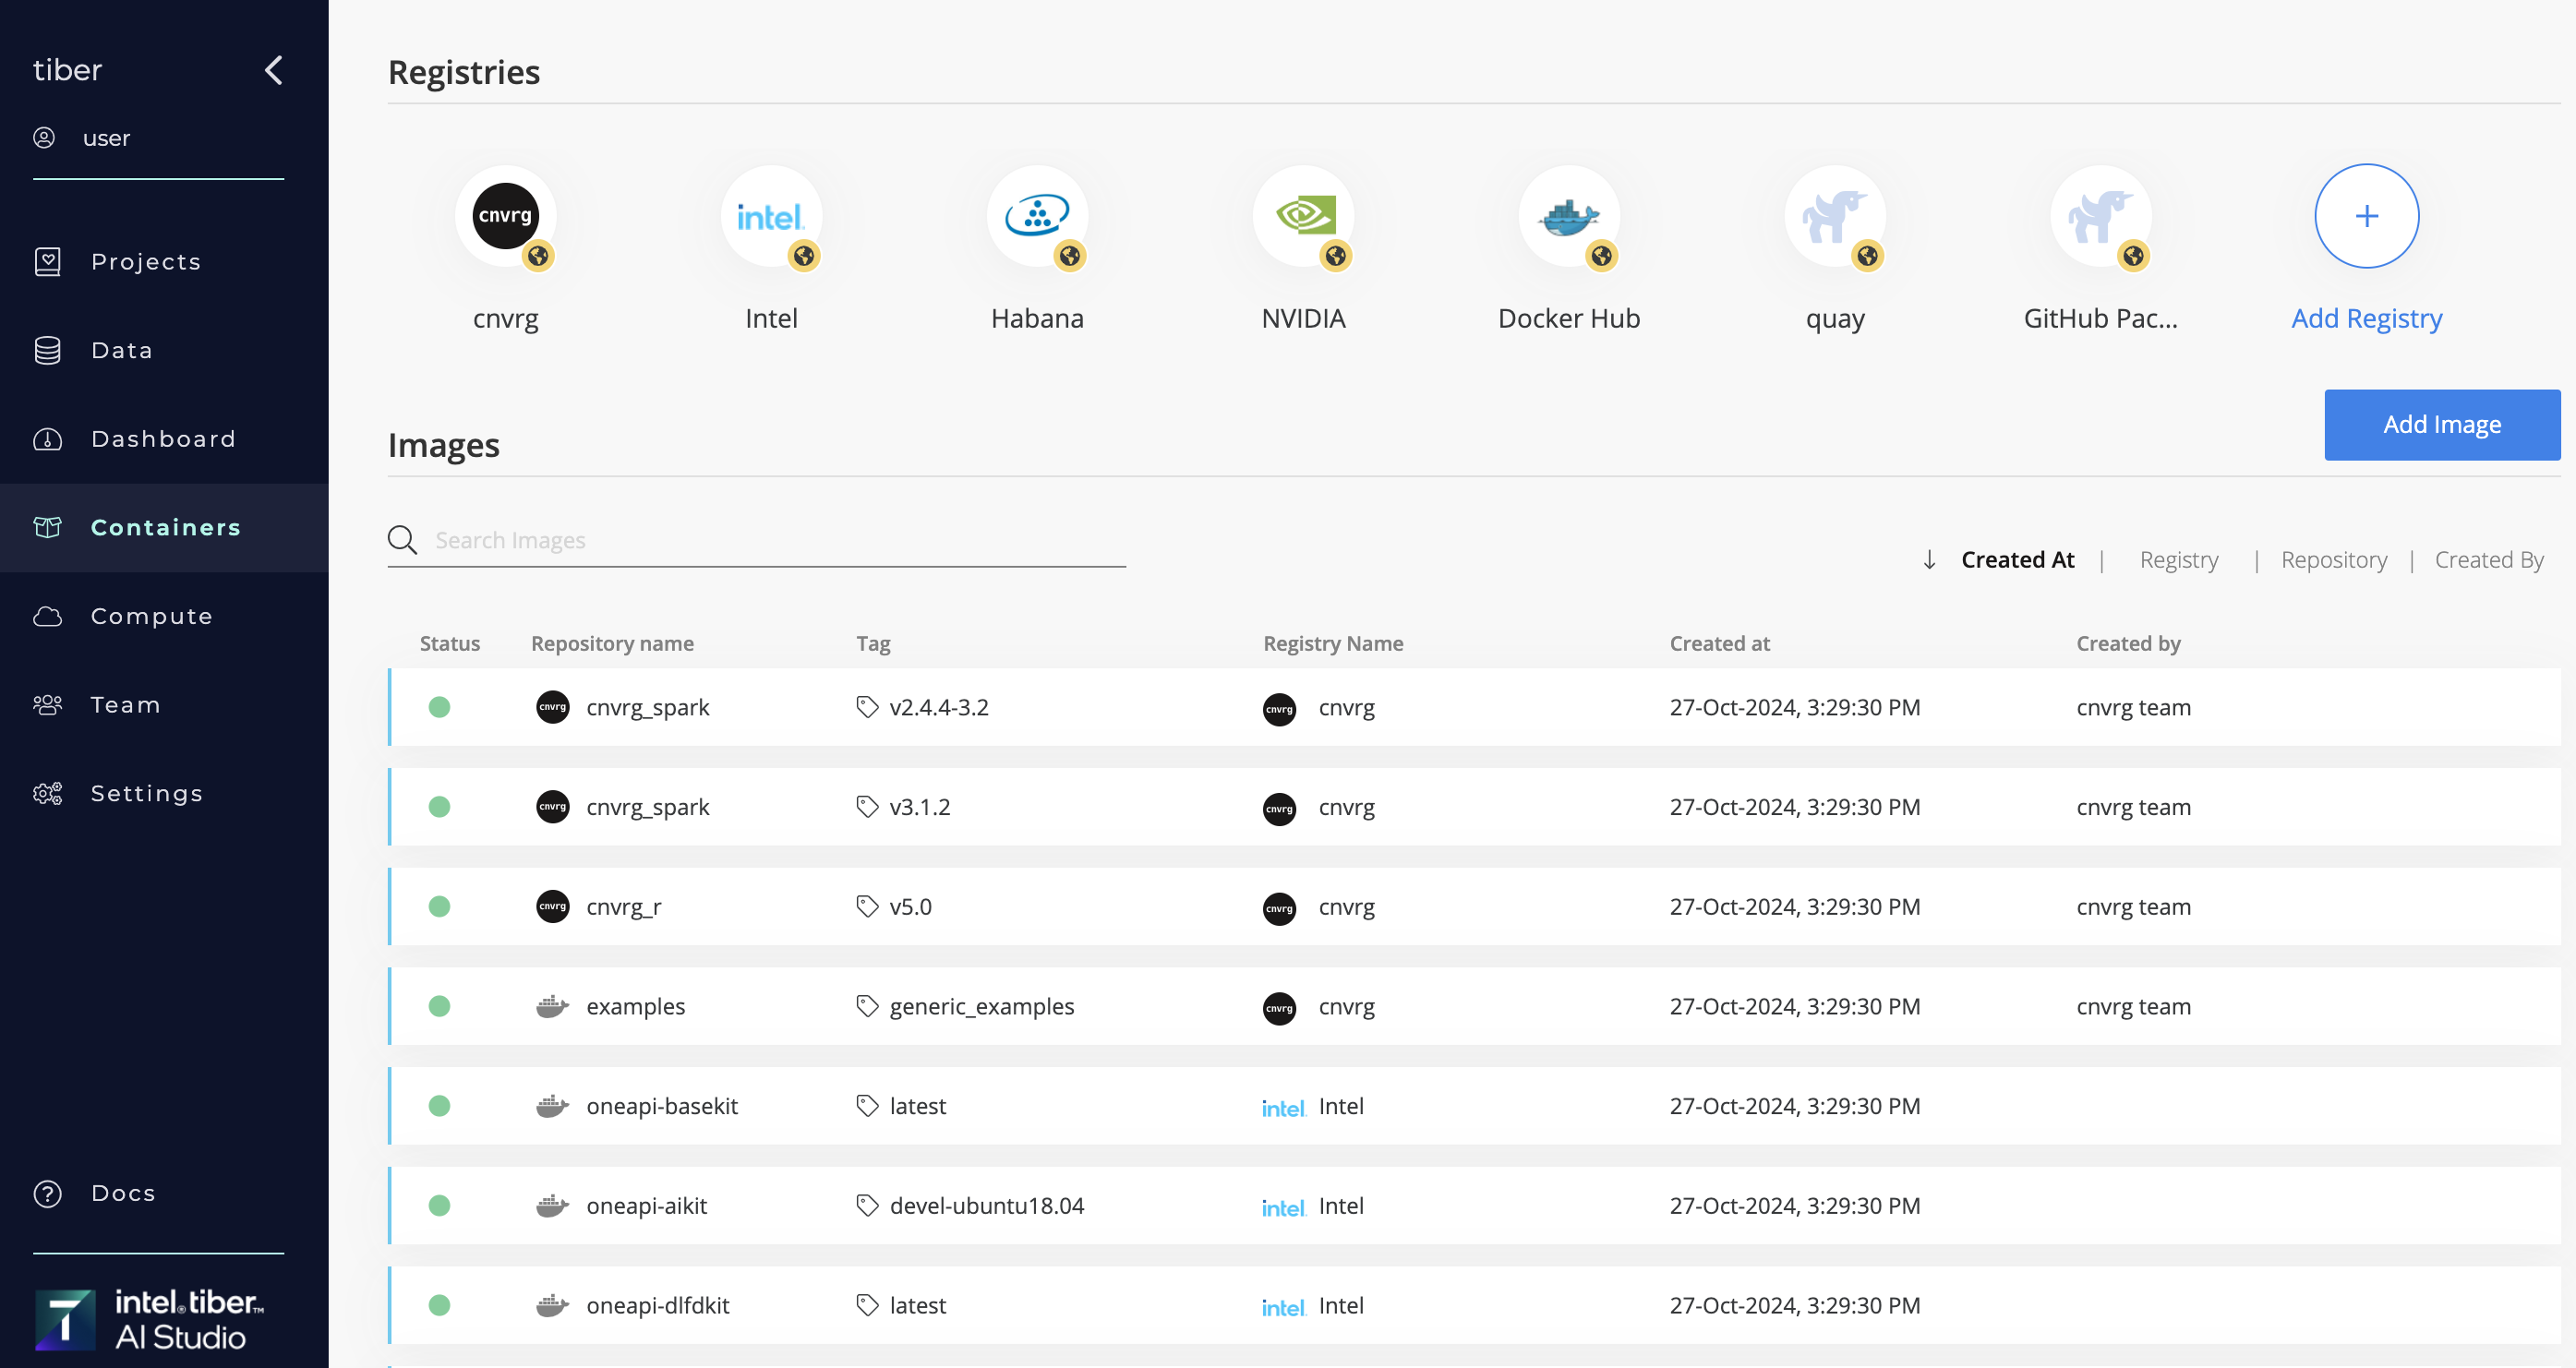
Click the Containers tab of your organization to display the AI Studio-included default registries, described in the following sections.
# AI Studio(cnvrg)
An organization's account is automatically connected to AI Studio's Docker container registries, which contain the default images the AI Studio team builds and maintains.
# NVIDIA NGC
NVIDIA's NGC platform is integrated with AI Studio. Without any further setup, a user can pull all of NVIDIA's Docker images.
# Docker Hub
The AI Studio platform is connected to the official Docker Hub container registry. Users can pull images from any public Docker Hub repository by simply adding the details to AI Studio. Follow the instructions here.
TIP
To pull an image from a public registry, the best practice is to connect to it, but this is not a requirement.
# Add a registry to AI Studio
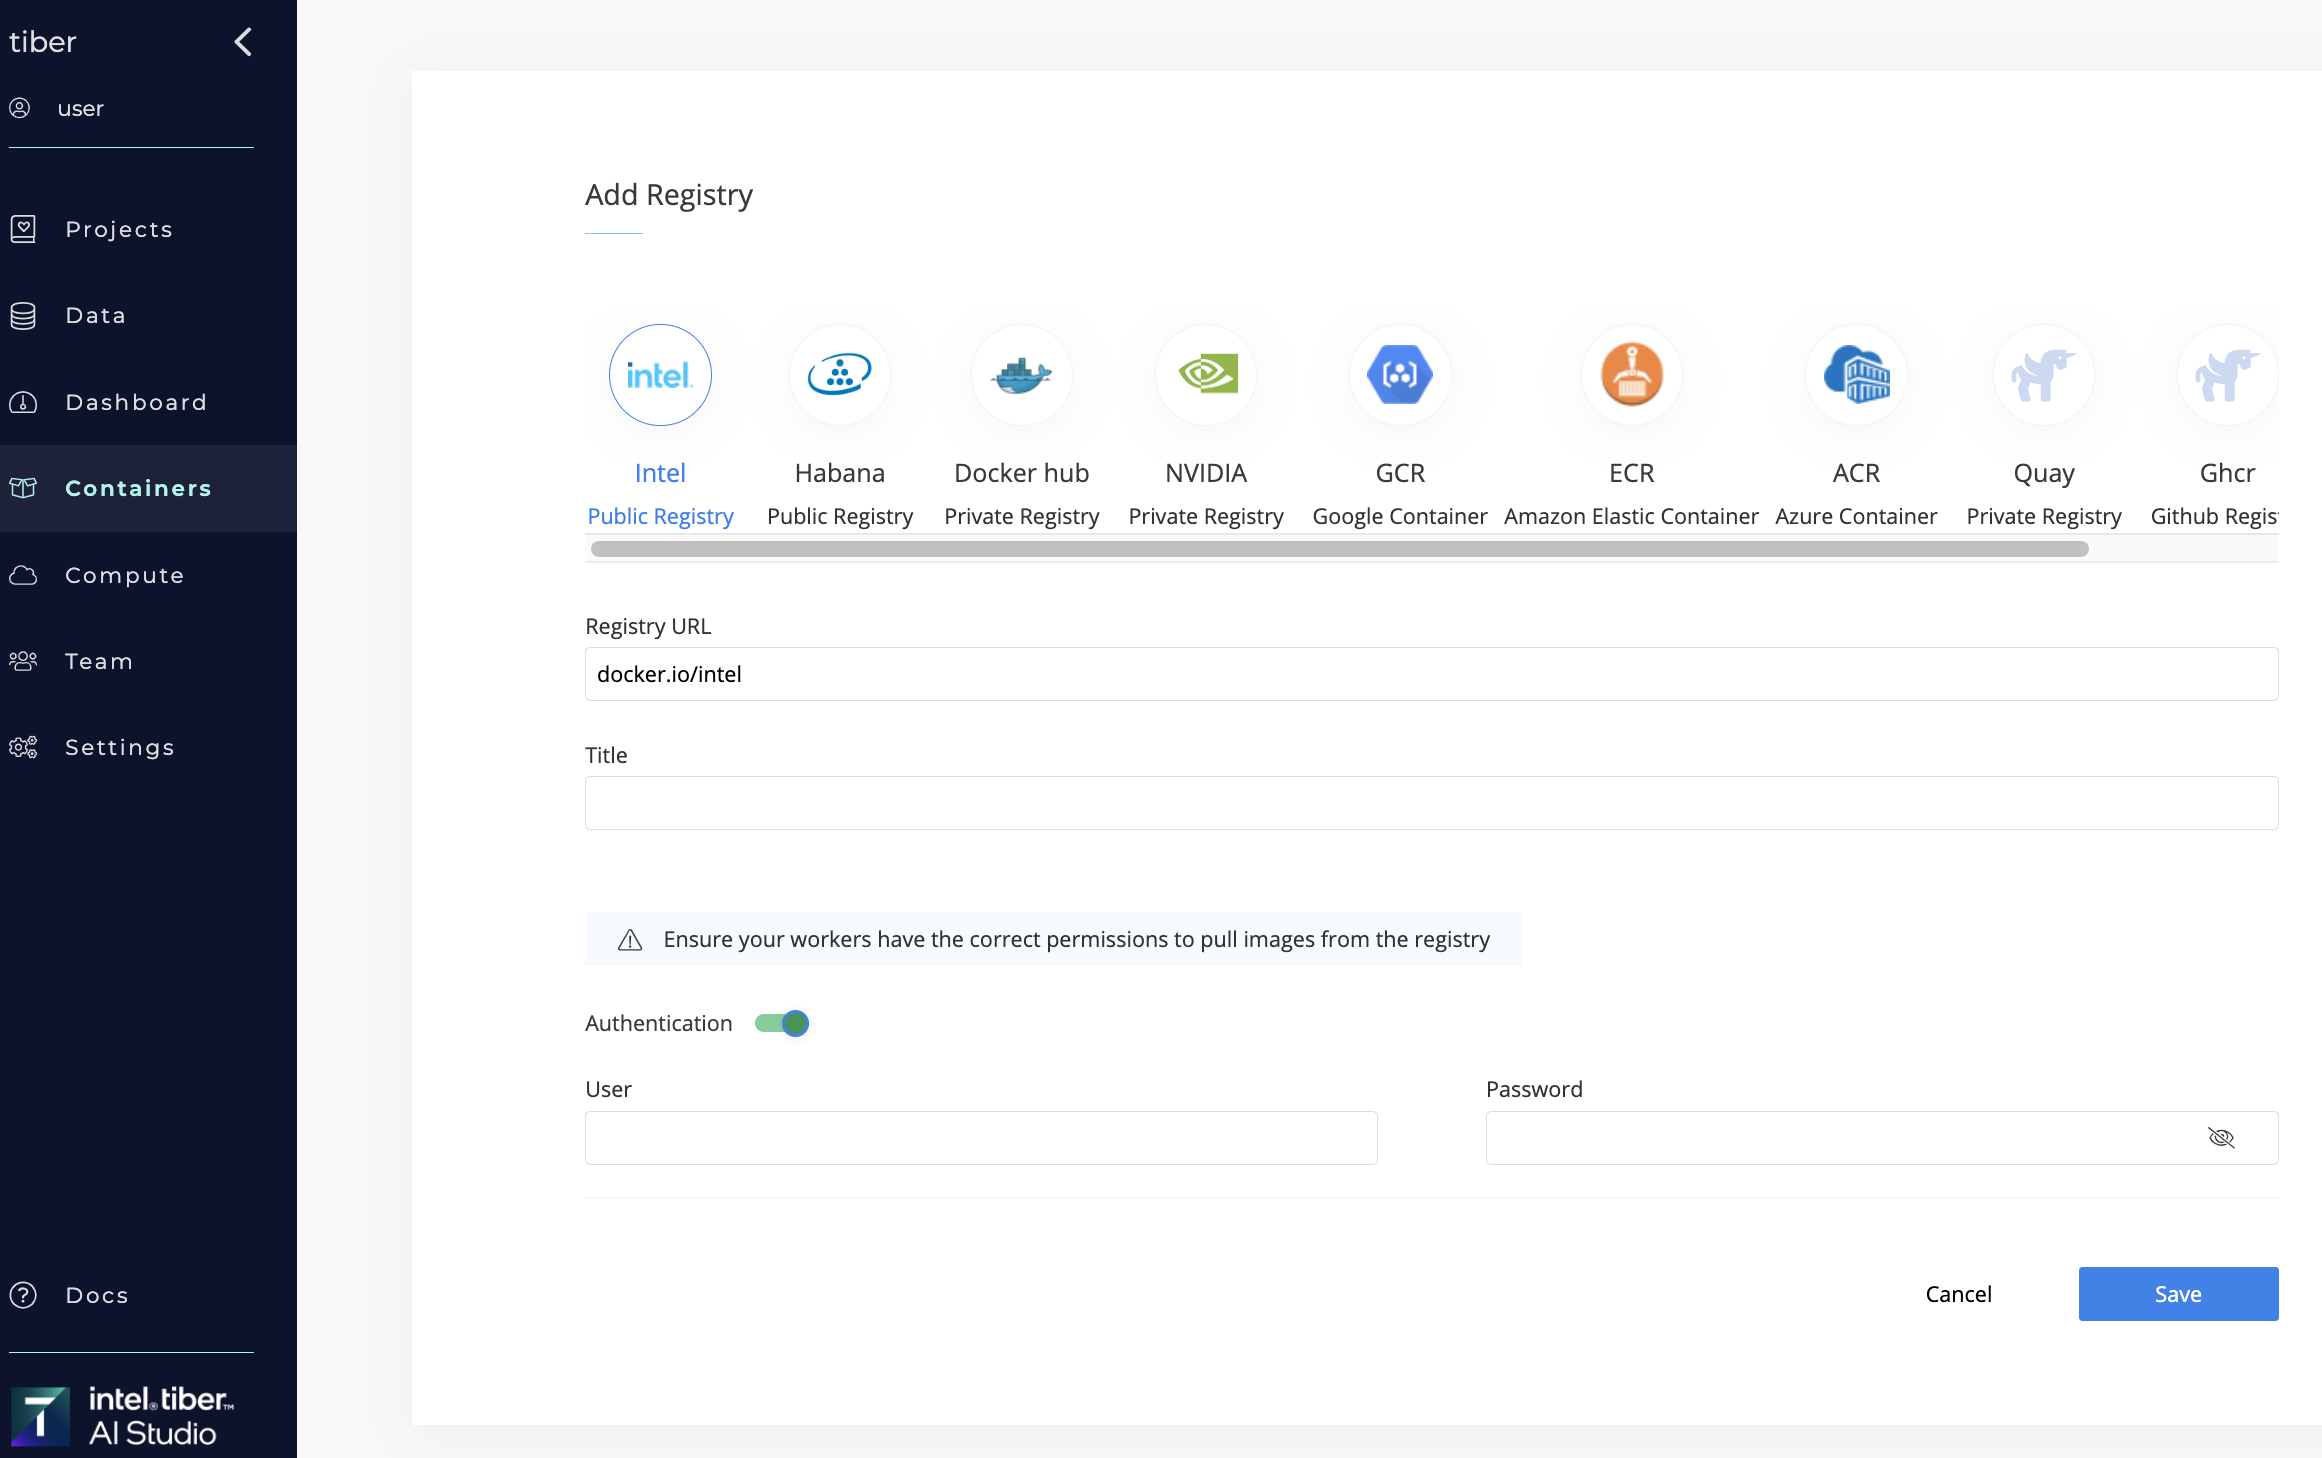
Complete the following steps to add a private or public registry to AI Studio:
Click the Containers tab of your organization.
Click Add registry.
From the list of registries, select one to connect to.
In the Registry URL field, enter the full registry URL.
Enter a Title for the new registry.
NOTE
If authentication is required for the new registry, click Authentication and provide the credentials (username and password).
Authentication is optional, because most cloud providers can be connected directly to the Kubernetes cluster, without additional authentication needed. It may also be a public registry.
Click Save.
# Default Docker Images
The AI Studio platform includes a set of Docker images that meet most ML requirements of data scientists. Using ready-made images saves them the often complex task of building Docker images thatAI Studios.
Users can also add custom Docker images to use in AI Studio.
To view the images and registries within AI Studio, navigate to the Containers tab of your organization.
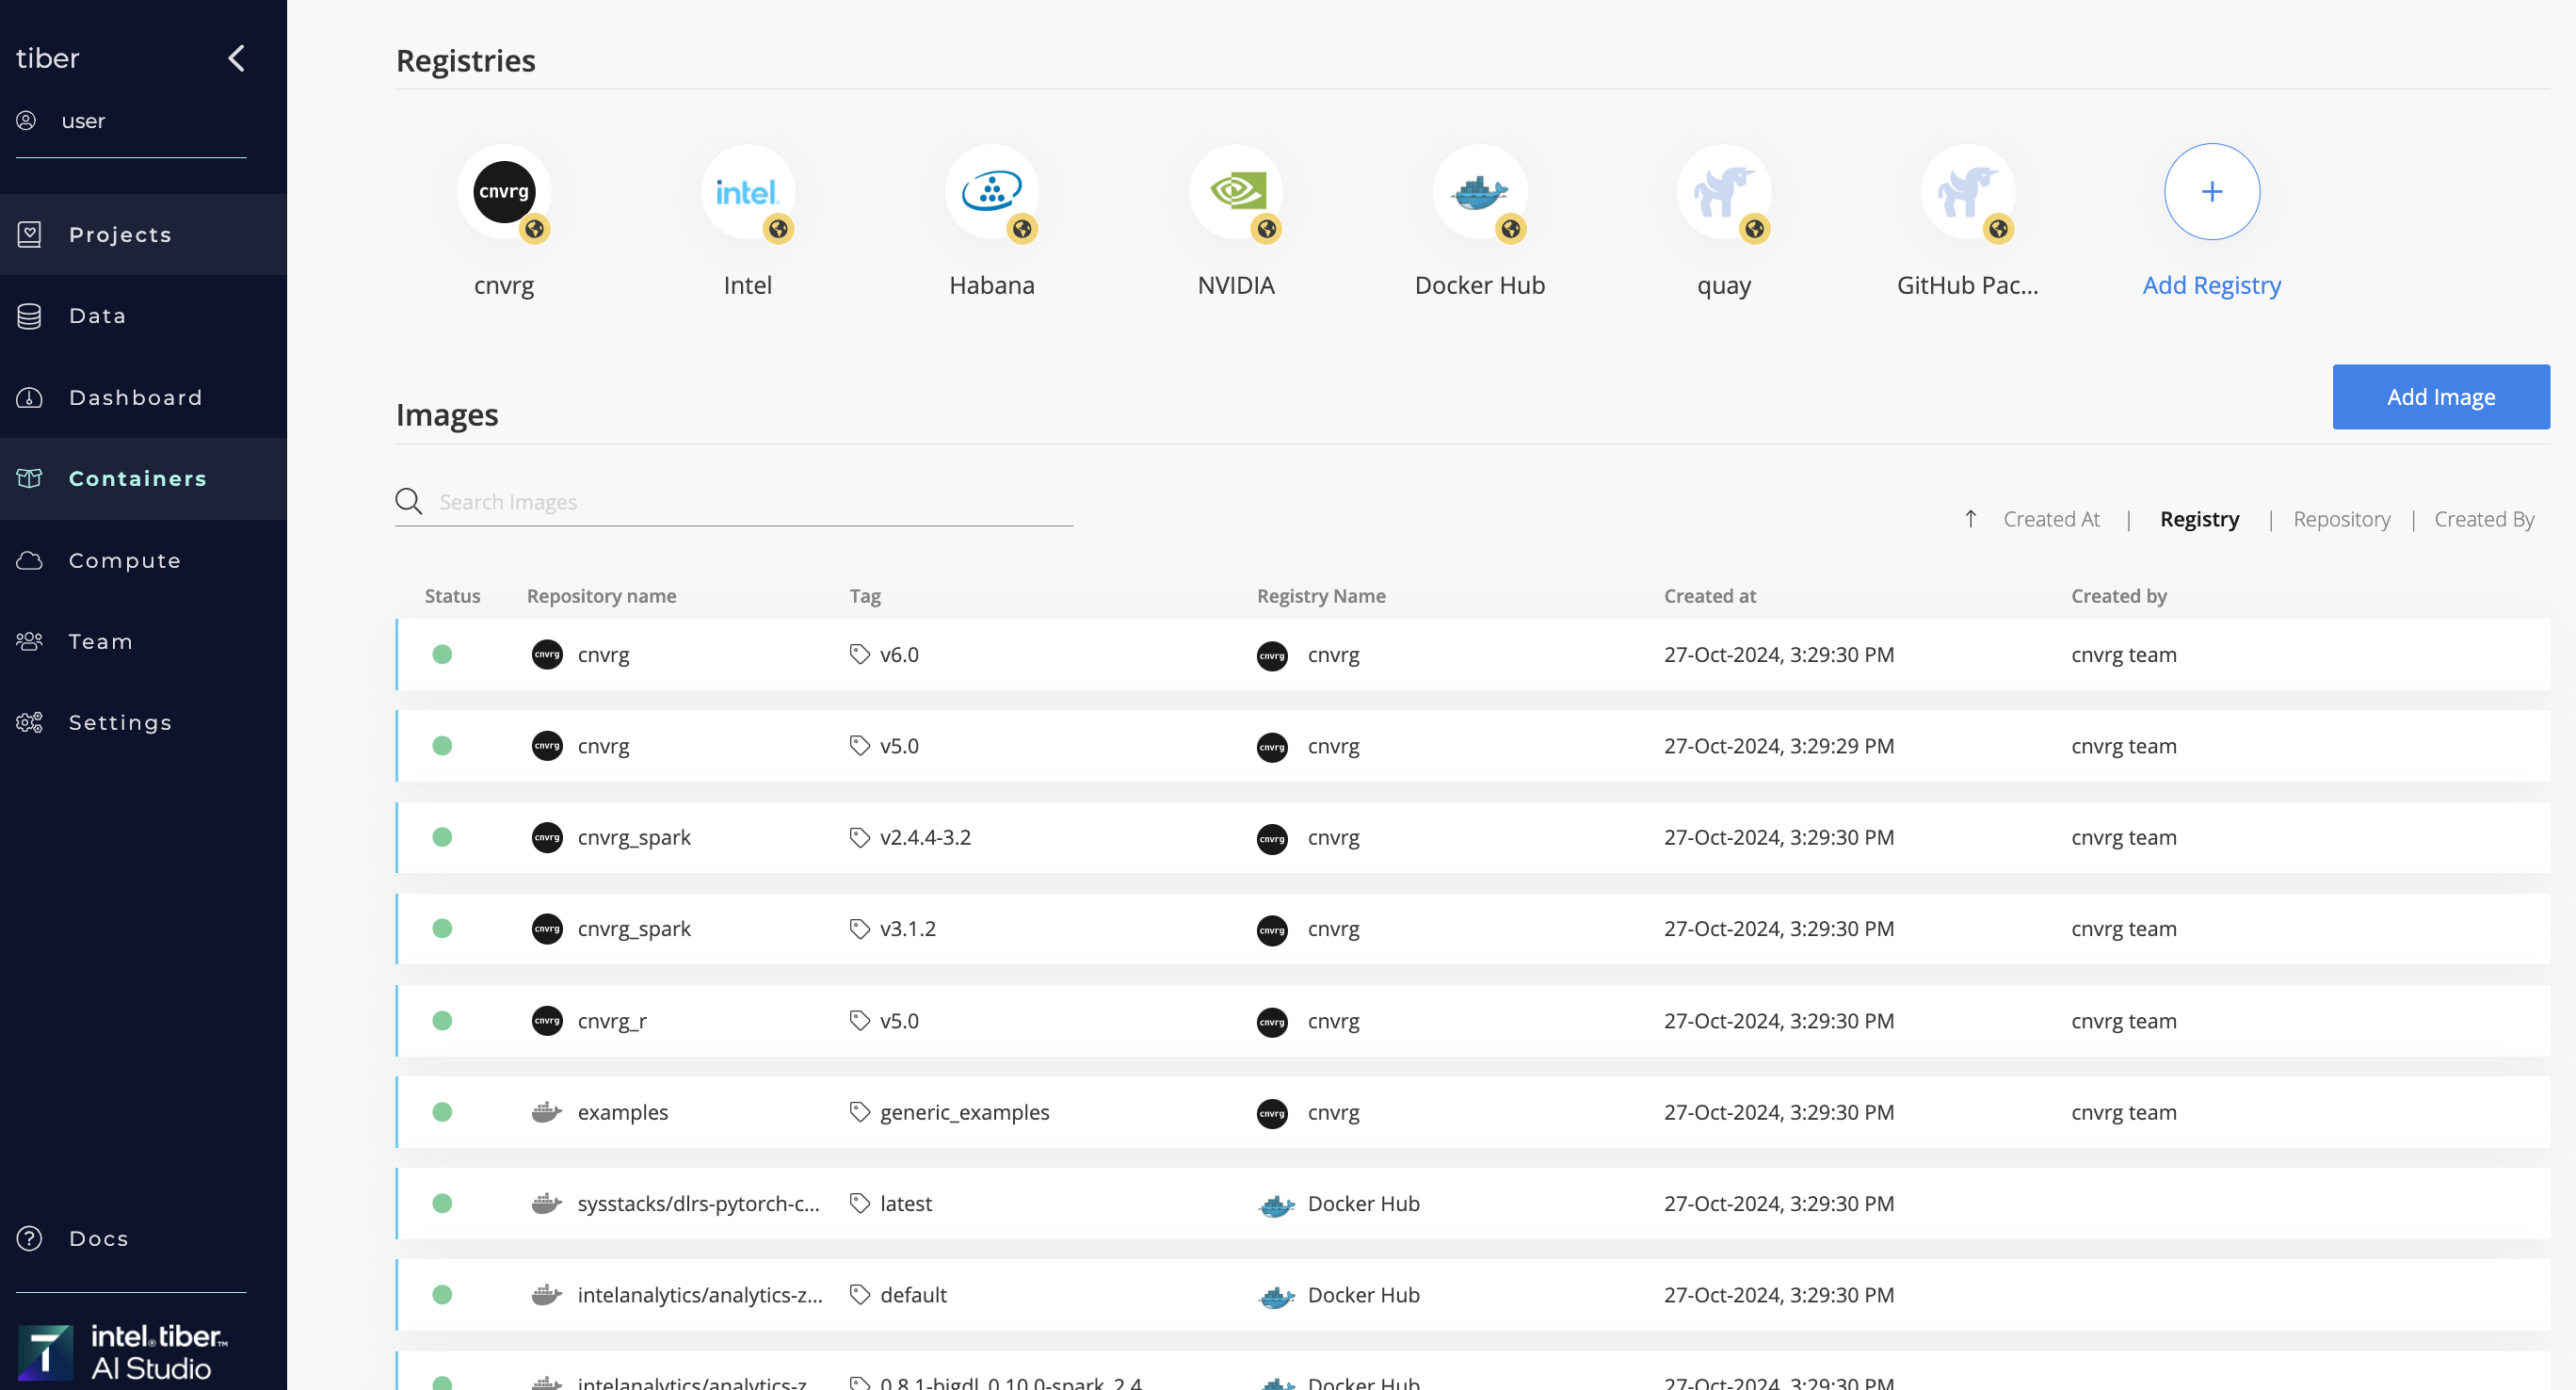
# Registries section
On the Containers page, the top Registries section displays the registries AI Studio has been configured to connect to.
A container registry is a storage and content delivery system, essentially a holding repository, which contains the Docker images available in different tagged versions.
Users can connect AI Studio to any additional registry to which they have access.
Click an icon to display the container registry's page.
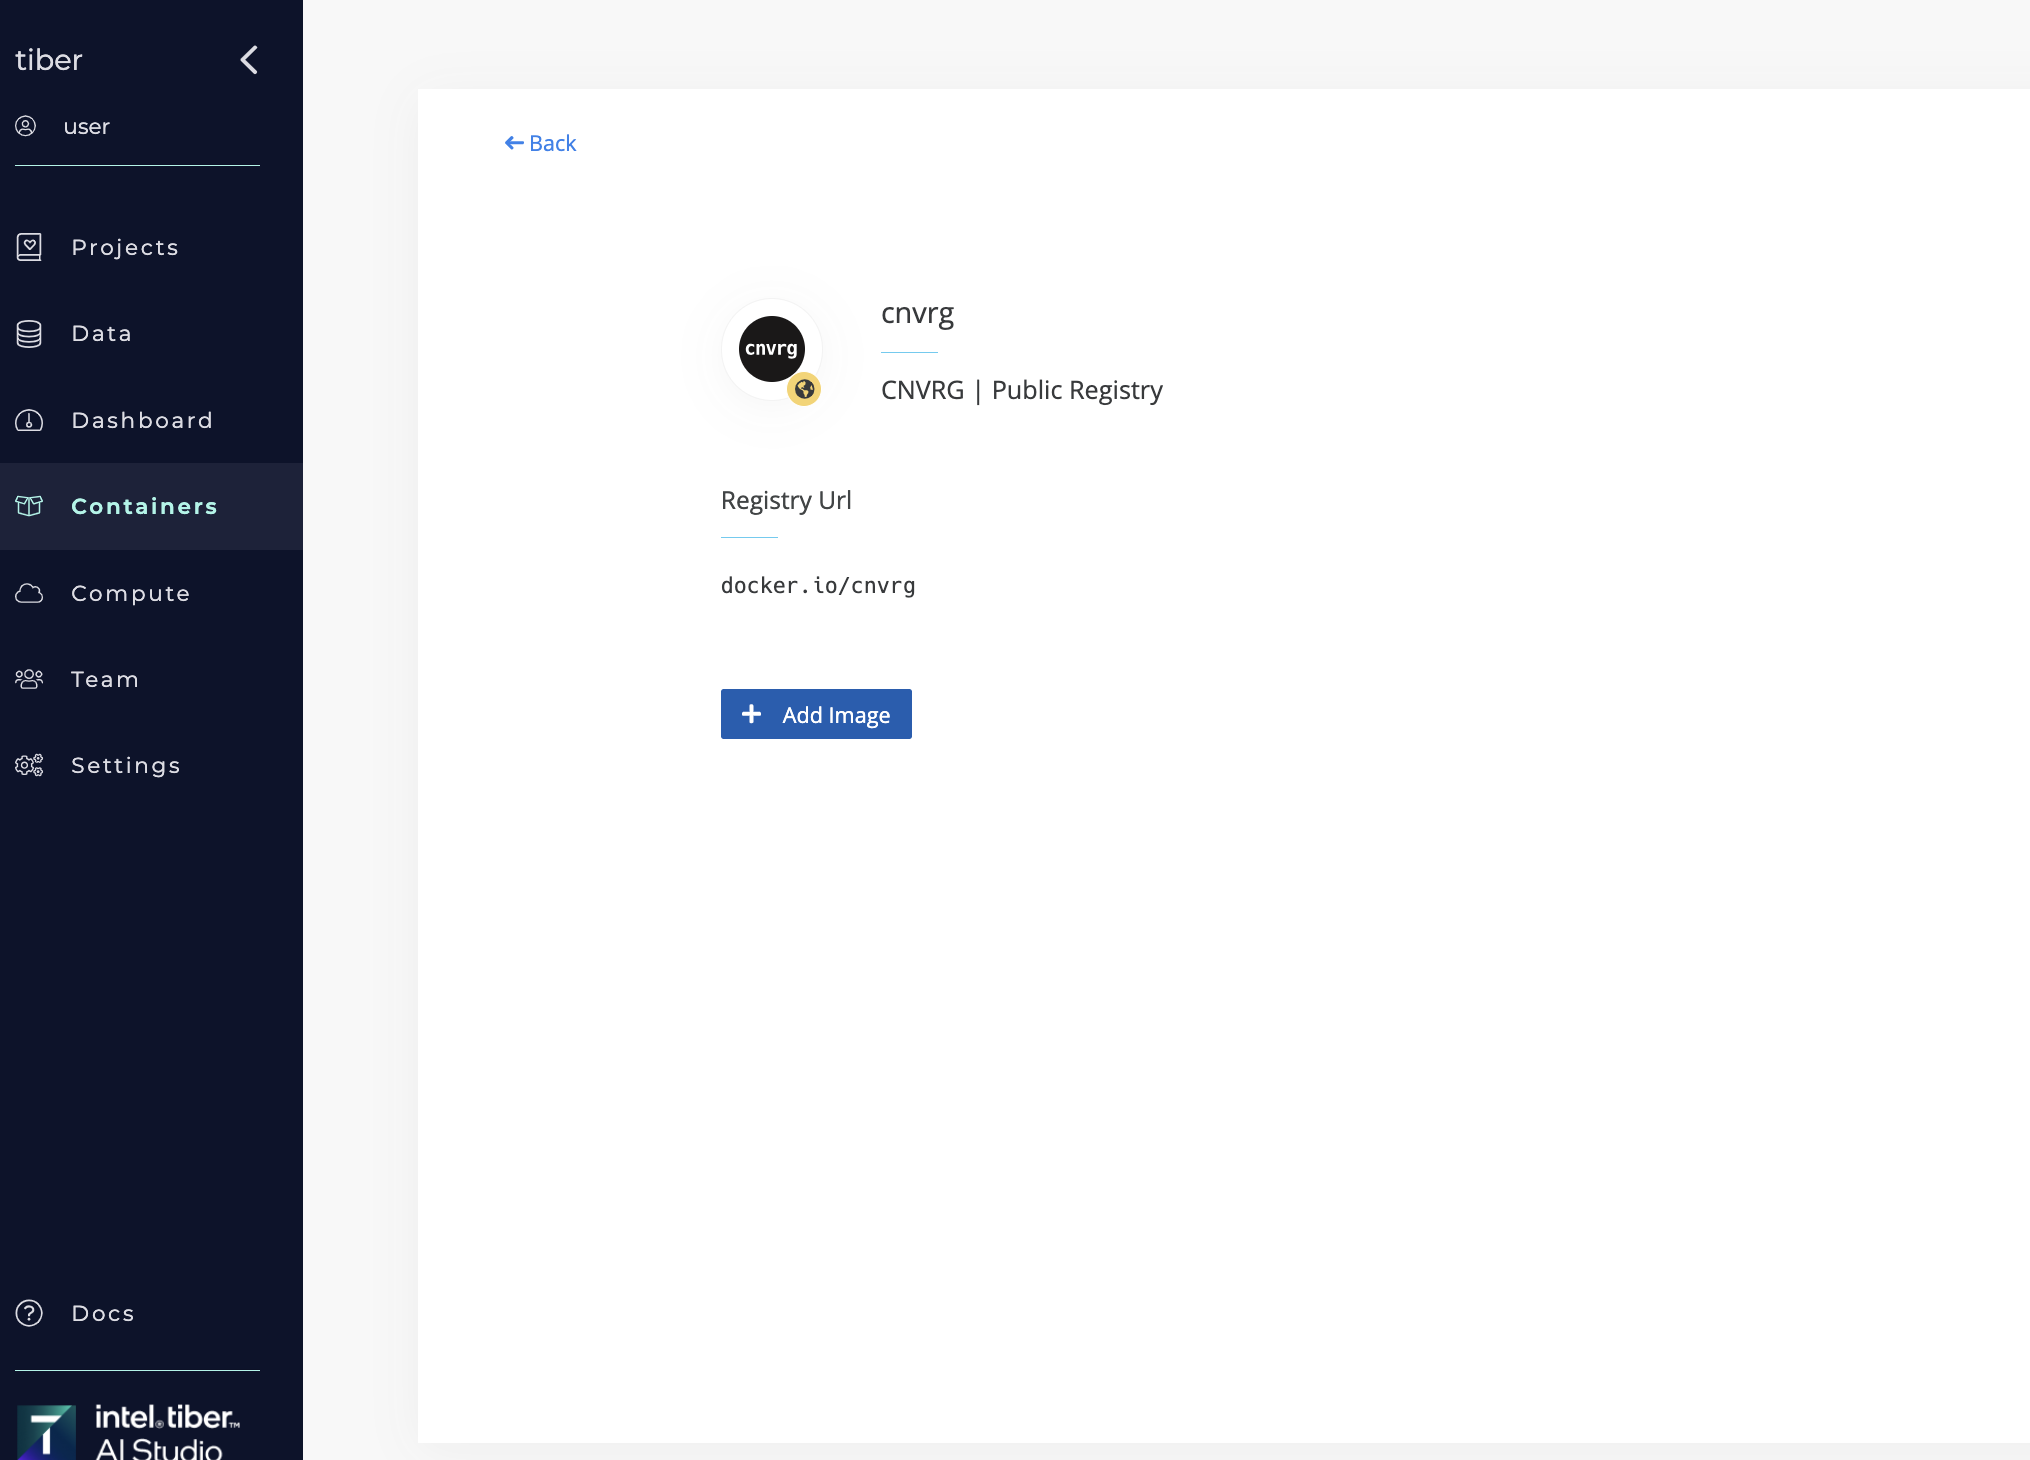
::: tipFrom this interface, you can edit or delete entries for custom registries exclusively. Additionally, you can manage container images by executing build and pull commands, facilitating efficient image lifecycle management. :::
# Images section
The Containers page's bottom Images section displays a table listing the Docker images within AI Studio, including both the AI Studio-provided default images (residing in the AI Studio registry) as well as user-added images.
For each image, the table displays the following information:
- Status
- Repository name
- Tag
- Registry name
- Creation date
- Author name
Users can sort and filter the data in the table.
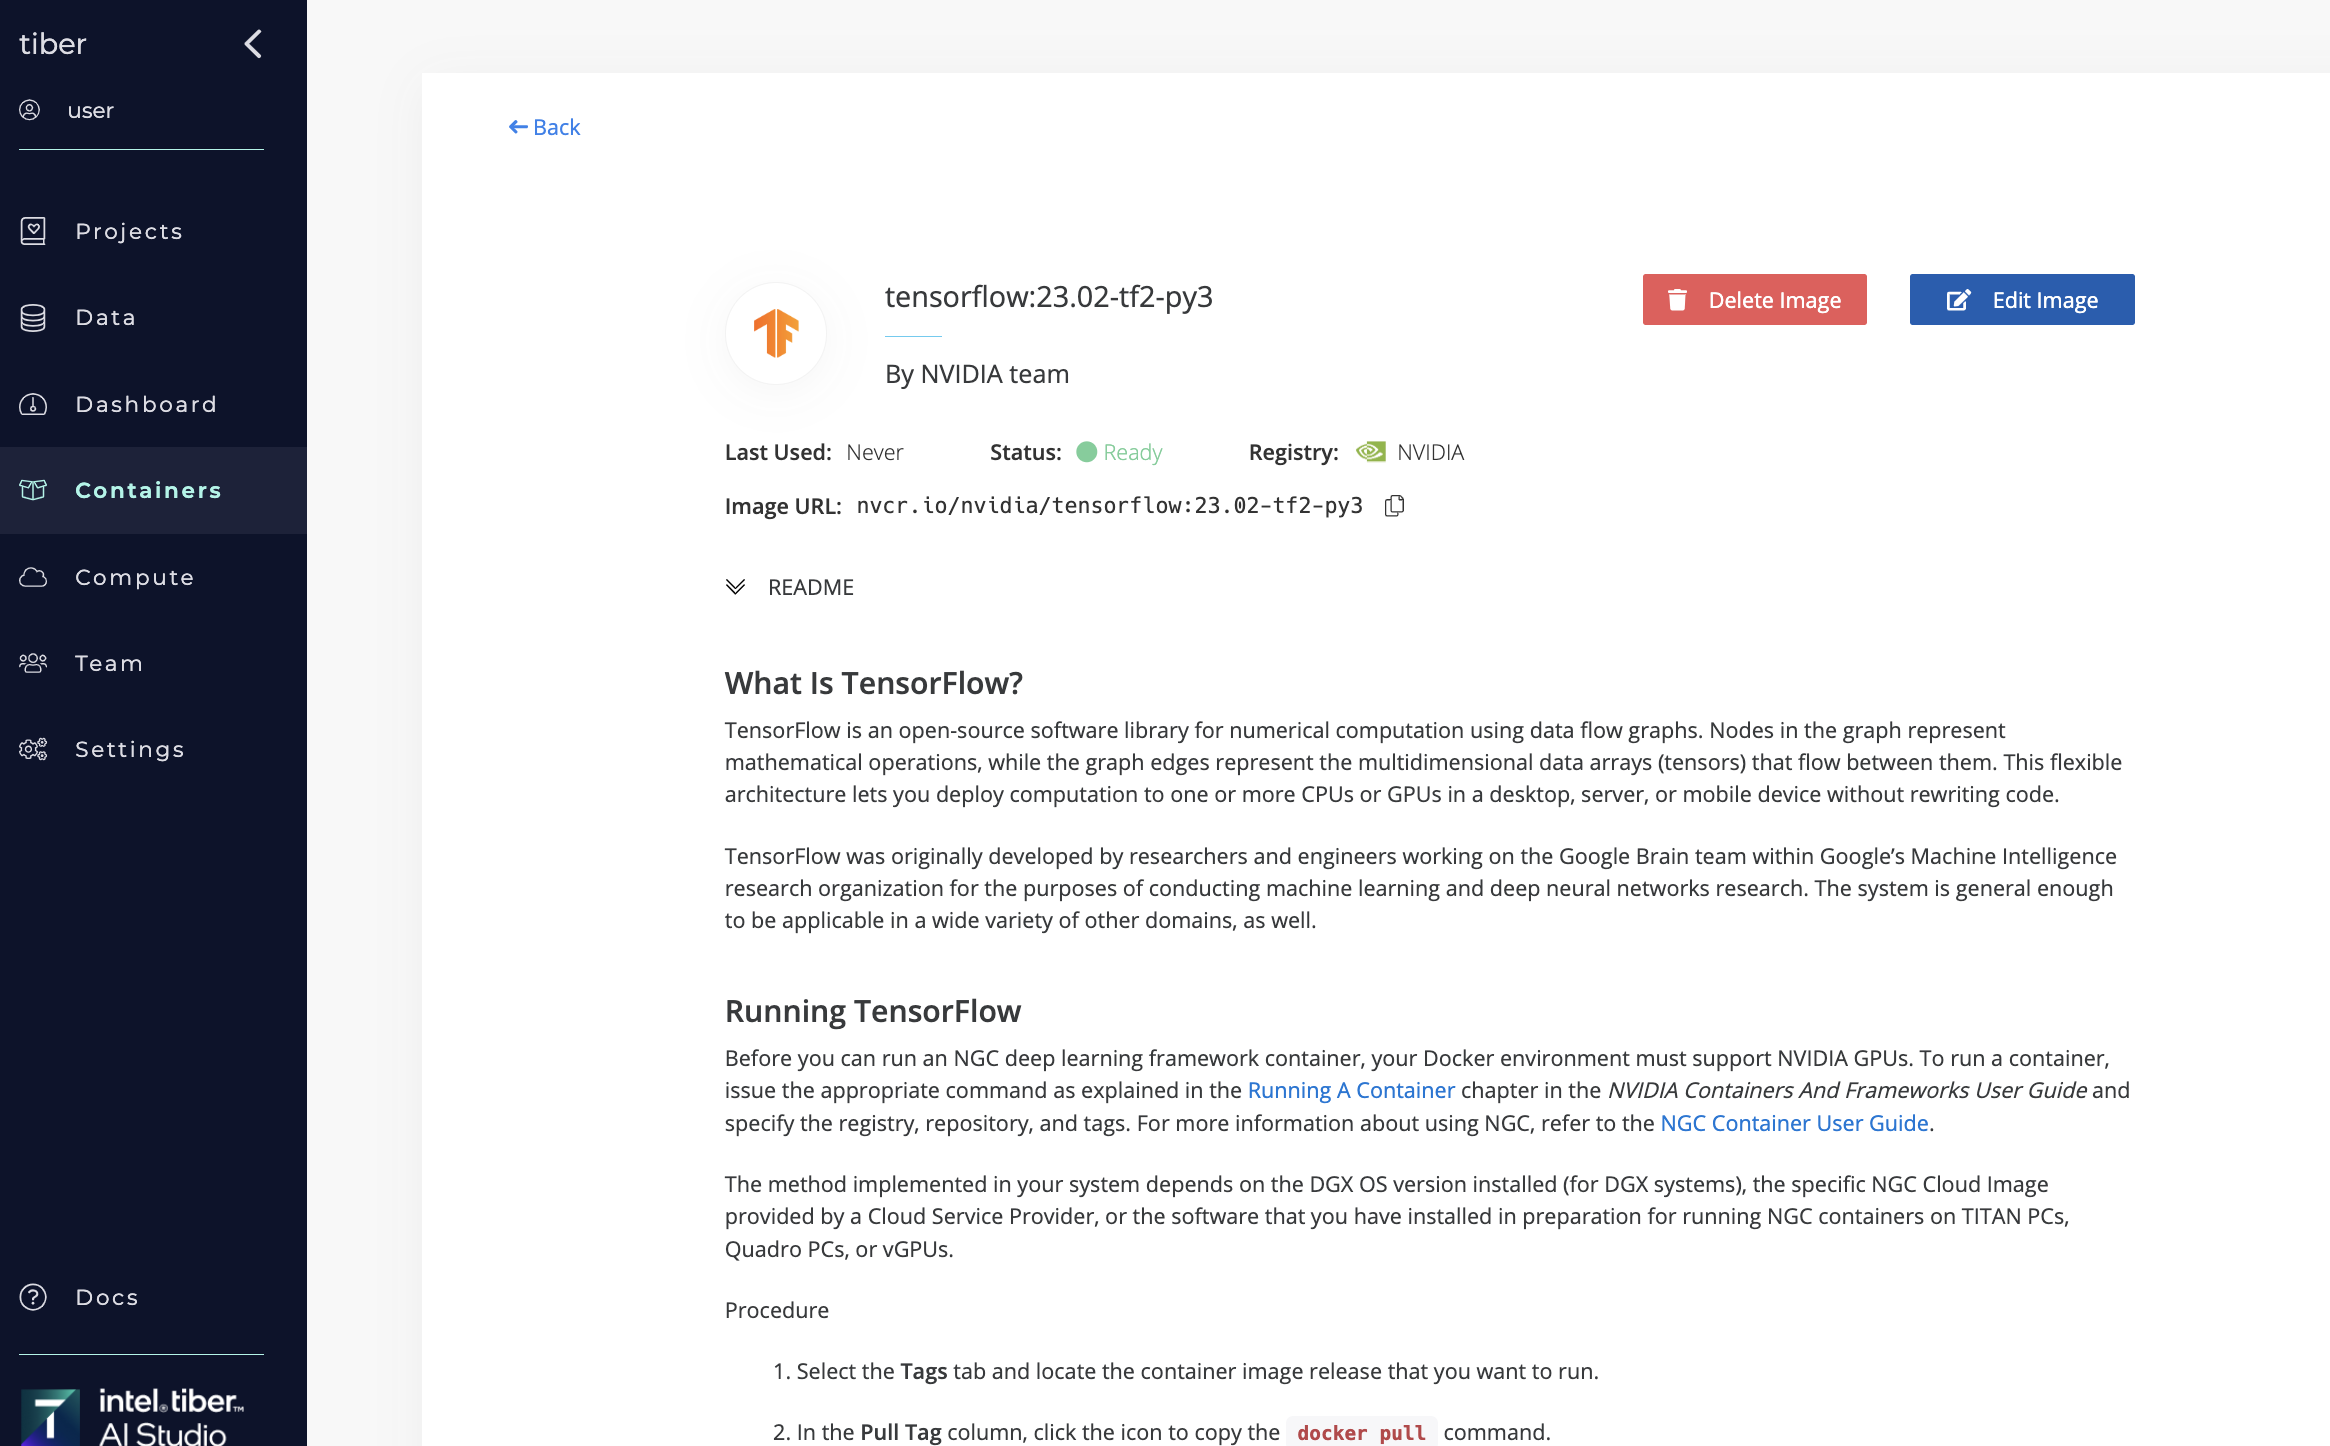
Click an entry in the table to display a summary of the image and its readme.md file. From there, edit or delete the image.
# Custom Docker Images
While AI Studio supplies capable, ready-to-use Docker images by default, users can add their own images, as required.
NOTE
The working directory of any images used in AI Studio is /cnvrg, regardless of the Dockerfile setting. To learn the requirements for custom images, see the next Custom Image Requirements section.
The AI Studio software platform enables users to:
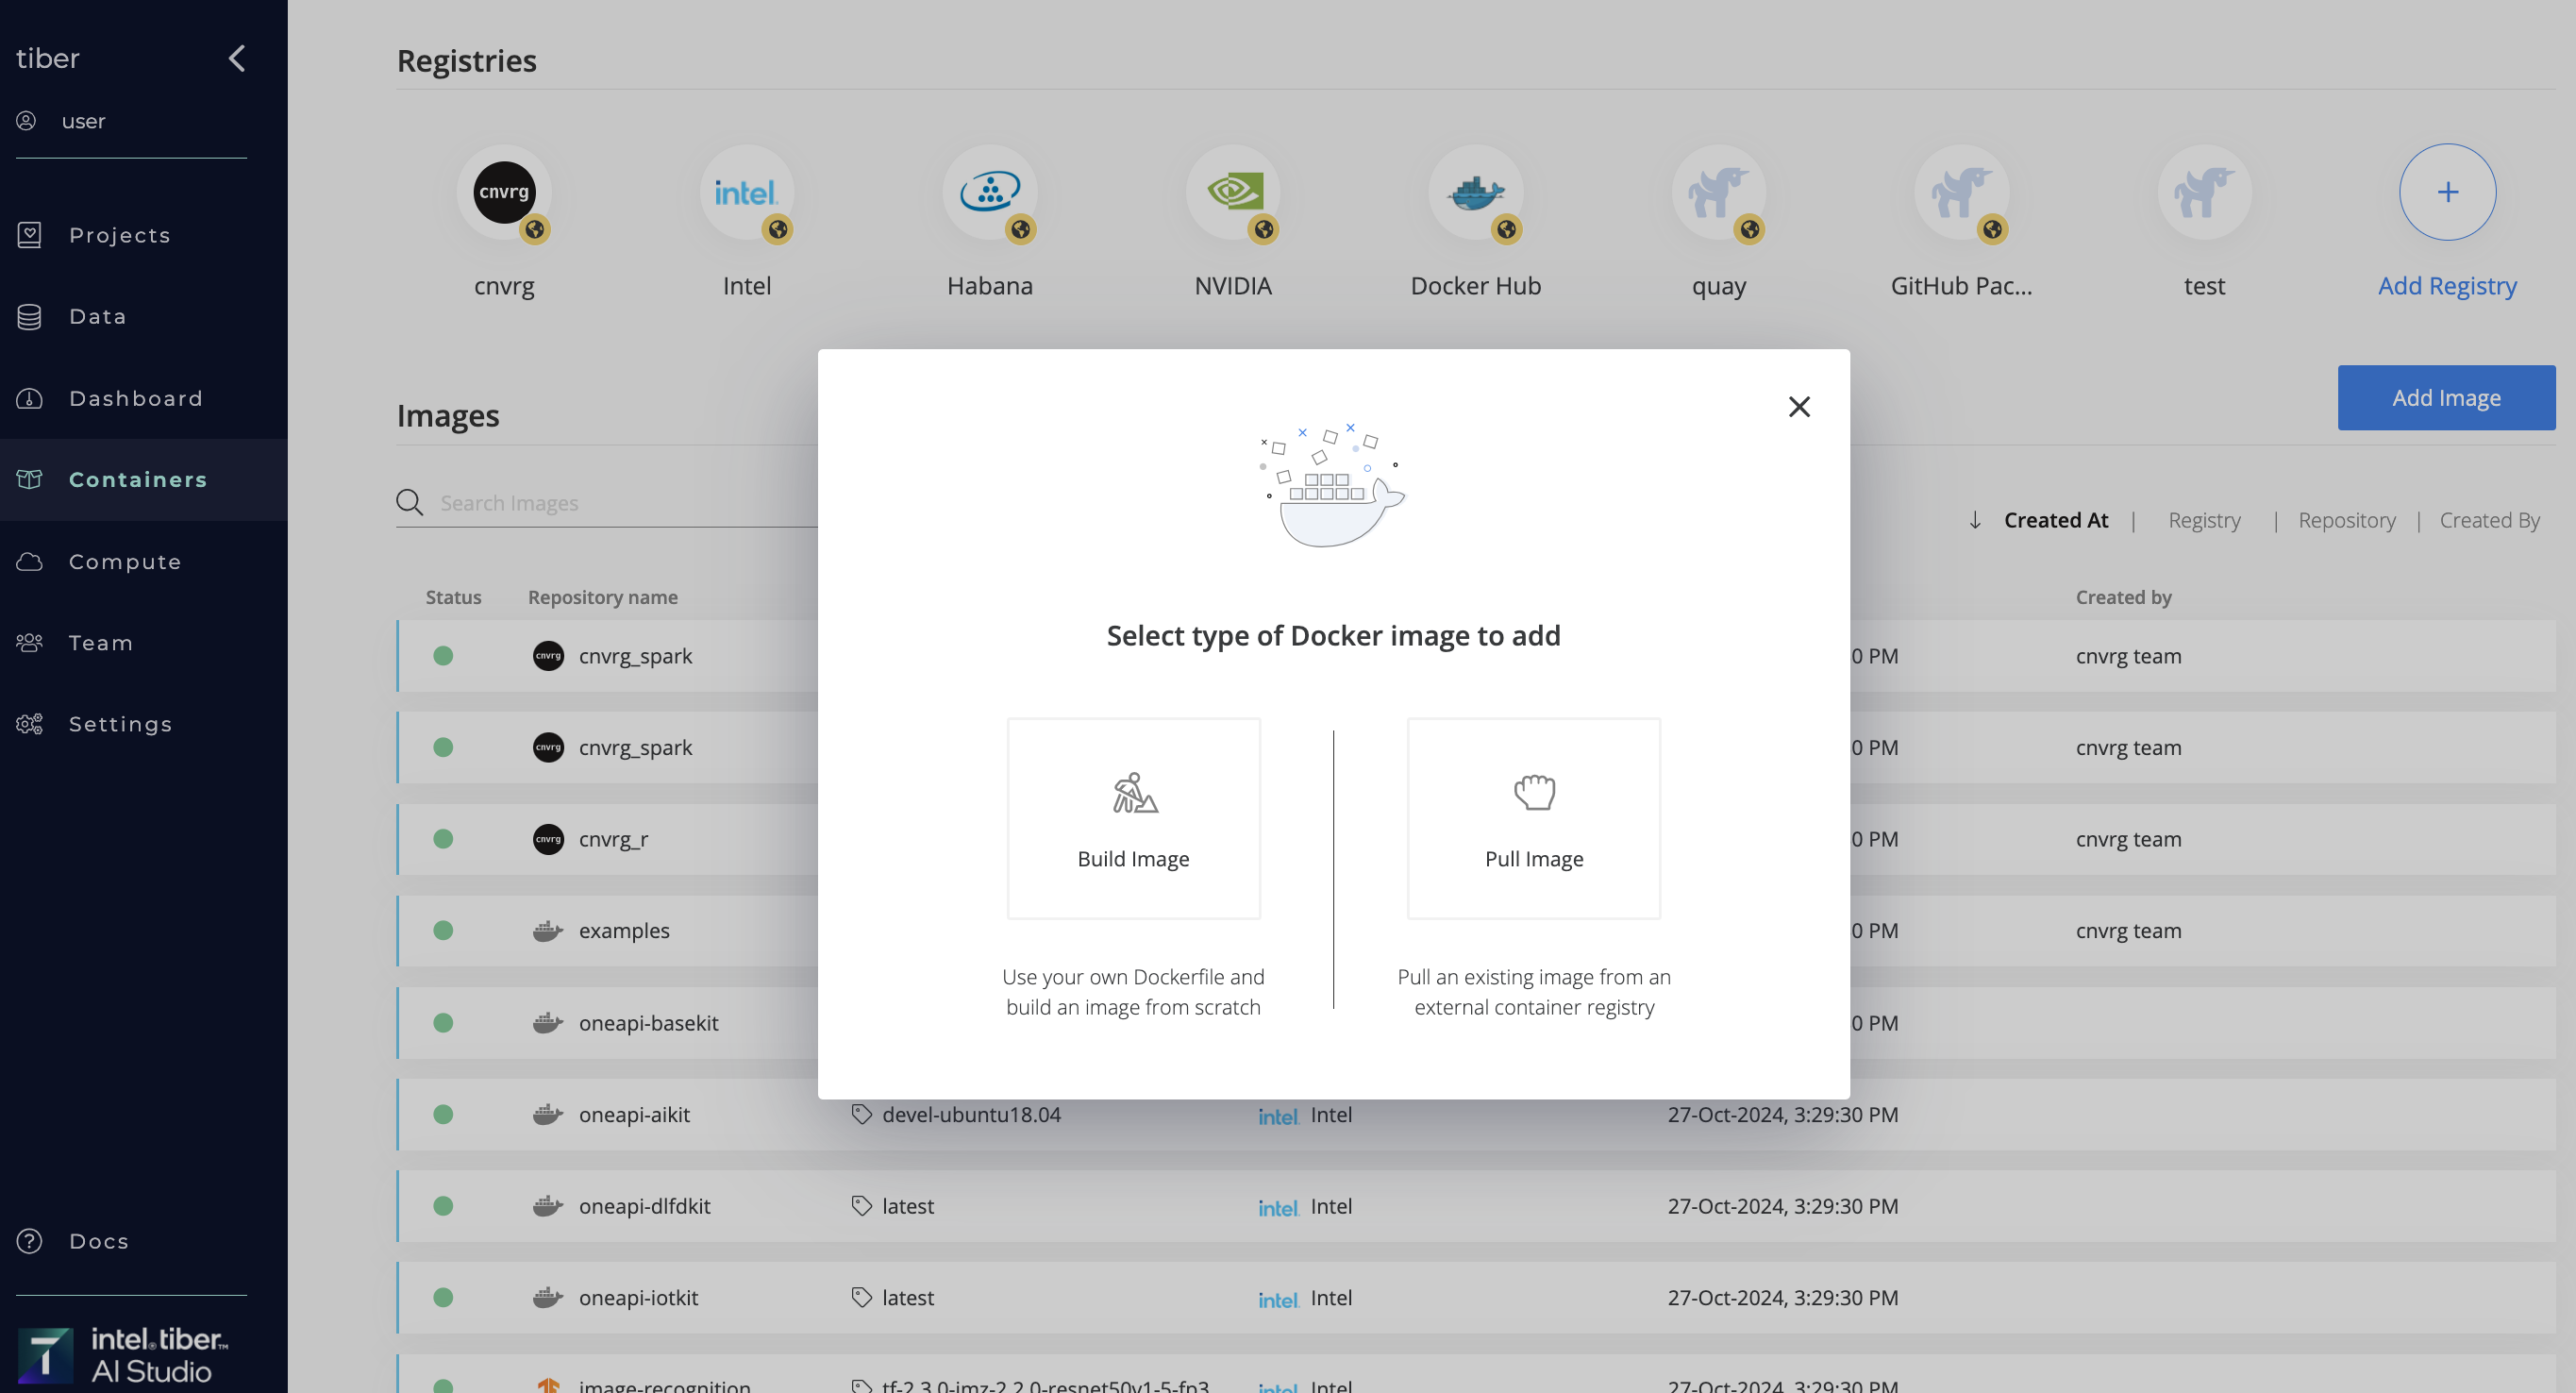
Build a Docker image: Users can upload a custom Dockerfile; AI Studio builds the Docker image and pushes it to the selected private registry.
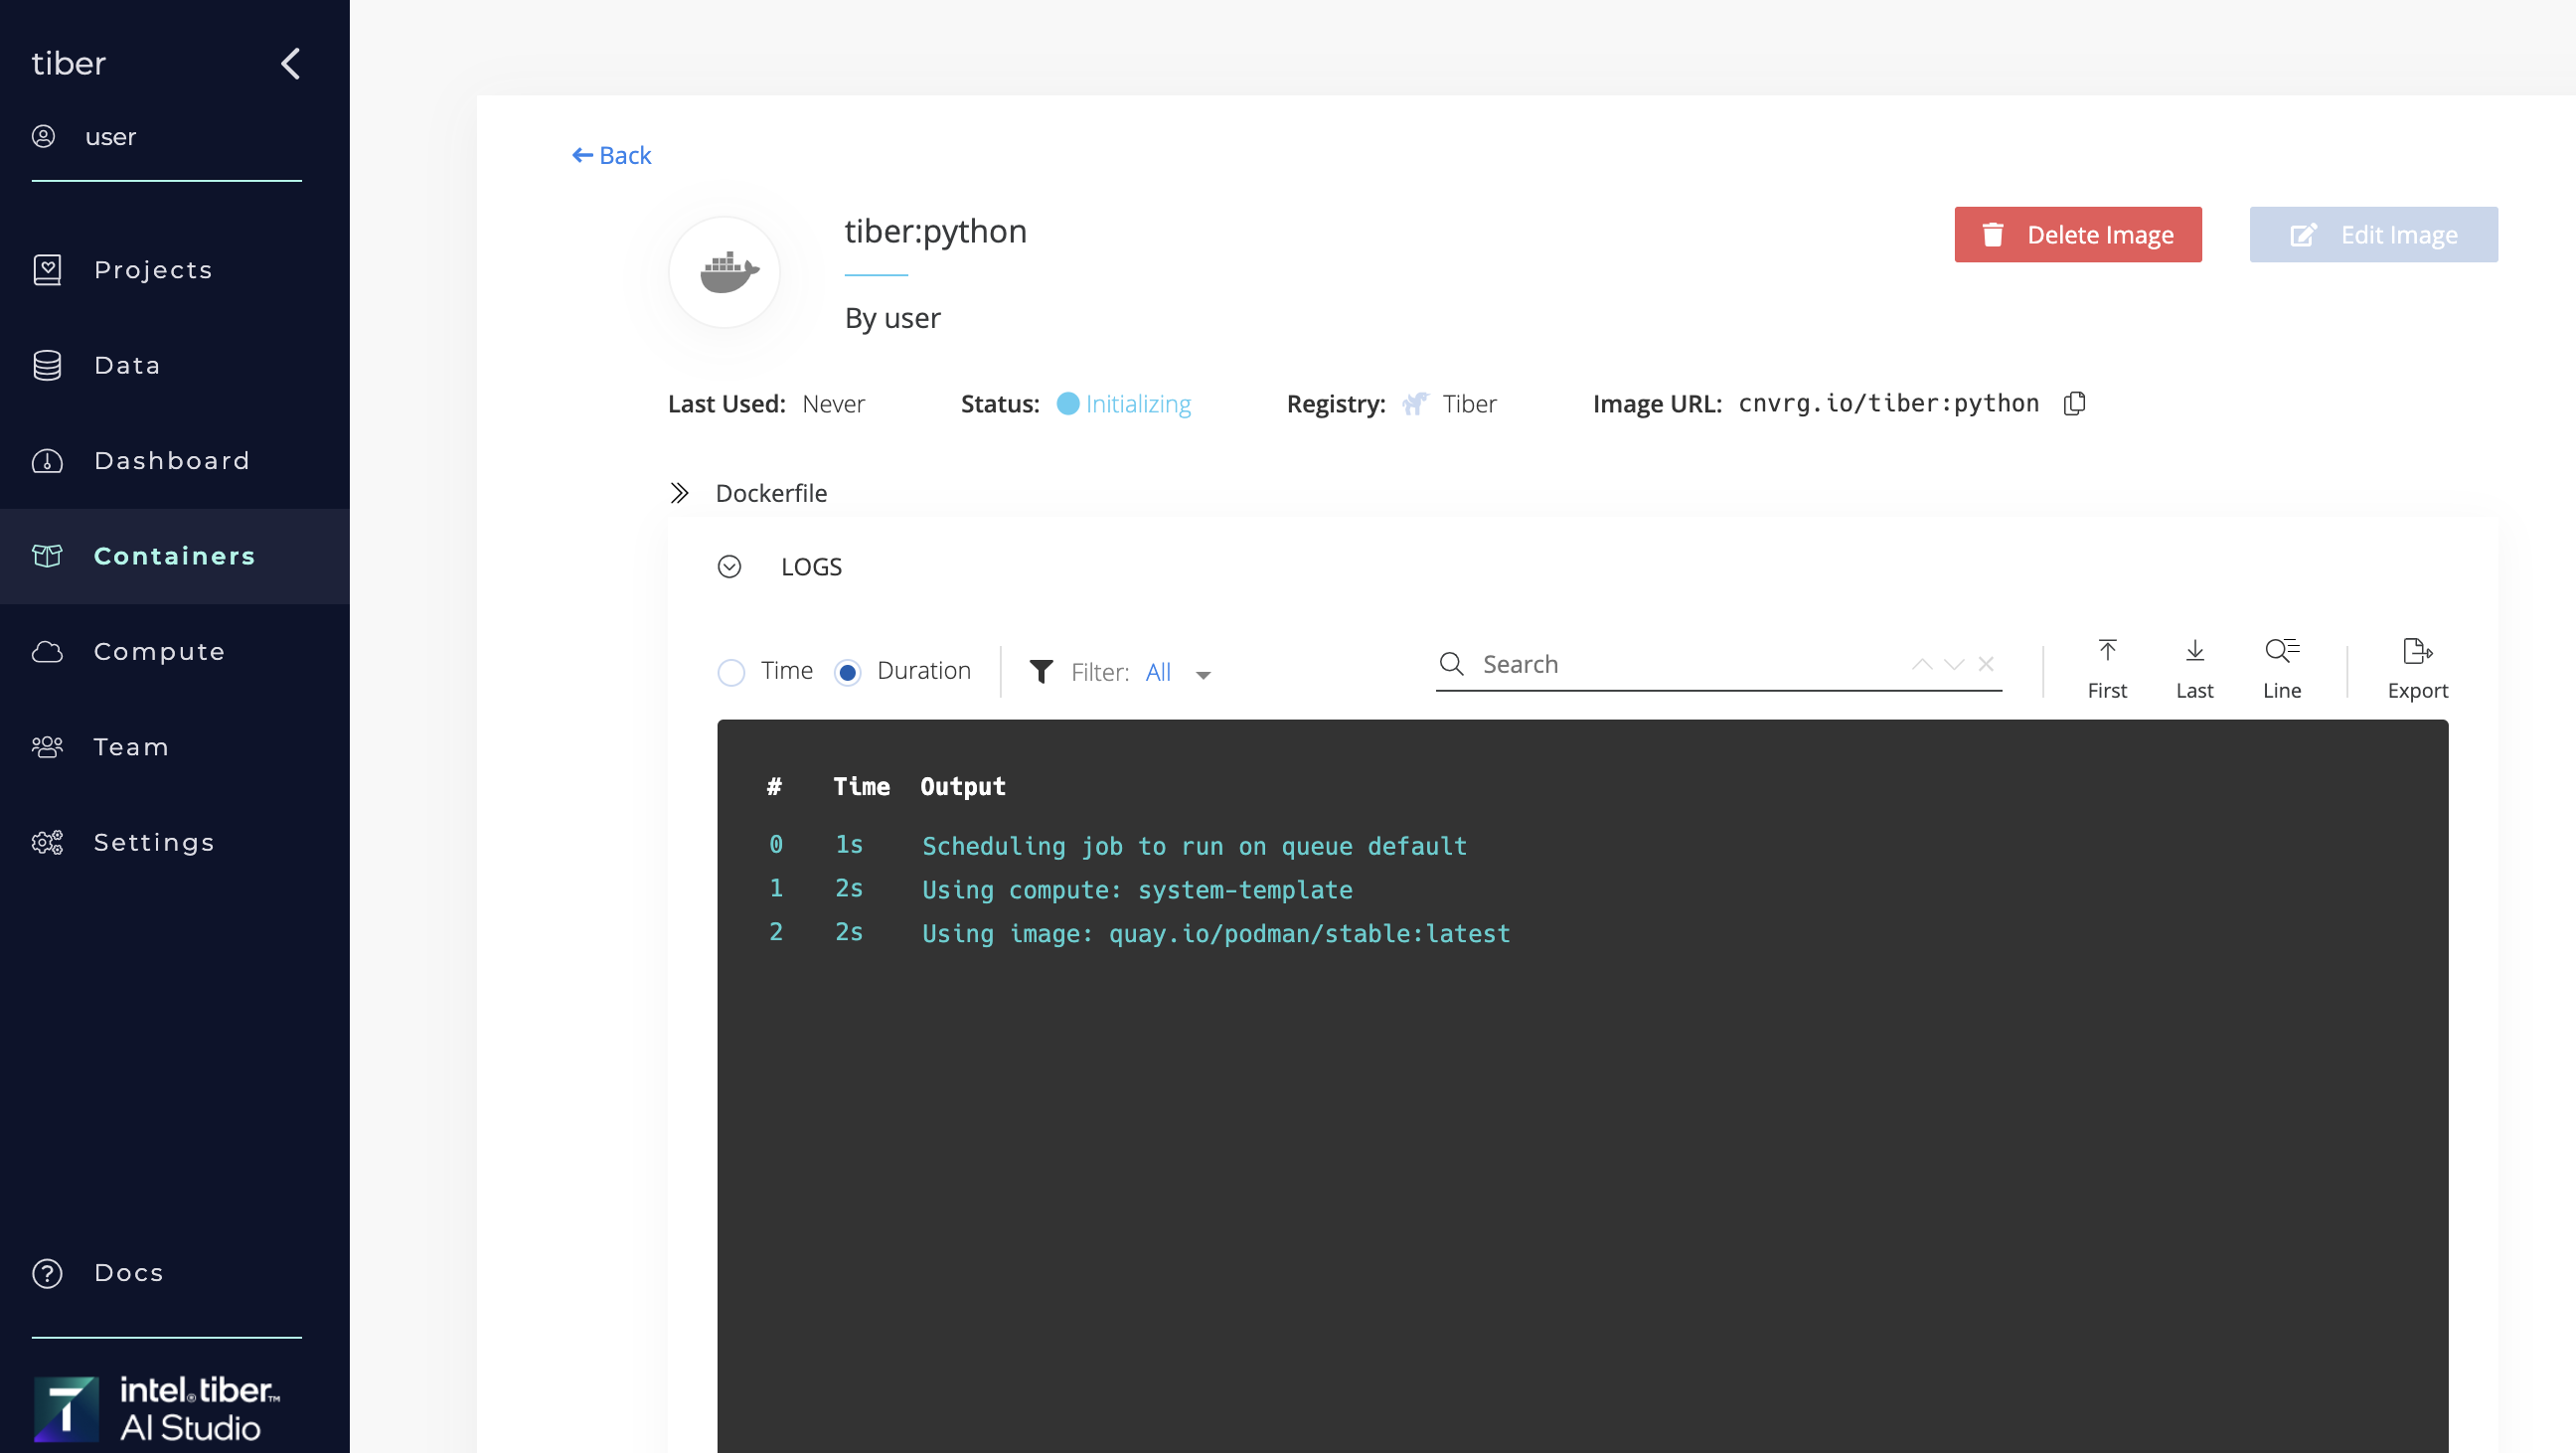
While AI Studio builds the image, it streams the build log live. After the image is ready, AI Studio adds it to the Images table. Then, AI Studio sends an email notification about the success or failure of the image build.
NOTE
- Build image from docker file is not supported in 'default' compute resource in MetaCloud
- Users can only build and push an image after connecting AI Studio to a private registry.
Pull a Docker image: Users specify the information of an existing Docker image.
After successfully adding a Docker image, a user can select the newly created Docker image when running a job like a workspace or an experiment. When selected, AI Studio pulls the image from the Kubernetes node and uses it to run that specific job. If the image is already available locally, is not pulled but just loaded.
For AWS, AI Studio creates a new AMI. For on-premise machines, the Docker image must be available locally on the machine.
NOTE
Users can pull images from public registries without connecting to them.
Several default registries come preconfigured in AI Studio.
TIP
Users can also access the Build Image and Pull Image panes from within the page of the relevant registry.
# Custom image requirements
The AI Studio platform is designed to simplify the use of custom Docker images. However, the following important prerequisites are required:
- Install the desired code language such as Python and R.
- Install R Studio or R Shiny, as desired.
- Ensure
pipis installed (version > 10.0). - Install
tarto use custom images with a Visual Studio Code workspace. - Install
gitandsshto use Git commands (such asgit push). Note: When stating a job, AI Studio clones the Git repository (when a project is linked with Git).
TIP
When using a container in AI Studio, the project is downloaded or cloned into /cnvrg. It does not need to be set as the WORKDIR in the Dockerfile.
If the Install Job Dependencies Automatically organization setting is enabled, a custom Docker image automatically works with all of the AI Studio jobs like workspaces, experiments, and endpoints. This includes the SDK. The toggle for this feature can be found in an organization's settings.
# Custom Docker image actions
In AI Studio, users can build and pull their custom Docker images.
# Build a custom Docker image
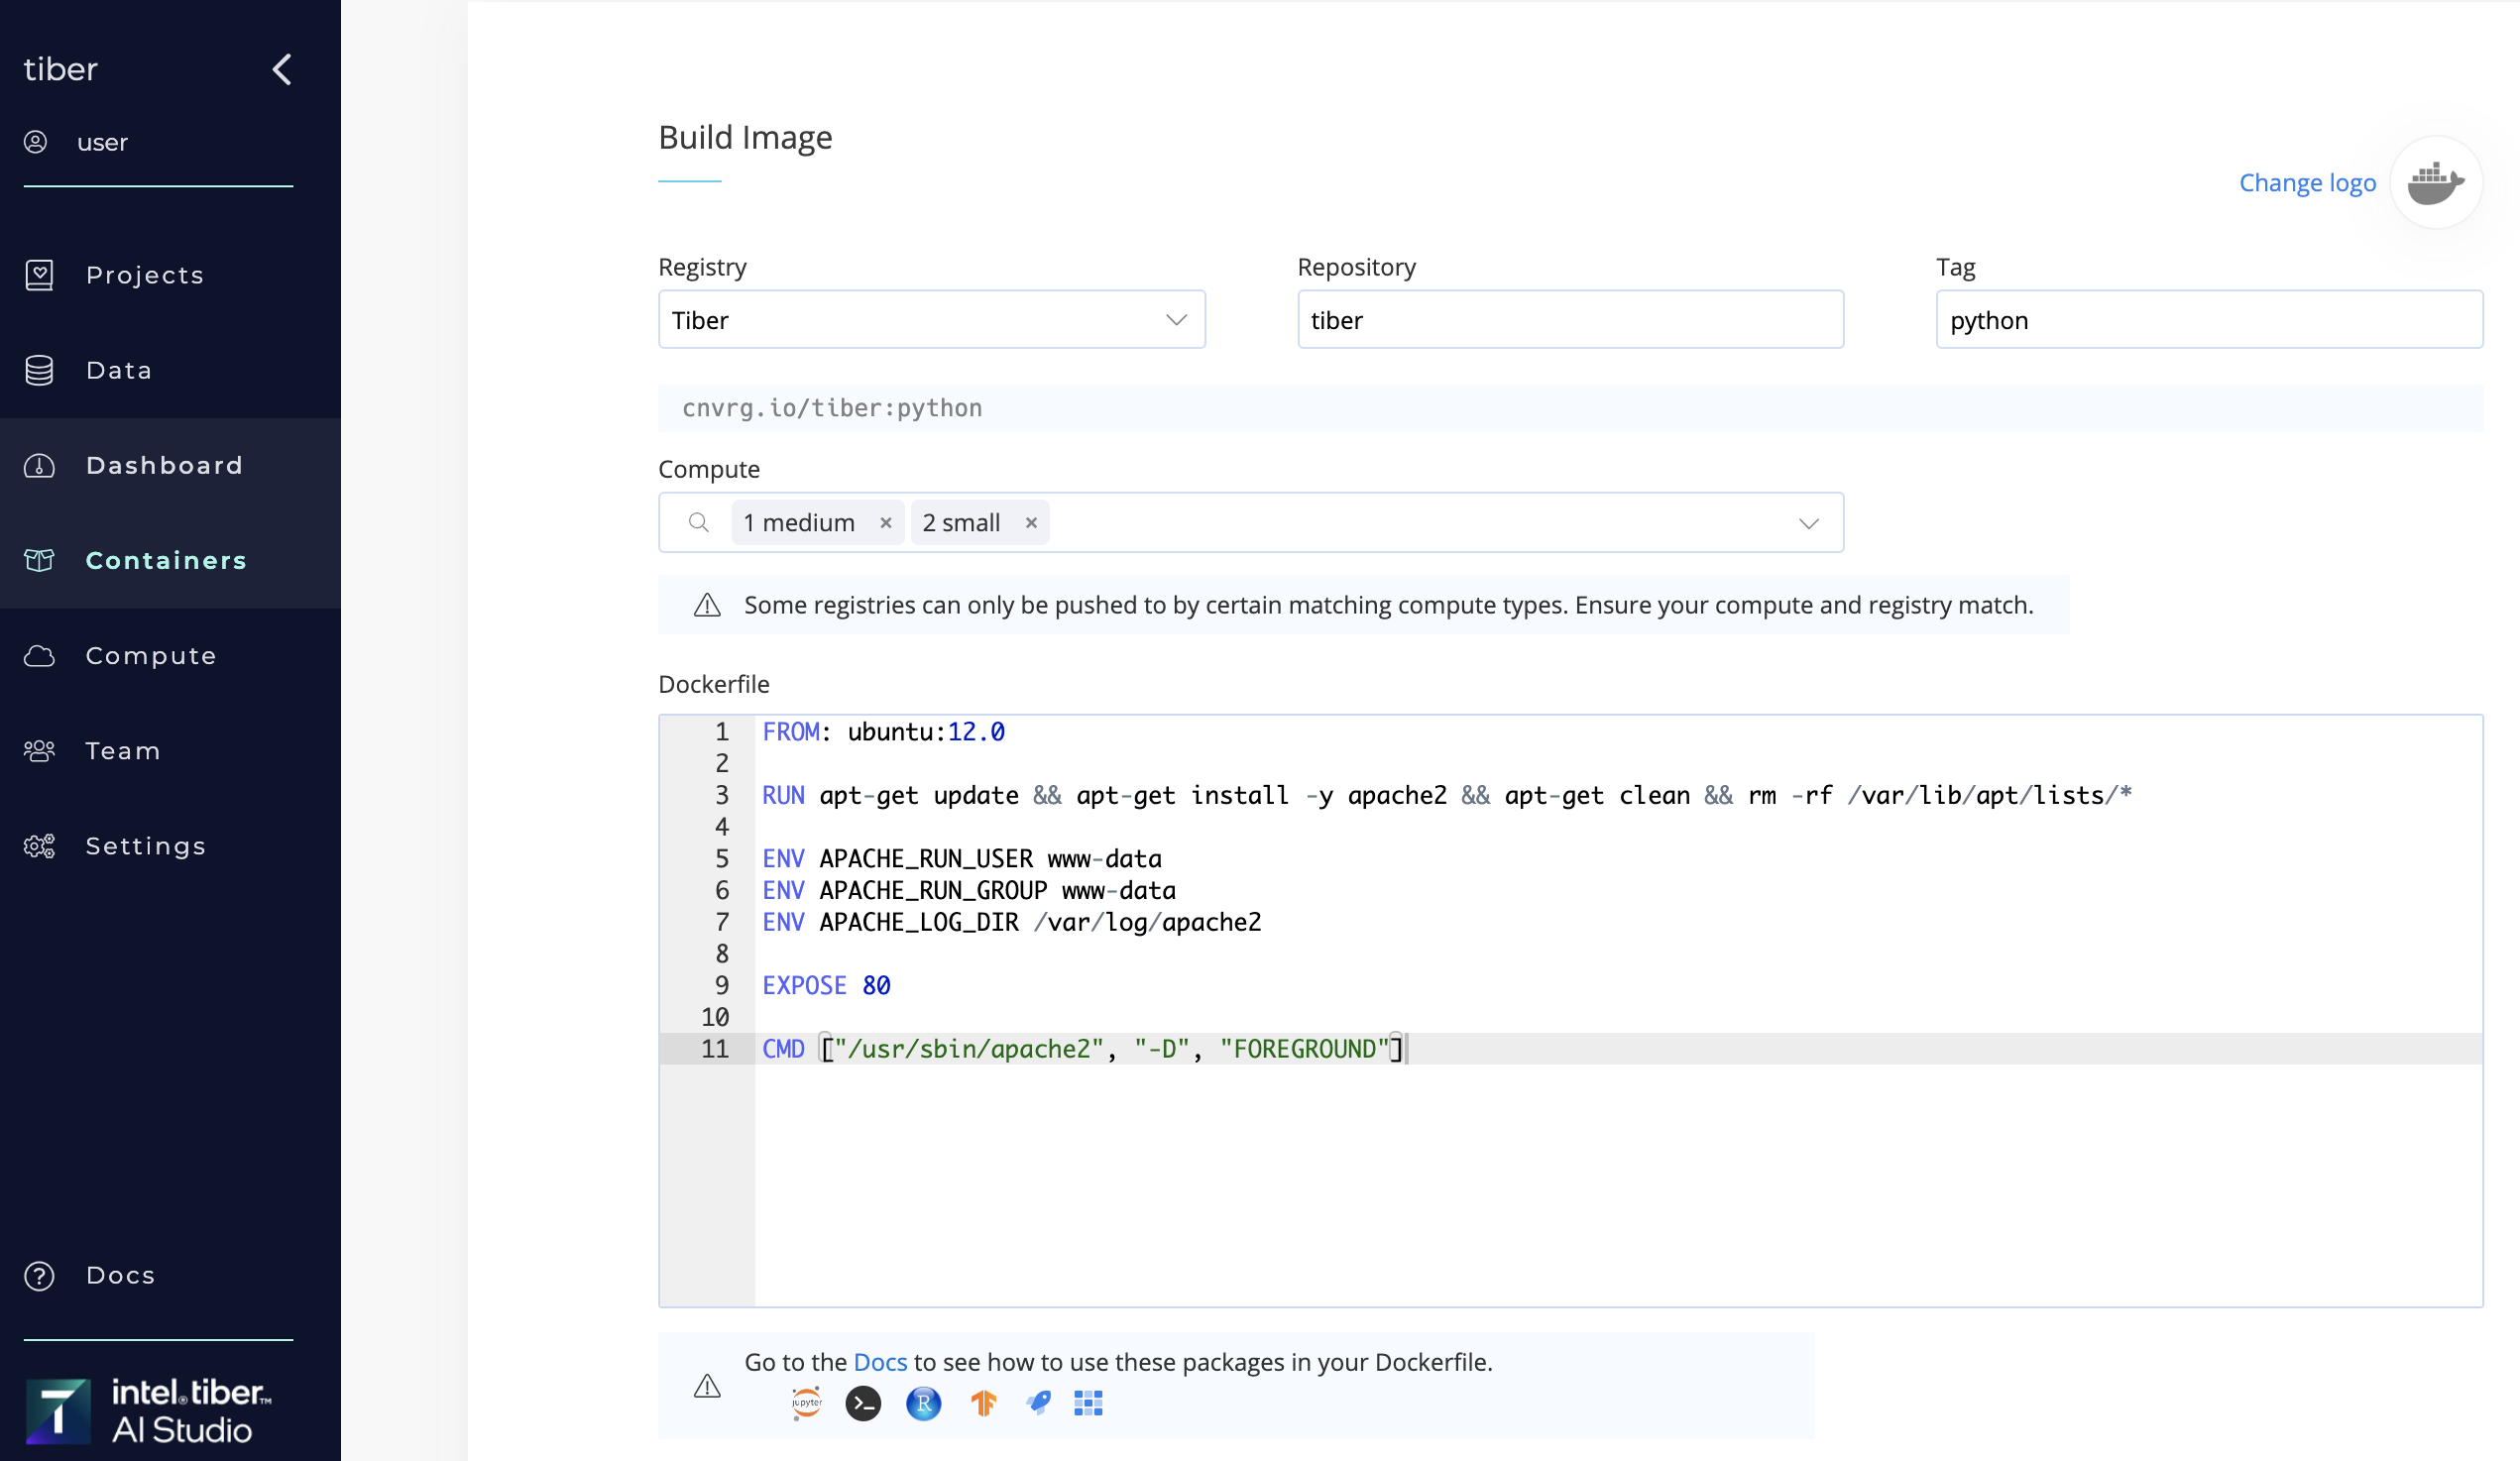 Complete the following steps to build a custom Docker image:
- Click the Containers tab of your organization.
- Click the Add Image button.
- In the displayed dialog, click Build Image to display the Build Image pane.
- In the drop-down list, select the Registry where the image is to be pushed.
- Enter the Repository name and Tag of the image to be created.
- In the Compute drop-down list, select one or more compute engines (AI Studio will attempt to run the job on the first available compute engine selected).
- Paste in the custom Dockerfile. Each time a user edits the Dockerfile and clicks Add, AI Studio pushes it again to the relevant repository.
- Enter a readme.md (optional).
- Click Change Logo and select an image from the list provided (optional).
- Click Add.
AI Studio builds the image, pushes it to the relevant repository, and adds it to the list of available Docker images.
# Pull a custom Docker image
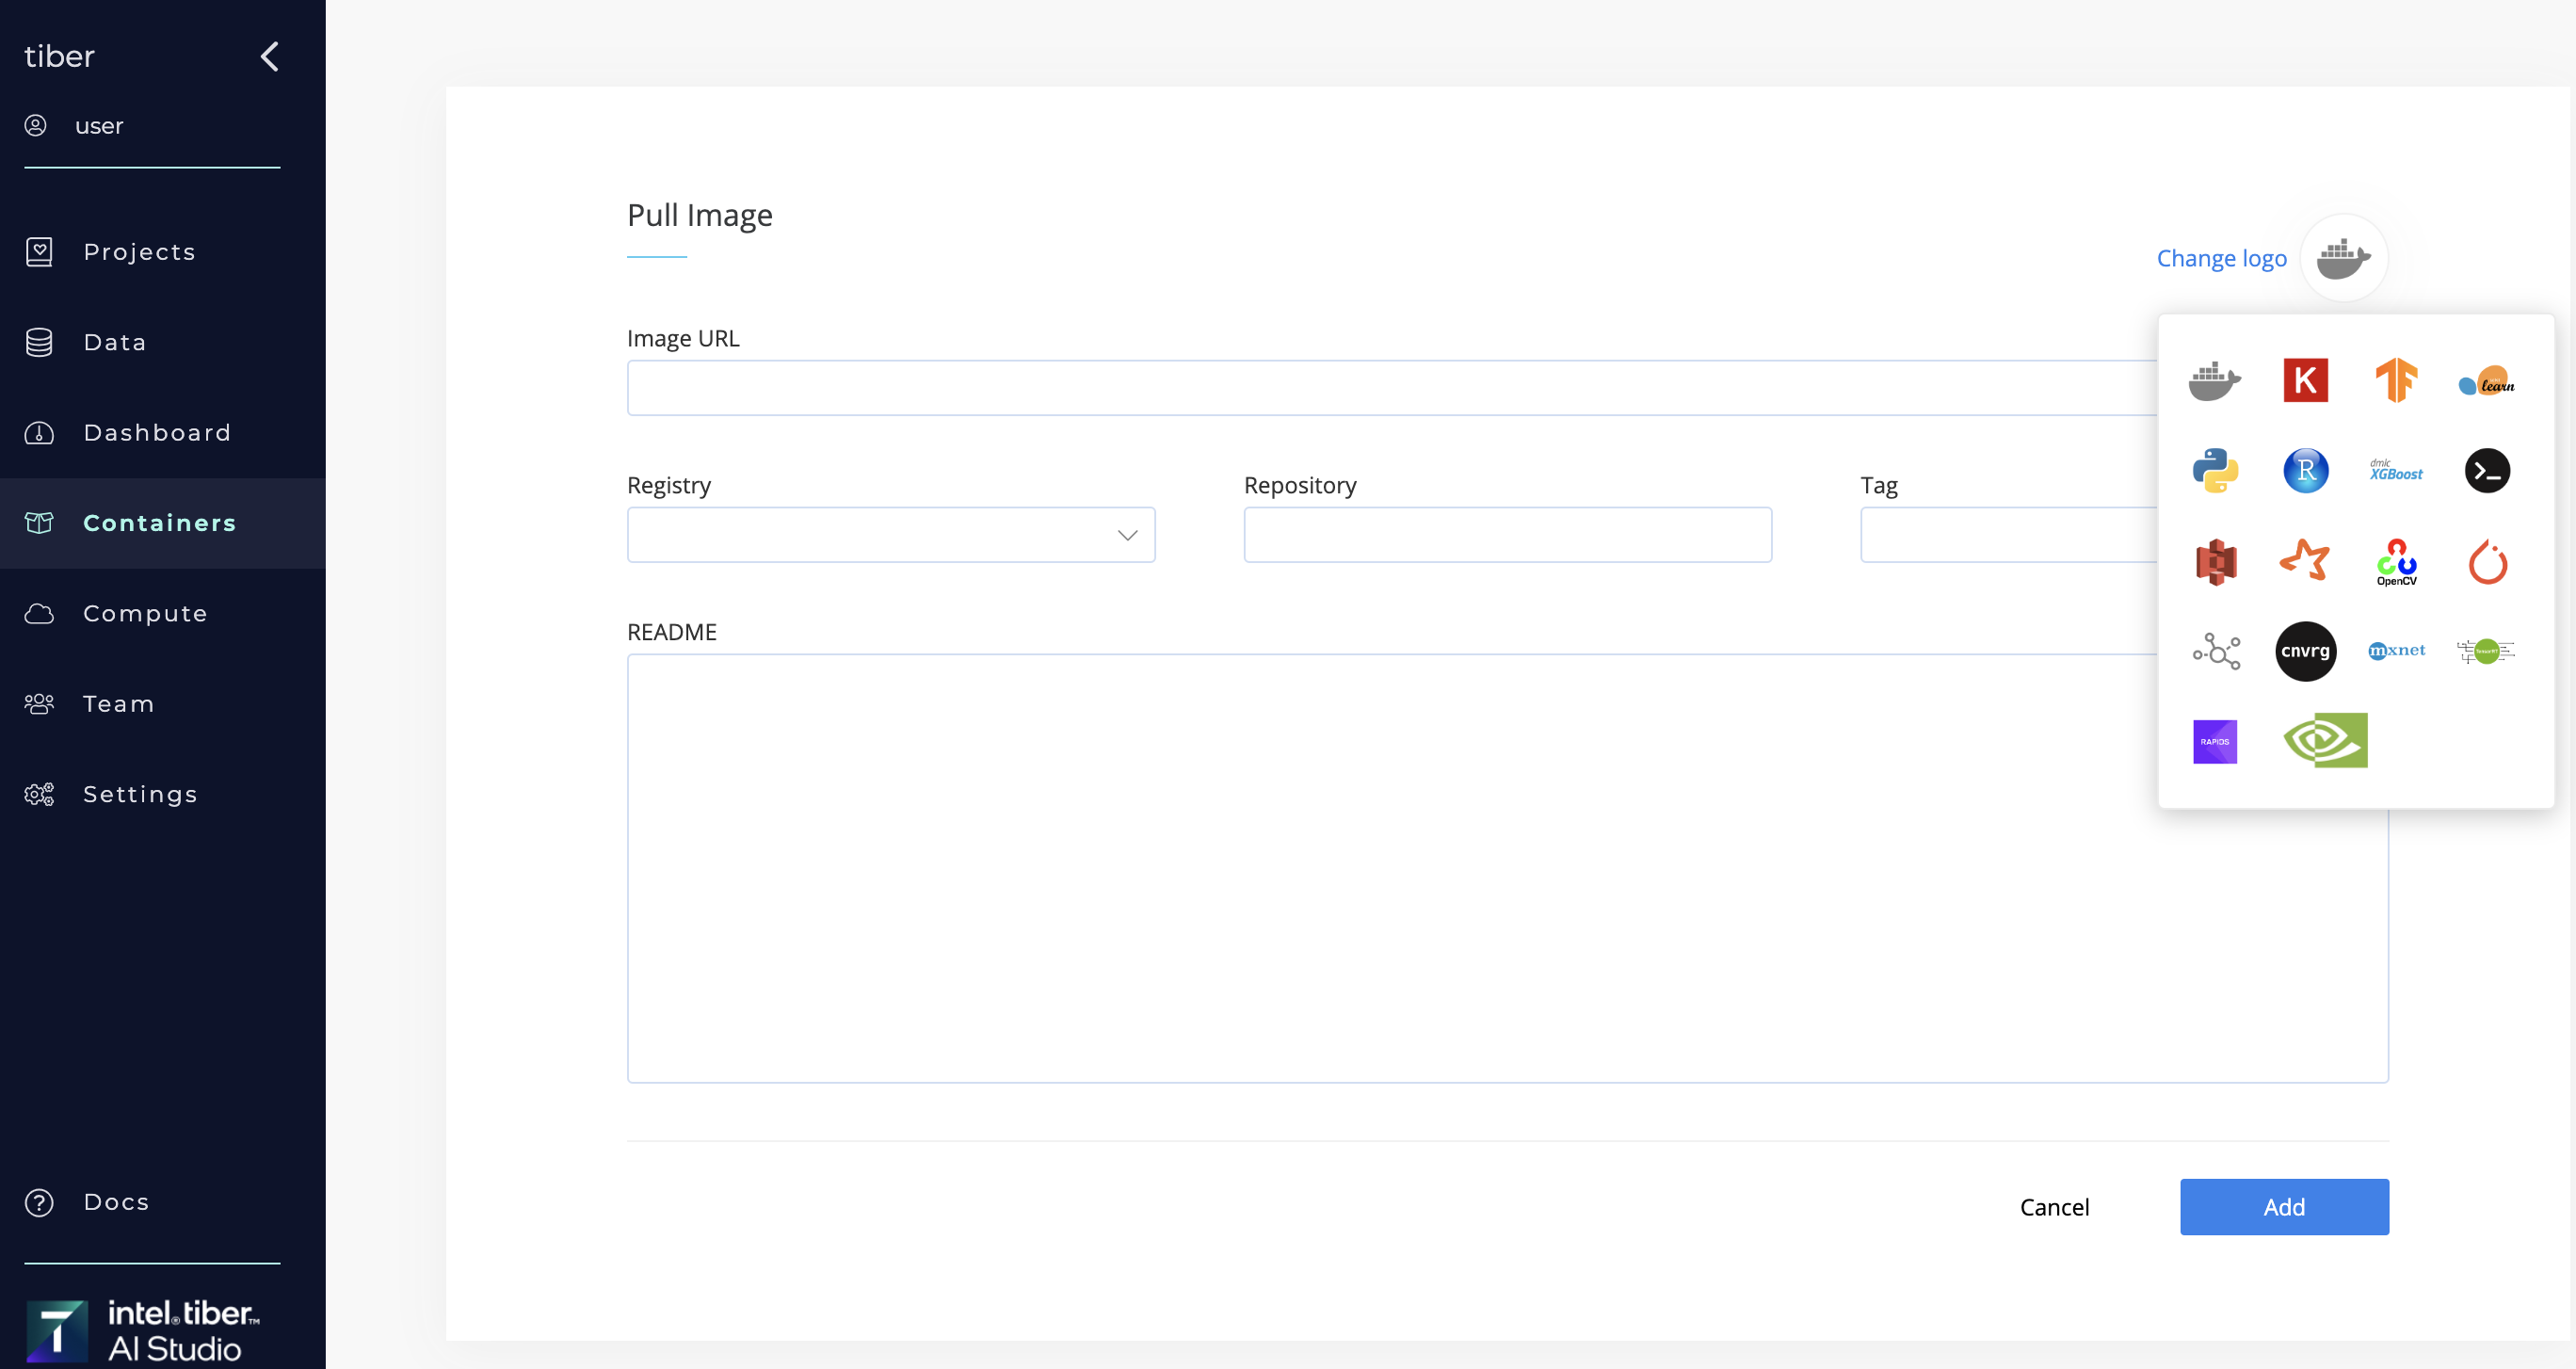 Complete the following steps to pull a custom Docker image:
- Click the Containers tab of your organization.
- Click the Add Image button.
- In the displayed dialog, click Pull Image to display the Pull Image pane.
- Complete one of the following two steps:
- Enter the full Docker URL.
- Select the registry in the drop-down list and enter the repository name and the tag.
- Enter a readme.md (optional).
- Click Change Logo and select an image from the list provided (optional).
- Click Add.
AI Studio adds the image to the list of available Docker images.
# Docker Image Usage in Jobs
There are three ways to select a Docker image for a AI Studio job:
NOTE
AI Studio always pulls the latest version of the Docker image and tag as selected for the job.
# Using the web UI image selector
Users can use the AI Studio UI image selector to choose a Docker image when starting a workspace, preparing a flow task, creating a new experiment, or deploying an endpoint from the web UI.
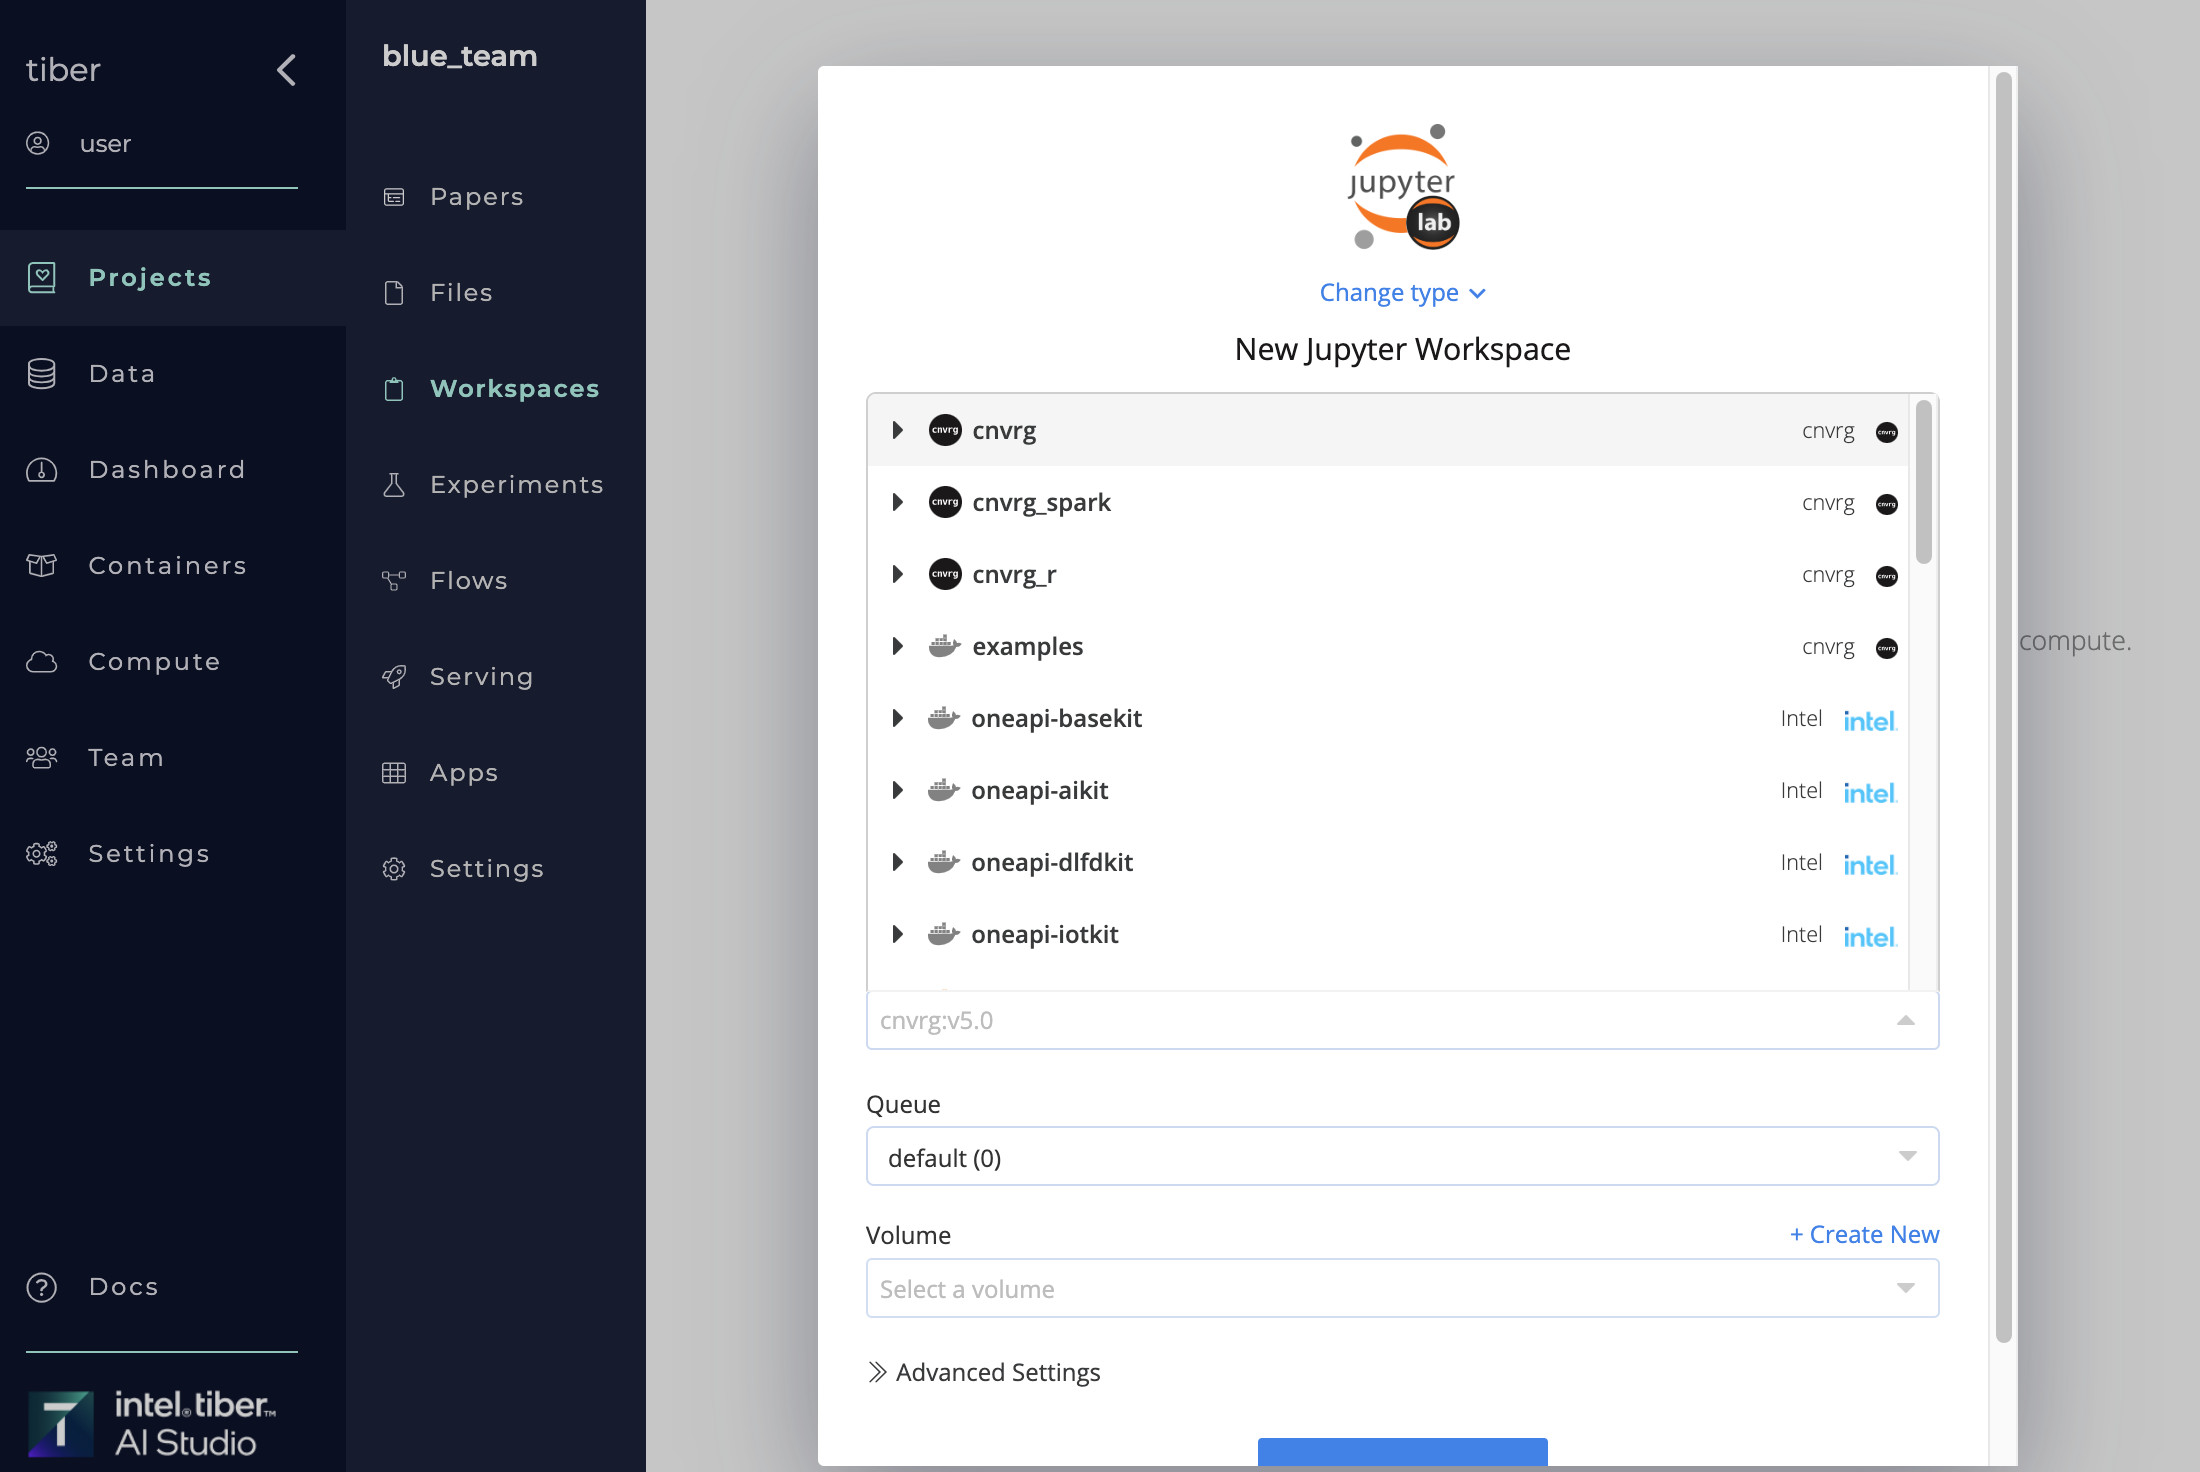
Complete the following steps to choose an image using the image selector:
- Click Start a Workspace, New Experiment, Task, or Publish, depending on the AI Studio job being run.
- Provide the other relevant details in the displayed pane.
- Click the Image drop-down list to select an image.
- Click the image repository toggle list and then select the desired tag. The repository and tag are now selected in the Image drop-down list.
- Click Start Workspace, Run, Save Changes, or Deploy Endpoint, depending on the AI Studio job.
The selected image will be used as the virtual environment.
TIP
The image selector is located in the Environment section for experiments and in the Advanced tab for flow tasks.
# Using the CLI
To use a new image through the CLI, add the --image flag in the experiment run command. For example:
cnvrgv2 experiment run --image "tensorflow:23.02-tf2-py3" --command "python3 mnist.py"
# Using the Python SDK
In the SDK call, pass the name of the image as a string argument to the experiments.create() function. For example:
from cnvrgv2 import Cnvrg
cnvrg = Cnvrg()
myproj = cnvrg.projects.get("myproject")
e = myproj.experiments.create(title="my new exp",
                              templates=["medium", "small"],
                              image="tensorflow:23.02-tf2-py3",
                              command="python3 test.py")
# Organization Setting: Install Job Dependencies Automatically
There are AI Studio recommendations and required packages depending on whether the organization setting Install Job Dependencies Automatically is enabled or disabled.
# Recommendations when Install Job Dependencies Automatically is enabled
While not mandatory, the AI Studio team recommends that users install the AI Studio CLI within their Docker image to enable the full range of CLI commands. Without this installation, CLI commands can only be executed within the designated directories: /cnvrg (the working directory) and /data (the directory where datasets are mounted). This limitation may restrict functionality and flexibility in managing your workflows.
To use Git easily inside a JupyterLab workspace, the team also recommends users install the JupyterLab Git extension.
# Required packages when Install Job Dependencies Automatically is disabled
If the Install Job Dependencies Automatically organization setting is disabled, users must install the required packages themselves. They also cannot use the AI Studio CLI and SDK unless they install these themselves.
The following table lists the required packages to install for each feature to use with a custom Docker image.
You may need to scroll horizontally to see the full table.
| Package | Experiments | JupyterLab Workspace | R Studio Workspace | Shiny App | Dash App | Voila App | Tensorboard Compare | Serving |
|---|---|---|---|---|---|---|---|---|
| tensorboard | ✅ | ✅ | ✅ | |||||
| butterfly | ✅ | |||||||
| jupyterlab | ✅ | |||||||
| jupyterlab-git | ✅ | |||||||
| RStudio | ✅ | |||||||
| dash | ✅ | |||||||
| dash-daq | ✅ | |||||||
| voila | ✅ | |||||||
| pygments | ✅ | |||||||
| gunicorn | ✅ | ✅ | ||||||
| flask | ✅ |
# Packages installation guides
WARNING
Creating a Dockerfile and building a working custom image can be a technically challenging process. Each situation differs and requires research while building a Dockerfile.
The following code snippets are examples, which may not work in a particular Dockerfile.
NOTE
Use your terminal to run the following example commands, if applicable and required.
# AI Studio SDK and CLI
RUN pip3 install cnvrgv2
# pip (version > 10)
RUN pip install --upgrade pip
# tar
RUN apt-get install tar
# TensorBoard
RUN pip3 install tensorboard
# Butterfly
RUN pip3 install butterfly
# JupyterLab
RUN pip3 install jupyterlab
# JupyterLab-git
RUN jupyter labextension install @jupyterlab/git
RUN pip3 install jupyterlab-git && jupyter serverextension enable --py jupyterlab_git
# Dash
RUN pip3 install dash
# Dash DAQ
RUN pip3 install dash-daq
# Voila
RUN pip3 install voila
# Pygments
RUN pip3 install Pygments
# Gunicorn
RUN pip3 install gunicorn
# Flask
RUN pip3 install flask
# R Studio
The simplest method is to build an image based on a Rocker image.
FROM rocker/rstudio:latest
# R Shiny
The simplest method is to build an image based on the official R Shiny Rocker image.
docker pull rocker/shiny
# Other Environment Configurations
# Custom Python Modules
Users can set up their own custom Python modules within AI Studio. To avoid any issues, apply the following best practices when setting up custom modules:
- Create and add a file named
__init__.pyto the modules folder in the file structure. - Add the following code snippet to the beginning of the code being executed:
import os, sys
from os.path import dirname, join, abspath
sys.path.insert(0, abspath(join(dirname(__file__), '..')))
# Git Submodules
If a project is connected to a Git repository that contains submodules, the following prerun.sh file must be added to the repository or Files. Also required is an OAuth Git token set for the user account.
If a user has not already, create a prerun.sh file and then add the code snippet below.
Use the following command to add to the prerun.sh file:
git config --global url."https://x-access-token:${GIT_REPO_CLONE_TOKEN}@github".insteadOf https://github
git submodule init
git submodule update
TIP
A prerun.sh script allows users to run commands to further customize their environment at the start of every job.
