# Preprocess Lending Club Dataset using a Flow
Flows in cnvrg are a powerful tool for automating and streamlining machine learning pipelines. When paired with the continual learning features of cnvrg you can retrain your models and create your own automated Auto-ML workflows.
In this tutorial, we will look at using Flows to preprocess your data and sync the chages back to your cnvrg dataset.
# Creating the Project
To start, log into your cnvrg account and navigate to Projects and click Example Projects. Click Start in the ML Pipeline with the LendingClub dataset example to create the project we will be using for this tutorial.
# Creating the dataset
Next, we will set up our dataset for the flow.
- Download the file that will be using for a dataset right-clicking and saving this file.
- Save the file as
lendingclub.csv. - Navigate to Datasets and click Create New Dataset to create a new dataset.
- Name the new dataset
lendingclub-dataand set the type as Tabular. - Click Save Dataset.
- Drag the
lendingclub.csvfile you downloaded and drop it onto the screen. - Click Upload to upload the file and finish initializing the dataset.
TIP
You could also use the CLI to accomplish this step. Follow the CLI commands for initializing a dataset.
# Setting up the code
Navigate back to your lendingclub-pipeline project and click Files on the project's sidebar. Select preprocess.py.
# Import the os python package
At the top right click 'edit' and add at the top of the file the following line to the code to import the os package:
import os
This package allows us to make directory changes and run bash commands (for the cnvrg CLI).
# Add the code to save the processed dataset and sync it to cnvrg
Insert one of following code snippet in place of line #162:
Option 1: Create a new dataset in cnvrg for the processed file
if not os.path.exists('processed-lendingclub'): #Check if the folder exits
	os.mkdir('processed-lendingclub') #If it doesn't, create it
data.to_csv('processed-lendingclub/processed_data_set.csv') #Save the processed dataset into our new folder
os.system("cd processed-lendingclub && cnvrg data init && cnvrg data put processed-lendingclub *") #Enter into the new folder, run cnvrg init (initialize dataset) and then run cnvrg data put (upload the files)
Option 2: Add the processed file into a subdirectory of the original dataset
if not os.path.exists('/processed_data'): #Check if desired subdirectory exists
	os.mkdir('/processed_data') #If it doesn't exist, create the subdirectory
data.to_csv('/processed_data/processed_data_set.csv') #Save the processed dataset to the subdirectory
os.system("cnvrg data put lendingclub-data /processed_data") #Upload the folder using cnvrg data put
The added lines will sync back the processed file as a new dataset or in a subdirectory of the original dataset using the cnvrg CLI.
# Creating the Flow
Now we can create our flow.
Click Flows on the left project sidebar and then click New Flow.
First, we will create a card for using our new dataset
- On the top right, click New Task and then select Data Task.
- On the card that appears, choose your newly added dataset from the Dataset list and click Save Changes.
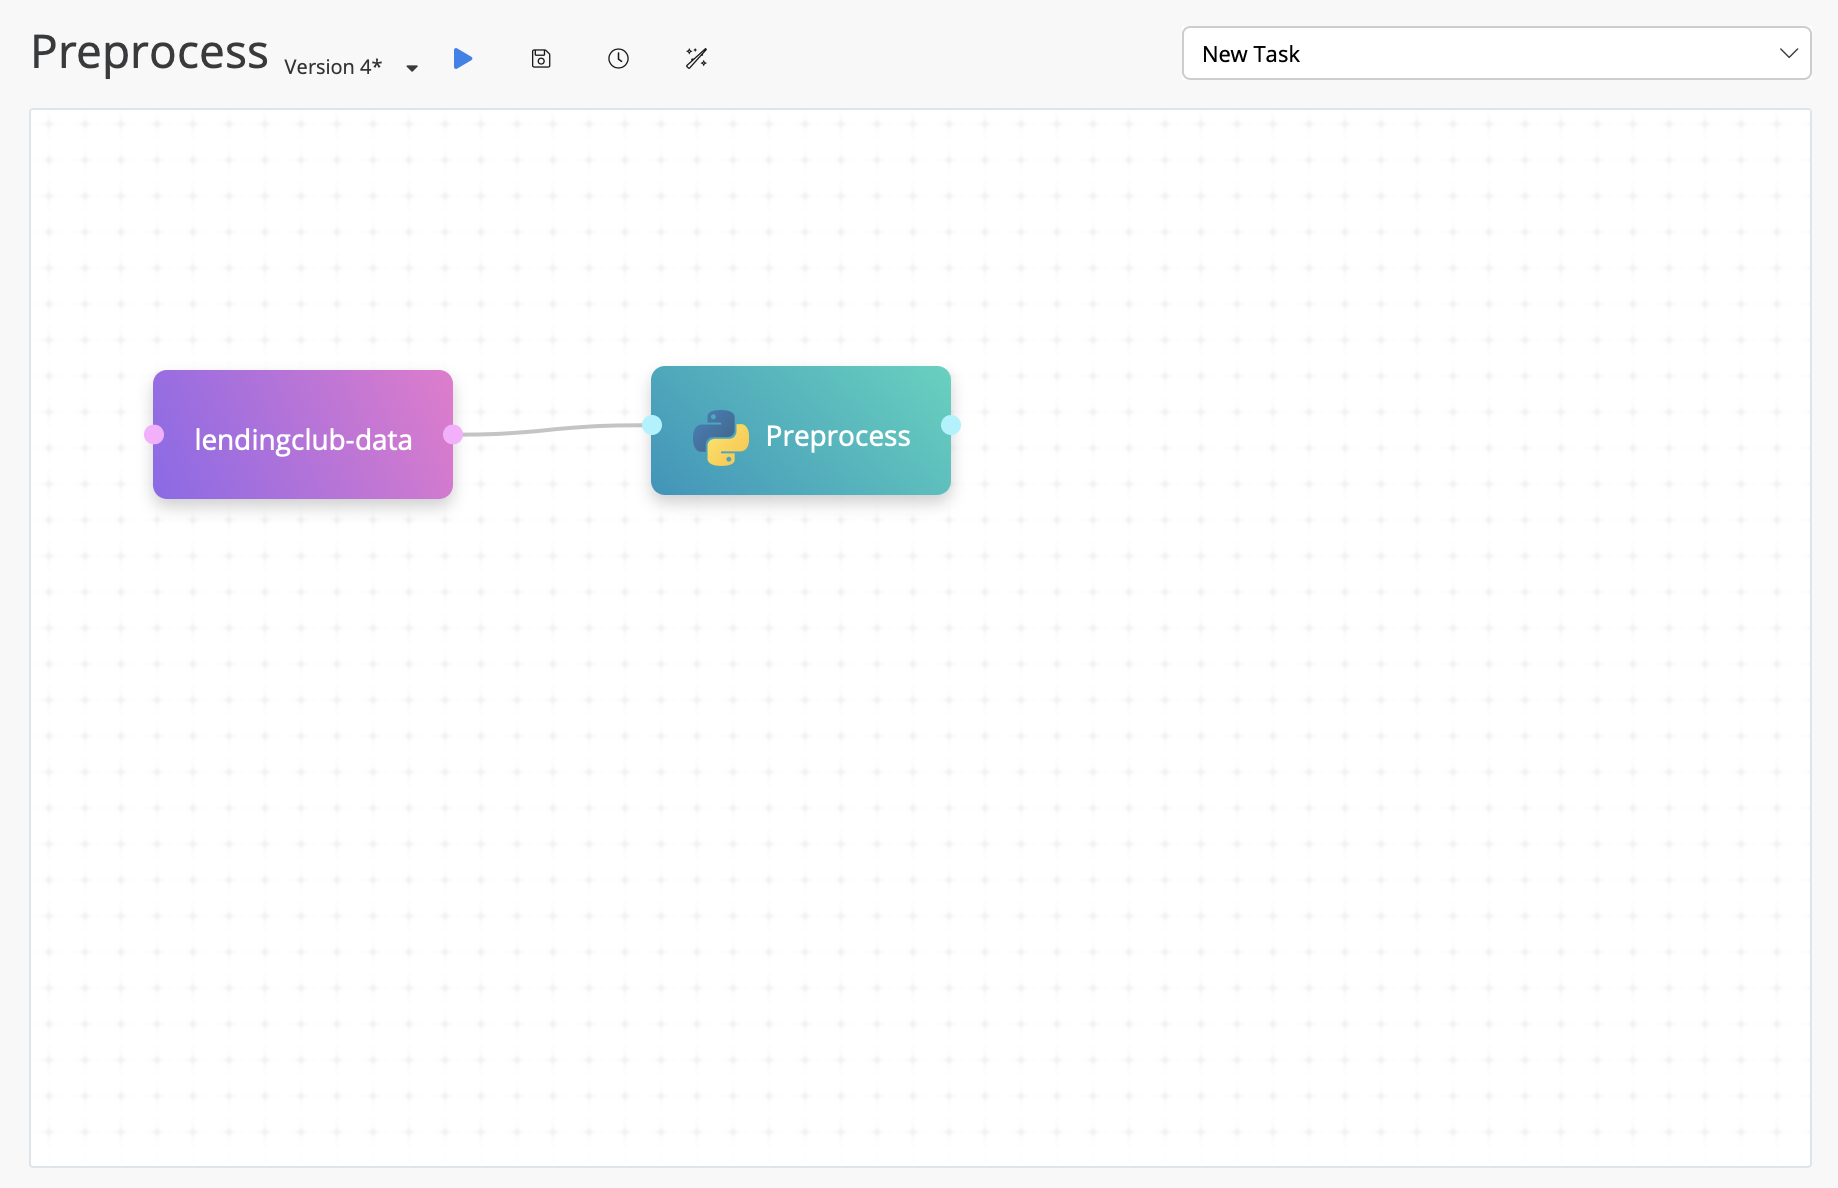
You should now have a purple card in your flow with the name of your dataset on it.
Next, we will create a card for our preprocessing code
On the top right, click New Task and then select Custom Task.
On the card that appears, type
python3 preprocess.pyin the text box (this is the command that will be run for this card's experiment). Press Enter.Click the Task 1 title at the top of the card to rename your card and type
Preprocess. You can also click on the little blue thumbnail to select a different thumbnail for the card.Next to Parameters (Key value pairs) click Add:
- For Key, type
data. - For Values, type
/data/lendingclub-data/lendingclub.csv.
- For Key, type
Click Save Changes.
You should now have a blue card with Preprocess on it.
WARNING
If you created the dataset using a different name, ensure you have included the correct path to the data in this step.
Finally we will link our tasks to complete our Flow
To link our tasks, we simply need to click the connector on the right edge of our dataset and then on the connector on the left edge of our preprocess task.
Congratulations! Your flow should now look like this:

# Running the Flow
All that's left is to give it a test run!
Click the blue Run button at the top of the screen and then Run in the confirmation message to start running your new Flow.
You can track the progress of the Flow in the Experiments tab and once it has completed, you can go into your Datasets and check the dataset you created or altered for the new folder and processed file.
